How It Works
Agent pauses
You get notified
You approve or reject
Setting Up Approval Controls
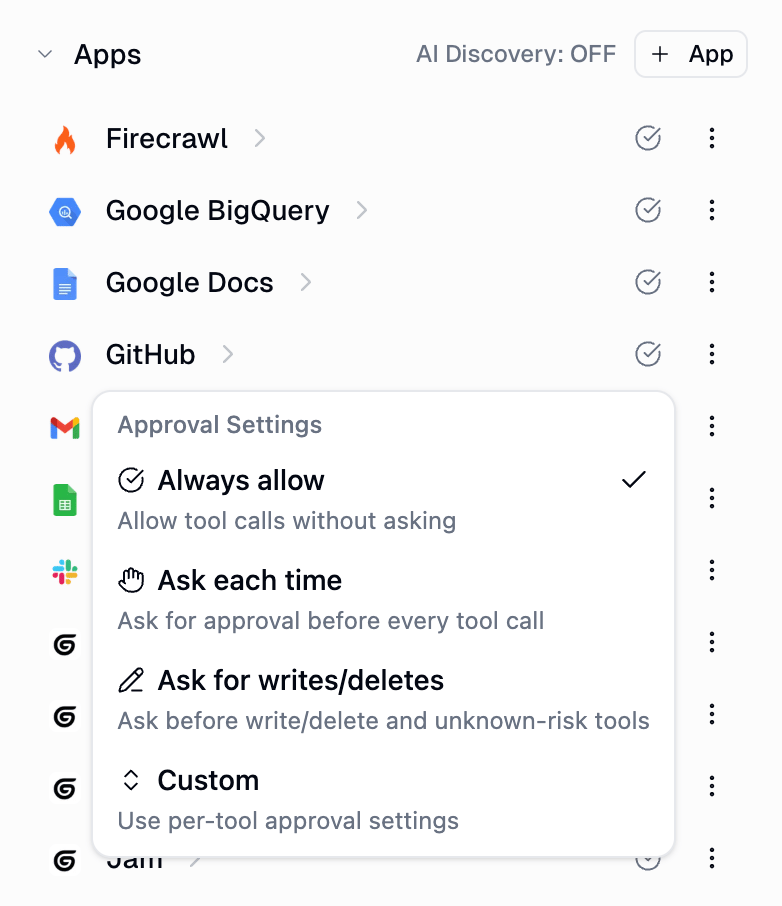
- App-Level Settings
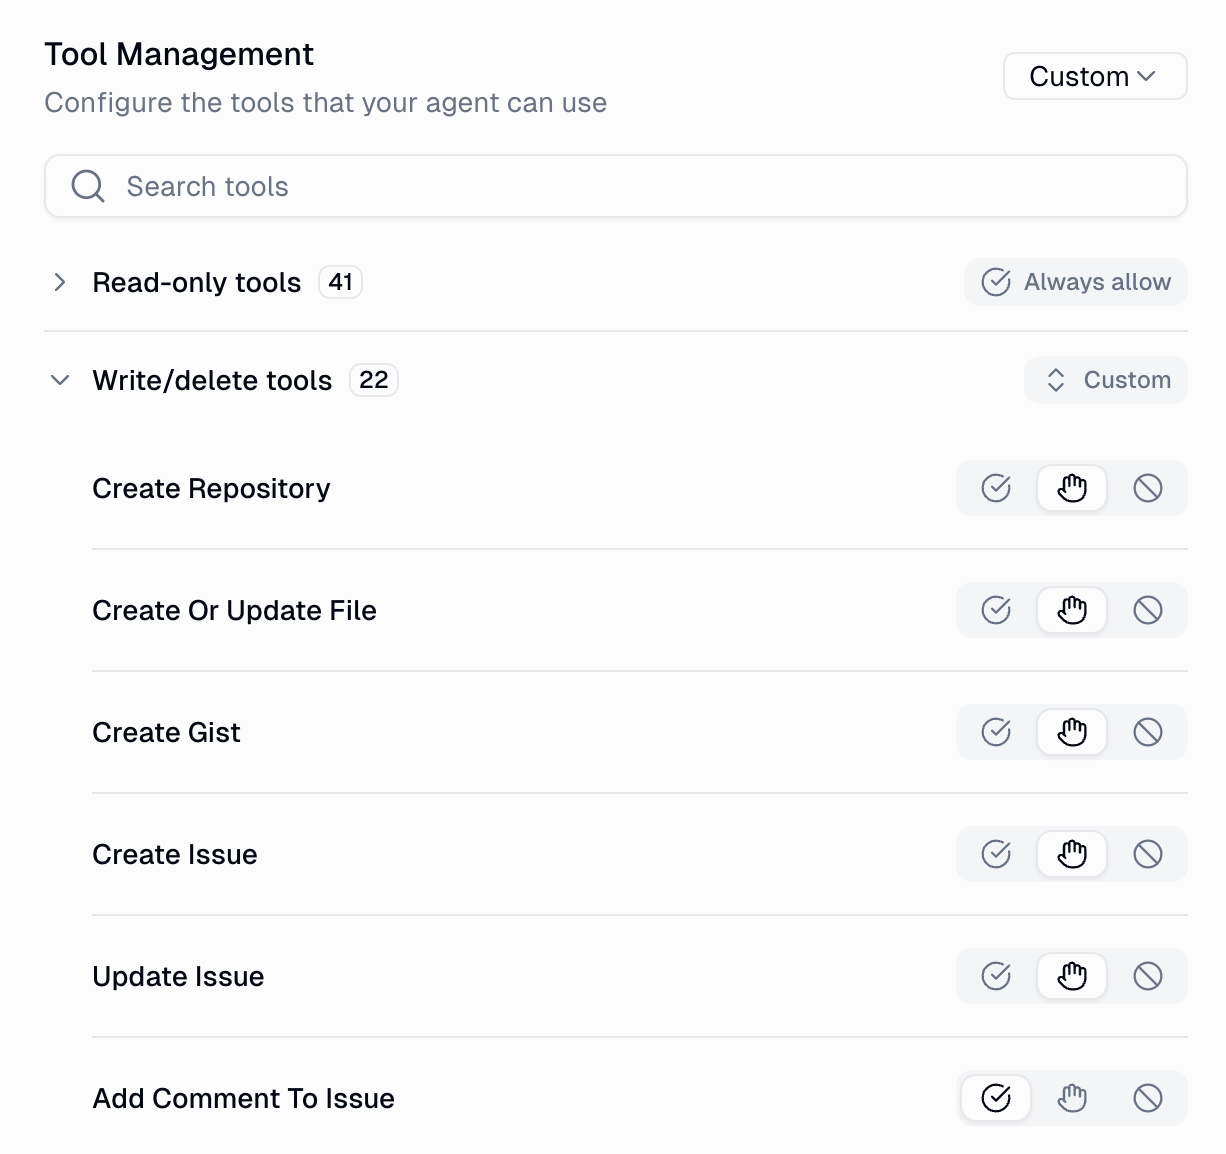
- Per-Tool Custom
- App Rules (CEL)
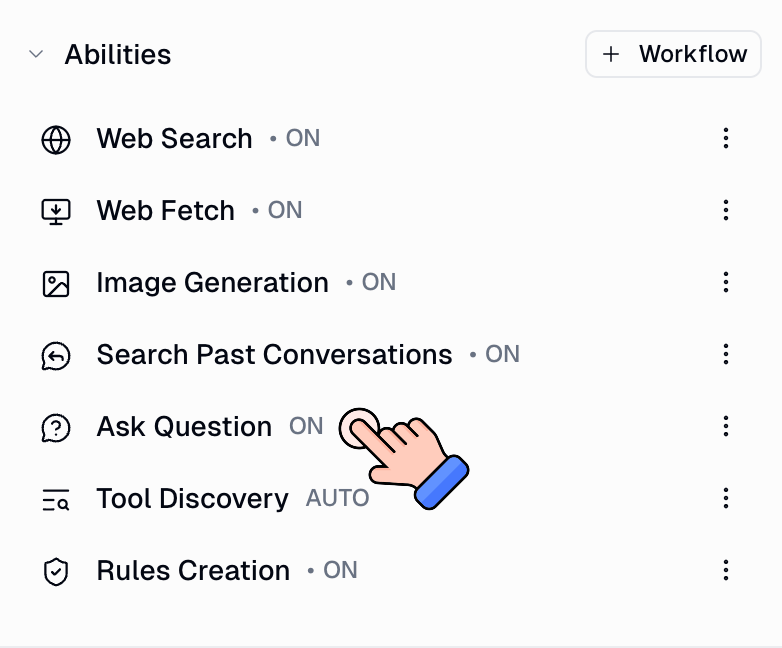
- Ask Question
Where You Get Notified
When an agent pauses for approval, you are notified in multiple places so you never miss it.- In the Chat
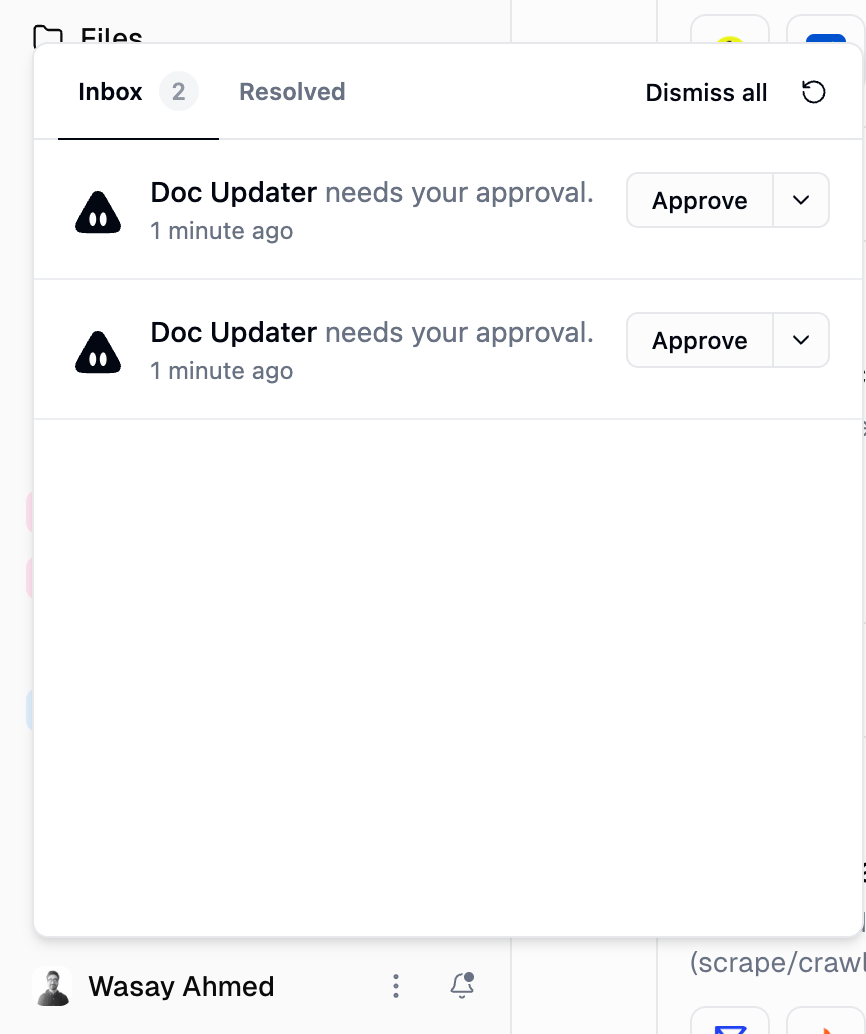
- Notification Bell
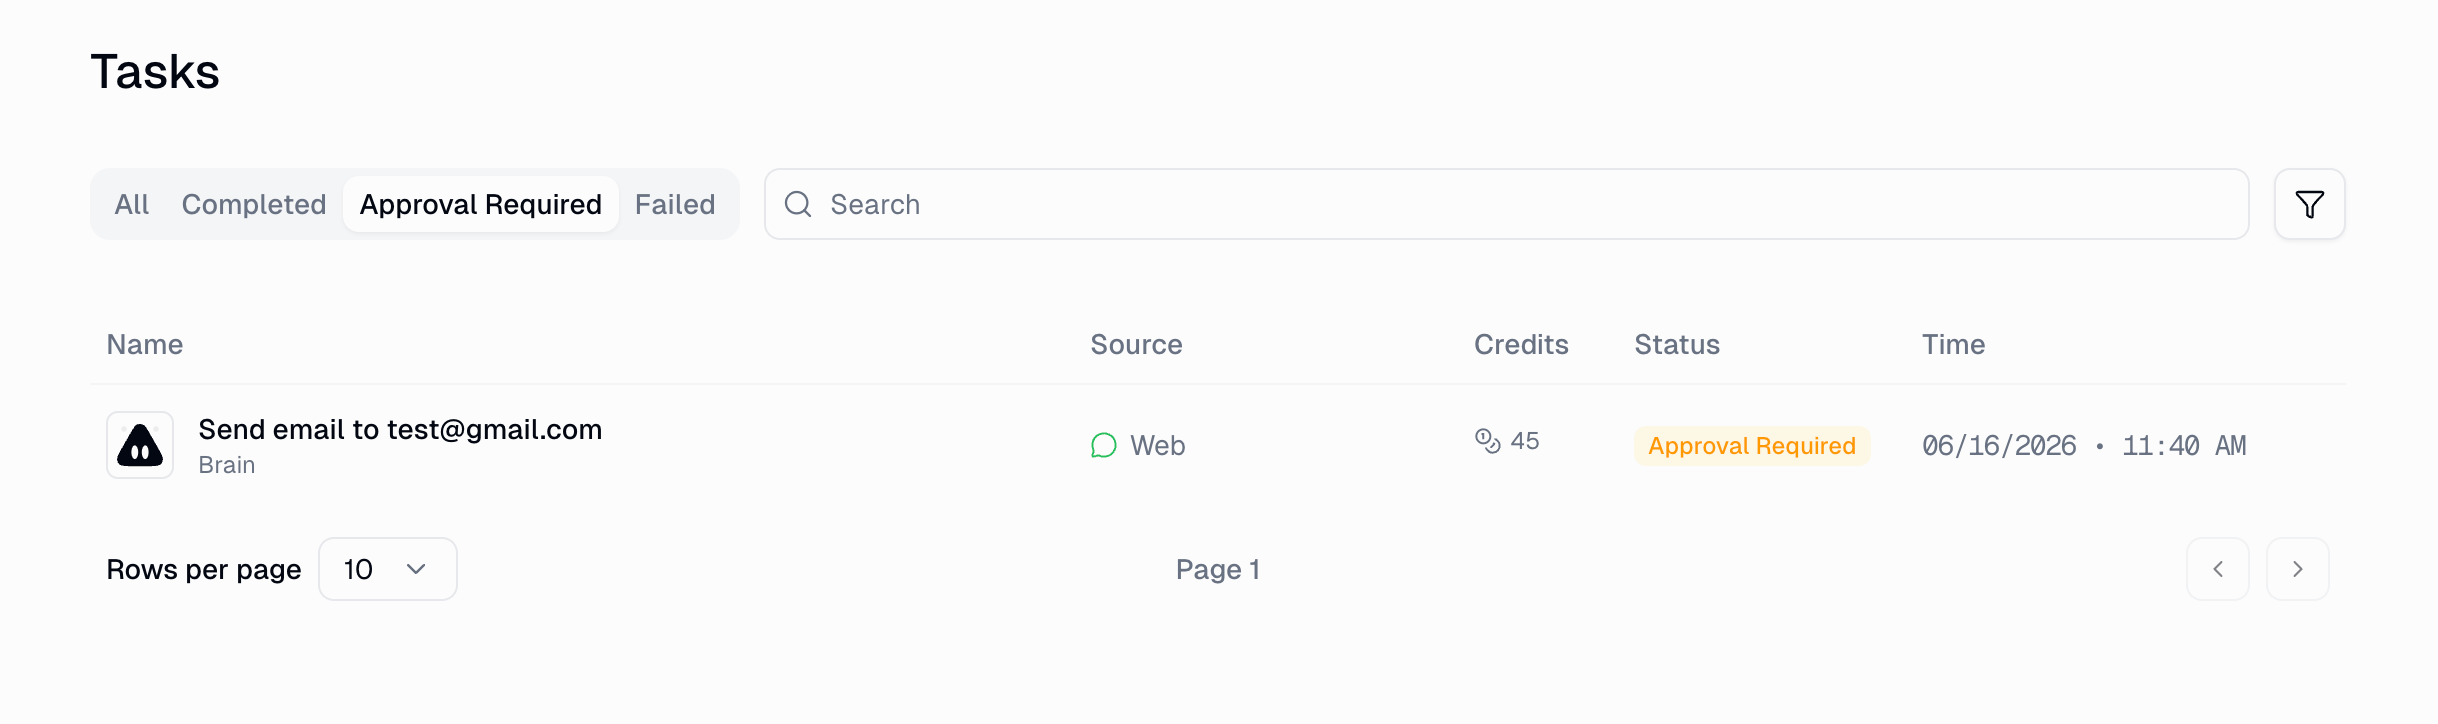
- Tasks Page
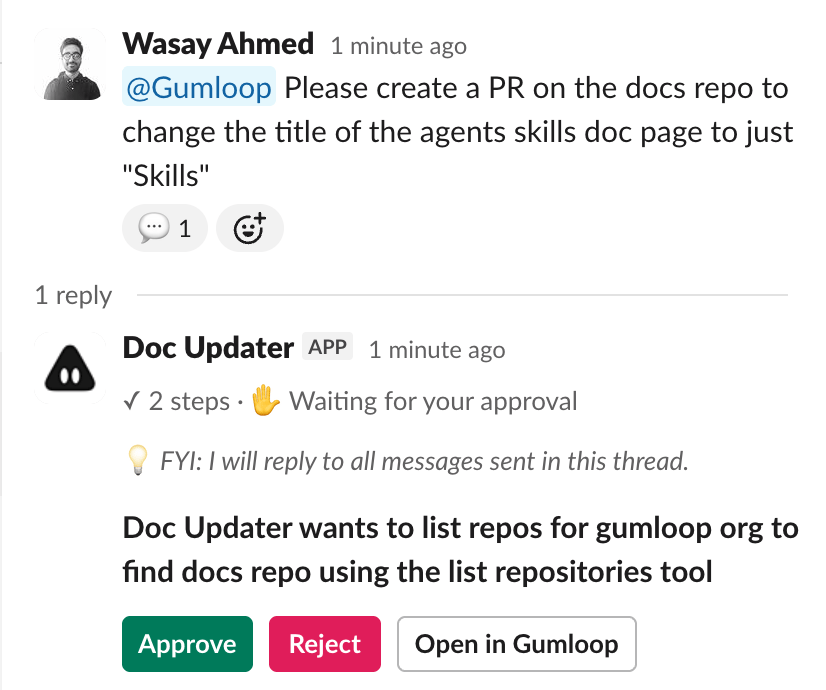
- Slack

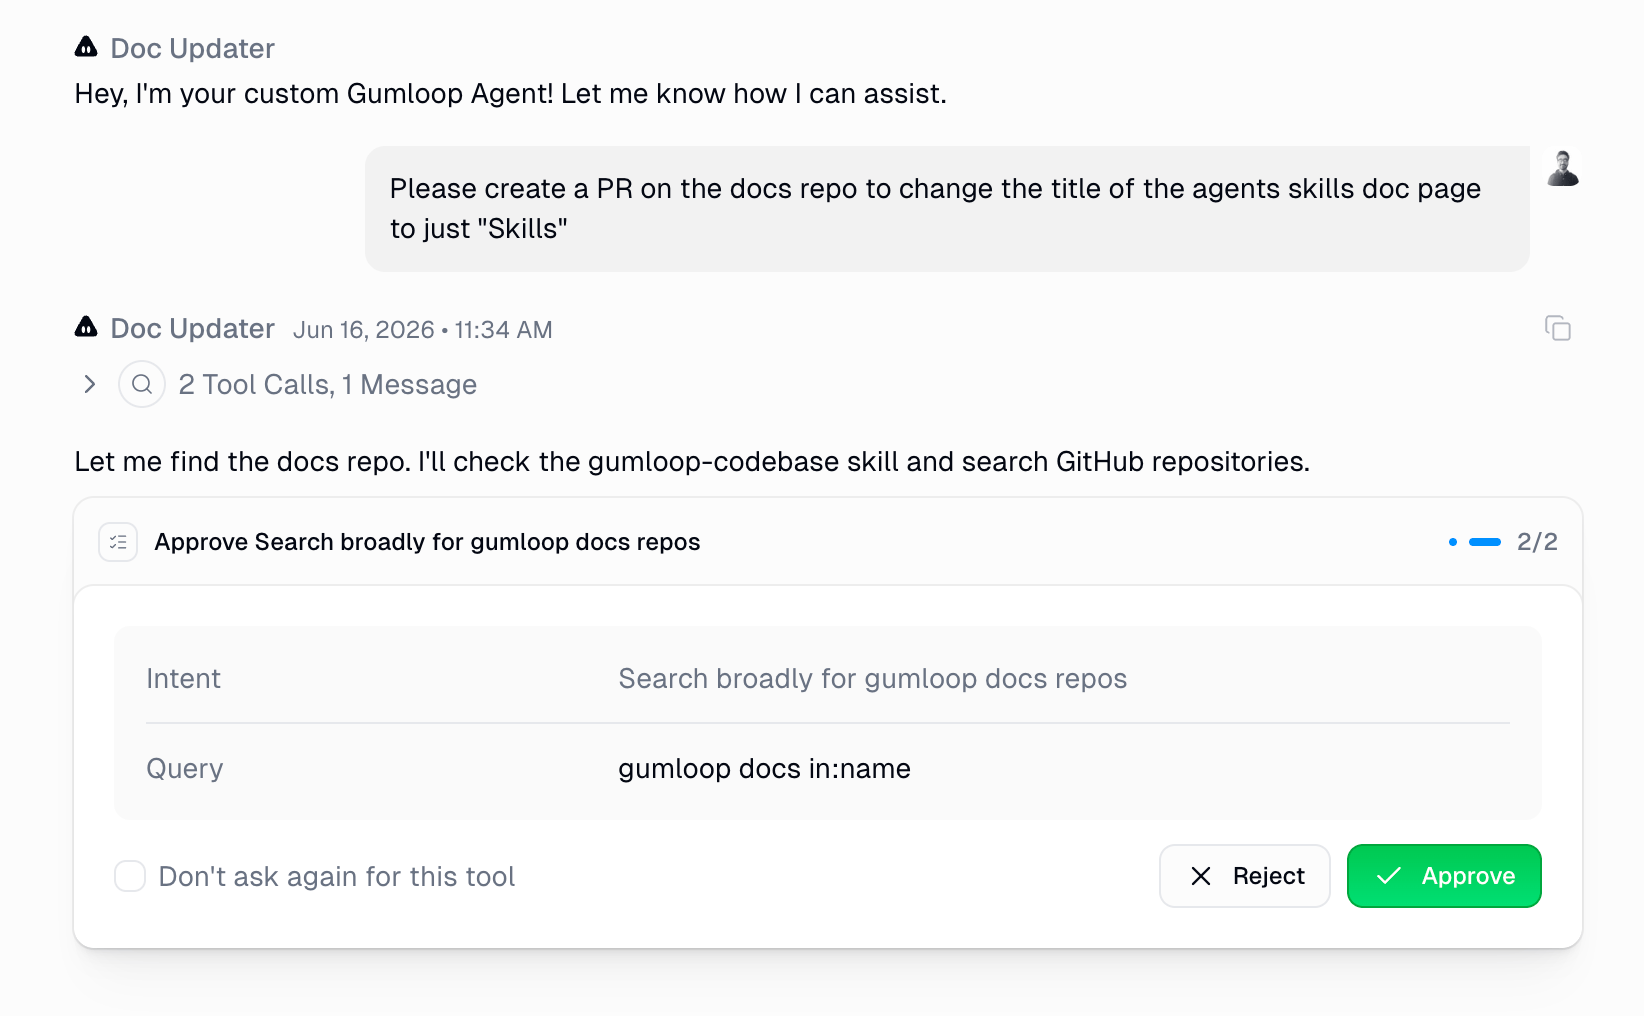
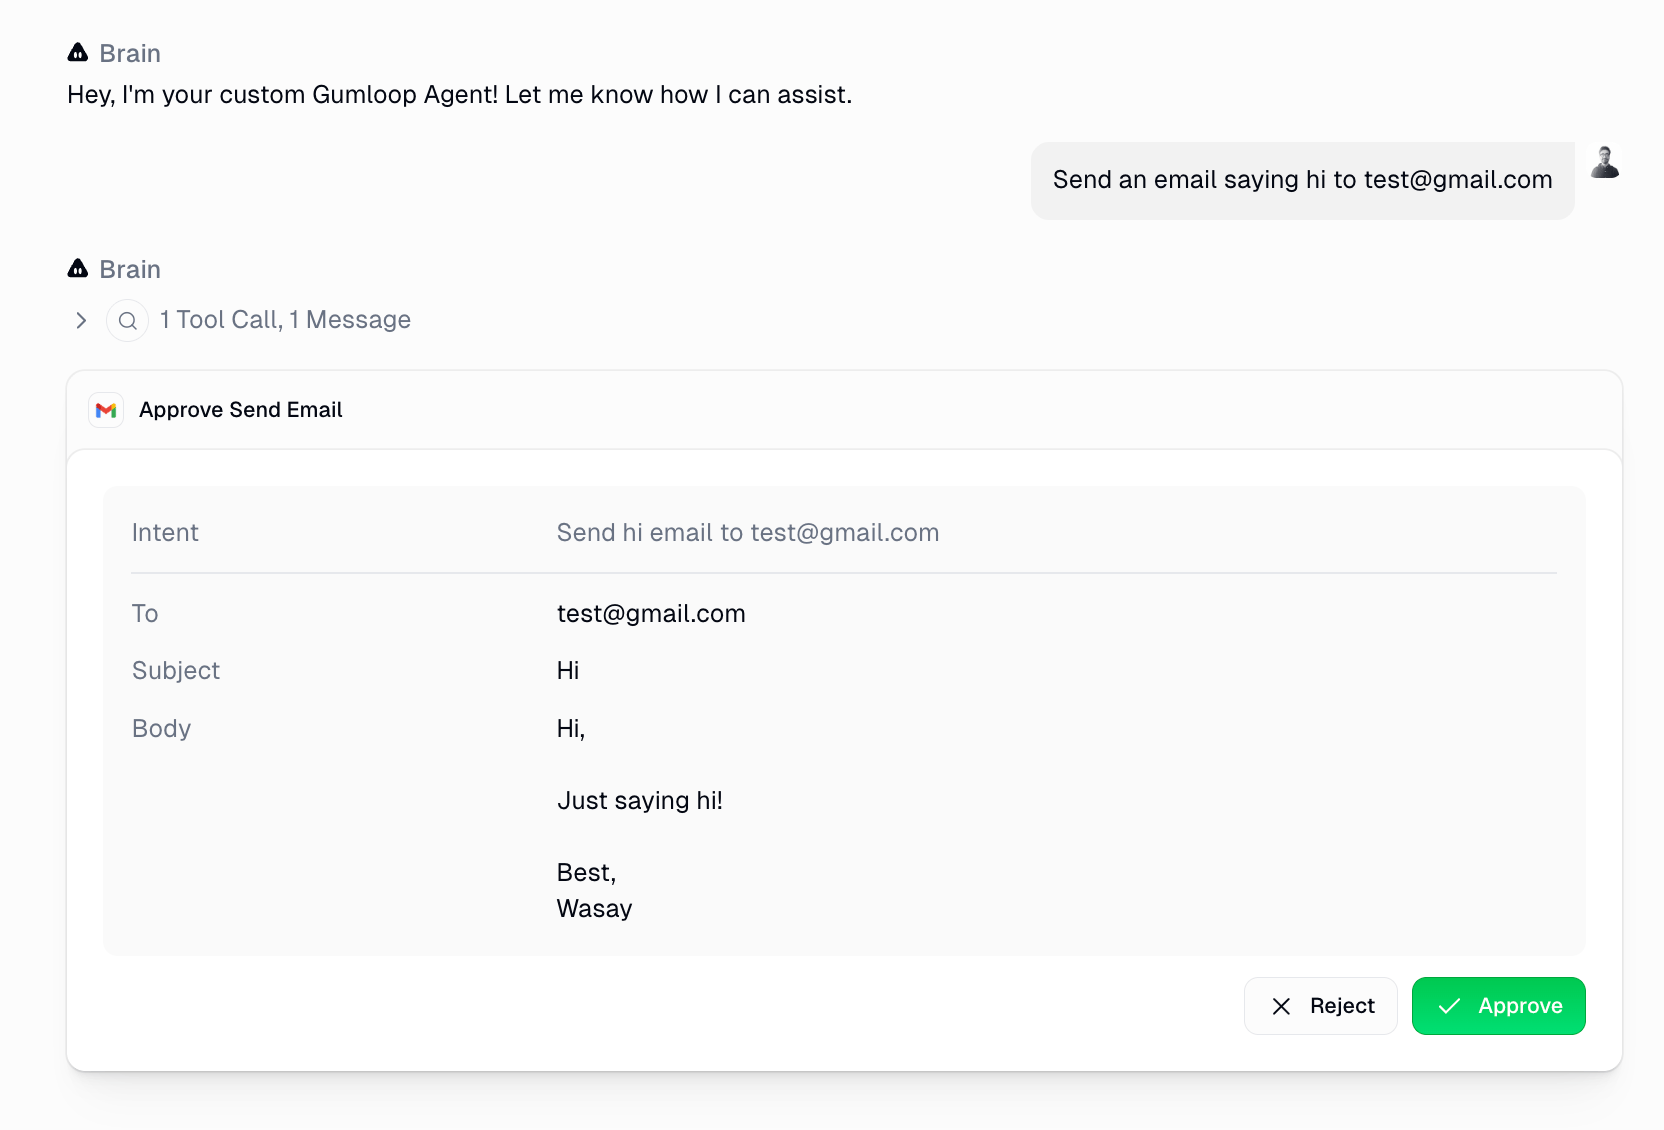
- Tool name and icon at the top (e.g. “Approve Send Email” with the Gmail icon)
- Intent describing what the agent is trying to do
- Display fields showing the key arguments (e.g. To, Subject, Body)
- Reject and Approve buttons
- “Don’t ask again for this tool” checkbox to remember your decision for future calls
Example Walkthroughs
Approving a GitHub tool call
Approving a GitHub tool call
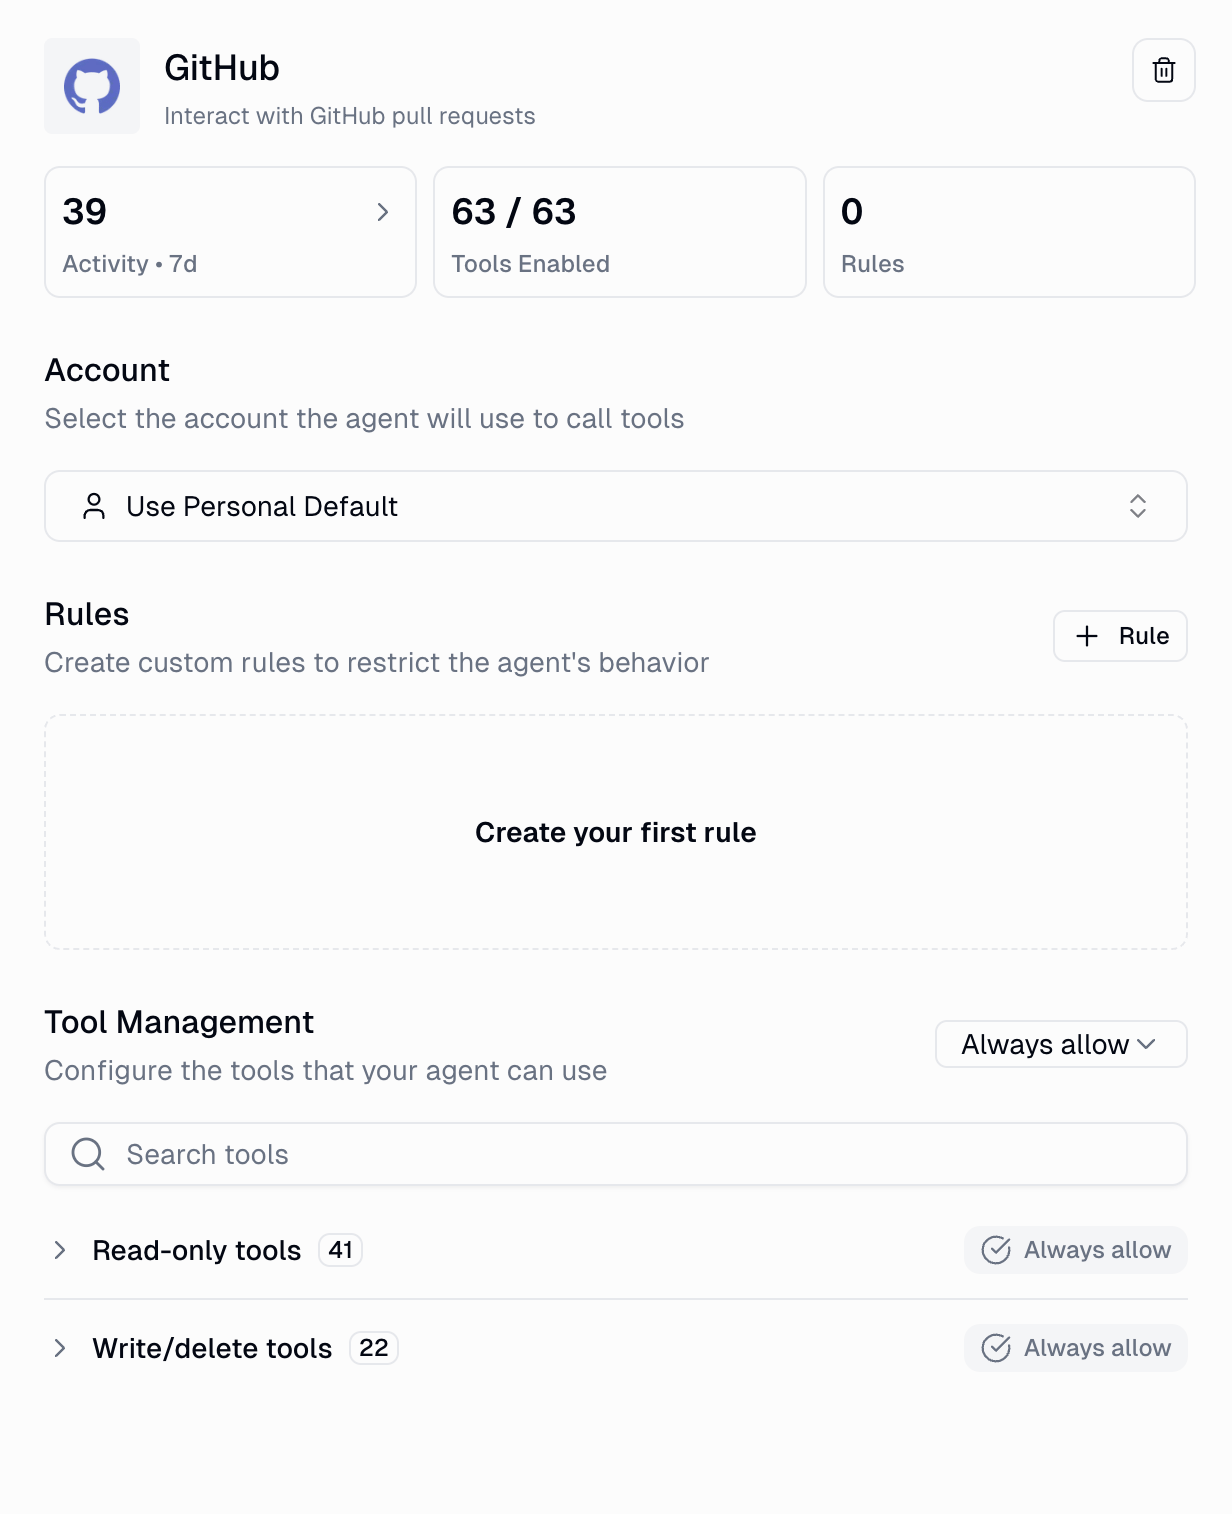
Configure the app
Ask your agent to do something
The agent pauses for approval
Review and decide
The agent continues
Creating a conditional rule via chat
Creating a conditional rule via chat
Enable the App Rules Creation ability
Ask your agent to create a rule
The agent builds the rule
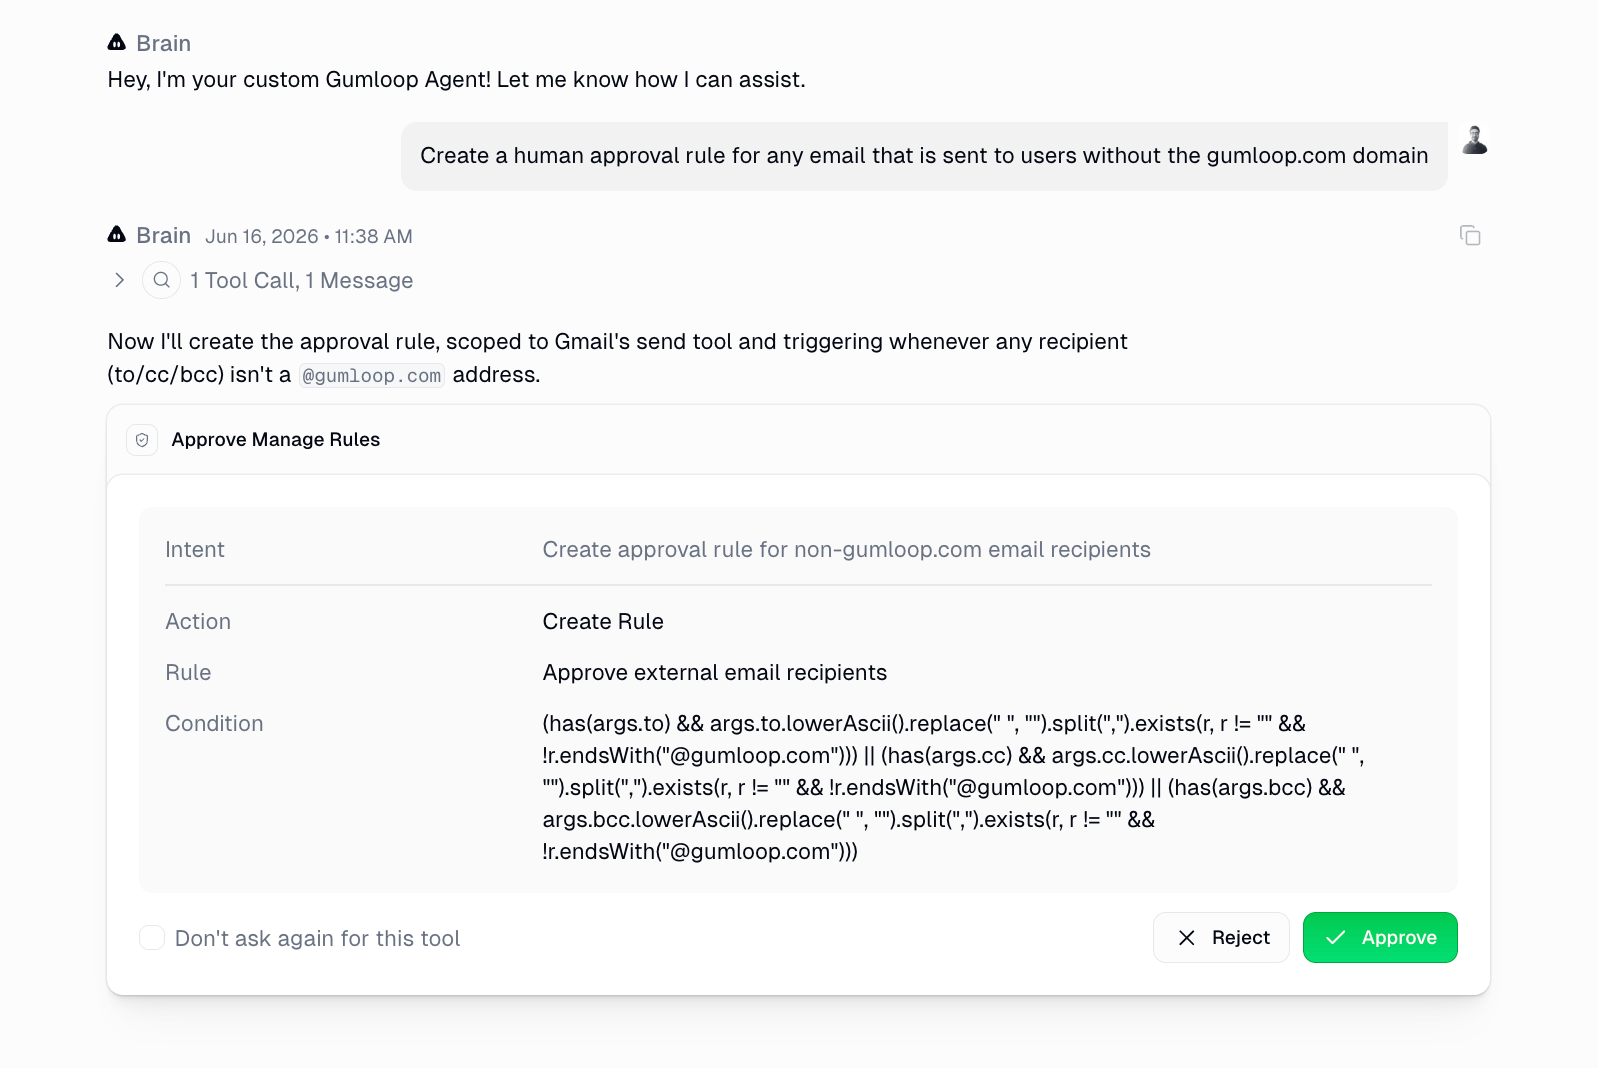
Approve the rule
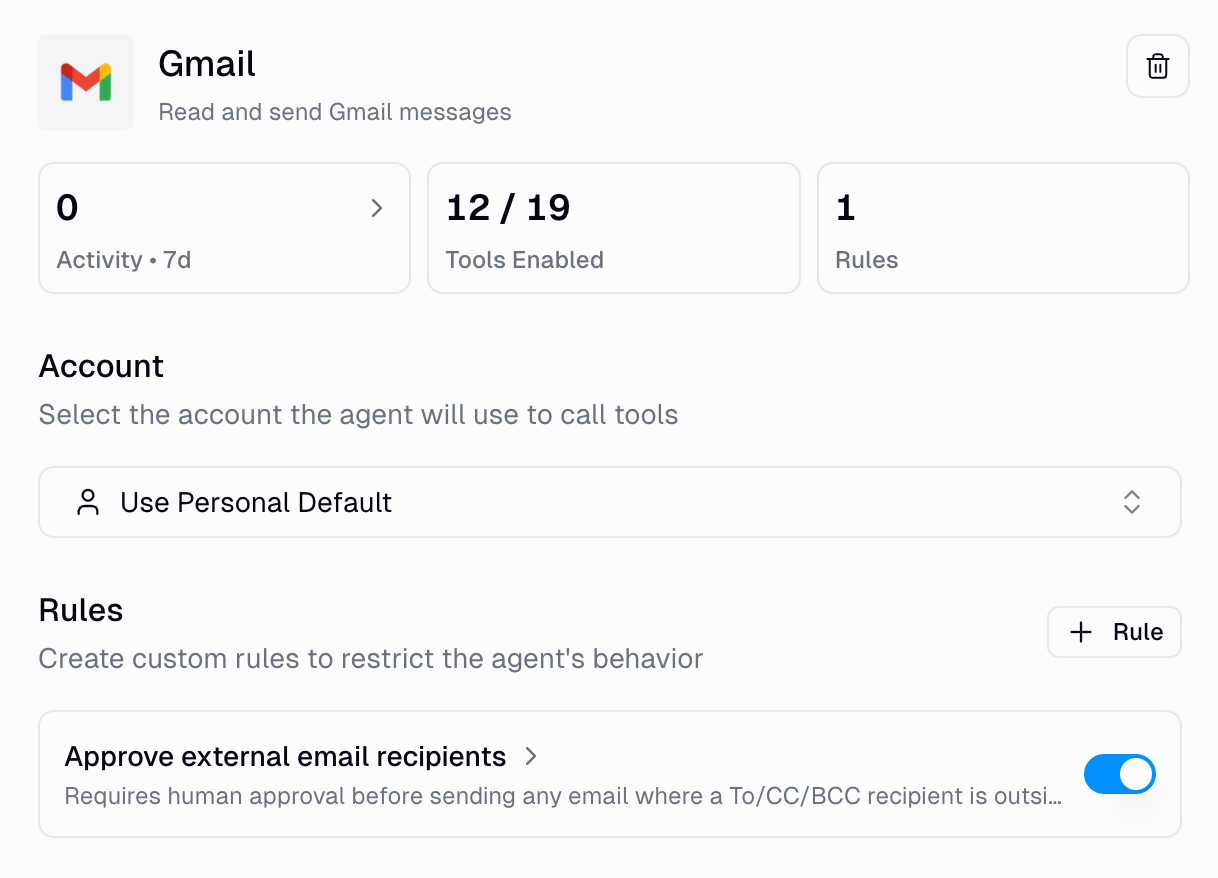
The rule takes effect immediately
What Happens When You Reject
When you reject a tool call:- The agent receives the rejection (and your optional reason).
- It does not execute the tool.
- It continues the conversation, often suggesting an alternative approach or asking for clarification.
Approval Modes at a Glance
FAQ
Does the agent time out while waiting for approval?
Does the agent time out while waiting for approval?
Can I approve from Slack without opening the web app?
Can I approve from Slack without opening the web app?
What does "Don't ask again for this tool" do?
What does "Don't ask again for this tool" do?
Can I set different approval requirements for different team members?
Can I set different approval requirements for different team members?
What's the difference between App Rules and Approval Settings?
What's the difference between App Rules and Approval Settings?
Where can I see all pending approvals across my agents?
Where can I see all pending approvals across my agents?
What happens if I reject a tool call?
What happens if I reject a tool call?
Can my agent create App Rules on its own?
Can my agent create App Rules on its own?
Does Human in the Loop work with sandbox (code execution) tools?
Does Human in the Loop work with sandbox (code execution) tools?