Where to find it
Go to Settings → Organization → Hosted MCPs at gumloop.com/settings/organization/hosted-mcps.Initial Setup
Before creating your first hosted MCP, you need to connect GitHub. Go to Hosted MCPs → Settings (or visit gumloop.com/settings/organization/hosted-mcps/setup) to configure two connections:1
GitHub OAuth (Personal)
Connect your personal GitHub account. This lets Gumloop create repositories
on your behalf when you set up new servers. Each developer on your team
connects their own GitHub account.
2
GitHub App (Organization)
Install the Gumloop GitHub App on your GitHub organization. This enables
automatic deployments: every push to your main branch triggers a new
build and deploy. This is a one-time setup for the whole organization.
Server List
The main Hosted MCPs page shows a table of all your organization’s servers. Each row displays:- Server name with a status indicator (green dot = active, yellow dot = disabled)
- Linked GitHub repository with a badge linking to the repo
- Tool count showing how many tools the server exposes
- Last Updated timestamp
Filtering
Use the toolbar above the table to:- Search by server name or repository
- Filter: My Servers Only to show only servers you created
- Filter: Show Disabled Servers to include disabled servers in the list
- Click Settings to go to the GitHub integration setup page
- Click Create to start the new server wizard
Creating a New Hosted MCP
Click the Create button to launch a 3-step wizard that sets up a new MCP server with a GitHub repository.Step 1: Basic Info
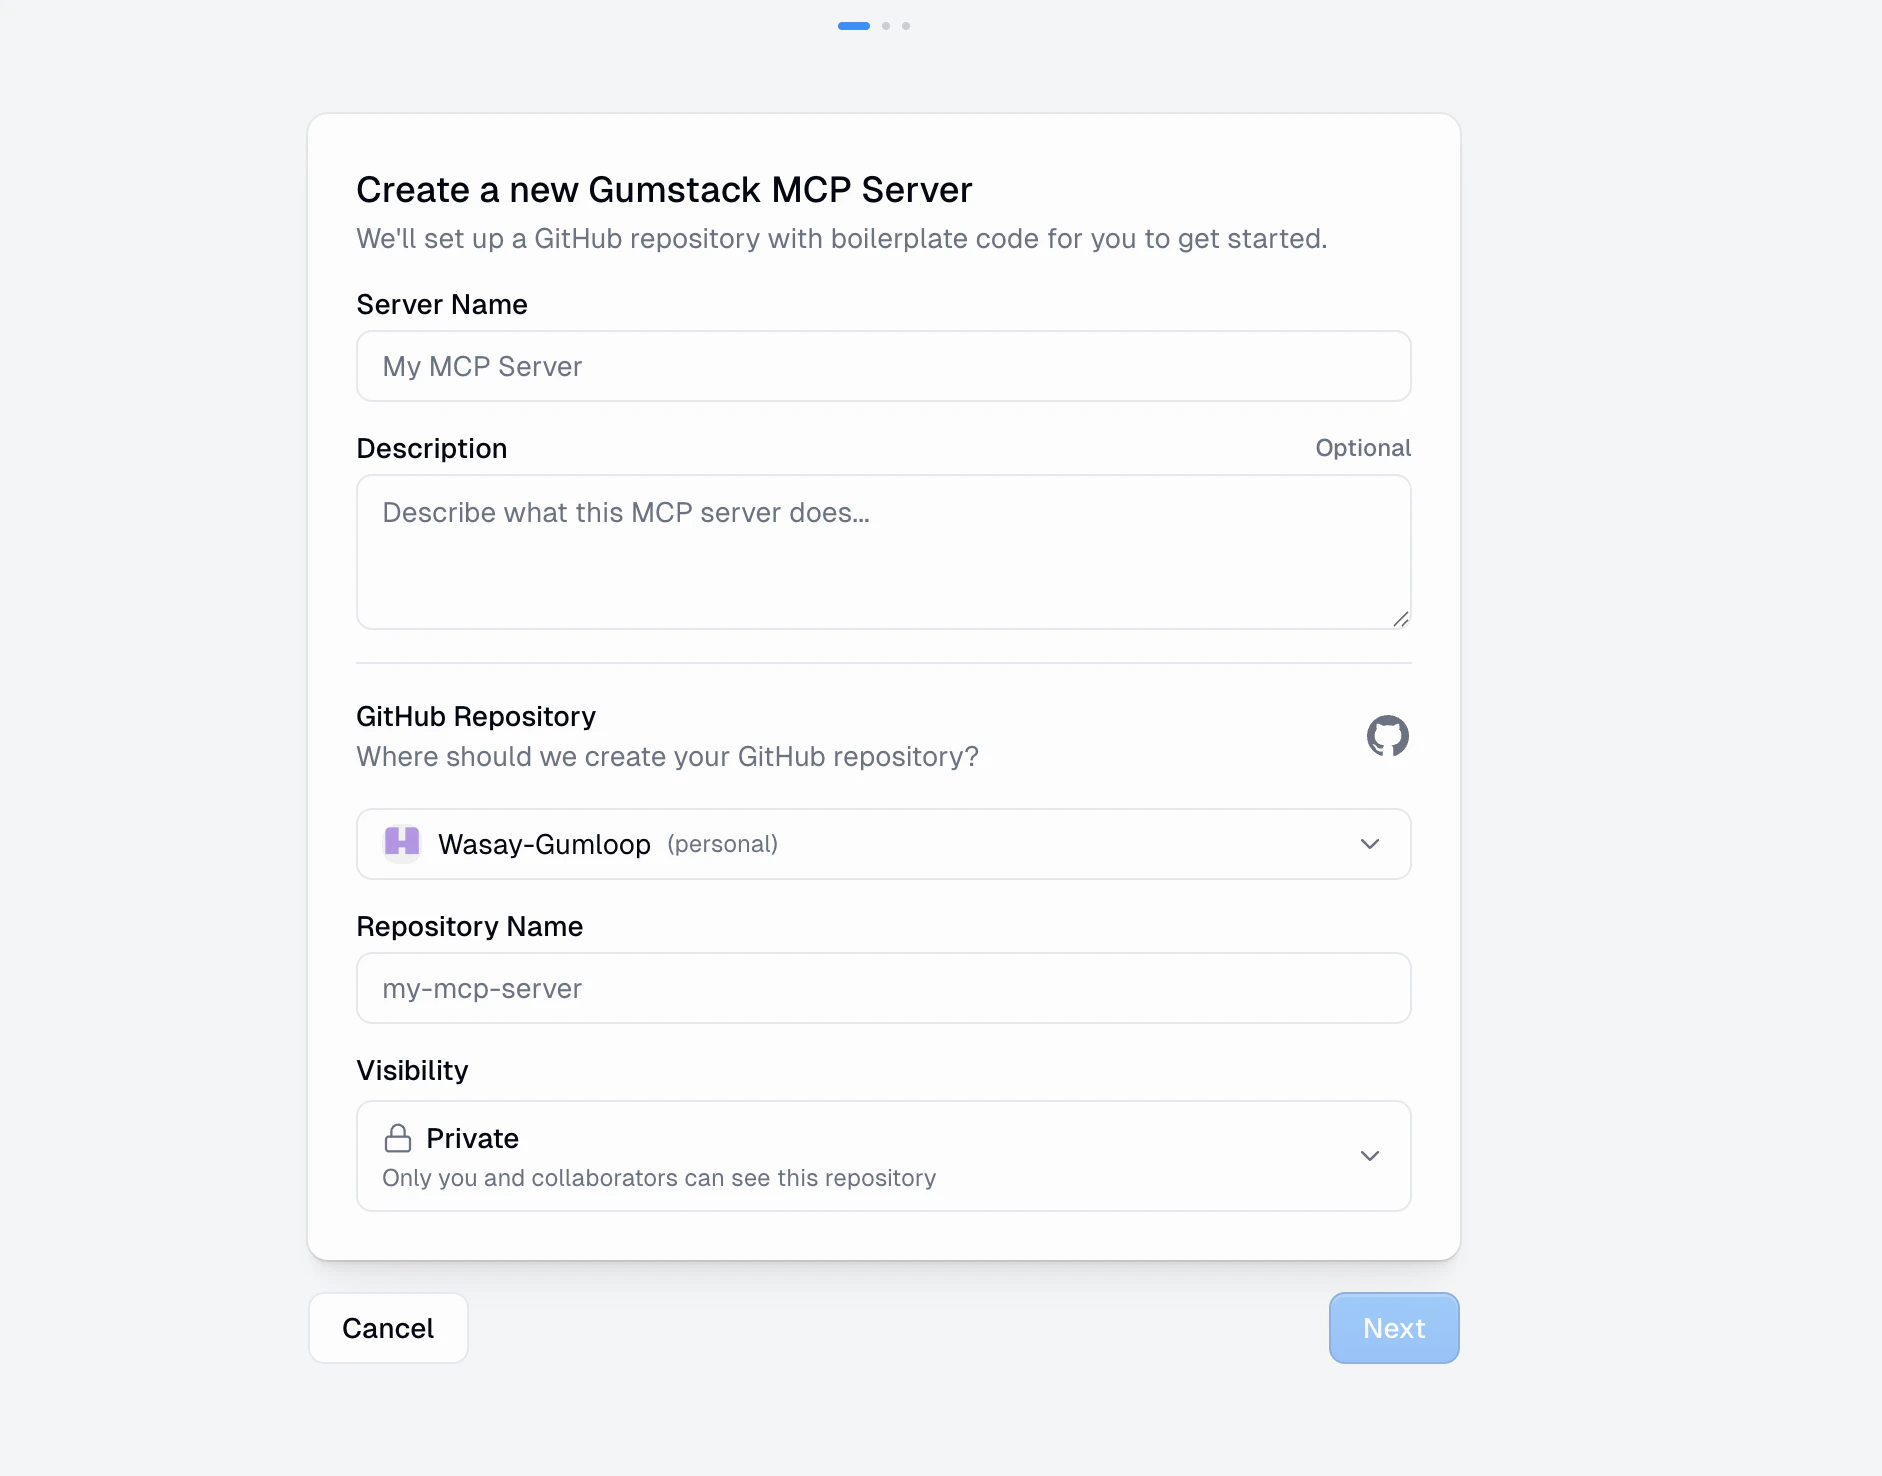
- Server Name: A display name for your MCP server (up to 100 characters)
- Description (optional): A brief description of what your server does
- GitHub Repository: Choose which GitHub account or organization should own the repo
- Repository Name: The name for the new GitHub repo (letters, numbers, hyphens, underscores, dots)
- Visibility: Public, Private, or Internal
Step 2: Authentication & Environment
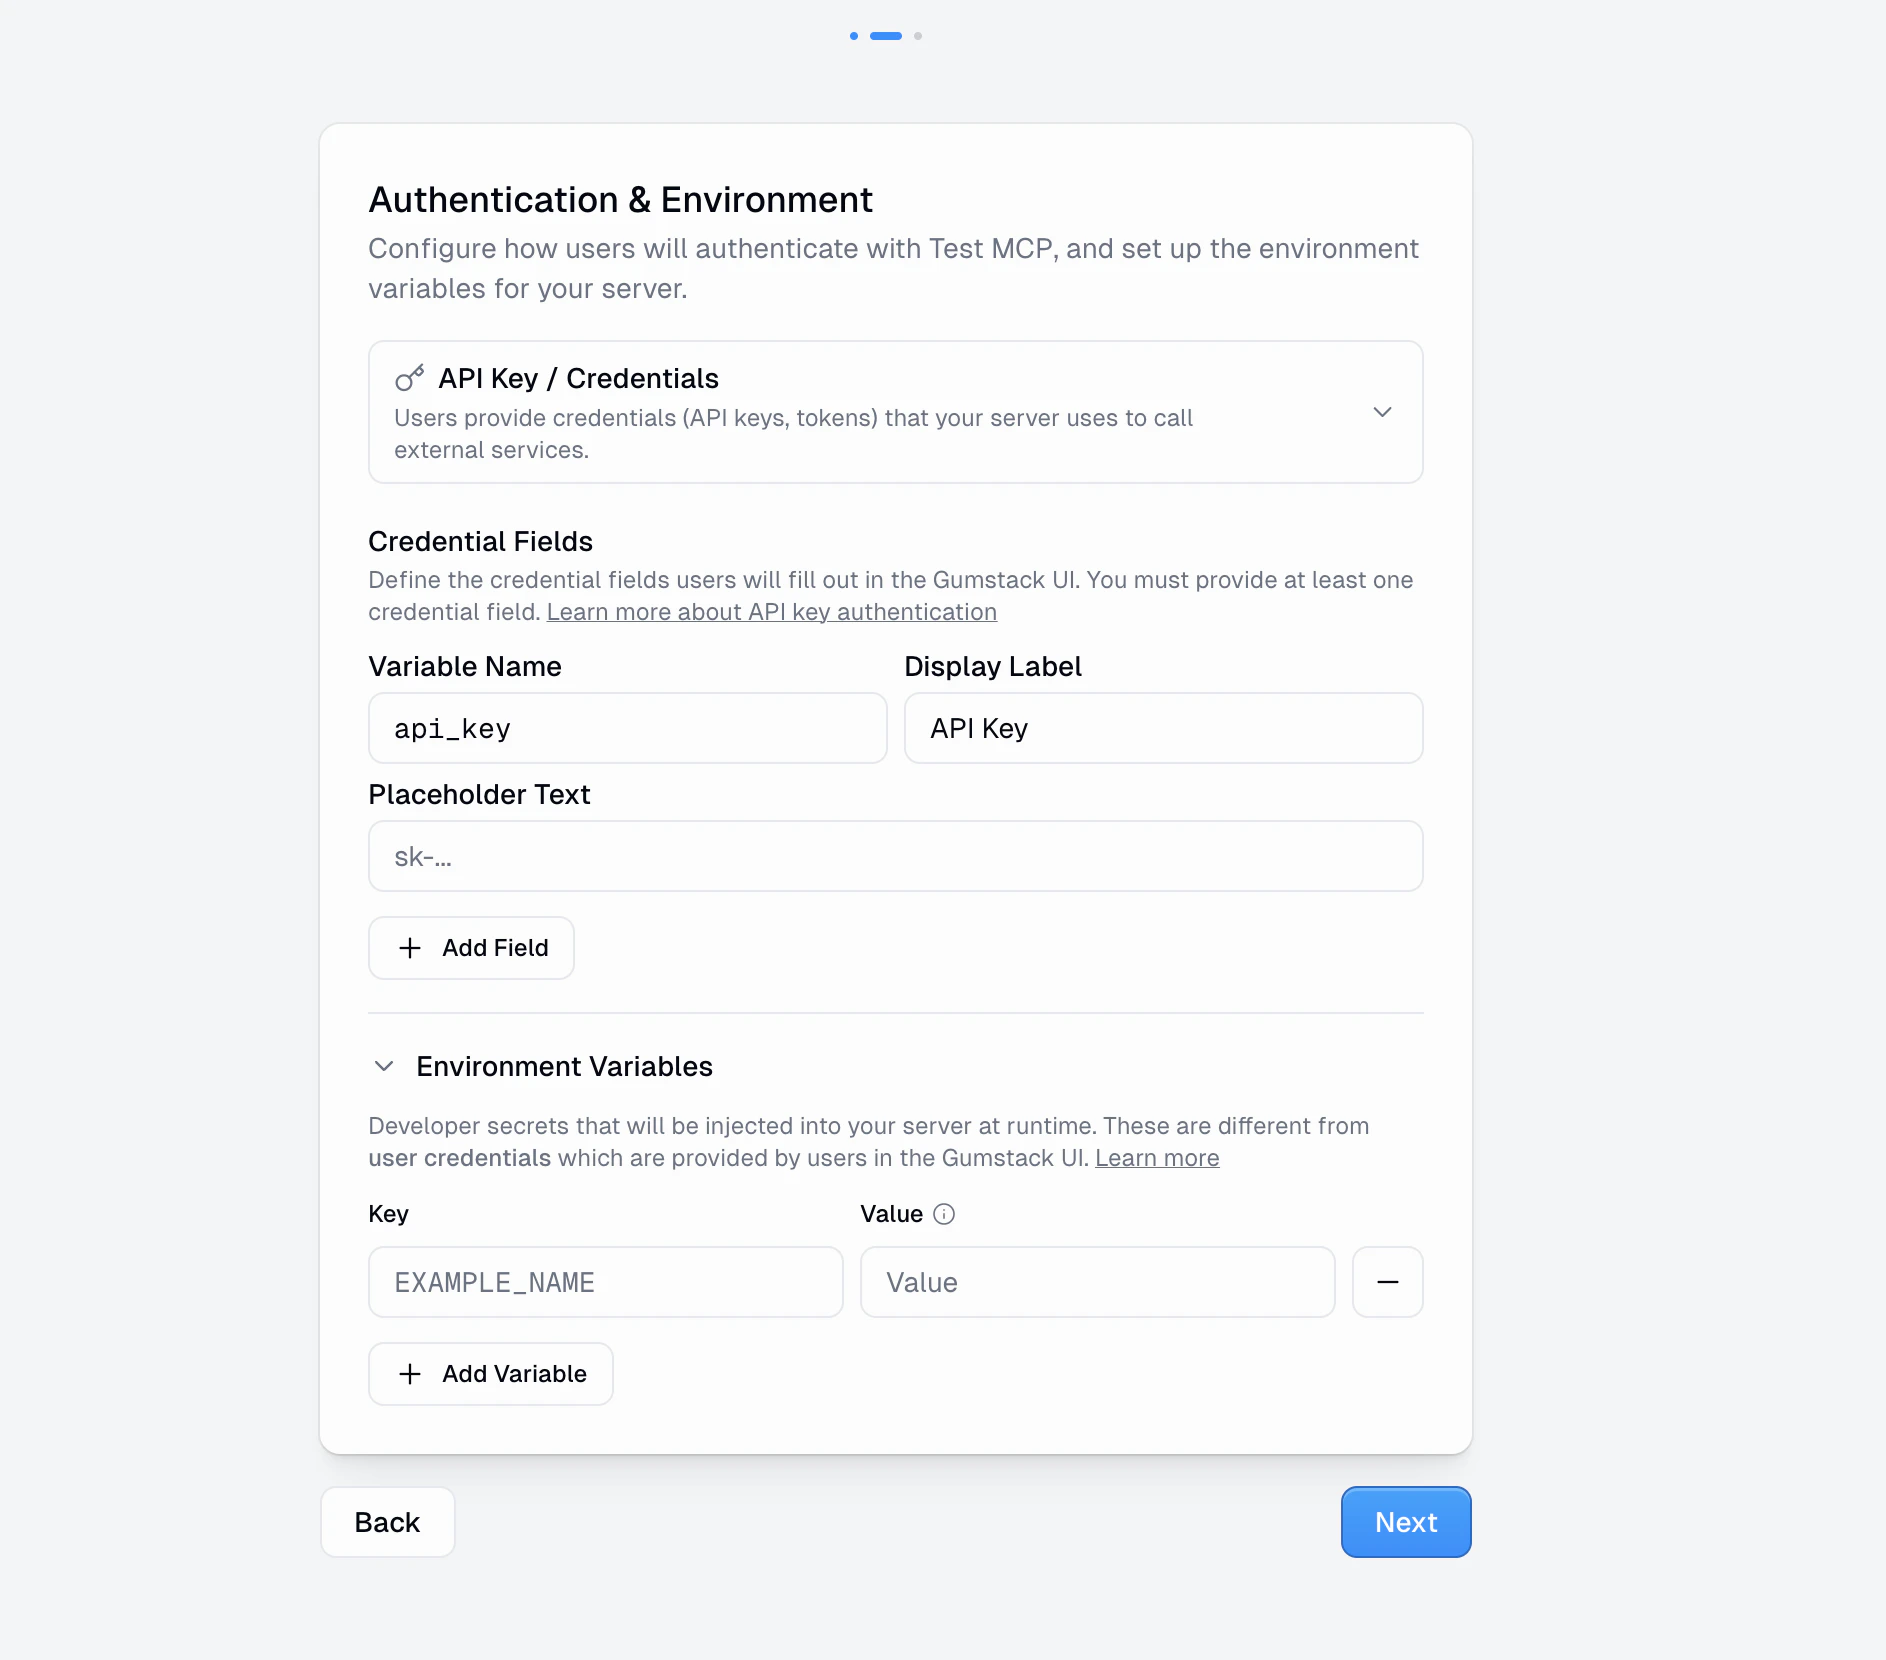
- No Authentication: Anyone with access can use the server without credentials
- API Key / Credentials: Users provide API keys or tokens. You define the credential fields (variable name, display label, placeholder text) that users fill out in the Gumloop UI
- OAuth 2.0: Users authenticate through an OAuth flow with a third-party provider
Credentials vs. Environment Variables: Credentials are provided by each
end user and are unique per person. Environment variables are set by the
server developer and shared across all users of the server.
Step 3: Review
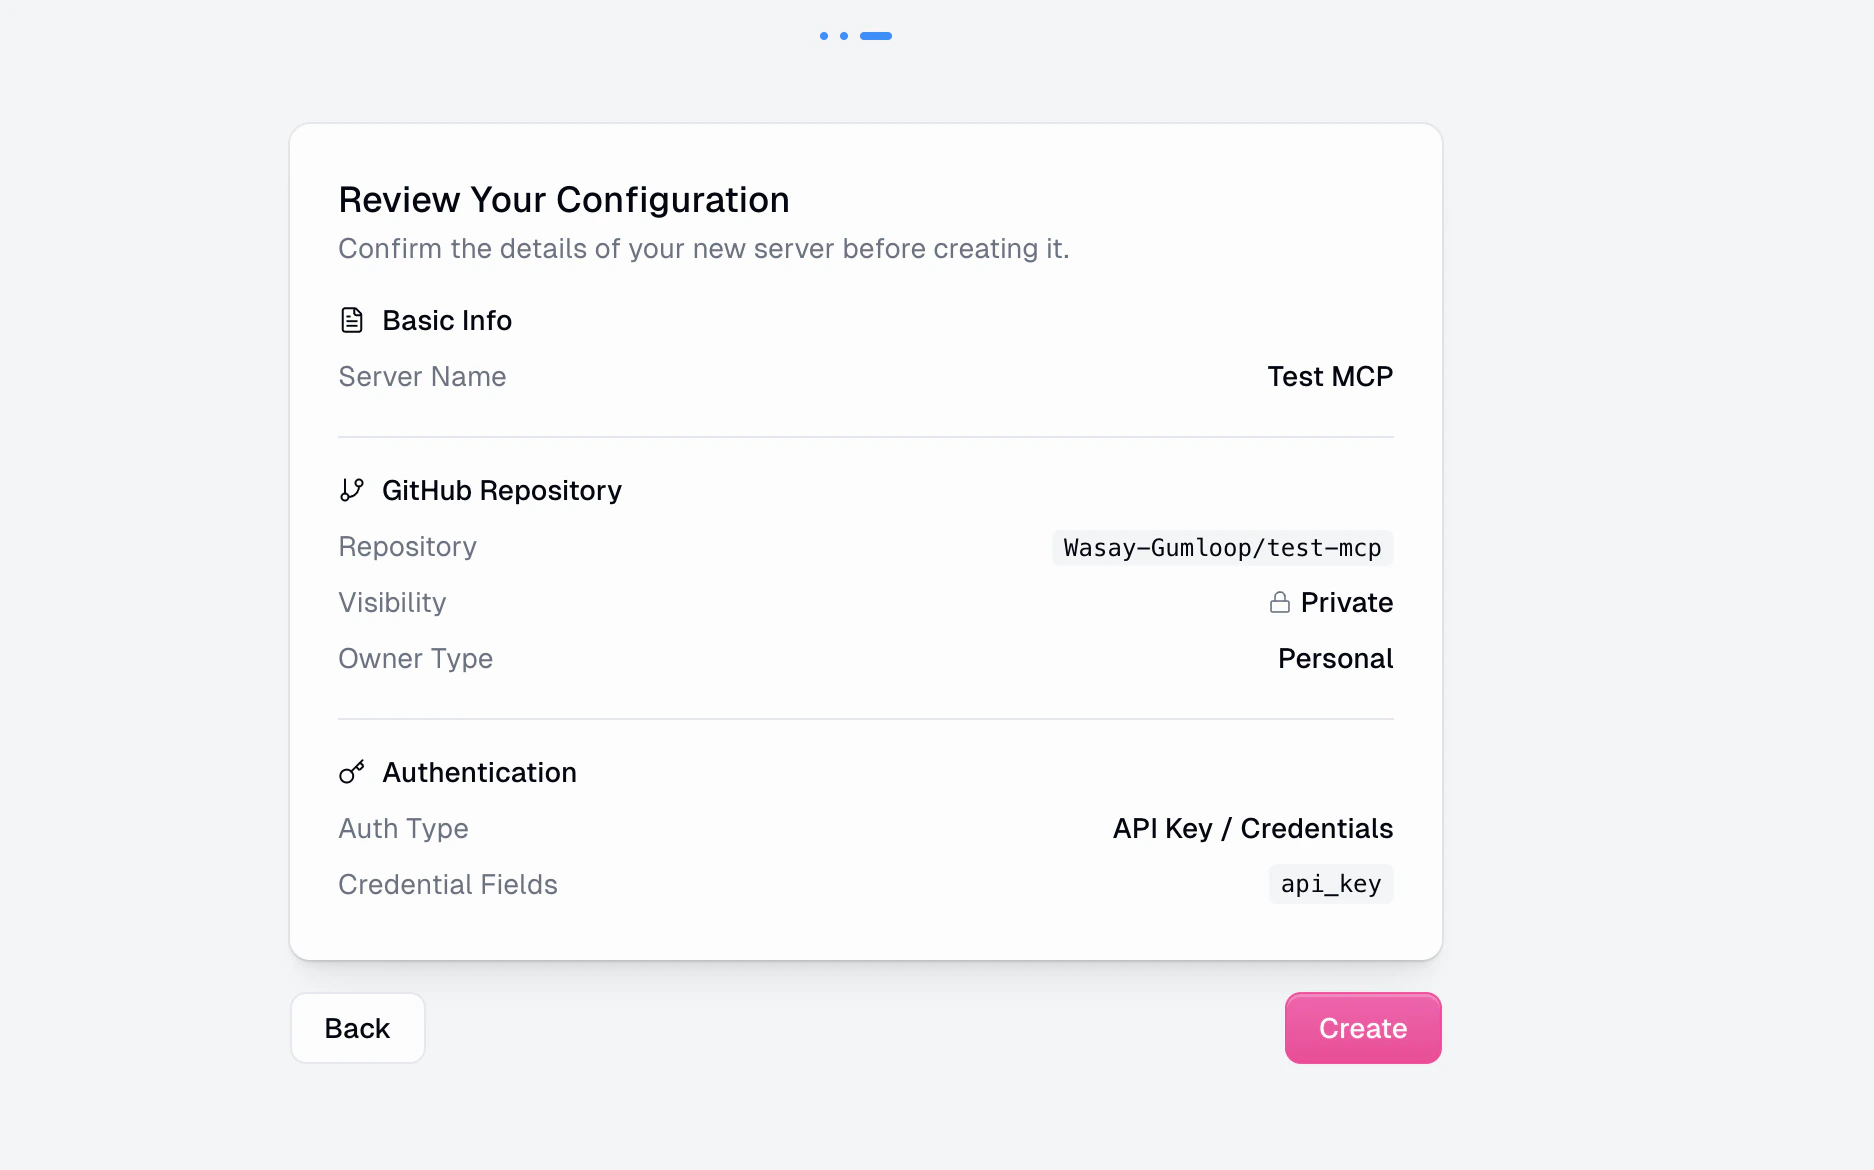
- Create a new GitHub repository with boilerplate MCP server code
- Register the server in your organization
- Redirect you to the server detail page
Server Detail Page
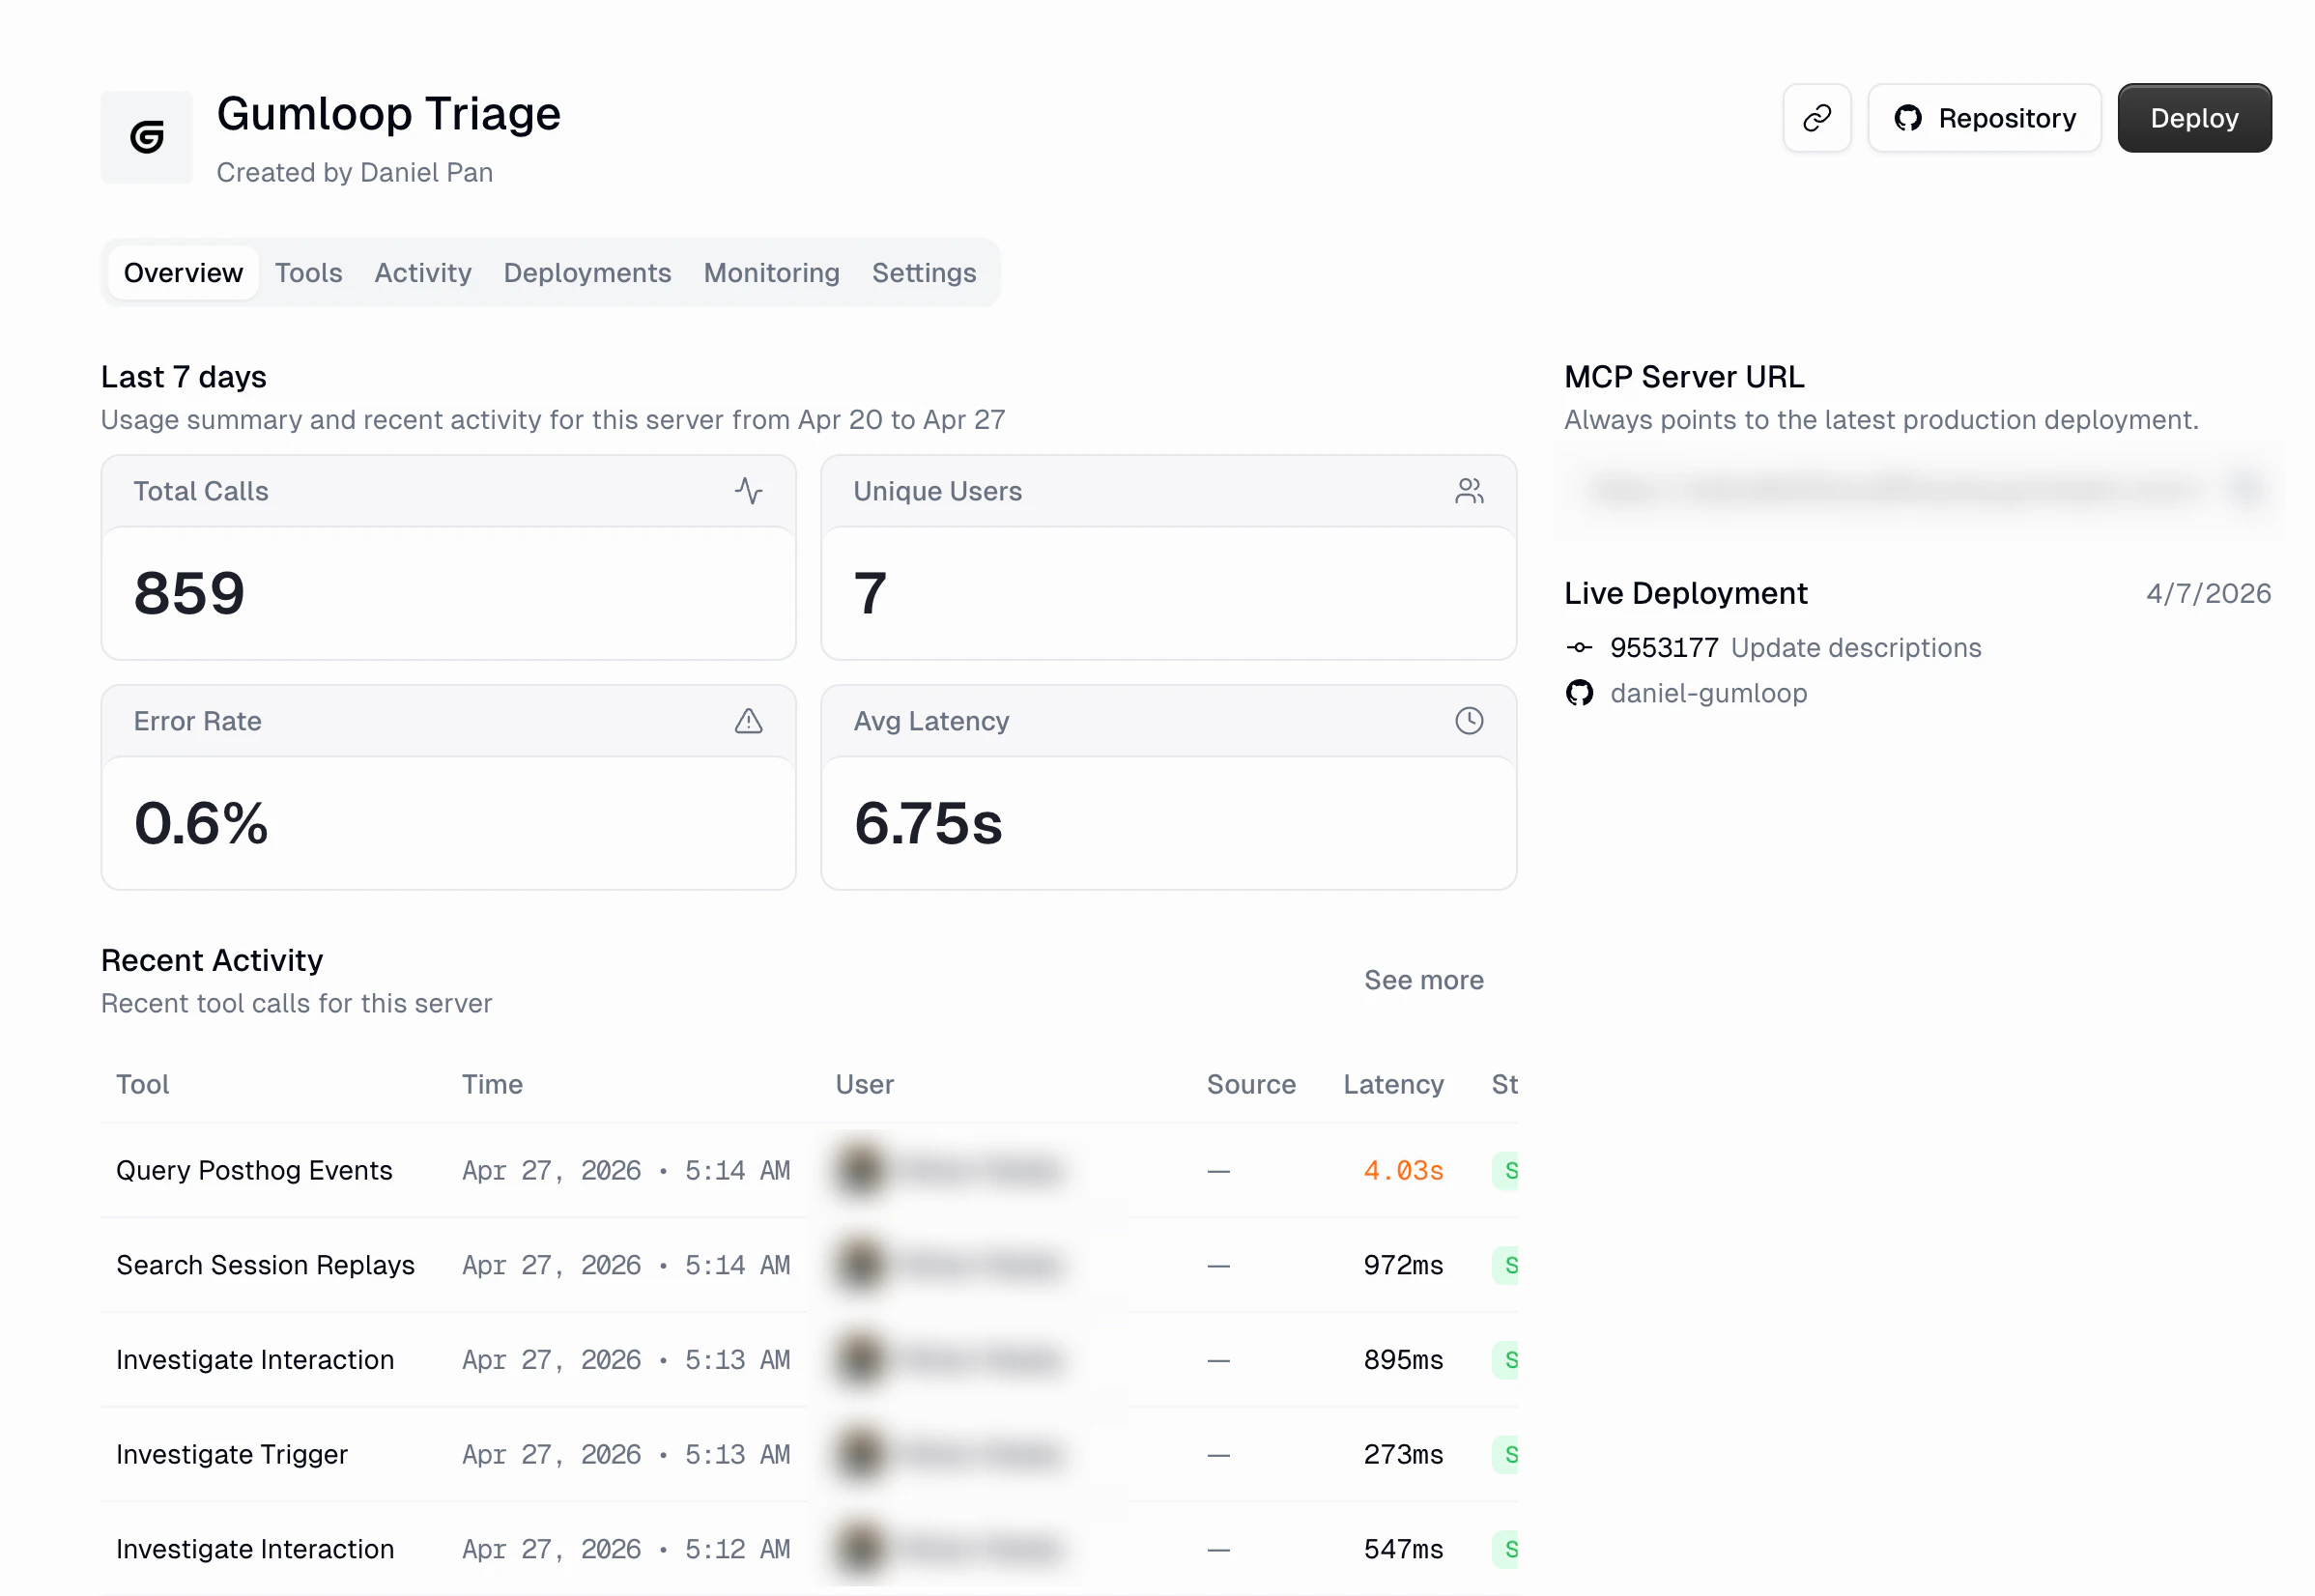
Every hosted MCP has a detail page with six tabs:Overview
The overview tab gives you a snapshot of server health and activity for the last 7 days:- Total Calls: Total number of tool calls
- Unique Users: How many distinct users made calls
- Error Rate: Percentage of calls that failed
- Avg Latency: Average response time
- MCP Server URL: A unique, stable URL that always points to your latest production deployment. Copy this to configure MCP clients.
- Live Deployment: Shows the current deployed commit, author, and date
- Recent Activity: A quick-look table of the most recent tool calls
- Copy URL (link icon): Copy the server URL to your clipboard
- Repository button: Jump to the GitHub repo
- Deploy button: Trigger a new deployment
Tools
The Tools tab shows every tool your server exposes and lets you control access per custom role. The matrix view shows:- Tool name and description for each tool
- Usage count: How many times each tool has been called
- Custom role columns: Toggle access on or off for each role
- Disable Server row: Block all tools for a specific role at once
Activity
The Activity tab is a server-scoped version of the global App Activity page. It shows the same histogram and table, but filtered to just this server. The histogram here uses latency-based color coding:- Green (P25): Fast calls
- Orange (P85-95): Moderately slow calls
- Red (P95+): Slowest calls
Deployments
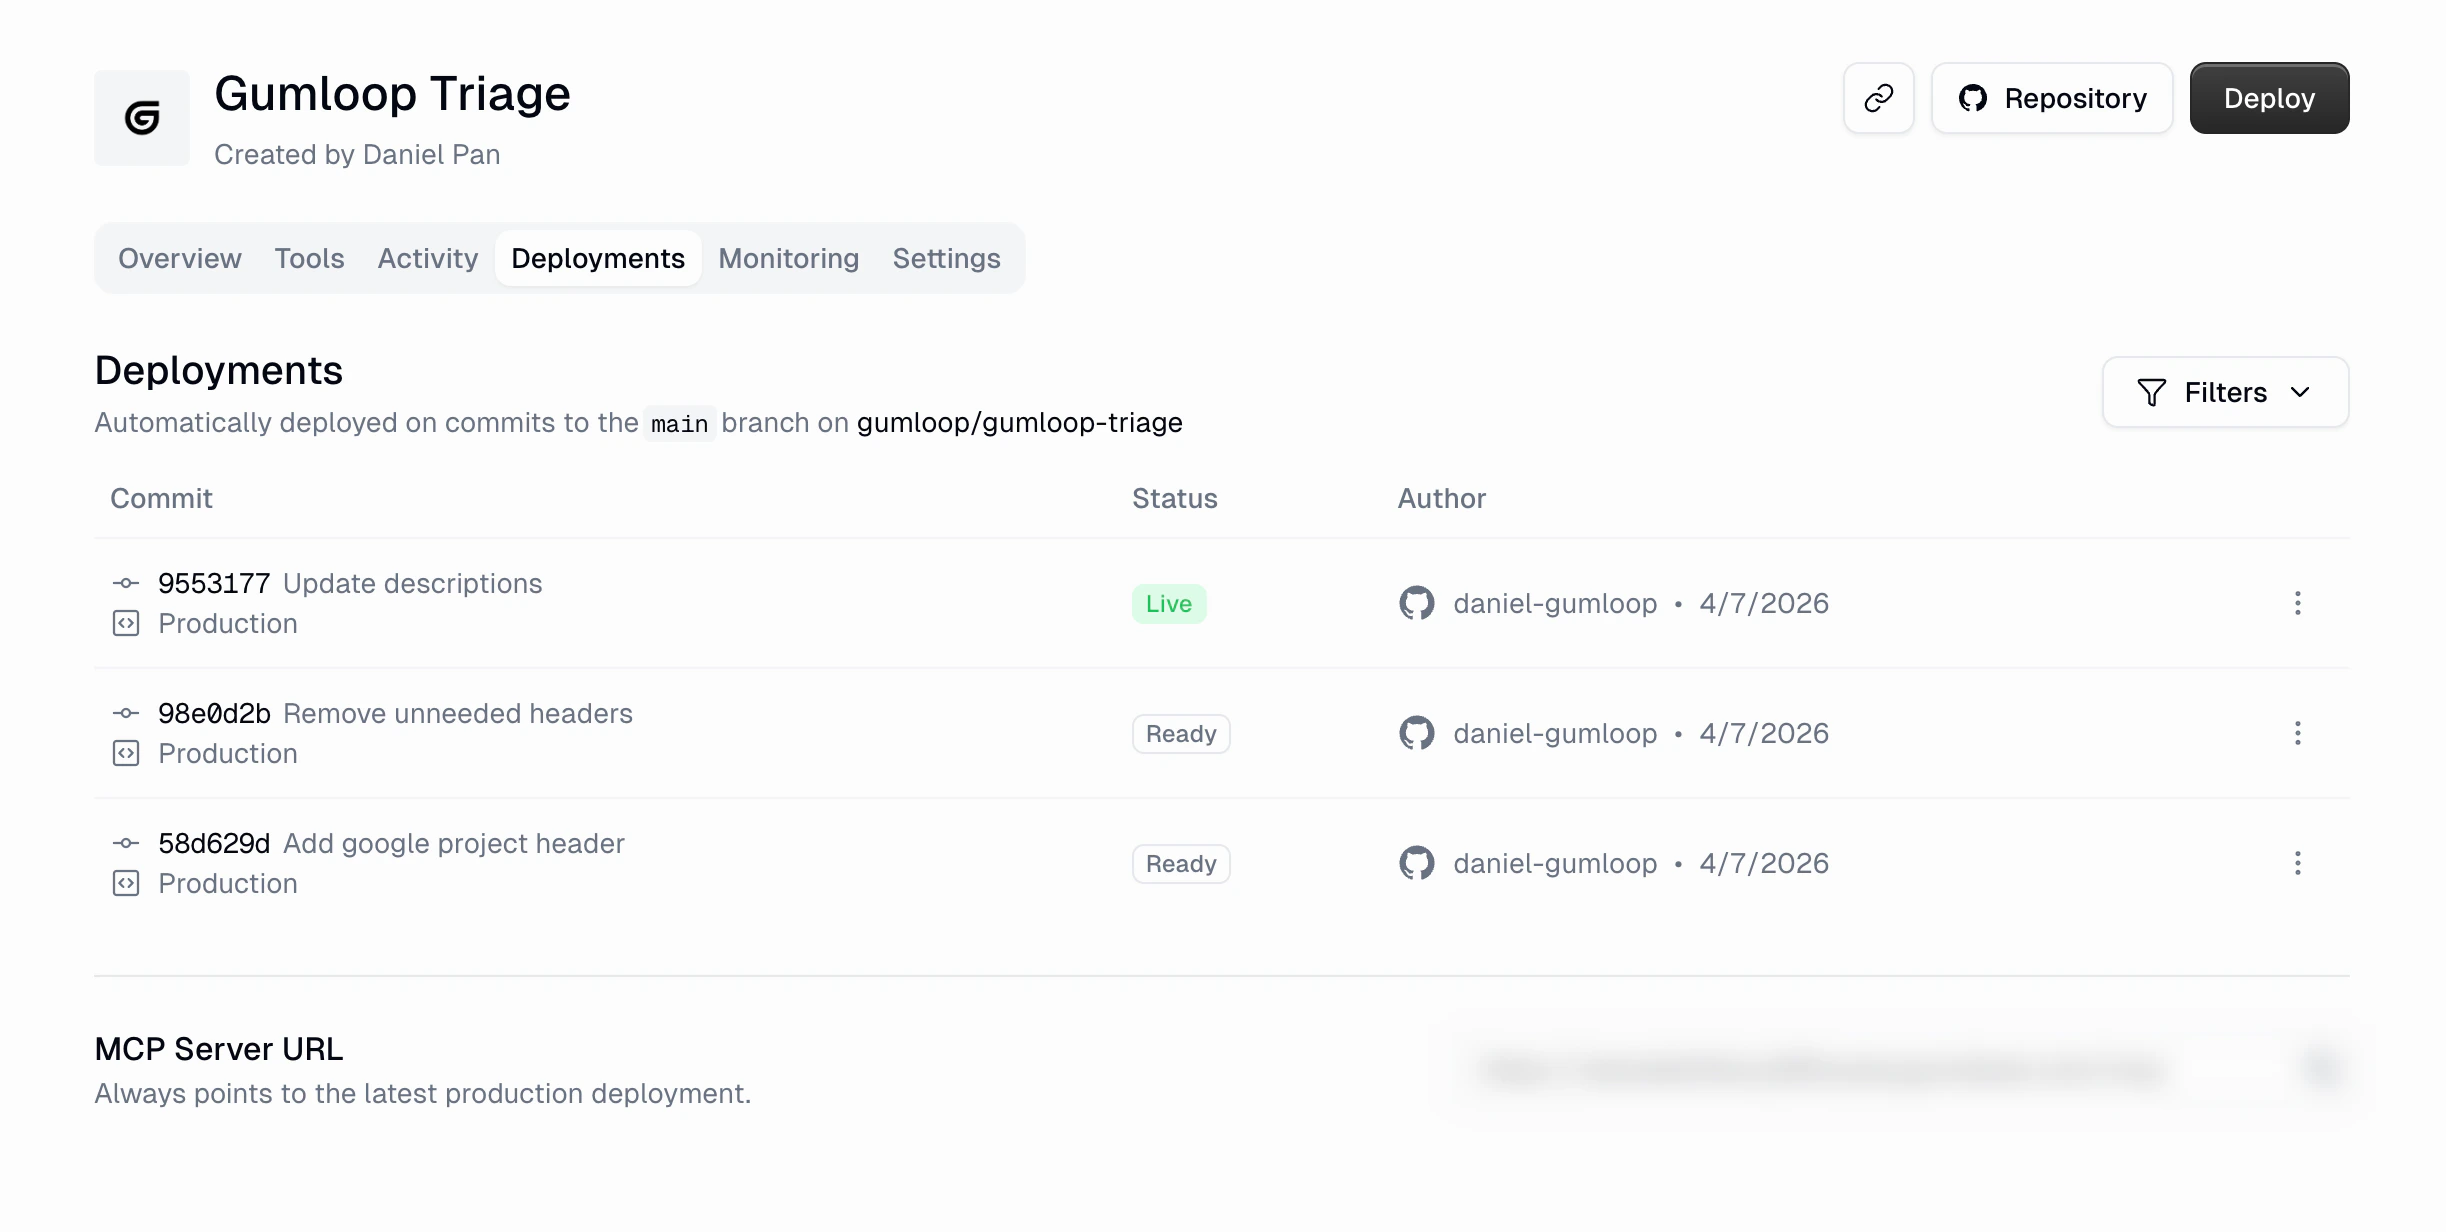
- Commit hash and message
- Status: Building, Deploying, Live, Ready, Failed, or Rolled Back
- Author: Who pushed the commit (from GitHub)
- Date: When the deployment happened
main branch (when the GitHub App is installed). You can also manually deploy from the Deploy button in the header, choosing a specific branch or commit.
Monitoring
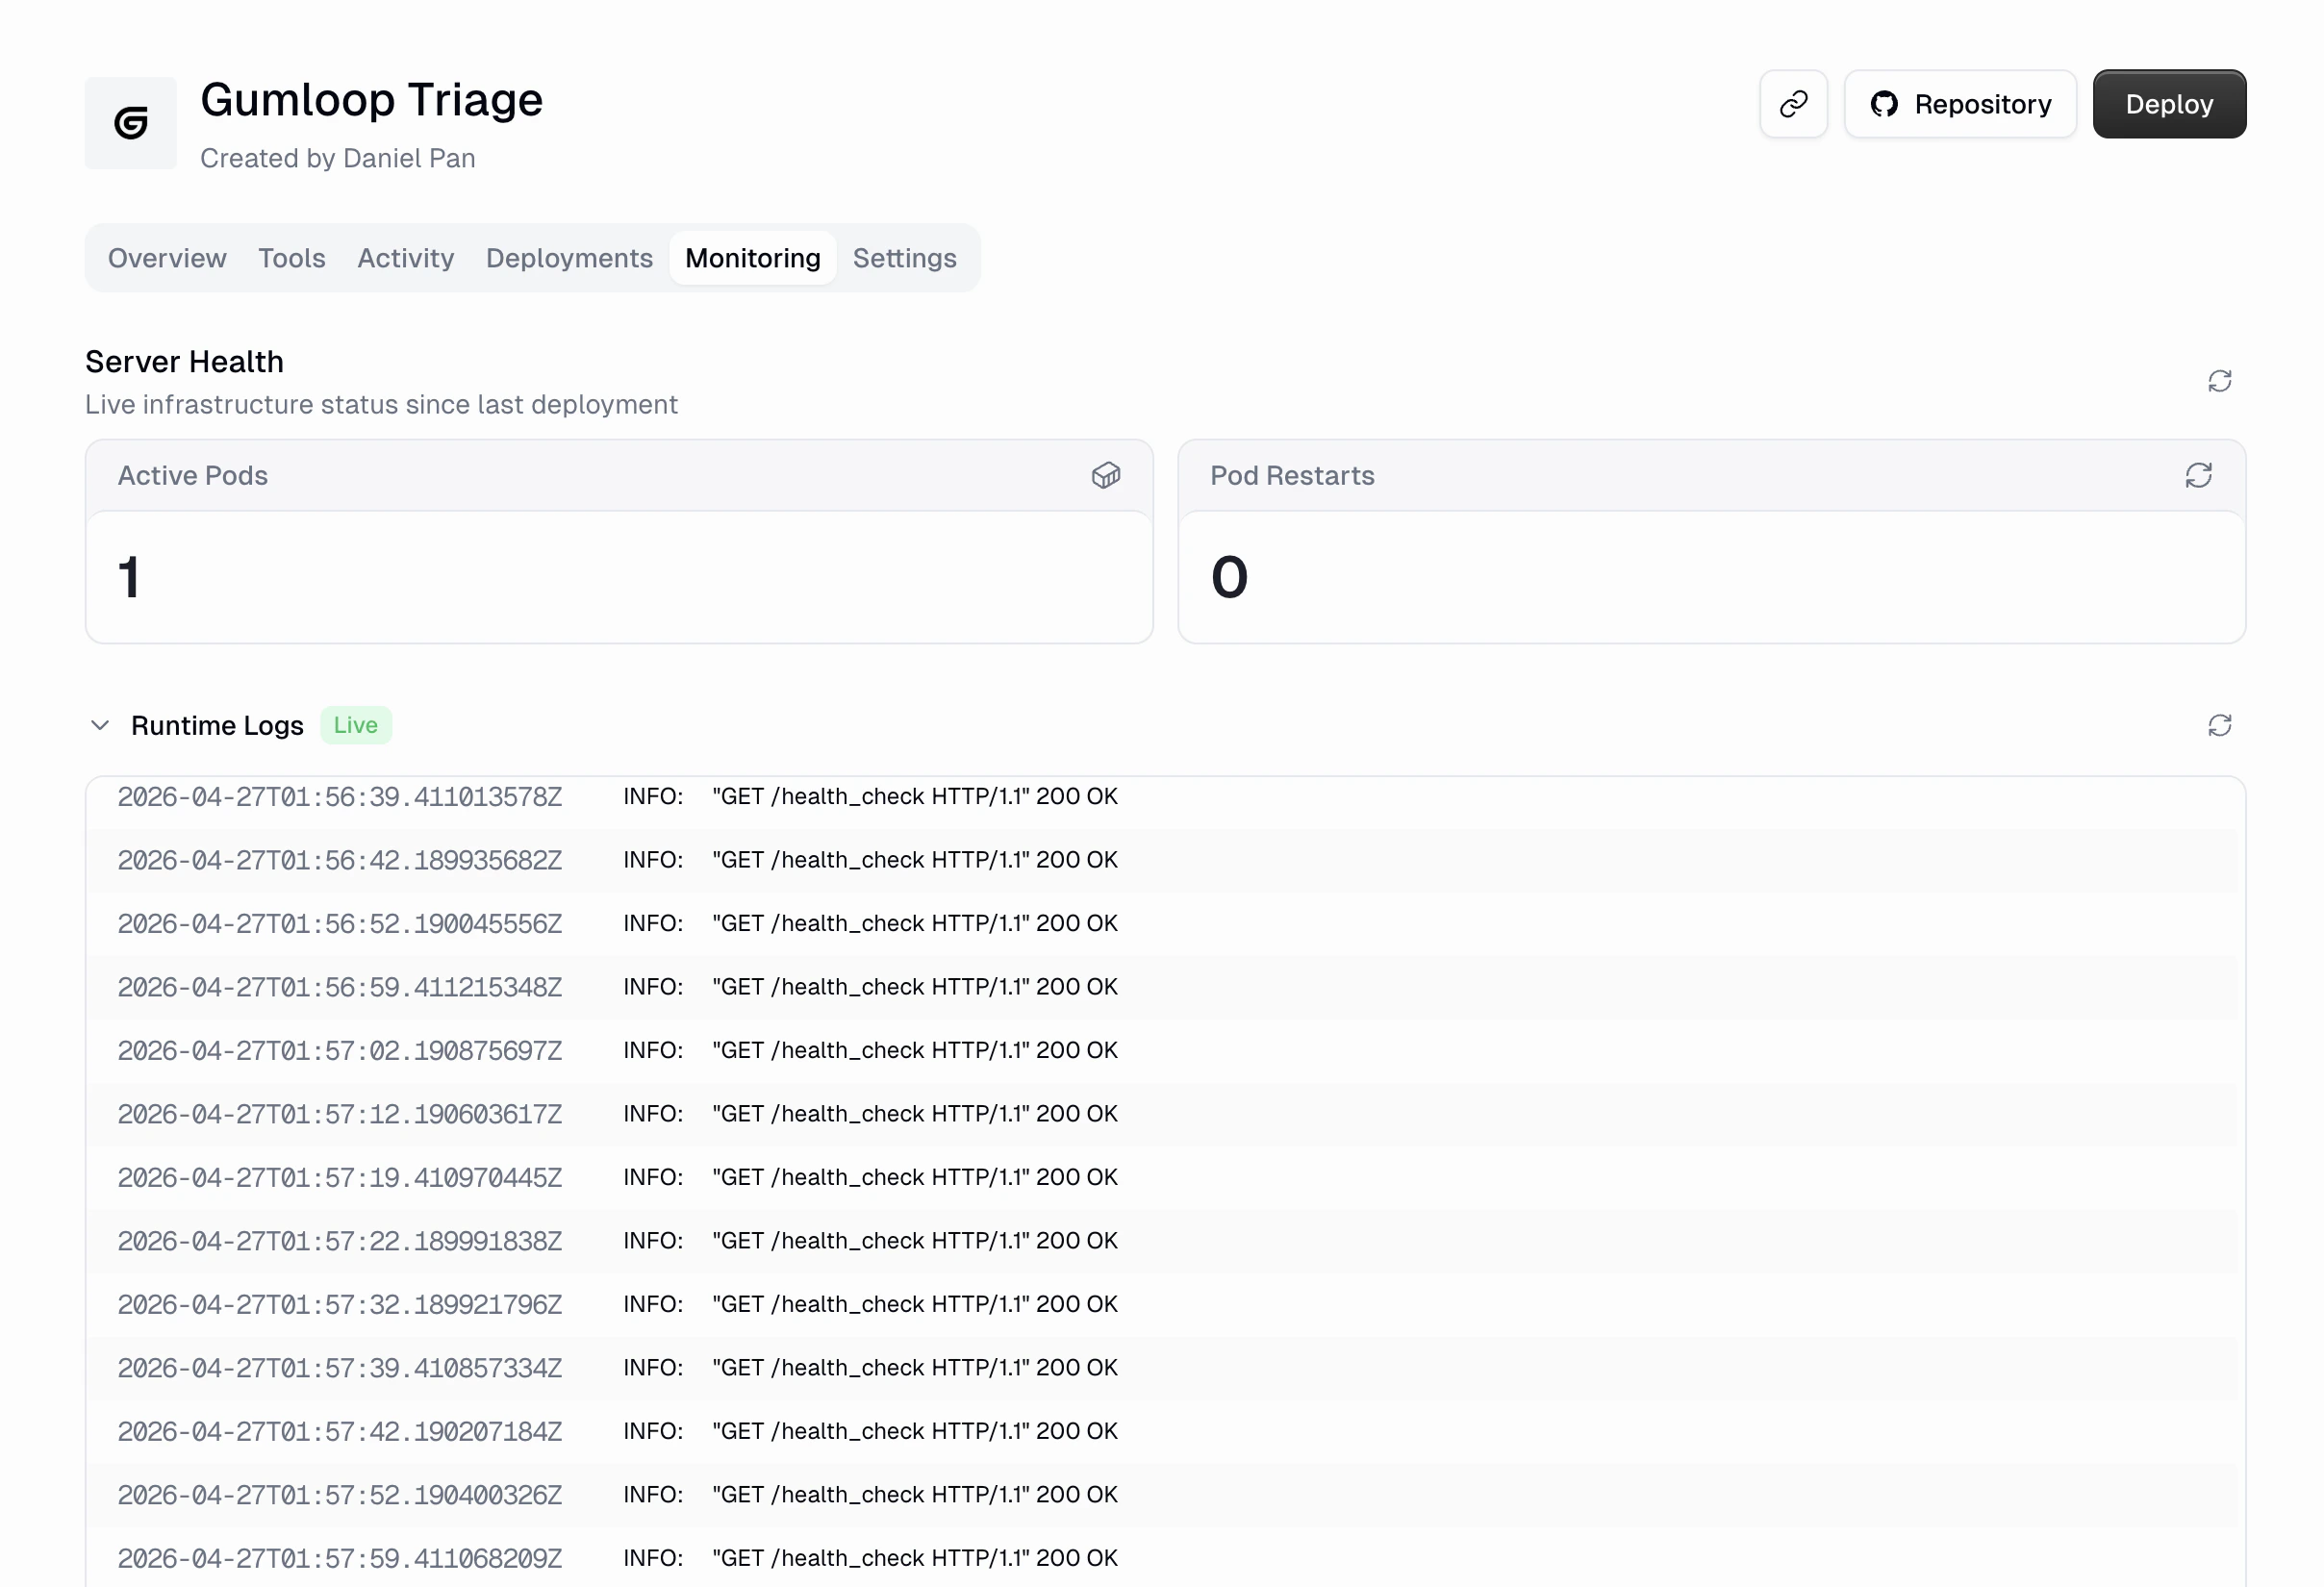
- Active Pods: How many server instances are running
- Pod Restarts: Number of times pods have restarted since the last deployment
- Runtime Logs: A live, streaming log view of your server’s output (health checks, request logs, errors, etc.)
Settings
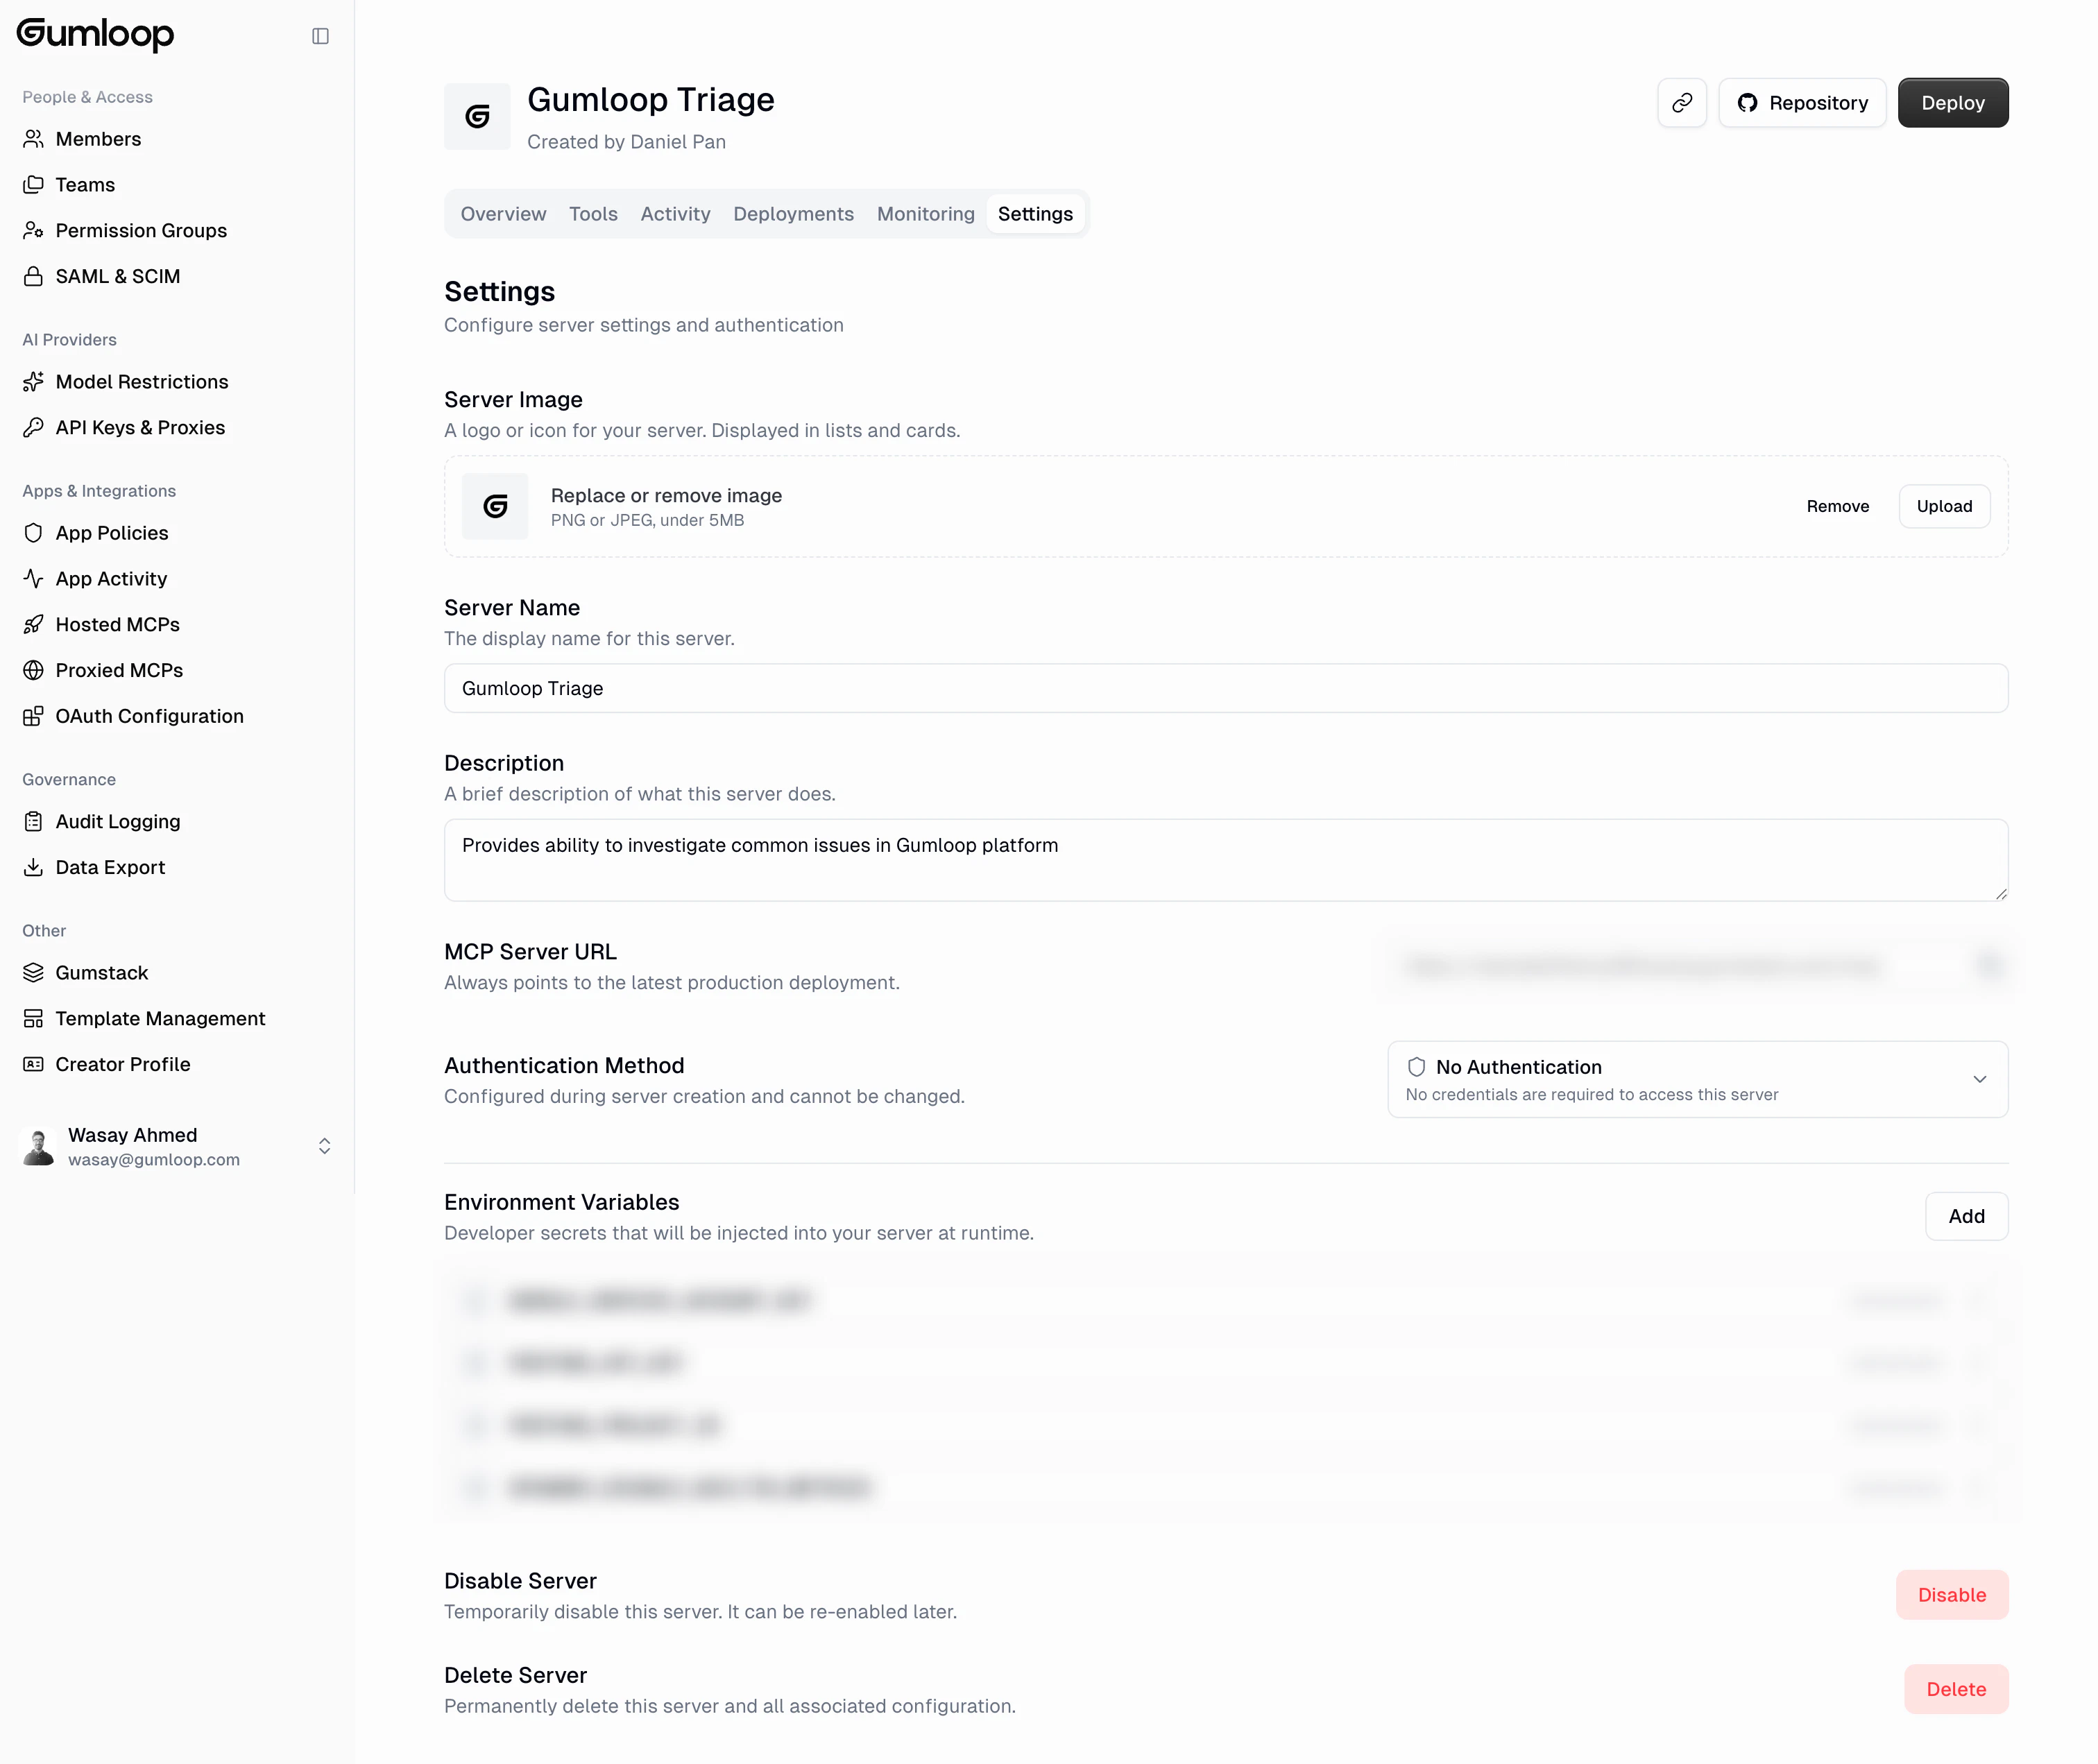
- Server Image: Upload a logo or icon (PNG or JPEG, under 5MB) shown in lists and cards
- Server Name: Update the display name
- Description: Update what the server does
- MCP Server URL: View and copy the server’s unique URL
- Authentication Method: Shows the auth type configured during creation (cannot be changed after creation)
- Environment Variables: Add, edit, or remove developer secrets injected at runtime
- Disable Server: Temporarily disable the server. It can be re-enabled later.
- Delete Server: Permanently delete the server and all associated configuration
FAQ
What language do I write my MCP server in?
What language do I write my MCP server in?
The boilerplate repository uses Python, but you can use any language that
implements the MCP protocol. Your server just needs to expose the standard
MCP endpoints over HTTP.
How do automatic deployments work?
How do automatic deployments work?
When the GitHub App is installed, every push to the
main branch triggers
a build and deploy. Gumloop builds a container from your code, deploys it,
and routes the MCP Server URL to the new version once it’s healthy.Can I roll back to a previous deployment?
Can I roll back to a previous deployment?
Yes. Go to the Deployments tab, find the deployment you want to restore,
and use the actions menu to redeploy that version.
What's the difference between Hosted and Proxied MCPs?
What's the difference between Hosted and Proxied MCPs?
Hosted MCPs are servers you build and deploy on Gumloop’s infrastructure
from a GitHub repository. You own the code and Gumloop handles the hosting.Proxied MCPs are external MCP
servers (hosted elsewhere) that you connect through Gumloop’s managed proxy
for observability and access control. You don’t deploy any code, just
provide a URL.
How do I control who can use specific tools?
How do I control who can use specific tools?
Go to the Tools tab on your server’s detail page. The custom-role
matrix lets you toggle access for each tool per role. You can also disable
the entire server for a group using the Disable Server toggle.