Key Concepts
- Additive membership — a user can hold multiple custom roles. Their effective access is the union across all roles.
- Default role — every new member is auto-assigned to the default role. It cannot be deleted.
- Restrictions compose least-restrictively — a user is only blocked from something if every role they hold blocks it.
Custom Roles restrict what a user can do. Organization Roles grant authority (Admin, Manager, etc.). Both must allow an action for it to succeed.
Managing Roles
Navigate to gumloop.com/settings/organization/groups. Each role has the following tabs:Apps Tab
The Apps tab is where you control which apps your users can access and what they can do with each app. It consolidates tools, scopes, and nodes into a single per-app view.Overview
The main view shows all available apps as cards. Each card shows the count of granted tools, scopes, and nodes at a glance.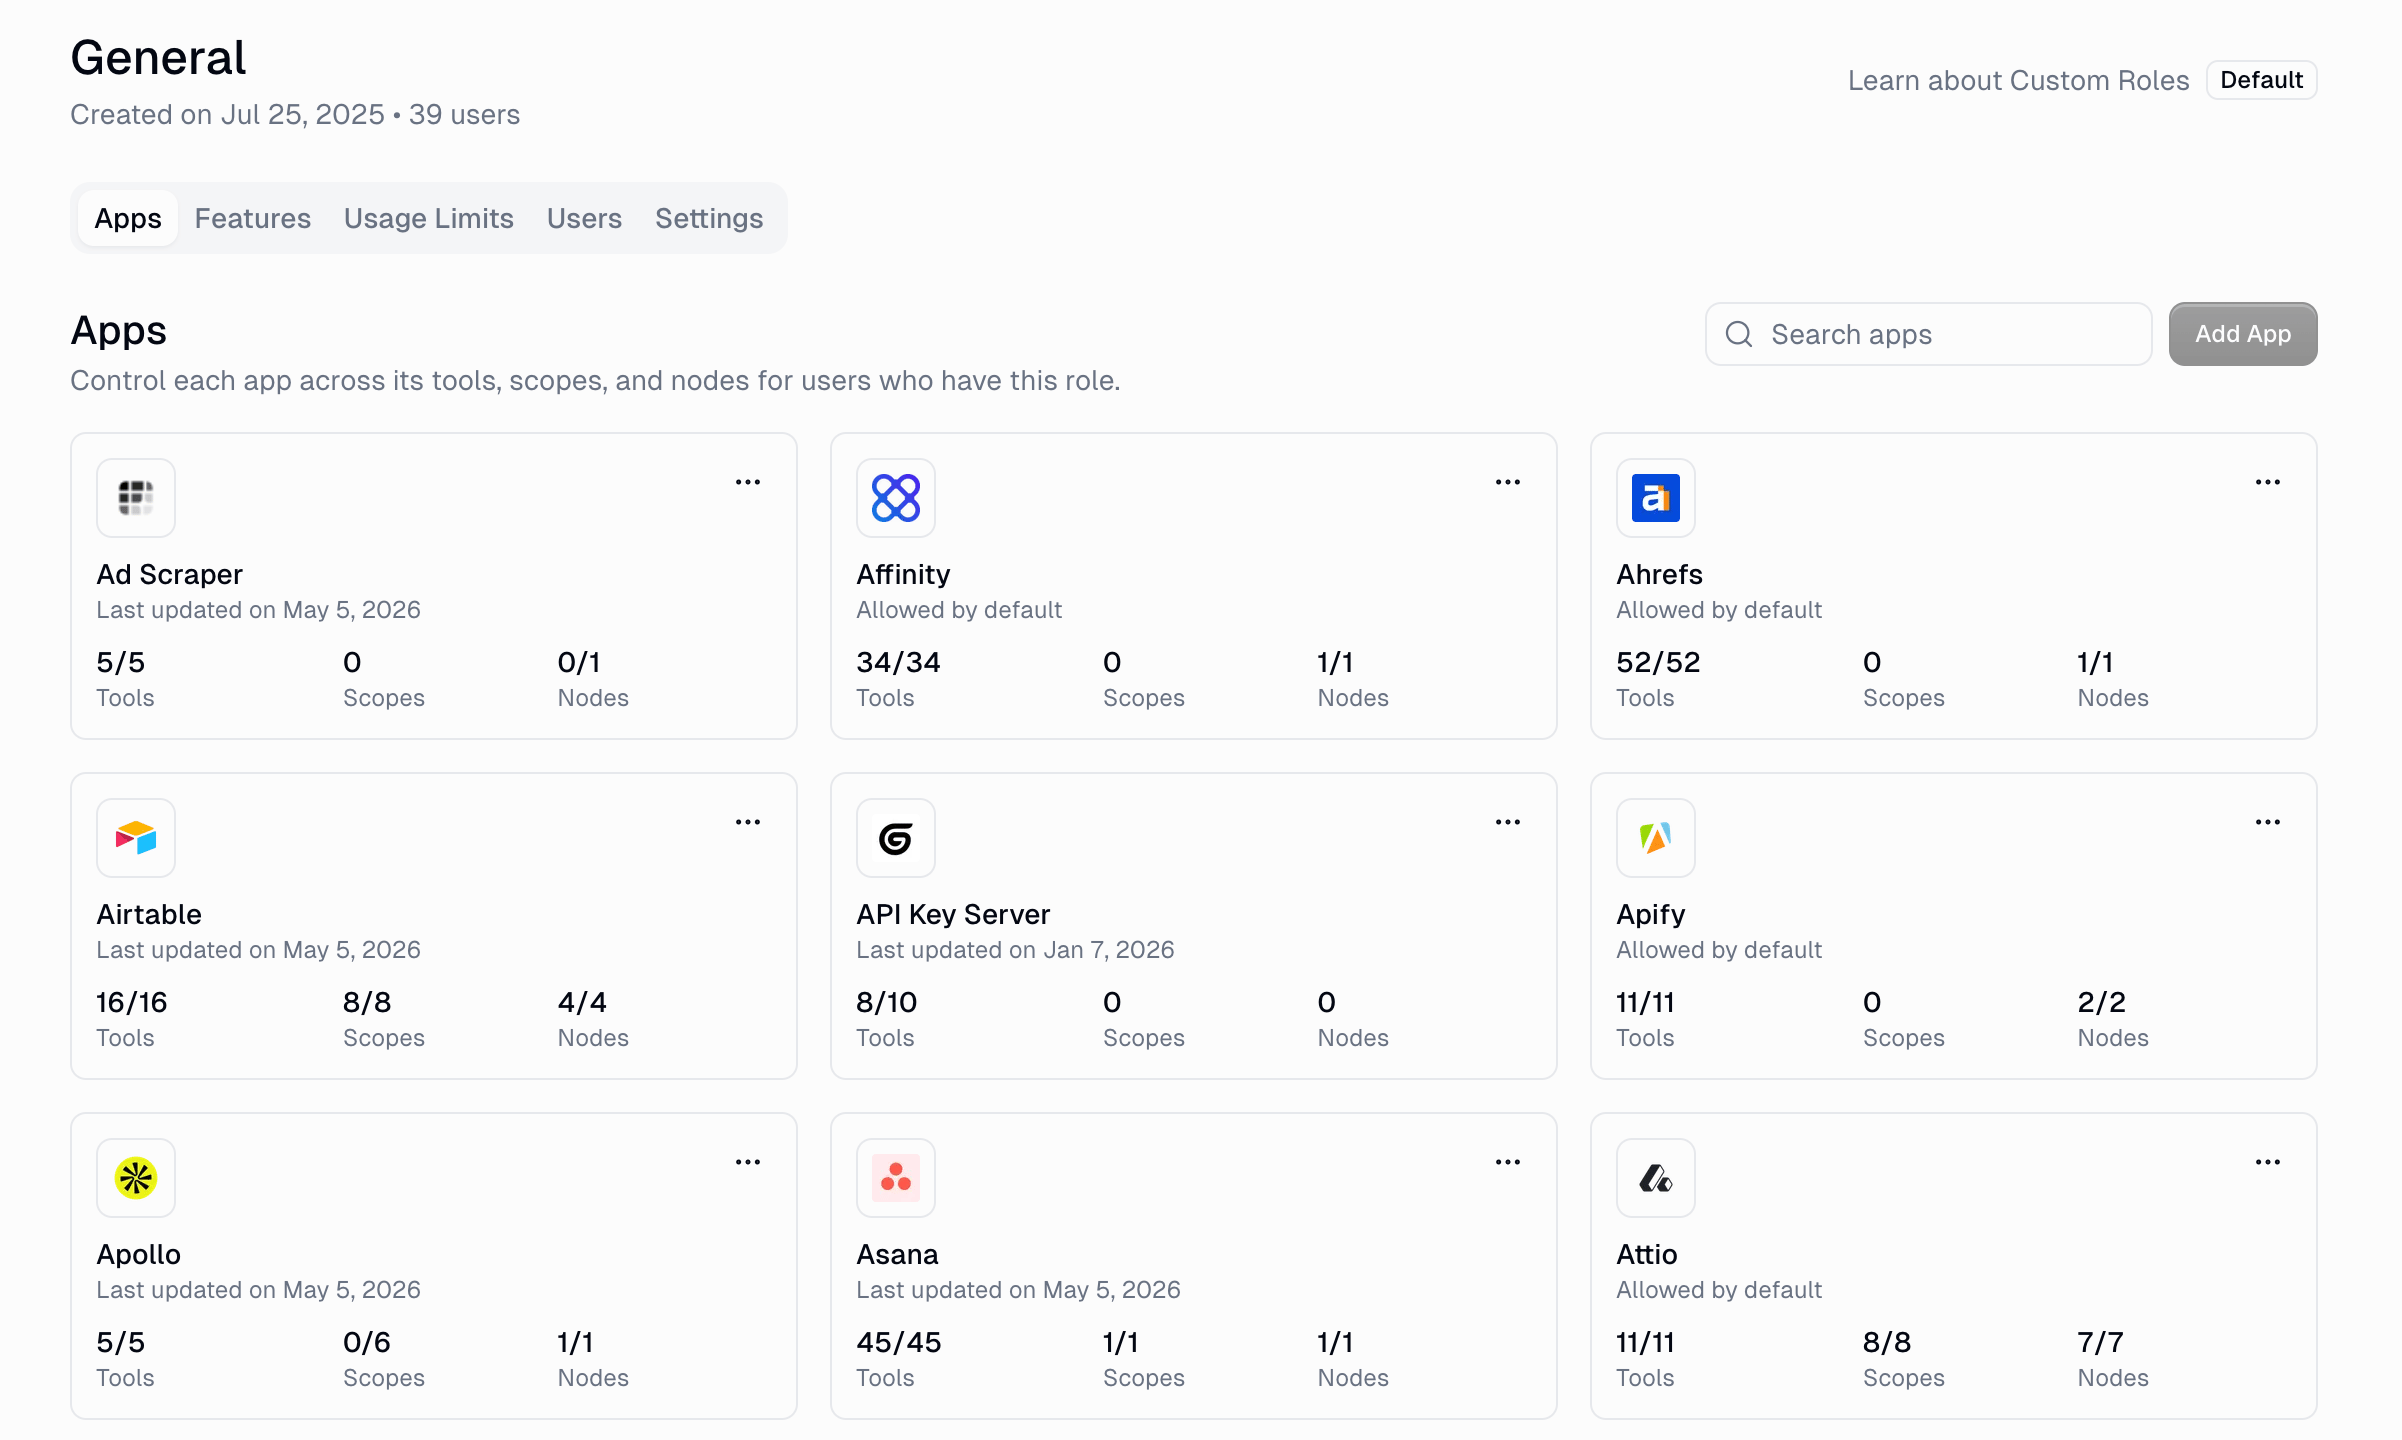
Example: Configuring GitHub Access
Let’s walk through configuring GitHub access for a custom role. Step 1: Open the app Click the GitHub card (or click Add App and select GitHub). This opens the App Picker with three sub-tabs: Tools, Scopes, and Nodes.Step 2: Configure Tools The Tools tab shows every agent tool available for this app. Toggle individual tools on or off. In this example, the role grants 61 of 63 GitHub tools (like Search Issues, Search Pull Requests, Search Repositories, etc.):
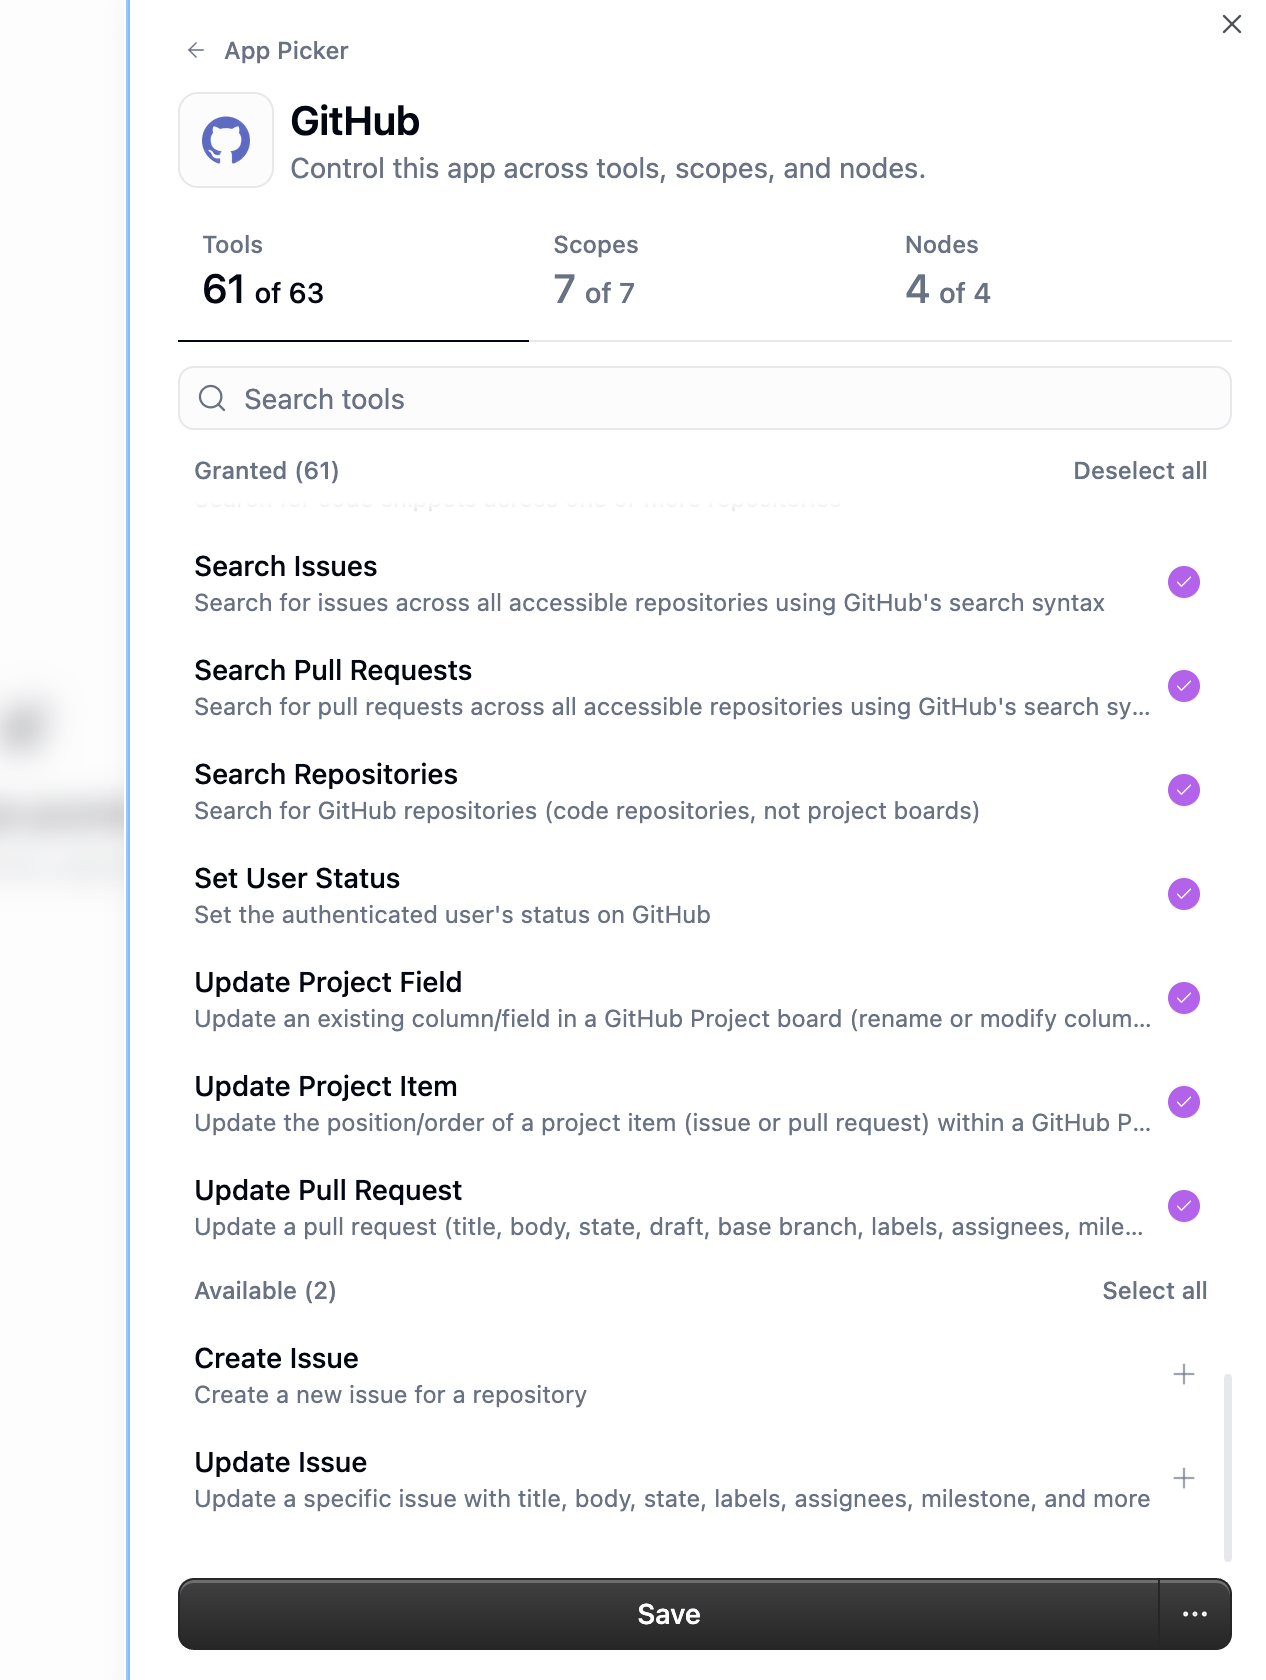
- Use Select all / Deselect all for bulk changes
- Search for specific tools using the search bar
- Tools that are not selected will be blocked for users in this role
Step 3: Configure Scopes The Scopes tab controls which OAuth scopes users in this role can grant when connecting the app. In this example, all 7 GitHub scopes are granted (
gist, project, public_repo, read:org, read:project, repo, user):
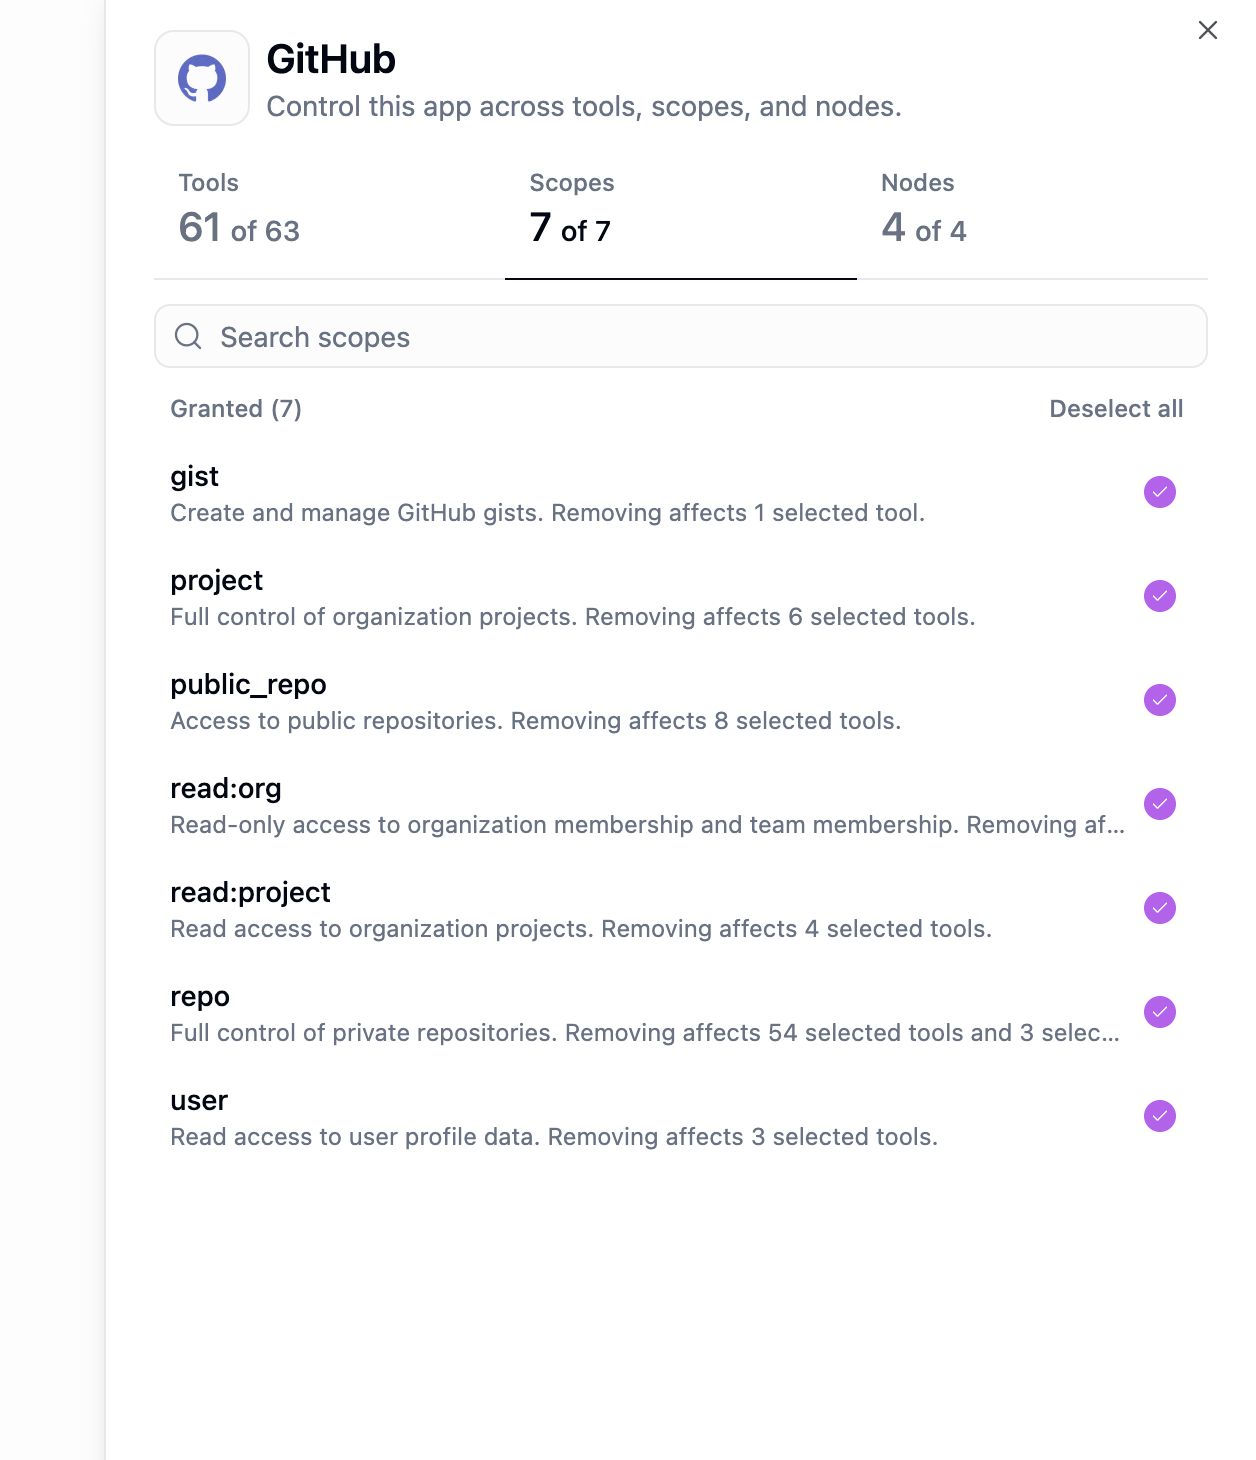
- Only selected scopes can be authorized by users in this role
- Removing a scope may affect tools or nodes that depend on it
Step 4: Configure Nodes The Nodes tab controls which workflow nodes are available for this app. It also has a toggle for MCP Node Creation that controls whether users can build new custom nodes for this app. In this example, 3 GitHub nodes are granted and MCP Node Creation is enabled:
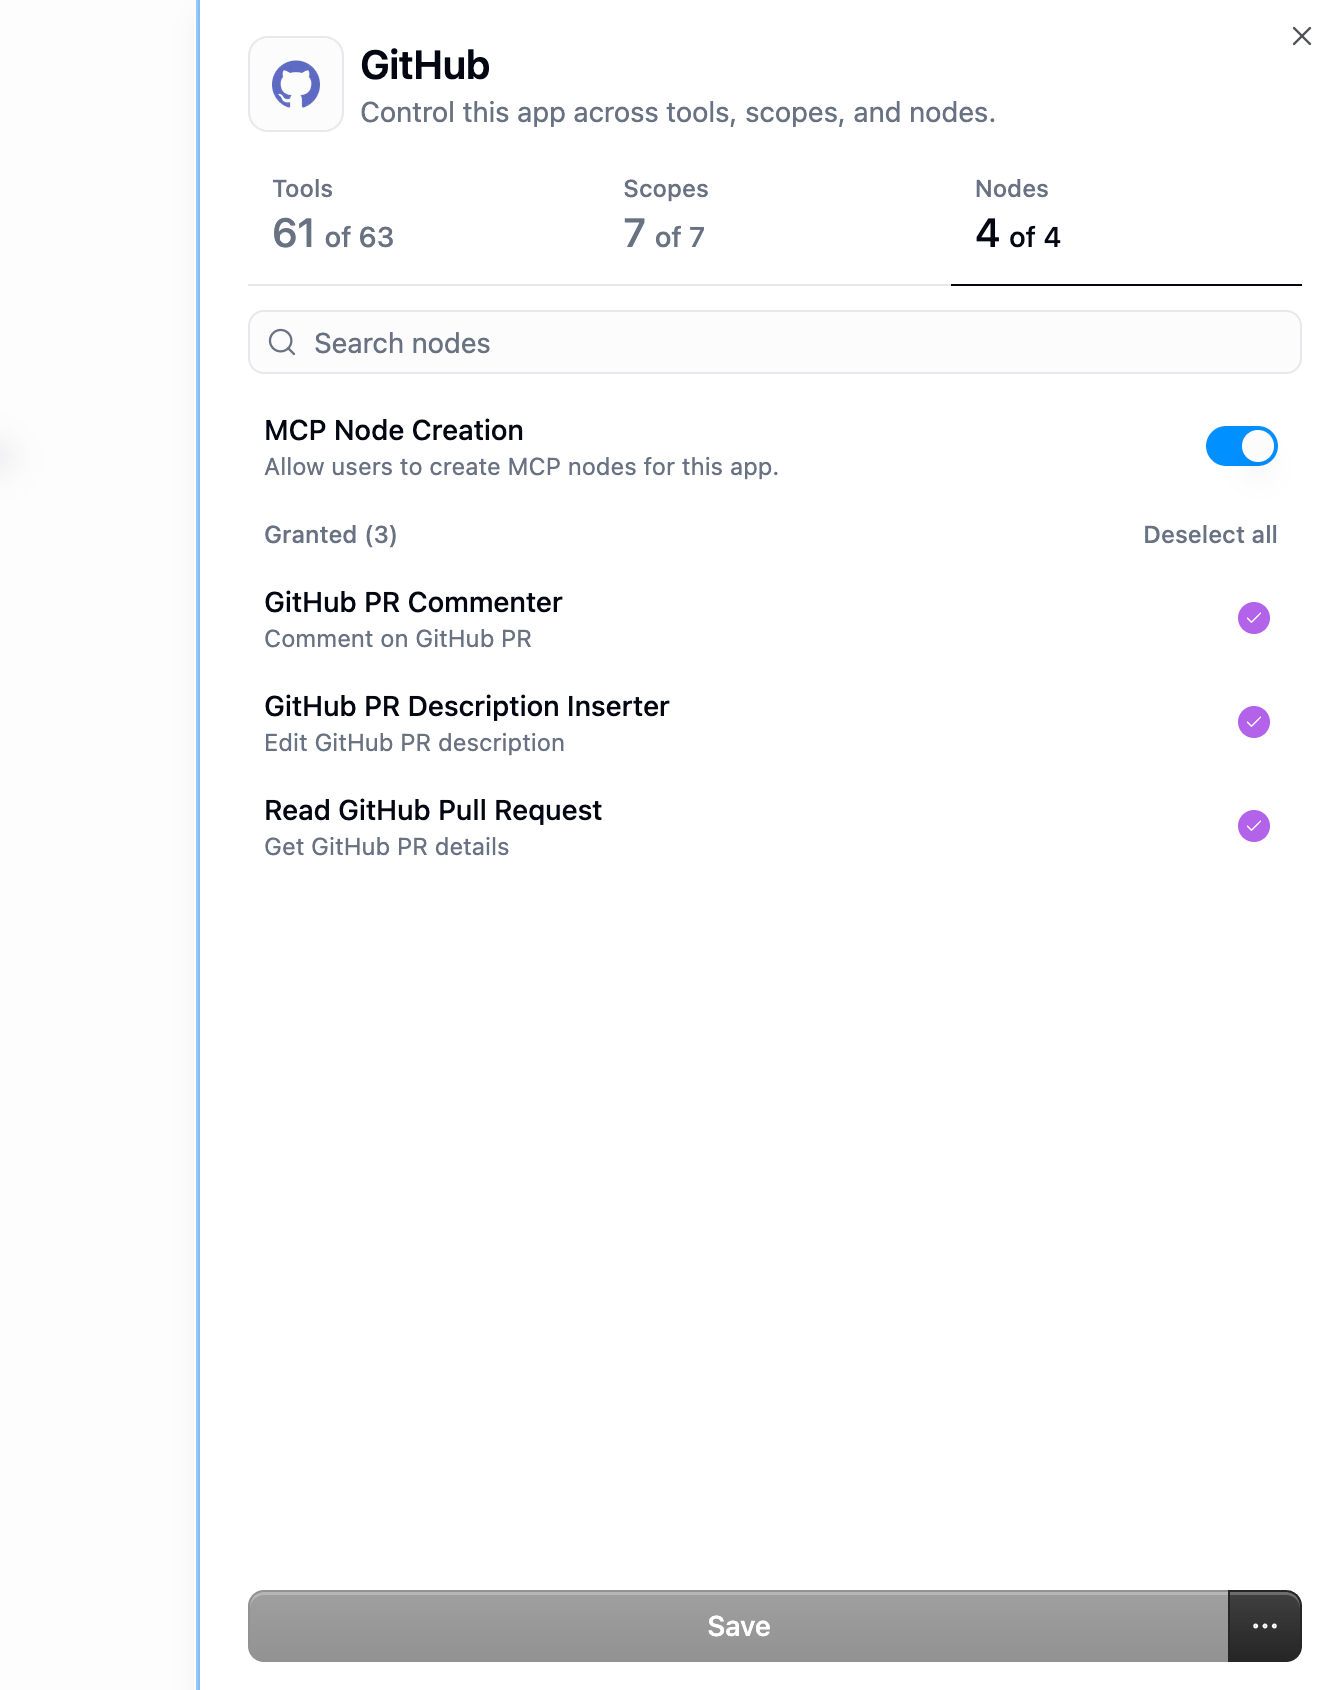
- MCP Node Creation toggle — controls whether users can create new custom MCP nodes for this app
- Individual node toggles — controls which existing nodes are available in the workflow builder
Step 5: Save Click Save to apply your changes. The app card on the overview will update to reflect the new counts.
Removing App Access
To completely remove a role’s access to an app, click the three-dot menu (⋯) on the app card and select Remove access.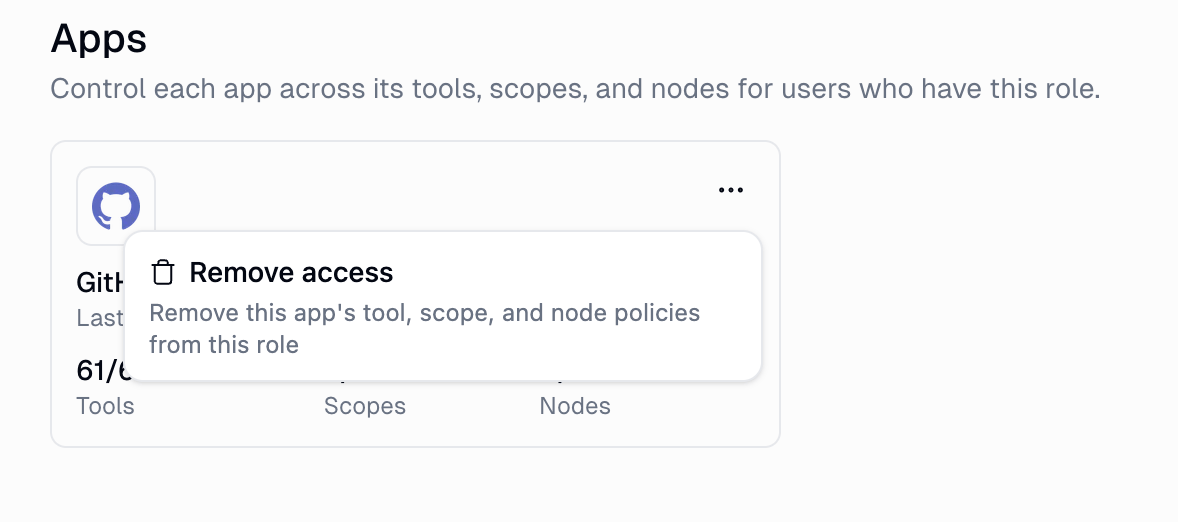
How App Restrictions Compose
When a user is in multiple roles, app access composes with the least-restrictive rule:A role with no card for an app is “silent” on that app, meaning it does not restrict it. Only when every role a user holds explicitly restricts an app does the restriction apply.
Features Tab
Controls sensitive capabilities that are gated by default for non-admin members. A user gets a feature if any of their roles grants it.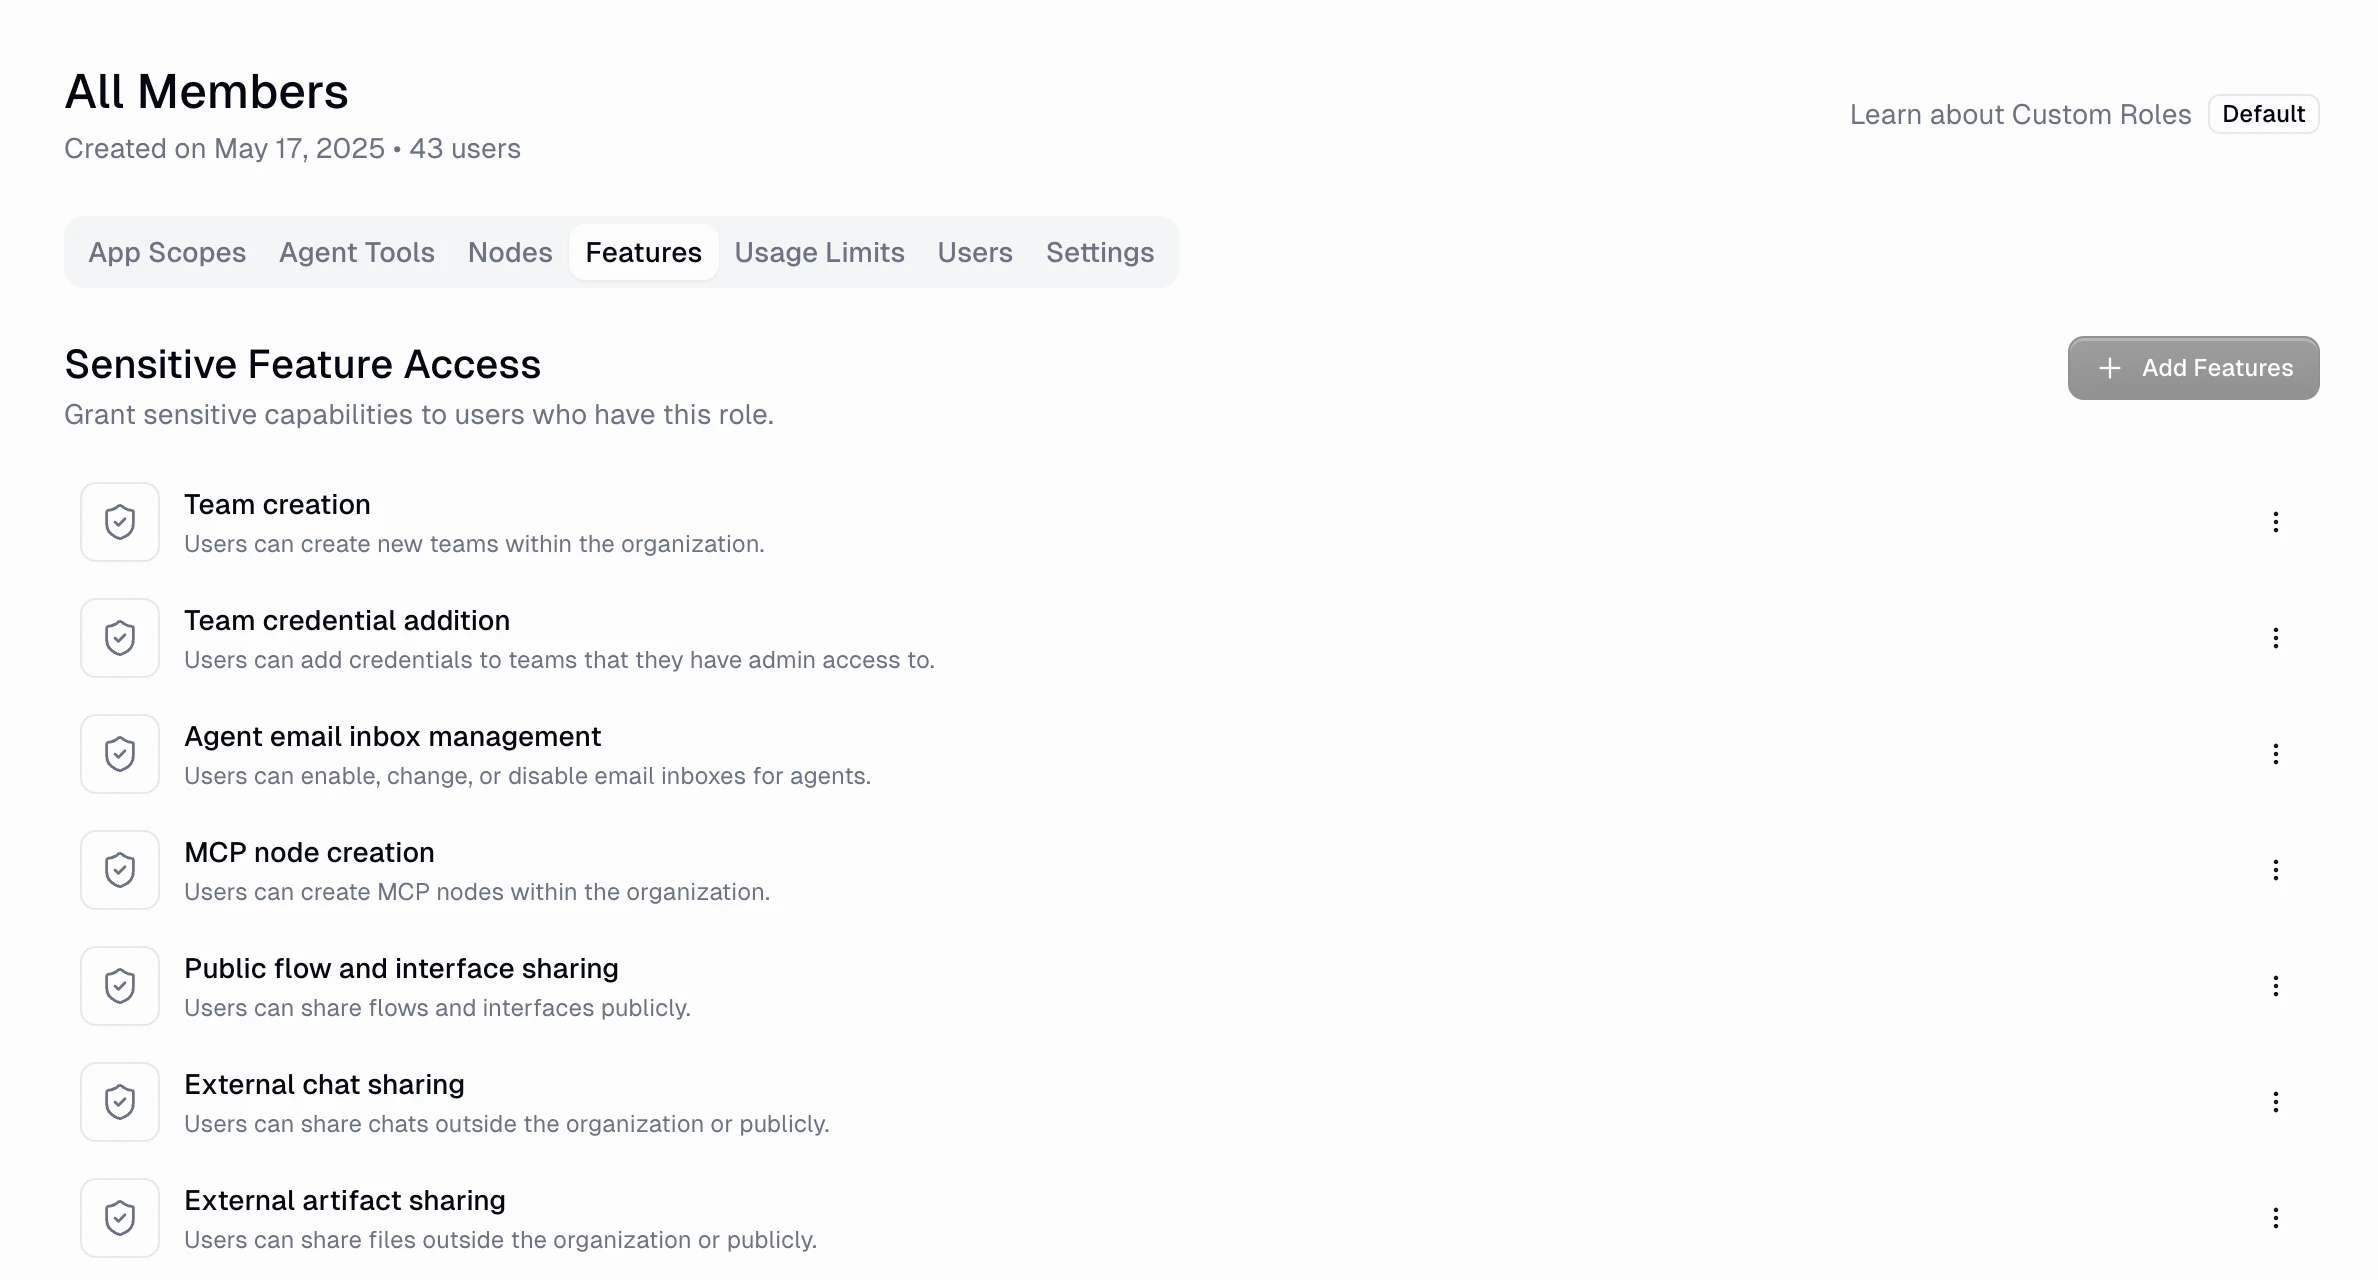
Features marked with a shield icon are denied by default for enterprise users unless explicitly granted. Others are allowed by default.
Usage Limits Tab
Per-user caps that override organization-wide defaults.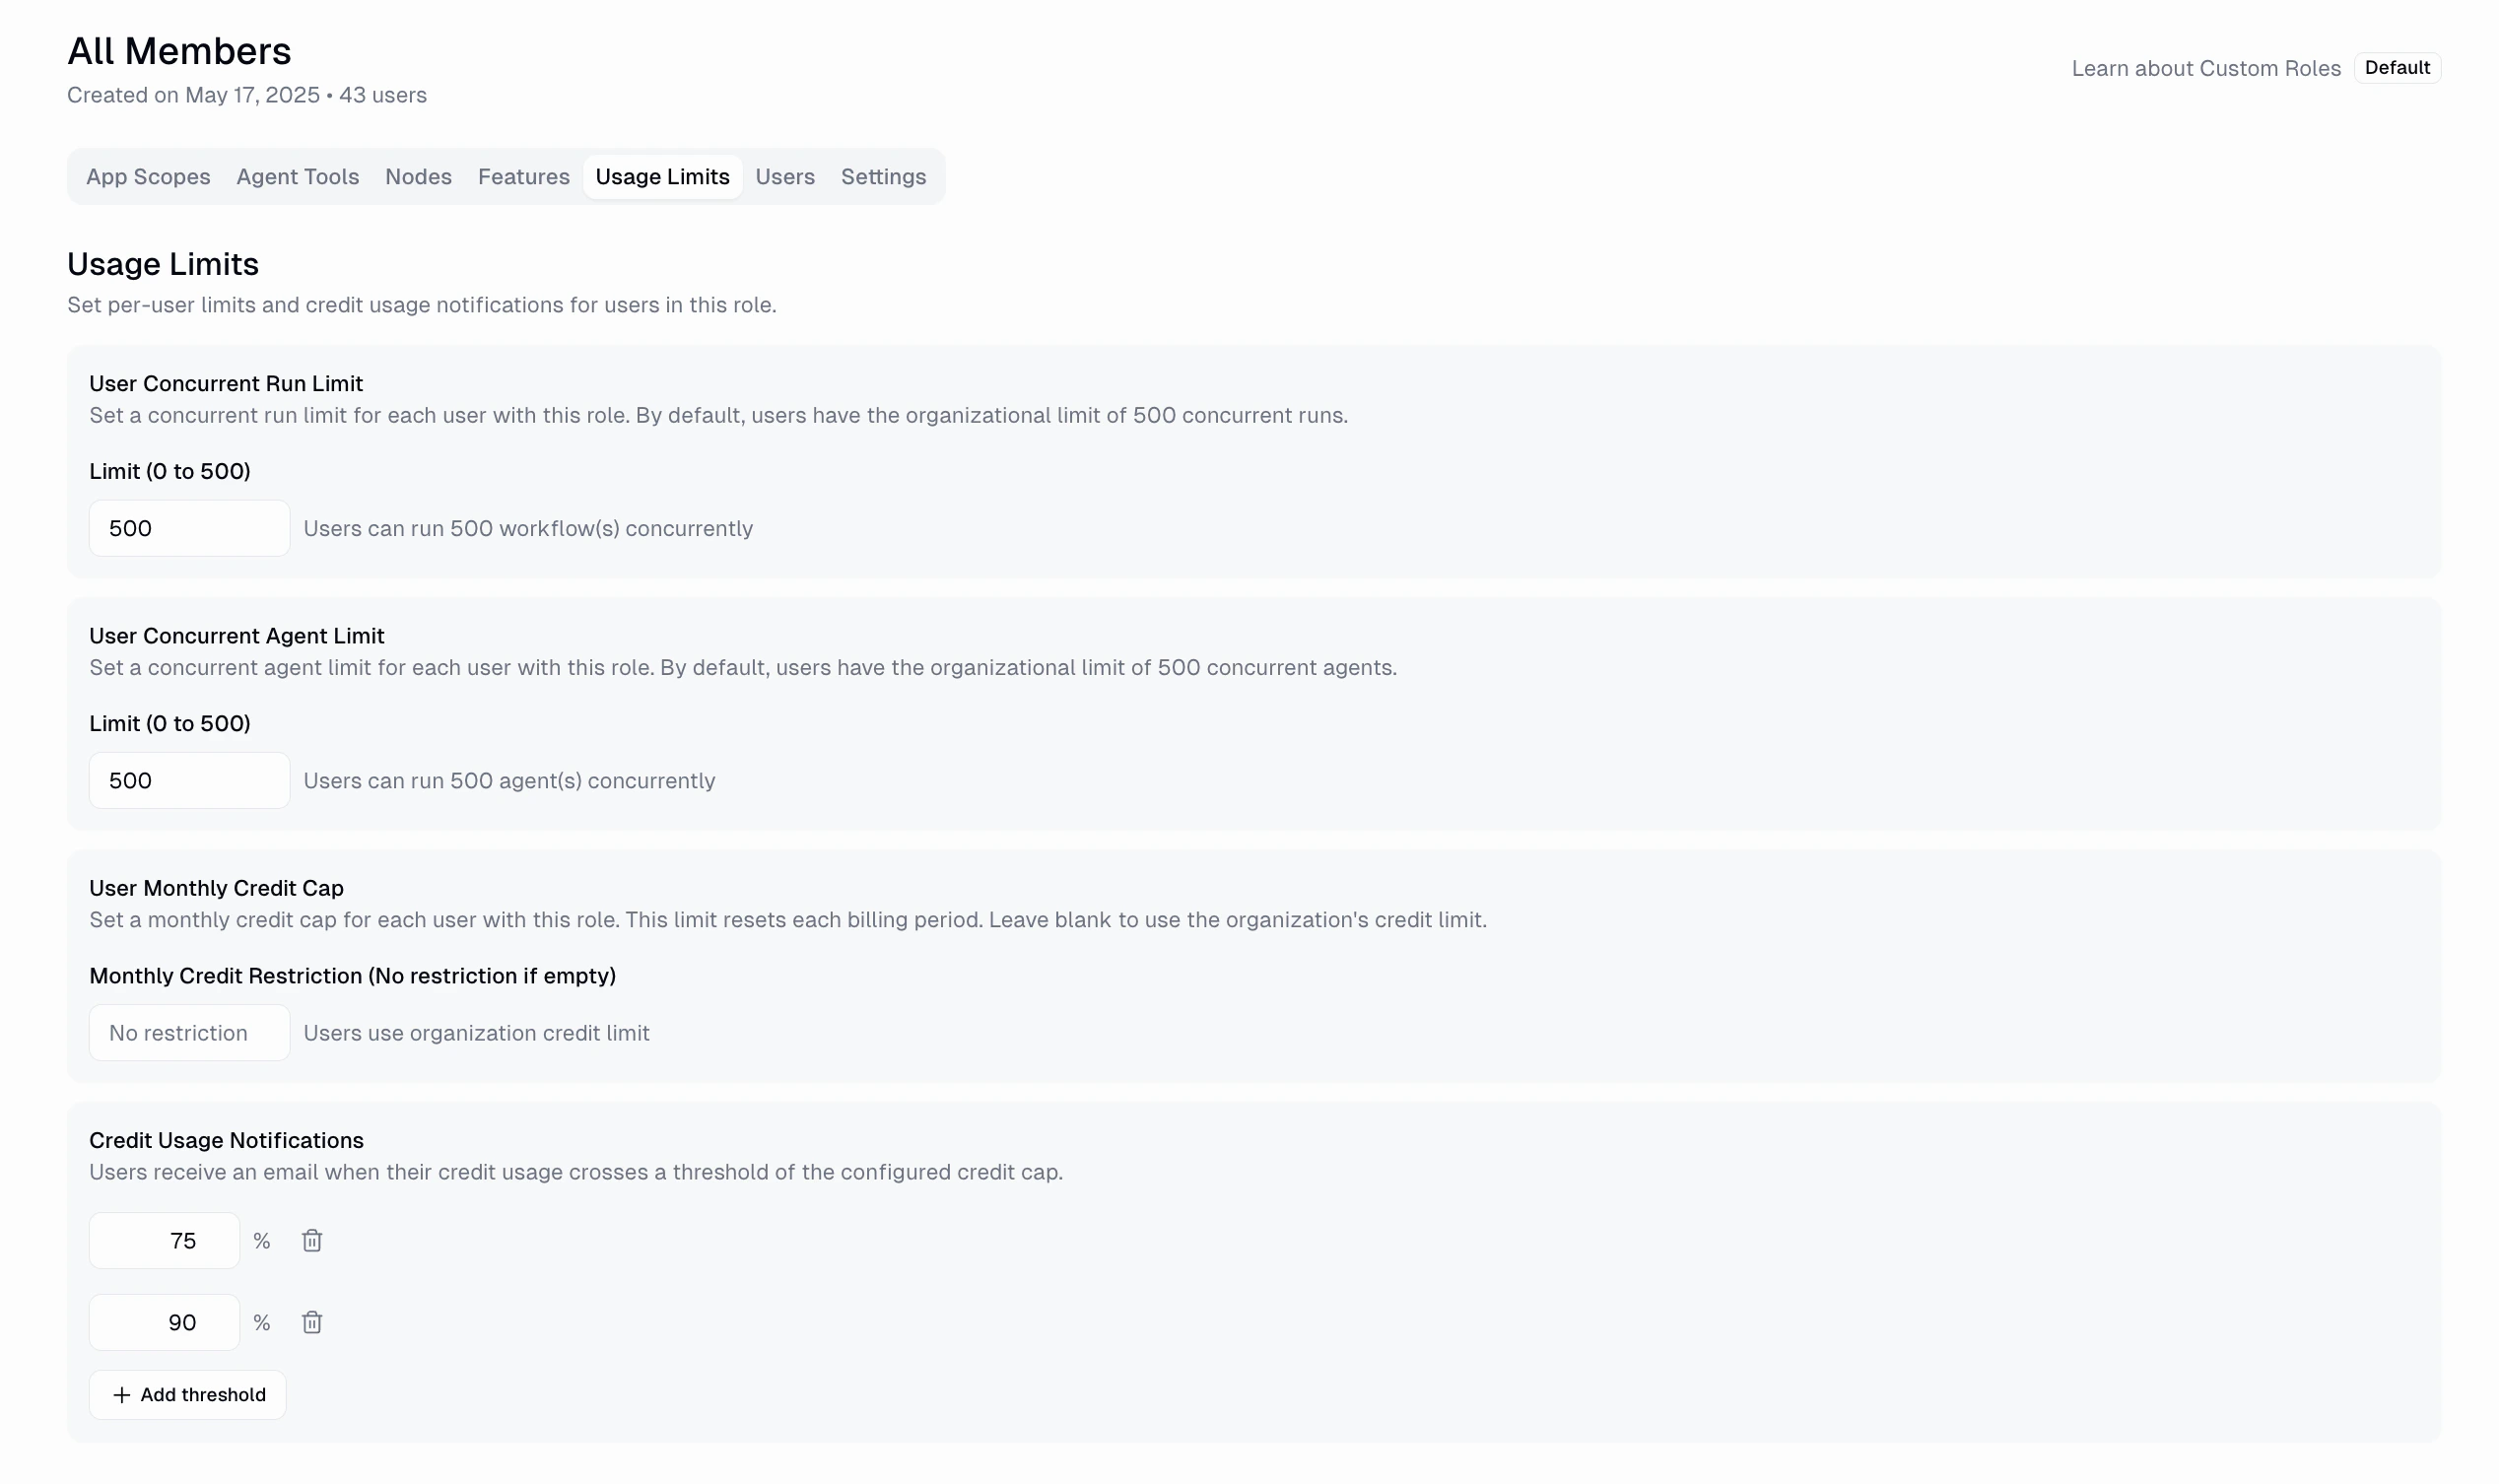
Caps compose by taking the maximum across a user’s roles.
Per-Chat Credit Warnings
Per-Chat Credit Warnings pause a user’s chat for approval whenever the credit spend in that single chat crosses a threshold. This prevents runaway conversations from silently burning through credits.
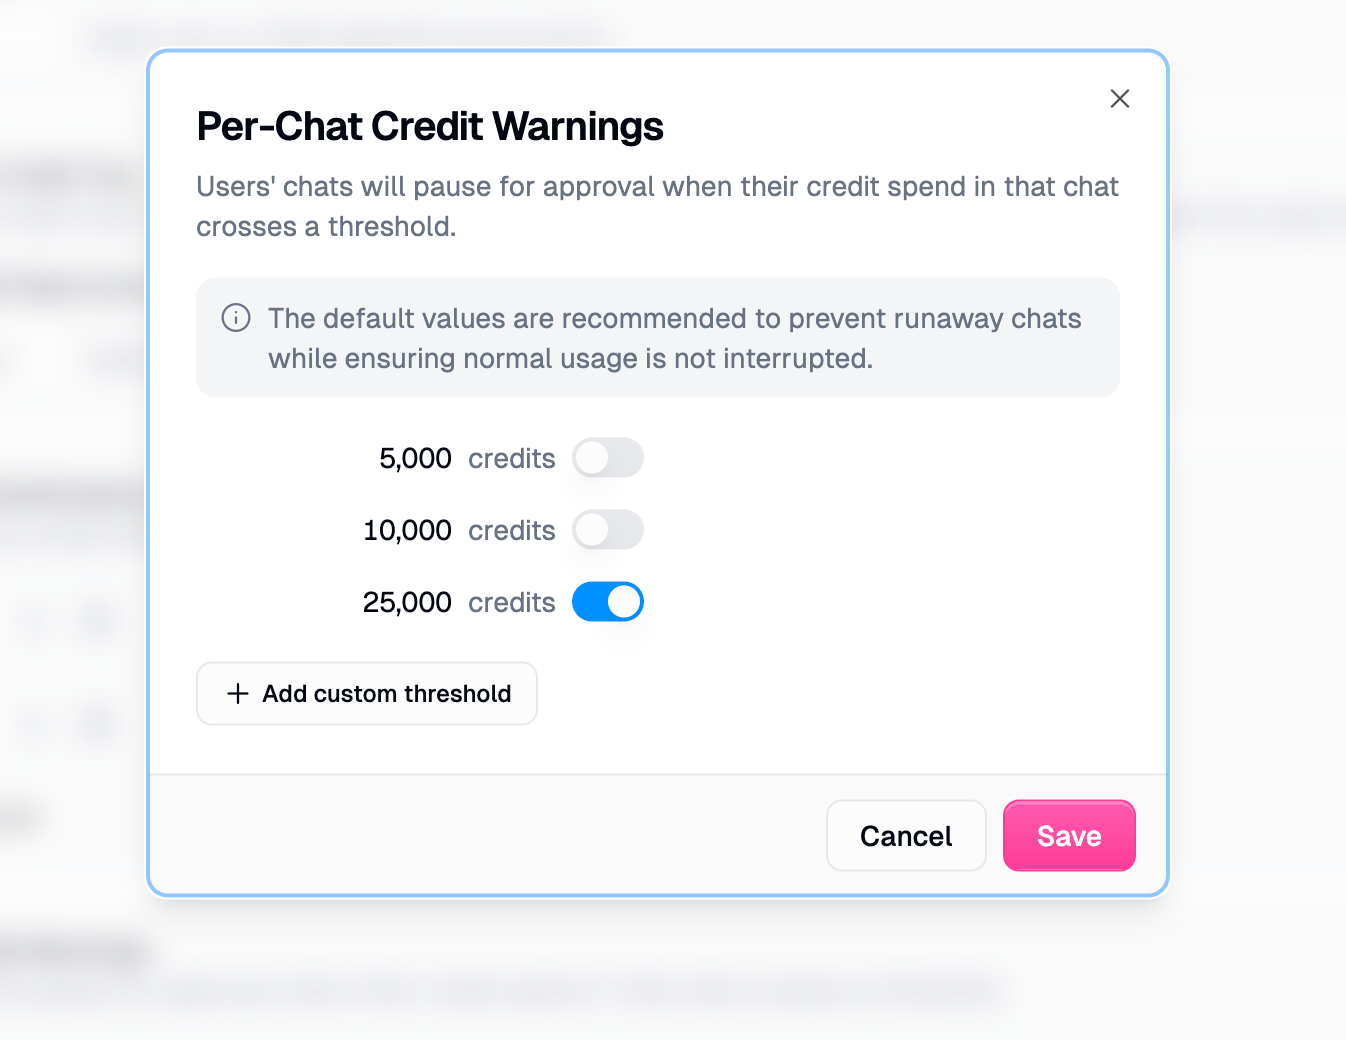
The default values are recommended to prevent runaway chats while ensuring normal usage is not interrupted.
Users Tab
Assign members to this role. Adding a user here does not remove them from any other role.Settings Tab
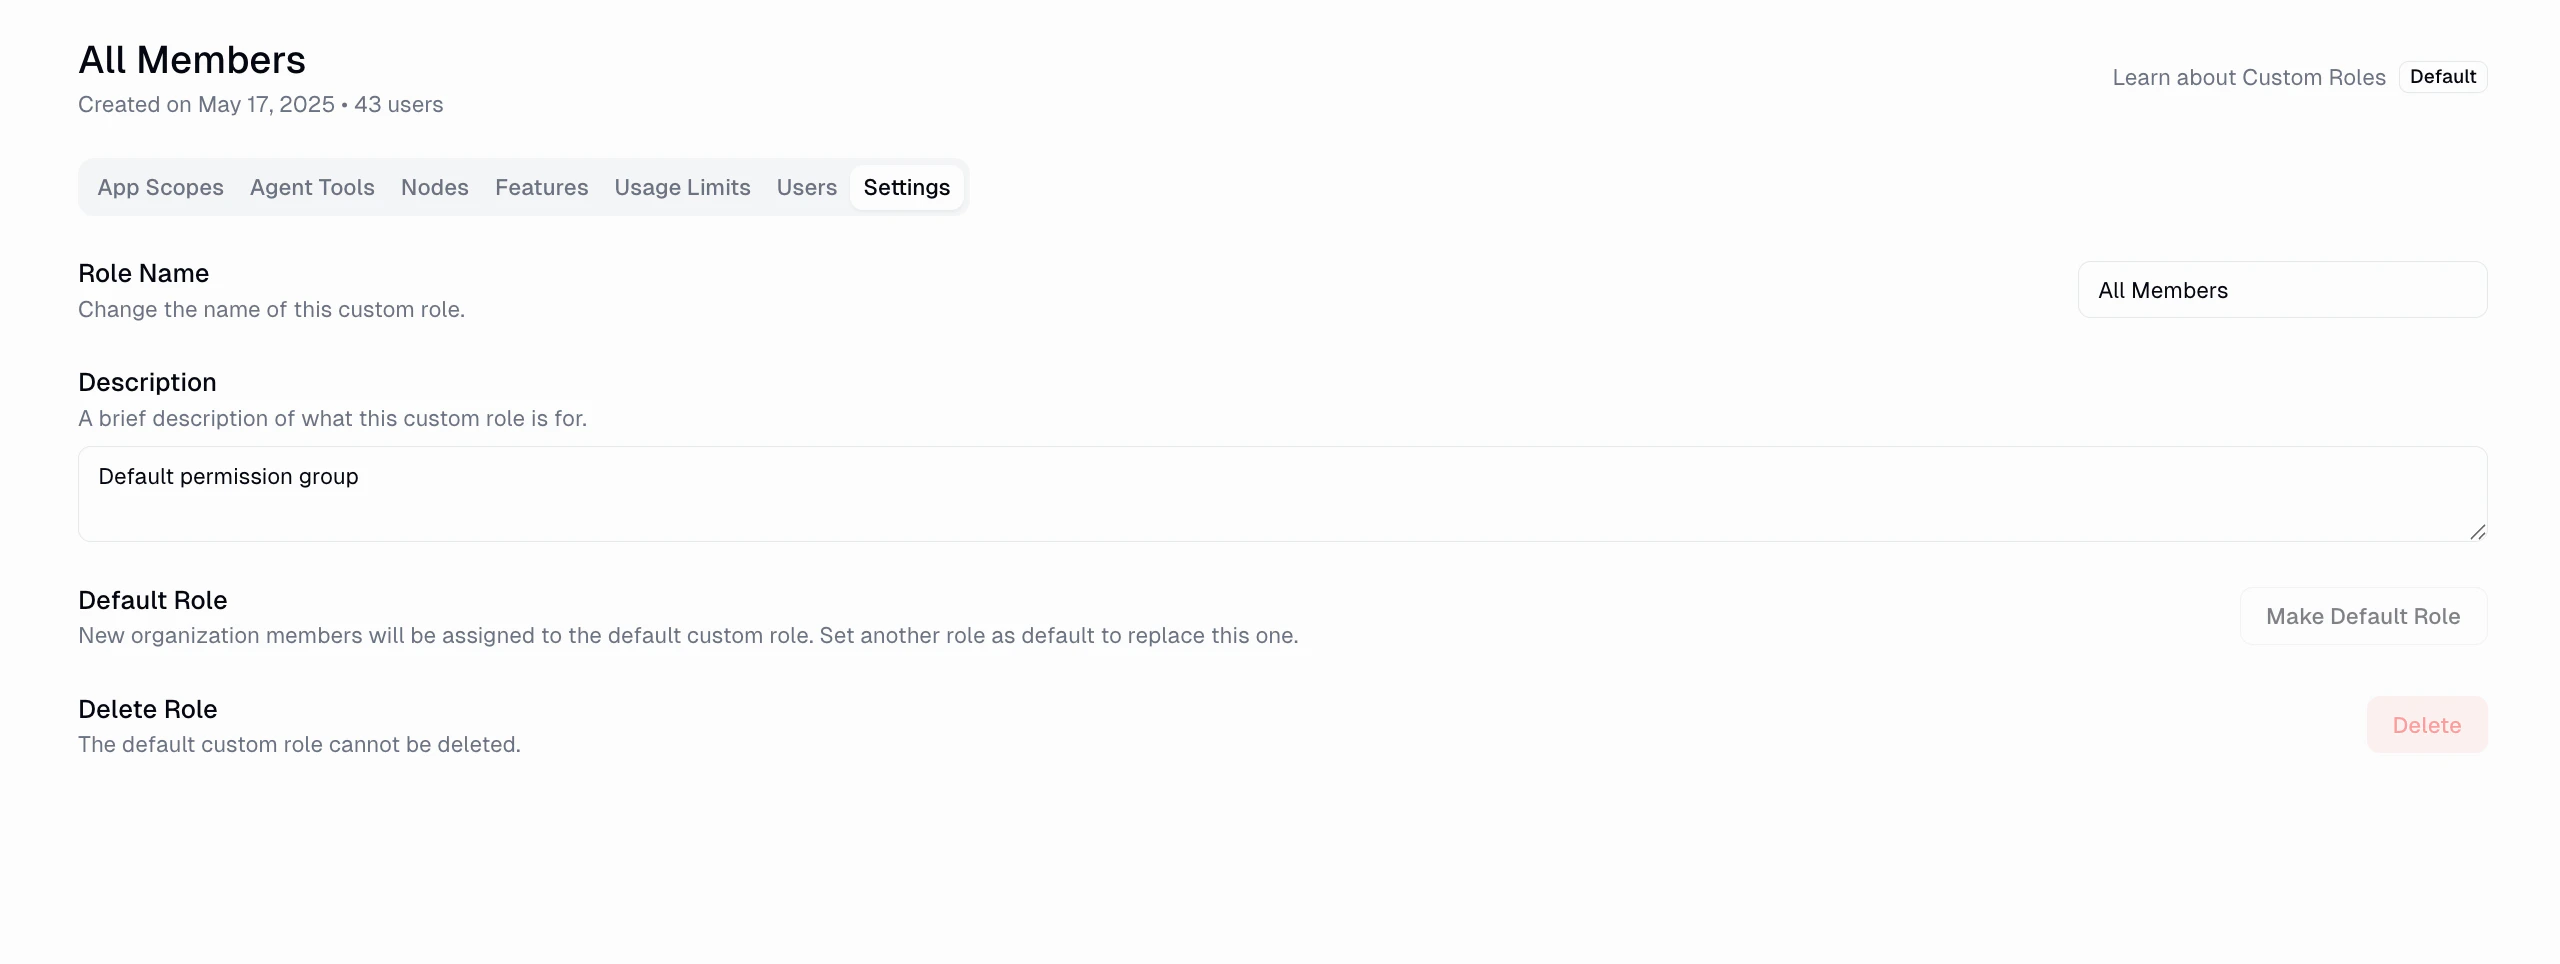
- Default Role toggle — promotes this role to be the org’s default
- Delete Role — irreversible; members fall back to the default role
SCIM and IdP Group Sync
If your organization uses SCIM provisioning, IdP groups can be mapped to custom roles automatically.How it works
- IdP groups map to custom roles via priority-based matching
- Each user is assigned to a single target role via SCIM
- Manual assignments through the UI are unaffected
Limitations
- SCIM sync maps each user to one role (not multiple)
- Multi-membership is still supported via manual assignment
- Priority determines which role wins if a user matches multiple groups
FAQ
What happens if a user is in multiple roles?
What happens if a user is in multiple roles?
- Apps: access is the union. Blocked only if every role blocks it.
- Features: granted if any role grants it.
- Usage caps: the highest value wins (including per-chat credit warning thresholds).
What does a 'silent' role mean?
What does a 'silent' role mean?
If a role has no card for an app, it has no opinion on that app. The user is unrestricted for that app by this role. Restrictions only apply when all roles agree.
Can I use the default role as a restrictive baseline?
Can I use the default role as a restrictive baseline?
Yes. Keep the default role restrictive, then create add-on roles that widen access for specific groups. Or do the opposite: keep default permissive and use stricter roles to narrow access.
See Also
Organization Roles
The authority side of Gumloop’s permission model.
App Policies
Block or tag specific tool calls and restrict OAuth domains.