Dedicated Inbox
Each agent gets a unique
@gumloopagents.com email address that routes messages straight to the agent.Threaded Conversations
Email replies stay threaded. The agent maintains full conversation history across multiple email exchanges.
Works with Attachments
Send files as email attachments and the agent can process them just like it would in chat.
Control Access Anytime
Update the email alias or disable the inbox whenever the agent no longer needs it.
Enabling the Email Inbox
1
Open the Email Inbox Page
Navigate to your agent, then click Email Inbox under External Channels in the sidebar.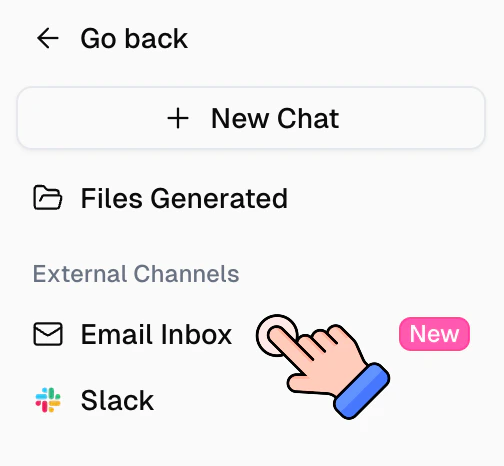
2
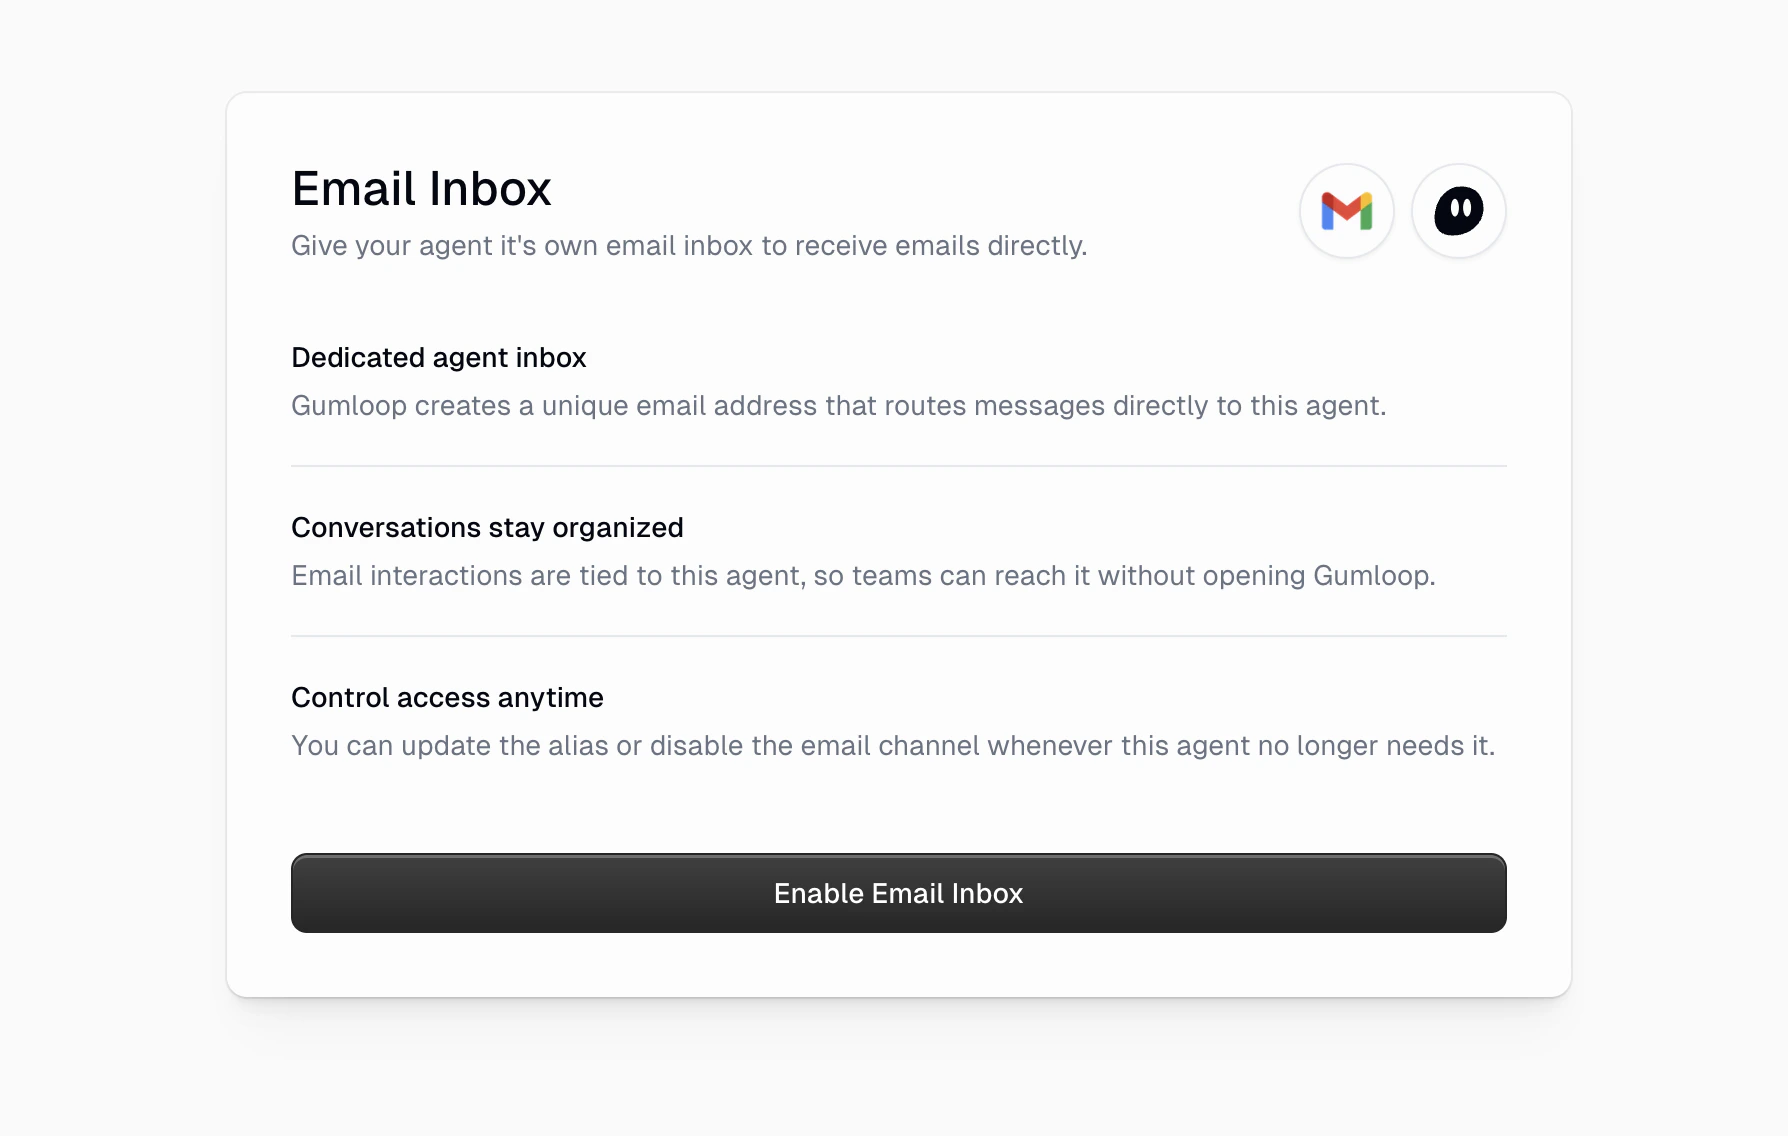
Enable the Inbox
Click Enable Email Inbox. Gumloop automatically generates a unique email alias based on your agent’s name. The alias follows the format: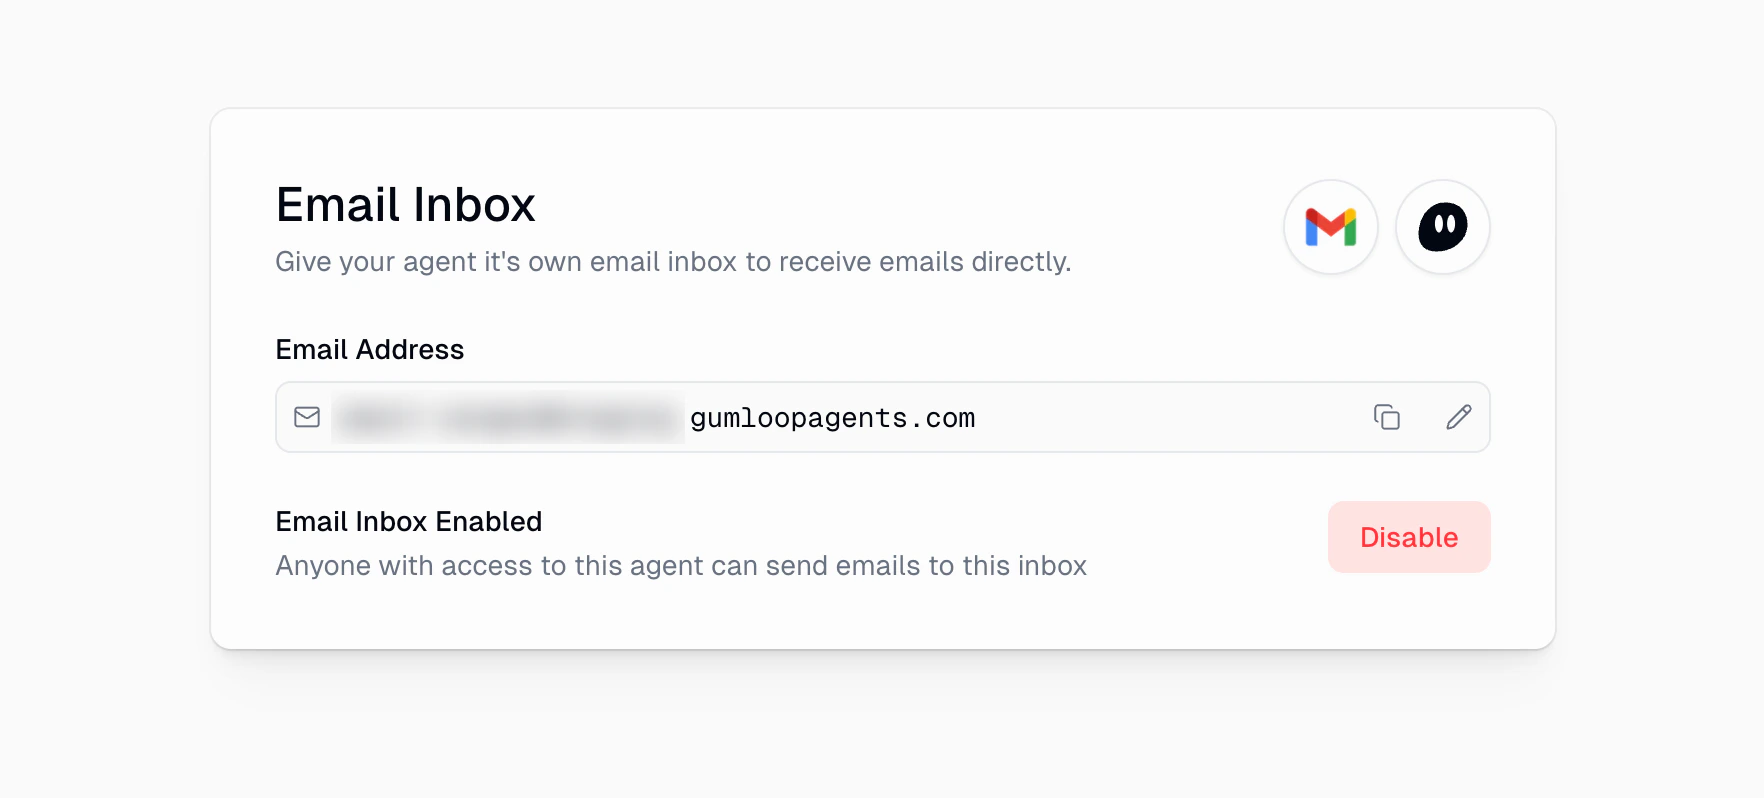
3
Start Sending Emails
Send an email to your agent’s address from any email client. The agent processes the message and replies directly to the sender’s inbox.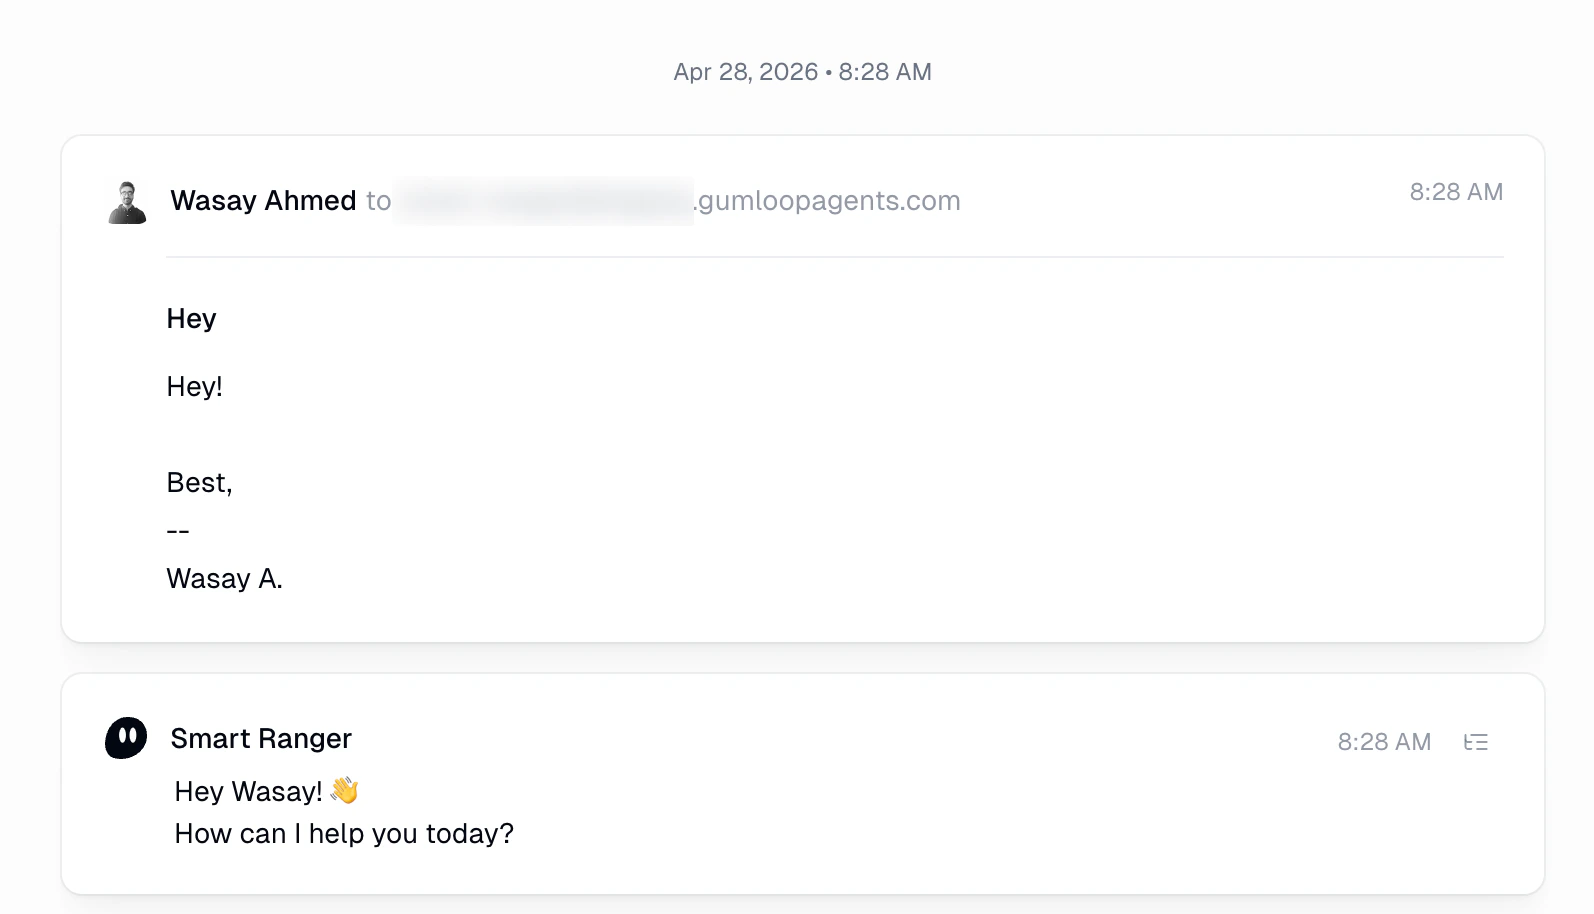
Customizing the Email Alias
You can change the email alias at any time:- Open the Email Inbox page for your agent
- Click the pencil icon next to the current address
- Type your preferred alias and press Enter (or click the checkmark)
- 3 to 64 characters
- Alphanumeric characters and hyphens only
- Must start and end with a letter or number
How It Works Behind the Scenes
When someone sends an email to your agent’s address, here is what happens:- Email received: The inbound email arrives at
gumloopagents.comand is routed to Gumloop’s email processing service. - Agent lookup: Gumloop looks up which agent is registered to the email alias.
- Sender verification: Gumloop verifies the message’s DKIM signature against the sender’s domain and matches the sender’s email to a Gumloop account. The sender must have a Gumloop account, and their domain must have DKIM configured. Messages without a valid DKIM signature are rejected. See Sender Domain Authentication (DKIM) for setup details.
- Permission check: Gumloop verifies that the sender has permission to use the agent (same access control as the chat interface).
- Thread resolution: If the email is a reply, Gumloop matches it to an existing conversation using email headers (
References,In-Reply-To). New emails start a fresh conversation. - Attachment processing: Any file attachments are decoded and stored securely, then passed to the agent as file inputs.
- Agent execution: The agent processes the message using the same AI engine as the chat interface, with access to all configured tools, integrations, and workflows.
- Reply sent: The agent’s response is formatted as an HTML email and sent back to the sender (and any CC’d recipients). File outputs from the agent are included as attachments.
- Conversation persisted: The full exchange is saved to the agent’s interaction history, visible in both the Gumloop UI and future email threads.
The email channel uses the same AI agent engine, tools, and credentials as the chat interface. There is no difference in agent capabilities between email and chat.
Sender Domain Authentication (DKIM)
Gumloop verifies the DKIM signature of every inbound email so it can confirm that the sender’s domain actually authorized the message. Without this check, anyone could spoof an email from a teammate’s address and gain access to that user’s agents and credentials. If the sender’s domain does not have DKIM configured, the email is rejected. The sender usually receives a generic bounce from their mail provider that looks like an “Address not found” or “domain couldn’t be found” error, even though the real cause is missing DKIM on their own outbound mail.When This Affects You
- Personal accounts on Gmail, Outlook, iCloud, and similar consumer providers already have DKIM enabled by default. No action is needed.
- Workspace and corporate domains (custom domains hosted on Google Workspace, Microsoft 365, or another provider) need DKIM enabled by an administrator before they can email a Gumloop agent.
Setting Up DKIM on Your Domain
Ask your IT administrator to enable DKIM signing for the sending domain. Both major providers have step-by-step guides:Google Workspace
Generate a DKIM key in the Admin console, add the provided TXT record to DNS, then turn on signing.
Microsoft 365 / Outlook
Add the two CNAME records for your custom domain in DNS, then enable DKIM in the Microsoft Defender portal.
If you administer your own mail server, configure DKIM using your provider’s documentation and confirm a
DKIM-Signature header is present on outbound messages. Gumloop accepts any valid DKIM signature where the signing domain (d=) matches the sender’s domain.Confirming DKIM is the Cause of a Bounce
If an email to your agent bounced and you’re not sure why, open the bounce message and view the original headers:- Gmail: open the message, click the three-dot menu, then Show original.
- Outlook: open the message, click File > Properties (desktop) or the three-dot menu and View message source (web).
Authentication-Results header. A line like dkim=none or dkim=fail (or no DKIM line at all) confirms the sender’s domain is not signing outbound mail.
Threading and Conversation History
The email inbox supports full conversation threading:- New emails start a new conversation with the agent.
- Replies (using your email client’s reply button) continue the existing conversation. The agent has access to the full thread history.
- CC recipients are preserved. When the agent replies, it CCs everyone who was on the original email.
- Subject lines are included as context for new conversations, helping the agent understand the topic.
References and In-Reply-To) to track threads, so threading works correctly across Gmail, Outlook, Apple Mail, and other email clients.
Credentials and Authentication
Email interactions use the same credential model as the chat interface:- The agent uses the sender’s personal credentials for any integrations (Gmail, Salesforce, etc.)
- If the sender has not authenticated with a required service, the agent will notify them in the reply
- Team credential settings (personal vs. team default) apply the same way as in chat
The sender’s email address must match their Gumloop account email. If someone sends an email from an address not associated with a Gumloop account, they will receive an error reply asking them to sign up.
Concurrency and Rate Limits
Email agent interactions follow the same concurrency limits as other agent channels:- If you have too many agent interactions running simultaneously, the email will receive a reply explaining that the request was rate-limited
- Enterprise users benefit from automatic queuing: instead of being rejected, their messages are queued and processed in order. The sender receives a notification with their queue position.
- If a message takes too long to process (exceeds the time limit), the sender receives an error reply
Disabling the Email Inbox
To turn off the email inbox:- Open the Email Inbox page for your agent
- Click the red Disable button
Permissions
Managing the email inbox requires Editor access to the agent. Viewers and “Use Only” users cannot enable, disable, or change the email alias. Organization admins can also restrict email inbox access using policy controls. If email inboxes have been restricted by your admin, you will see a message indicating this on the setup page.Troubleshooting
My email bounced with 'Address not found' or 'domain couldn't be found'
My email bounced with 'Address not found' or 'domain couldn't be found'
This almost always means the sender’s domain does not have DKIM signing enabled. The bounce message from your mail provider can be misleading:
gumloopagents.com exists and is reachable, but Gumloop rejected the message because the DKIM signature could not be verified.Fix: Ask your IT administrator to enable DKIM on the sender’s domain. See Sender Domain Authentication (DKIM) for the Google Workspace and Microsoft 365 setup guides.To confirm this is the cause, open the bounce email, view the original headers, and look for dkim= in the Authentication-Results header. A dkim=none or missing DKIM signature confirms the issue.The sender received a 'sign up for Gumloop' reply
The sender received a 'sign up for Gumloop' reply
The sender’s email address must match an existing Gumloop account. Either invite them to your organization or have them sign up at gumloop.com using the same email address they’re sending from.
The agent didn't reply to my email
The agent didn't reply to my email
Check the agent’s chat history in Gumloop. If the email made it through, the conversation will appear there. If not, the email was rejected before it reached the agent. Common causes:
- DKIM is not configured on the sender’s domain (see above).
- The sender’s email does not match a Gumloop account.
- The sender does not have permission to use the agent.
- The email inbox has been disabled or restricted by an admin policy.
FAQ
Who can send emails to the agent?
Who can send emails to the agent?
Anyone with a Gumloop account and read access to the agent can send emails to it. The sender’s email address must match the email on their Gumloop account, and the sender’s domain must have DKIM configured.
Can I use my own custom domain?
Can I use my own custom domain?
Not currently. All agent email addresses use the
@gumloopagents.com domain. Custom domain support may be added in the future.What happens if I send an email from an address not linked to Gumloop?
What happens if I send an email from an address not linked to Gumloop?
You will receive an error reply asking you to sign up for a Gumloop account at gumloop.com.
Are email attachments supported?
Are email attachments supported?
Yes. File attachments are processed and made available to the agent. The agent can also send files back as attachments in its reply.
How does CC work?
How does CC work?
If you CC other people on your email to the agent, the agent’s reply will also CC those recipients. This makes it easy to keep team members in the loop.
Can the agent send emails proactively?
Can the agent send emails proactively?
No. The email inbox is inbound-only. The agent only replies to emails it receives. It cannot initiate email conversations on its own. If you need outbound email capabilities, use the Gmail or email MCP integrations as agent tools.
What email format does the agent reply in?
What email format does the agent reply in?
The agent replies in HTML format with clean formatting, including support for headings, lists, code blocks, and tables. The reply also includes a plain-text fallback for email clients that do not render HTML.
Can I have the same agent on both Slack and email?
Can I have the same agent on both Slack and email?
Yes. An agent can be connected to Slack, email, and the Gumloop chat interface simultaneously. Each channel maintains its own conversation threads.
What happens to old threads if I change the alias?
What happens to old threads if I change the alias?
Existing conversation threads are preserved in the agent’s history. However, replies to those threads using the old email address will no longer be delivered. You would need to start a new email thread using the new address.
Is there a limit on email size or attachment count?
Is there a limit on email size or attachment count?
Standard email size limits apply. Very large attachments may fail to process. For best results, keep individual attachments under 25 MB.
Why does my agent need DKIM on my domain?
Why does my agent need DKIM on my domain?
Gumloop uses DKIM signature verification to confirm that emails really came from the sender’s domain. Without it, anyone could spoof a teammate’s address and access their agents and credentials. Personal Gmail and Outlook accounts already have DKIM. Custom workspace domains need an admin to enable it. See Sender Domain Authentication (DKIM).