New to Agents? Agents are AI-powered assistants that use tools to solve open-ended tasks. Learn about creating and configuring agents in the Agents documentation.
Why Use Agents in Workflows?
Placing agents inside workflows gives you the best of both worlds, and unlocks capabilities that standalone agents don’t have:
The key insight: By embedding an agent in a workflow, your agent inherits all the triggering and automation capabilities that workflows provide.
Schedule Your Agents
Run agents on a schedule: daily summaries, weekly reports, or any cadence you need.
Trigger via Webhook
Call your agent from external systems using webhook triggers.
Respond to Events
Trigger agents when events happen: new emails, form submissions, database updates.
Chain with Logic
Combine agent intelligence with deterministic workflow logic for hybrid automation.
How It Works
- A trigger starts your workflow (schedule, webhook, event, or manual)
- Your workflow passes data to the Agent node as a prompt
- The agent processes the request using its configured tools, integrations, and instructions
- The agent returns its response and any generated attachments
- Your workflow continues with the agent’s output
Adding an Agent Node
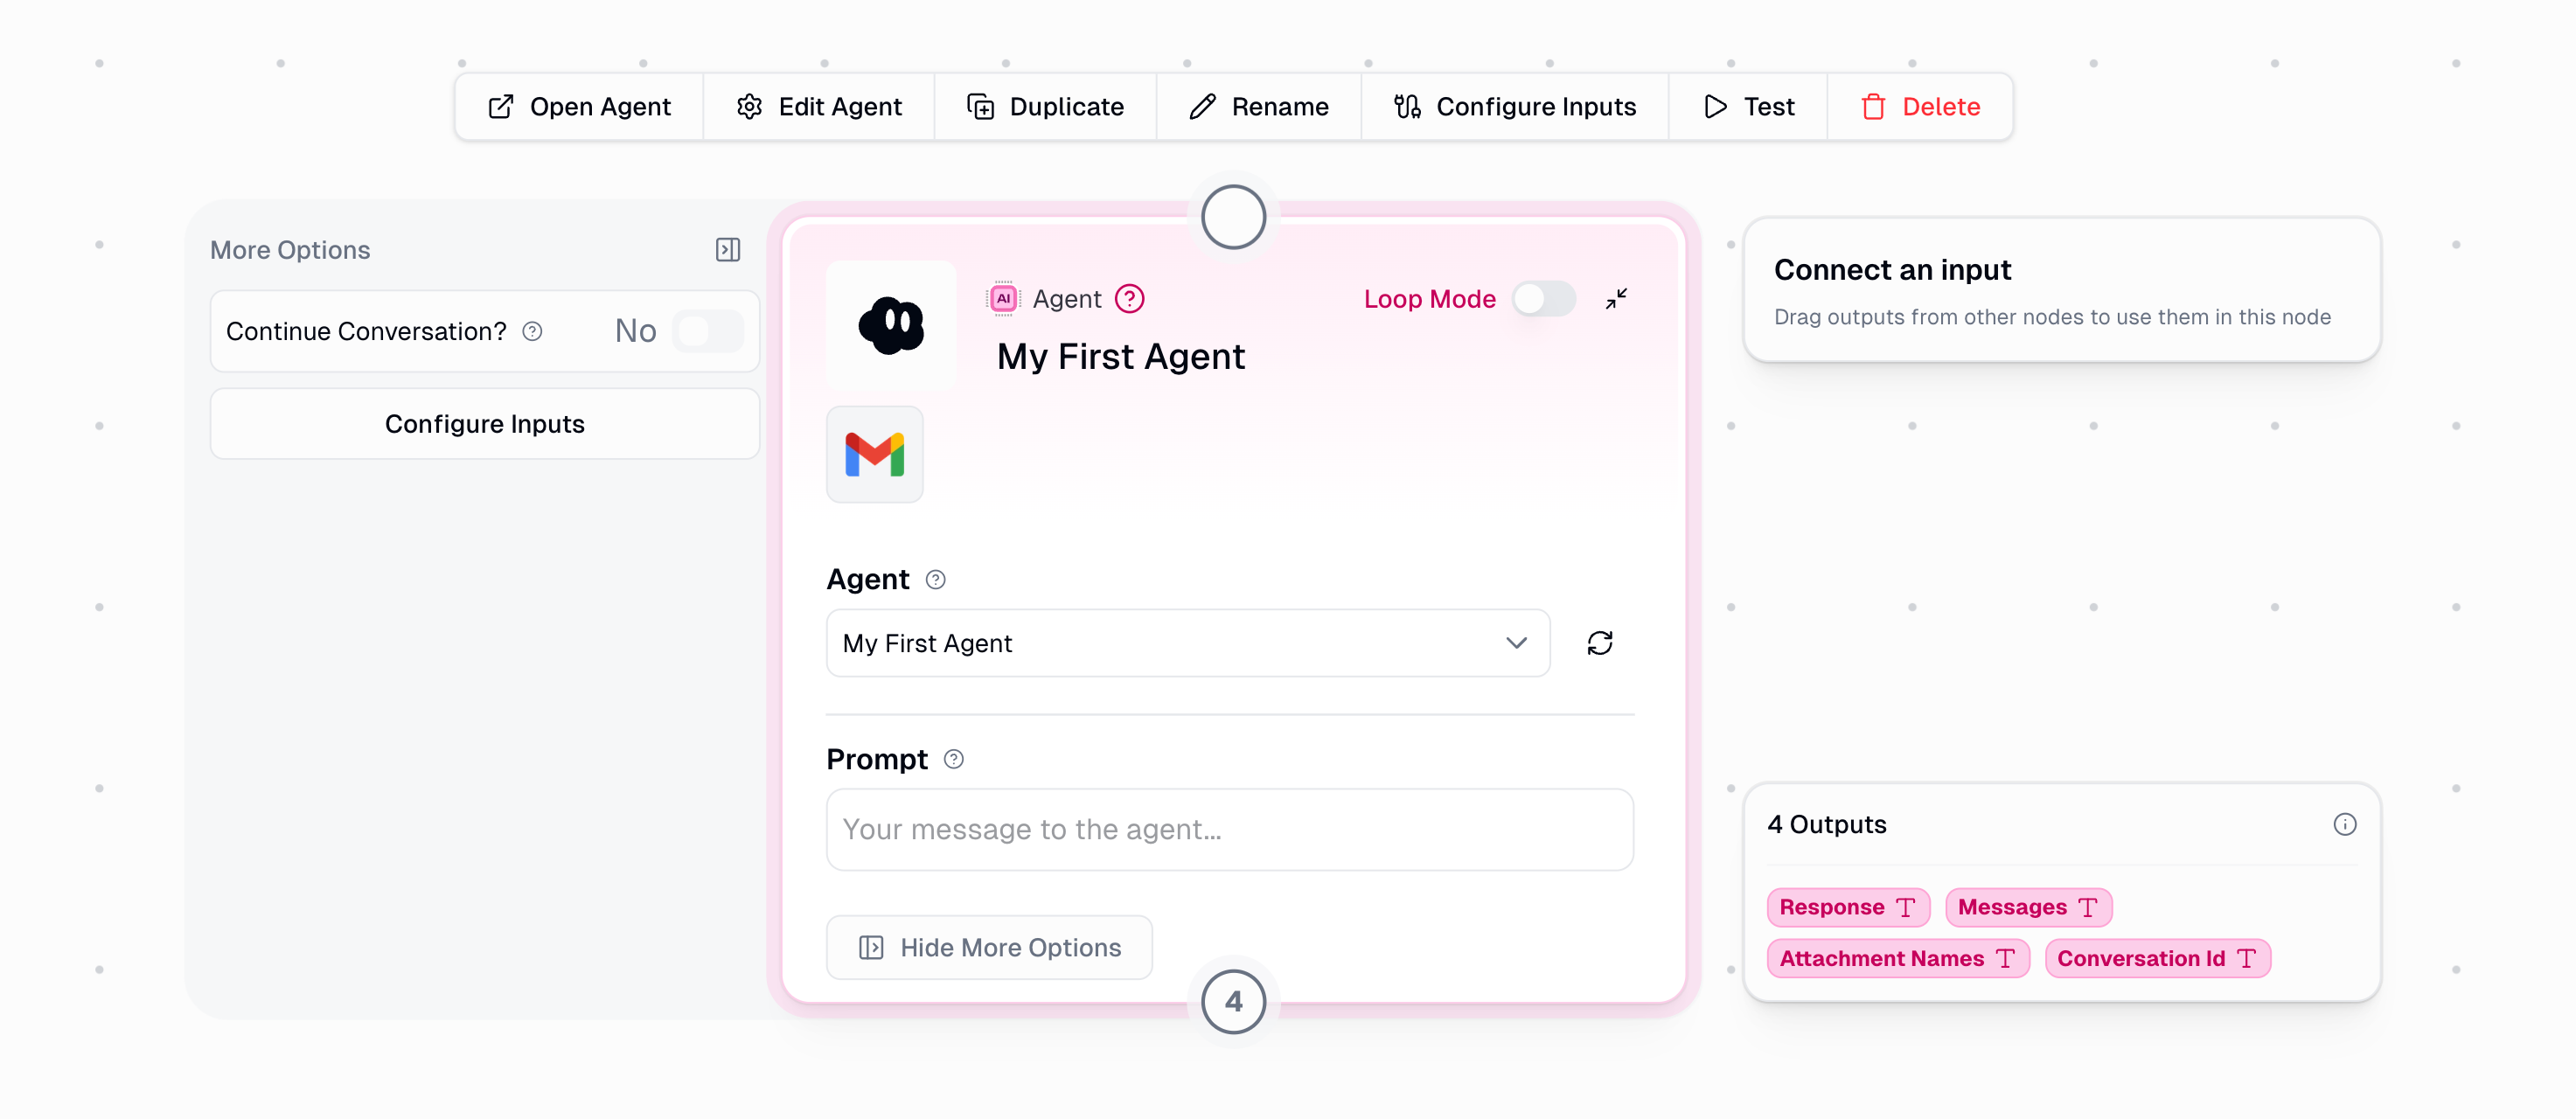
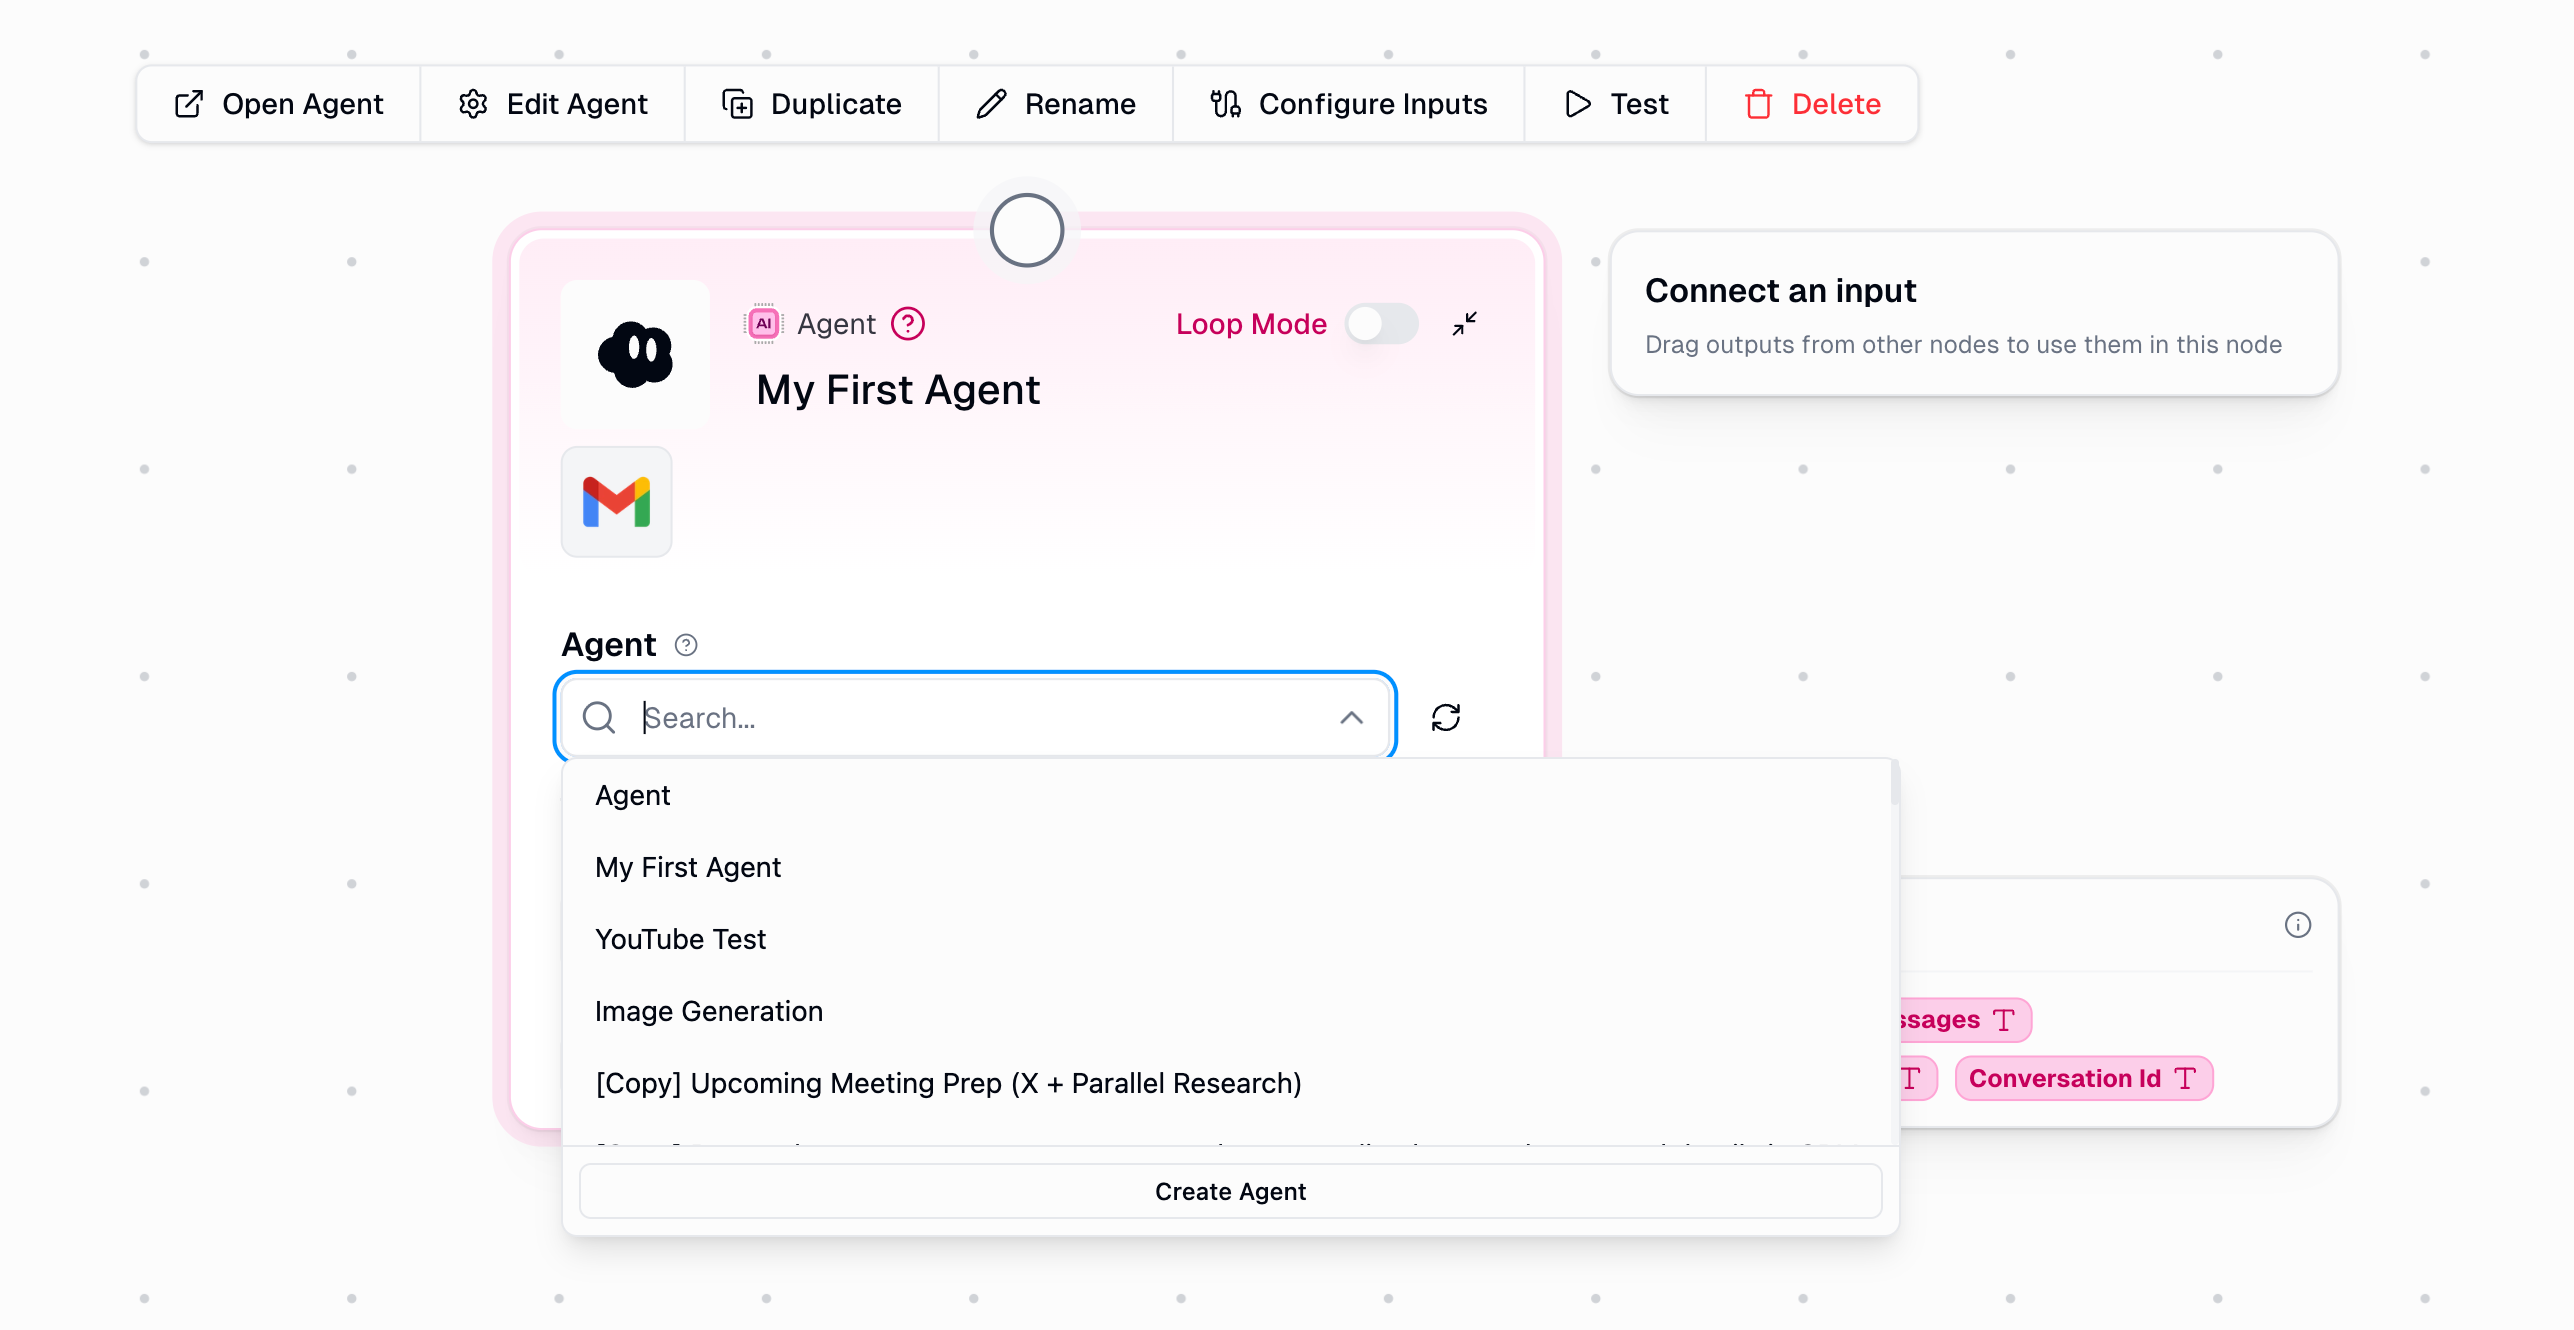
- Add an Agent node from the “Using AI” category
- Select an agent from the dropdown (shows all agents you have access to)
- Configure your prompt and optional settings
Node Inputs
The Prompt input can be a static value or connected from another node’s output, allowing you to pass dynamic data to your agent.
Node Outputs
Continuing Conversations
By default, each Agent node run starts a fresh conversation. To maintain context across multiple interactions (for example, to ask follow-up questions or build on previous responses) you can continue an existing conversation. To enable conversation continuity:- Click Show More Options in the Agent node
- Enable the Continue Conversation? toggle
- Connect a
Conversation Idoutput from a previous Agent node to the Previous Conversation ID input
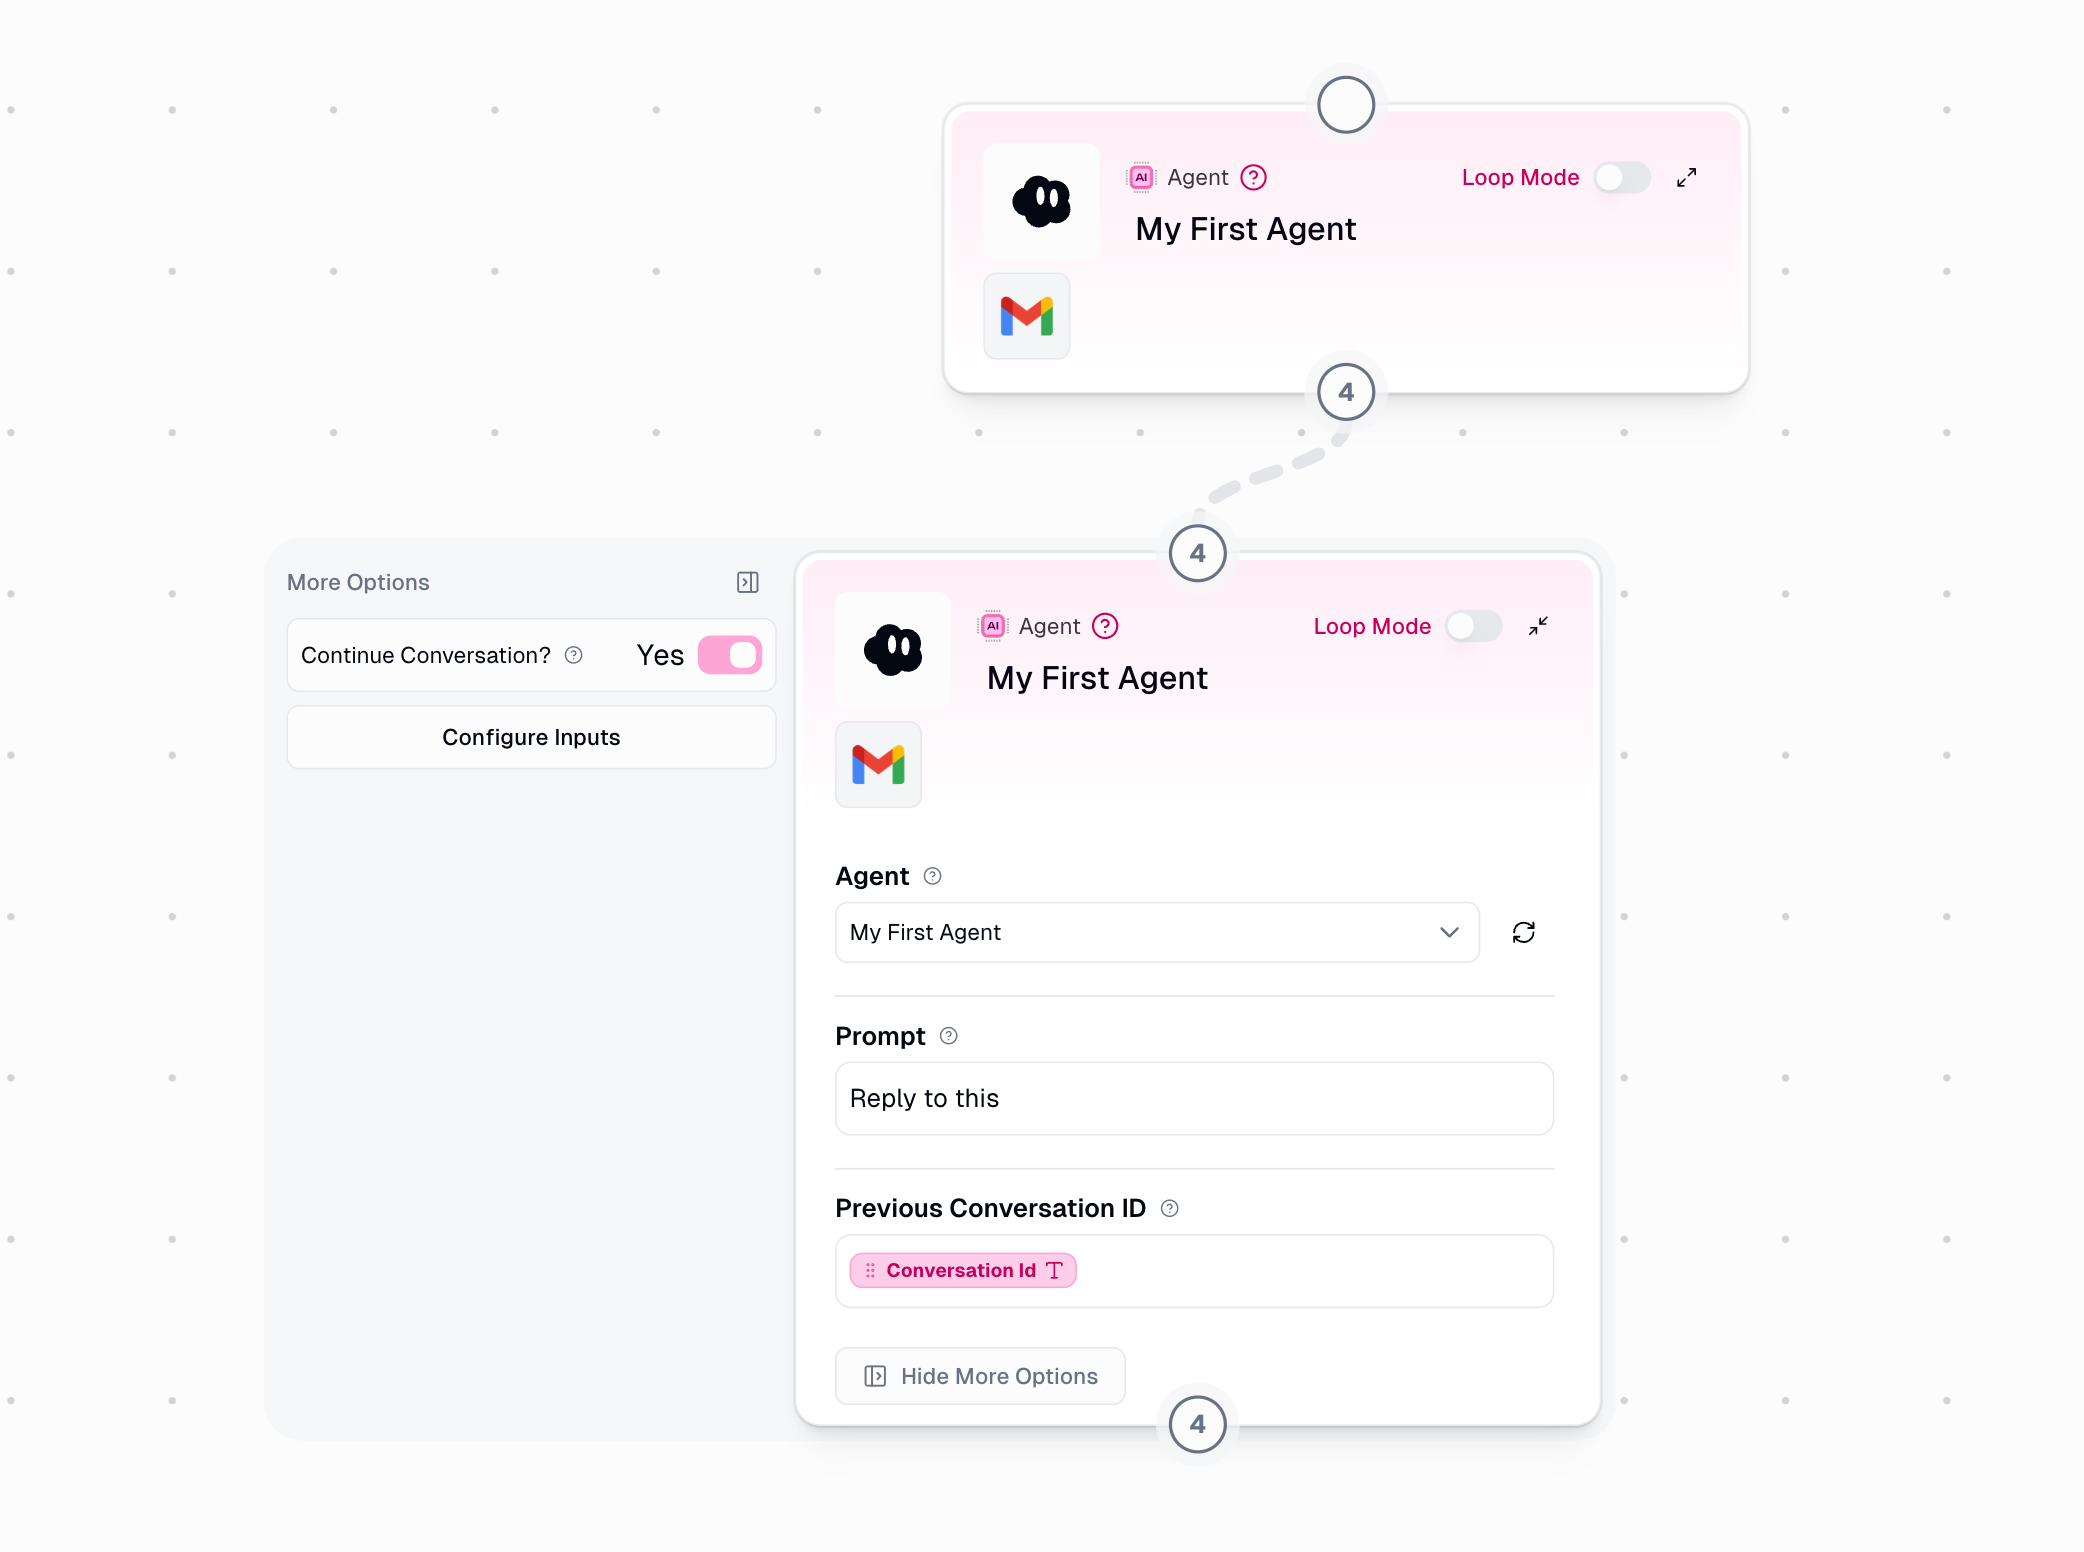
Conversation Id from the first, allowing it to reference and build upon the initial research without needing to repeat context in the prompt.
When to use conversation continuity: Use this when you need the agent to remember what it said or did in a previous step. If each Agent node handles an independent task, you don’t need to continue conversations.
Permissions & Access
When you run a workflow with an Agent node, two things must be in place for it to work:- Agent Access: The user running the workflow must have access to the agent
- Credential Access: The user must have authenticated with any integrations the agent uses
Agent Access
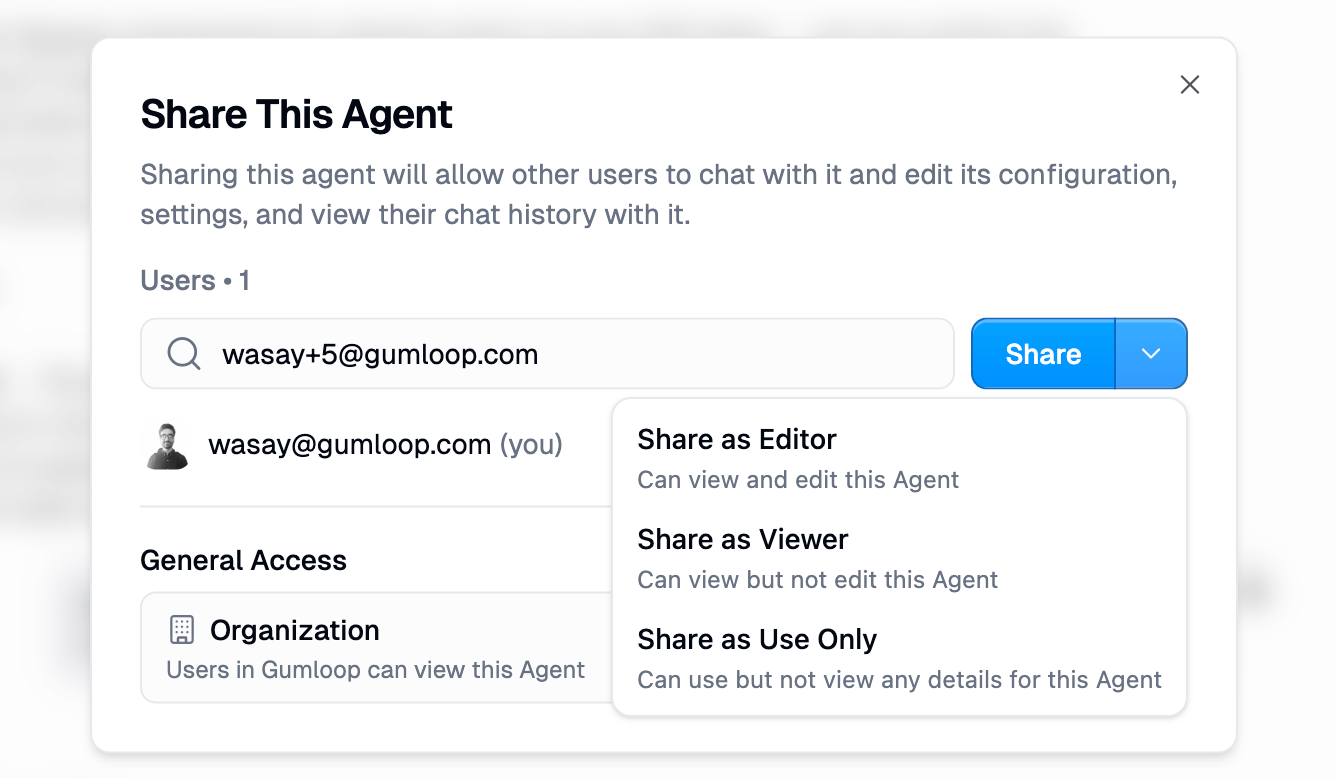
If a user tries to run a workflow but doesn’t have access to the agent, the node will fail with an error. This commonly happens when you share a workflow (as an interface, template, or with collaborators) but forget to share the underlying agent. Ways to share an agent: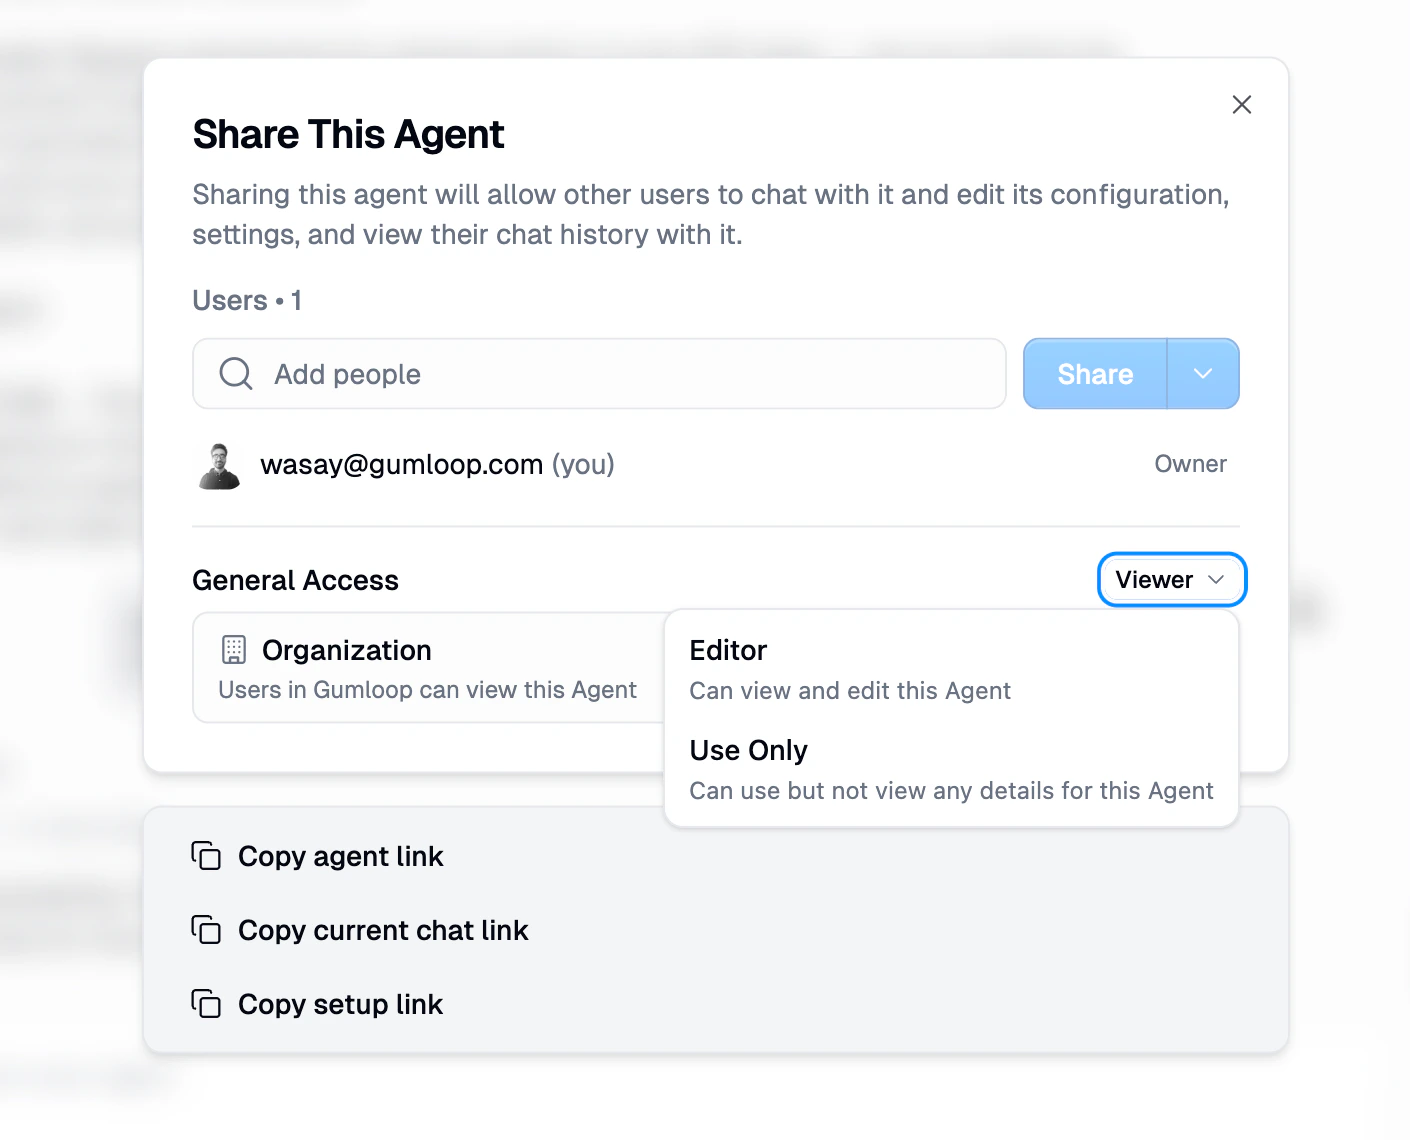
Credential Access
Even if a user has access to the agent, they also need to have authenticated with any integrations the agent uses. For example, if your agent uses Gmail and Google Drive, users running the workflow must have their own Gmail and Google Drive credentials set up in Gumloop. If credentials are missing, the agent won’t be able to make tool calls for those integrations, and the task may fail or produce incomplete results.Setting Up Users with the Setup Link
To make it easy for others to authenticate with the required integrations, you can share an agent setup link. This link guides users through connecting the necessary credentials. To find the setup link:- Open your agent
- Click the Share button
- Click Copy setup link from the share settings
Credit Costs
The Agent node has a base cost of 3 credits per run, charged on top of the actual credit cost of running the agent. For example, if an agent’s total credit cost is 10 credits, you’d be charged 13 credits total on the workflow. This is similar to how custom nodes and MCP nodes also have a 3 credit base cost. Beyond the base cost, credits are based on the AI model, message length, conversation history, and any tools or workflows the agent calls. For detailed pricing information, see Understanding Credit Costs in the Agents documentation.Loop Mode Support
The Agent node supports Loop Mode for batch processing multiple prompts:- Enable Loop Mode on the Agent node
- Connect a list of prompts as input
- Each item is sent as a separate message to the agent
Each loop iteration starts a new conversation unless you explicitly manage conversation IDs. For multi-turn conversations within a loop, you’ll need to track and pass conversation IDs between iterations.
Use Cases
Scheduled Agent Reports
Scheduled Agent Reports
Run agents on a schedule to generate daily summaries, weekly reports, or periodic analyses without manual intervention.Example: Every Monday at 9am → Agent analyzes last week’s sales data → Sends summary to Slack
Webhook-Triggered Agent Actions
Webhook-Triggered Agent Actions
Trigger agents from external systems via webhooks. Connect your agent to any system that can make HTTP requests.Example: CRM sends webhook when deal closes → Agent generates personalized onboarding plan → Saves to Notion
Event-Driven Agent Responses
Event-Driven Agent Responses
Use trigger nodes to run agents when events happen: new emails, form submissions, database changes.Example: New support email arrives → Agent analyzes urgency and sentiment → Routes to appropriate team
Hybrid Decision Workflows
Hybrid Decision Workflows
Combine deterministic workflow logic with intelligent agent decisions where human-like judgment is needed.Example: Lead data → Workflow enriches → Agent evaluates fit → Workflow routes to sales or nurture
Batch Processing with Agents
Batch Processing with Agents
Process lists of items through an agent using Loop Mode. Research multiple companies, analyze multiple documents, or handle multiple requests in batch.Example: List of 50 companies → Agent researches each → Compiled report output
Best Practices
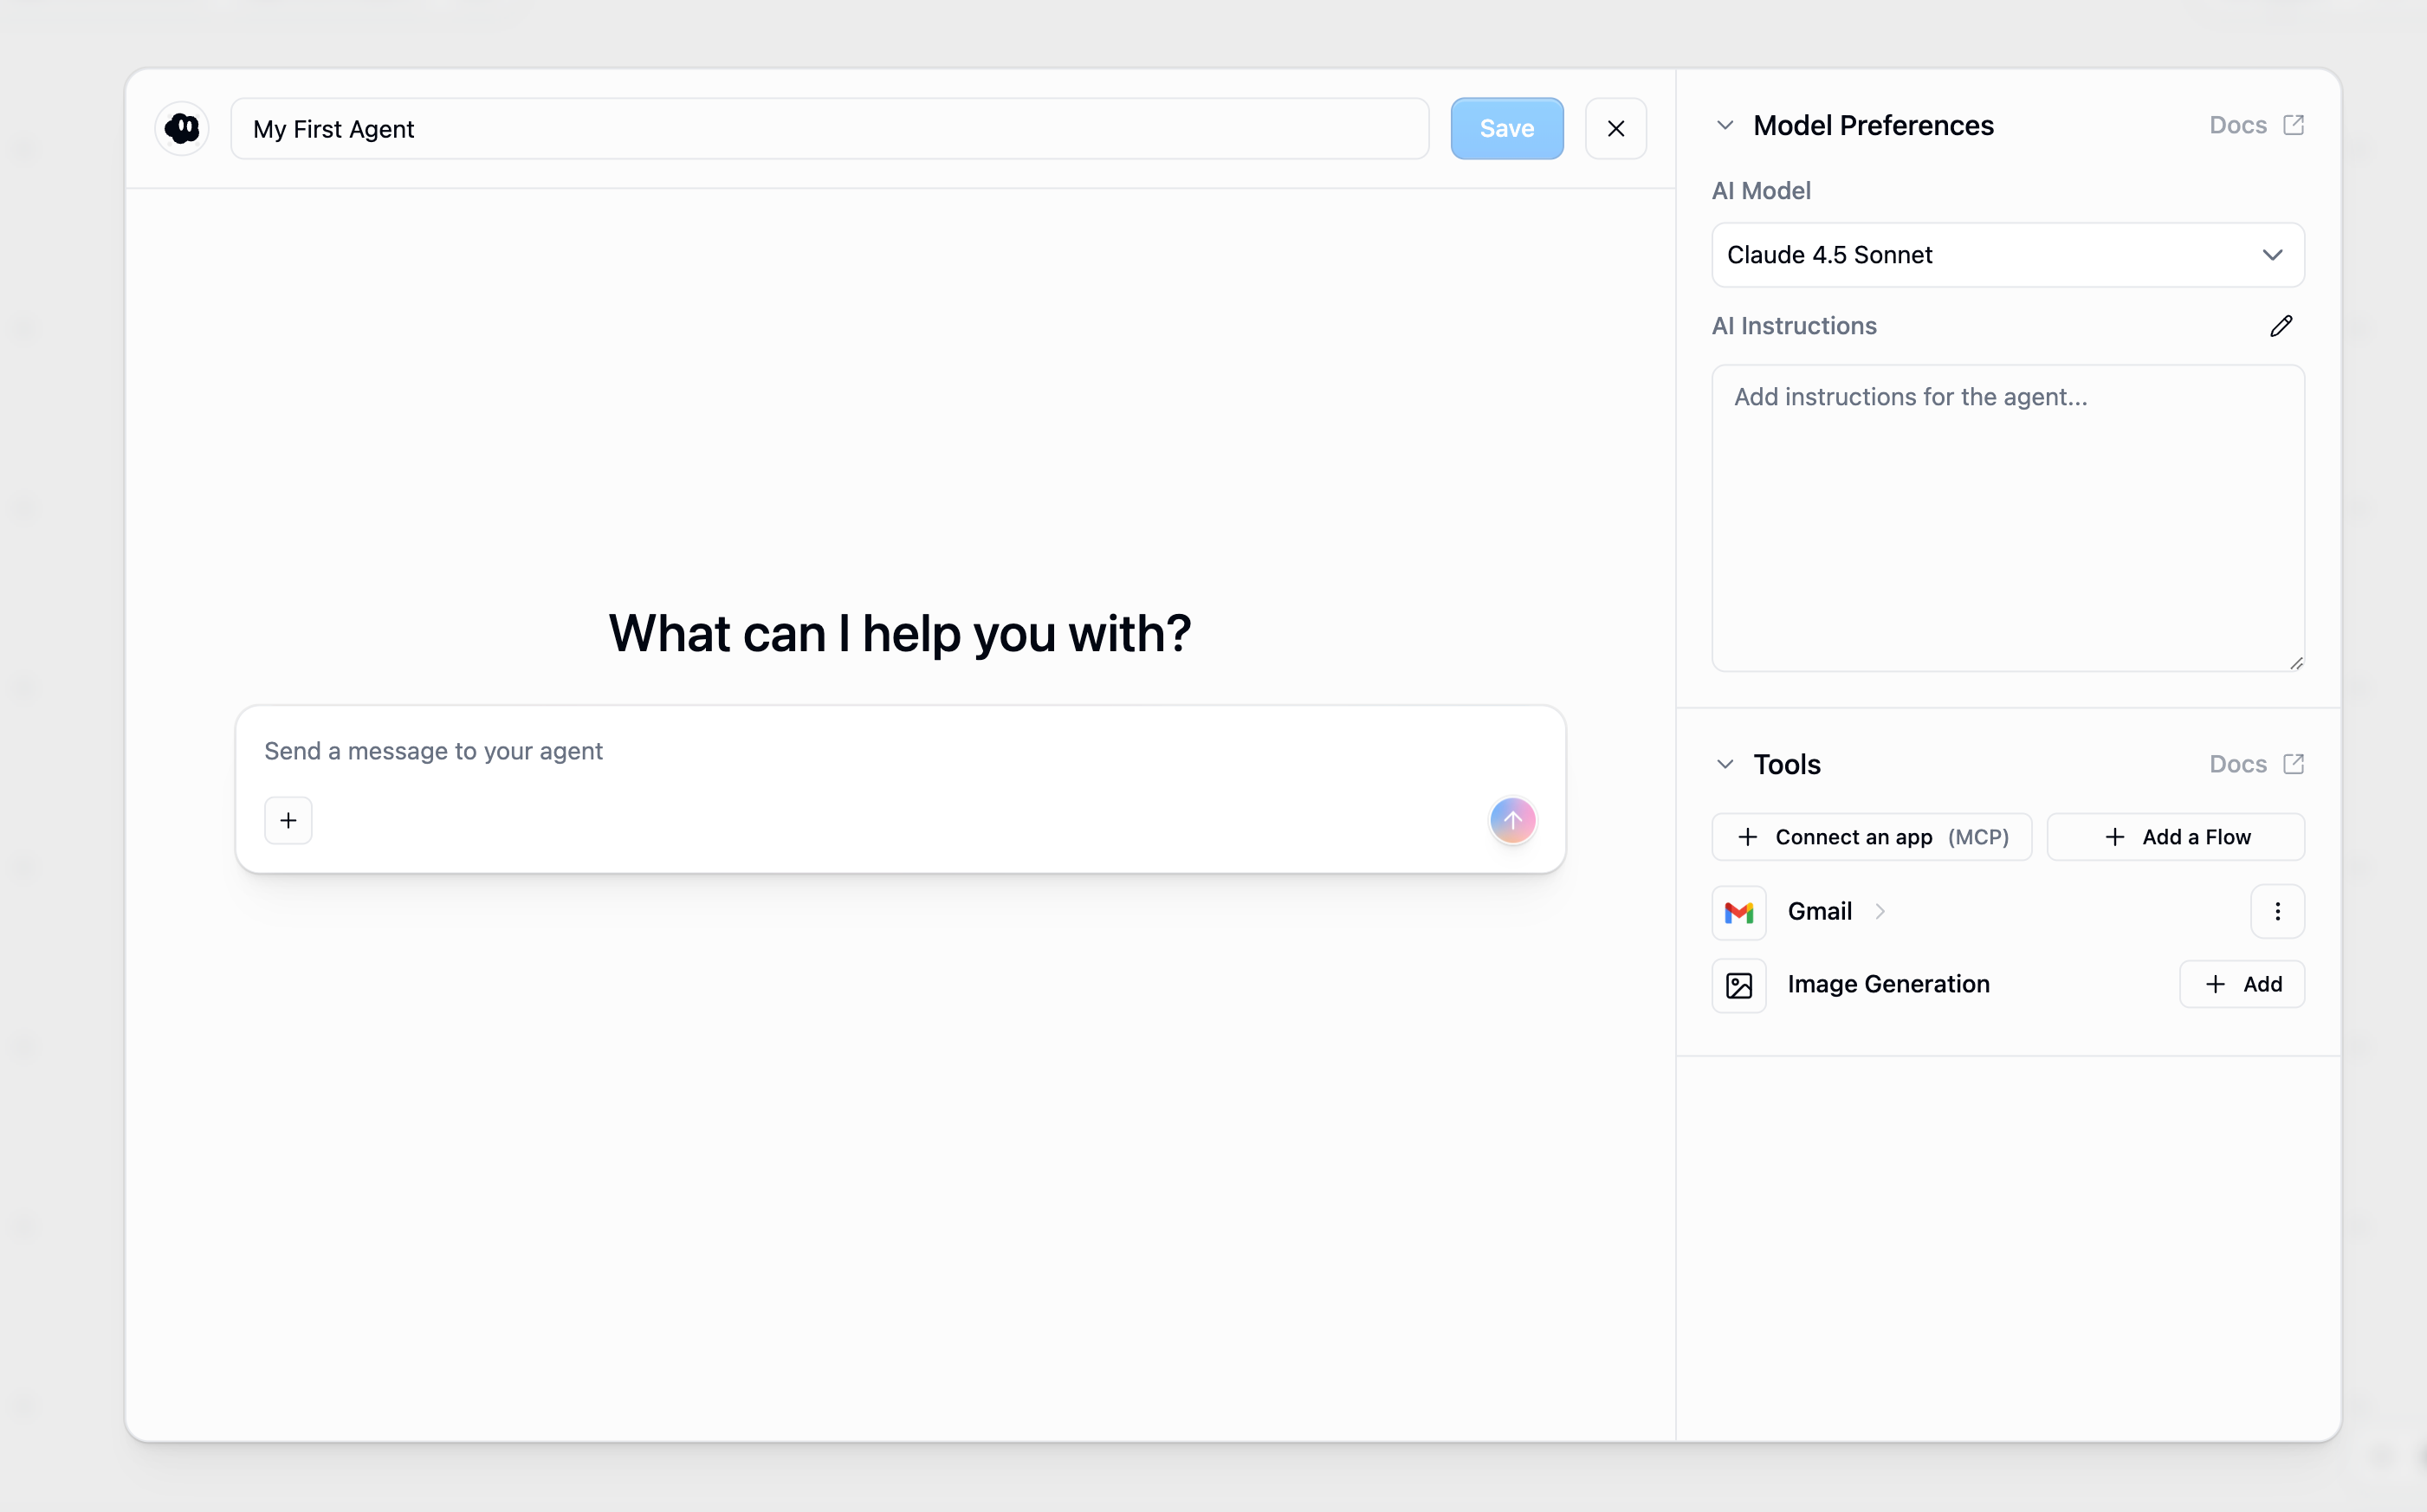
Choose the Right Agent
Select agents configured for your specific use case. Ensure the agent has the necessary tools and integrations for the task.
Write Clear Prompts
Be specific about what you want the agent to do. Include relevant context and use template variables to pass dynamic data.
Handle Outputs Appropriately
Parse the Messages output if you need detailed conversation data. Check Attachment Names when expecting generated files.
Start with Simple Triggers
Test your agent workflow manually first, then add scheduling or event triggers once you’ve verified the agent behaves correctly.
Troubleshooting
Agent Not Found
Agent Not Found
Cause: The selected agent was deleted or you lost access to it.Solution: Verify the agent exists in your Agents page and that you have permission to access it.
Permission Denied
Permission Denied
Cause: You don’t have sufficient access to the agent.Solution: Ask the agent owner to share the agent with you. They can add you by email from the Share dialog and assign you an appropriate role (Editor, Viewer, or Use Only). See Permissions & Access for details.
Conversation Not Found
Conversation Not Found
Cause: The conversation ID is invalid or you don’t have access to it.Solution: Verify the conversation ID is correct and from a conversation you initiated. Make sure you’re connecting the
Conversation Id output from the correct previous Agent node.Missing Credentials
Missing Credentials
Cause: The agent needs integrations you haven’t authenticated.Solution: Visit your Connectors page and authenticate with the required services. If you received a setup link from the workflow creator, use that to set up all required credentials.
Agent Tool Calls Failing
Agent Tool Calls Failing
Cause: You have access to the agent but haven’t authenticated with the integrations it uses.Solution: Check which integrations the agent uses (Gmail, Google Drive, Slack, etc.) and ensure you have credentials set up for each one. Ask the workflow creator for the agent setup link if needed.
Related Resources
Agents
Learn how to create and configure agents
Agents in Slack
Deploy agents to Slack channels
Workflow Triggers
Learn about workflow triggers