How Sharing Works
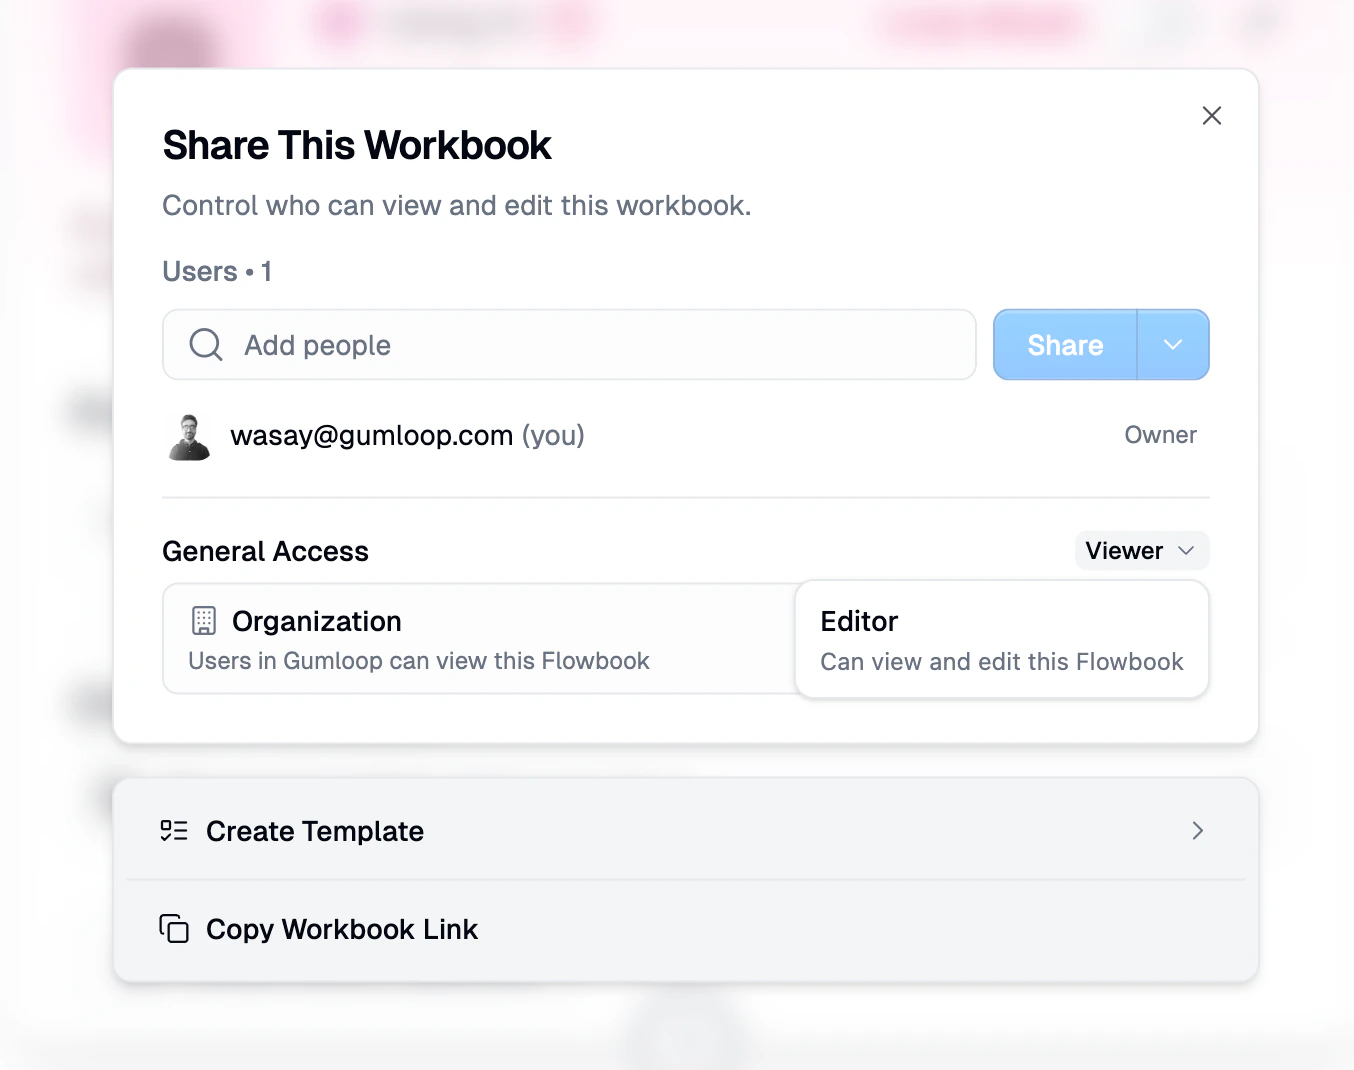
Every resource in Gumloop (agents, workflows, custom nodes, interfaces) has a Share dialog that you access by clicking the Share button. The dialog has two main sections:- Users: Add specific people by email and assign them a role
- General Access: Control broader access for your team, organization, or the public
Roles
Roles determine what someone can do with a shared resource. Gumloop uses a four-tier role hierarchy:Role Comparison
Owner
The person who created the resource. Owners have full control and cannot be removed through the sharing UI. Ownership is assigned at creation time and can only be transferred explicitly.Editor
Full access to view, edit, delete, and manage sharing for the resource. Editors can add and remove other Editors and Viewers. This is the role team members get by default on team resources.Viewer
Read-only access. Viewers can see the resource and its configuration, view who has access, and make a copy to their own space. They cannot edit anything.Use Only
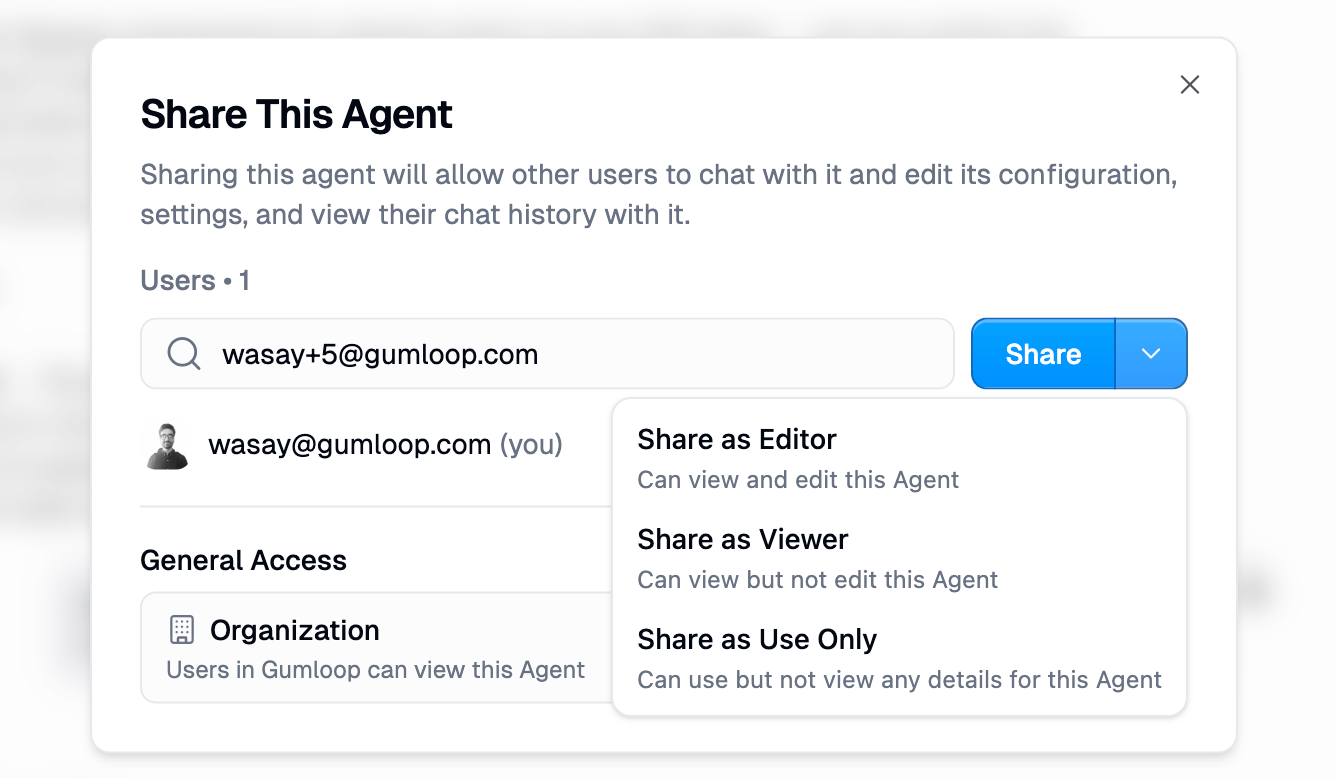
The most restricted role, currently available for agents and skills. Use Only users can interact with the resource (chat with an agent, or use a skill in their agents) but cannot see its configuration, instructions, tools, or any internal details. This is perfect for sharing a resource with end users who just need to use it without seeing how it works.Sharing with Specific Users
To share a resource with specific people:- Open the resource and click the Share button
- Enter their email address in the “Add people” field
- Click the dropdown arrow on the Share button to choose a role
- Click Share
You can share with any Gumloop user by email. They don’t need to be on your team or in your organization.
Changing a User’s Role
After sharing, you can change a user’s role from the Share dialog. Click the role label next to their name to see available options. You cannot change the Owner’s role through the sharing UI.Removing a User
To remove someone’s access, click the role label next to their name and select Remove. Owners cannot be removed.Leaving a Shared Resource
If you have access to a resource you no longer need, you can remove yourself by clicking your own role and selecting Leave. Owners cannot leave their own resources.General Access
General Access controls who can access a resource without being explicitly added by email. Think of it as concentric rings, from most restrictive to most open.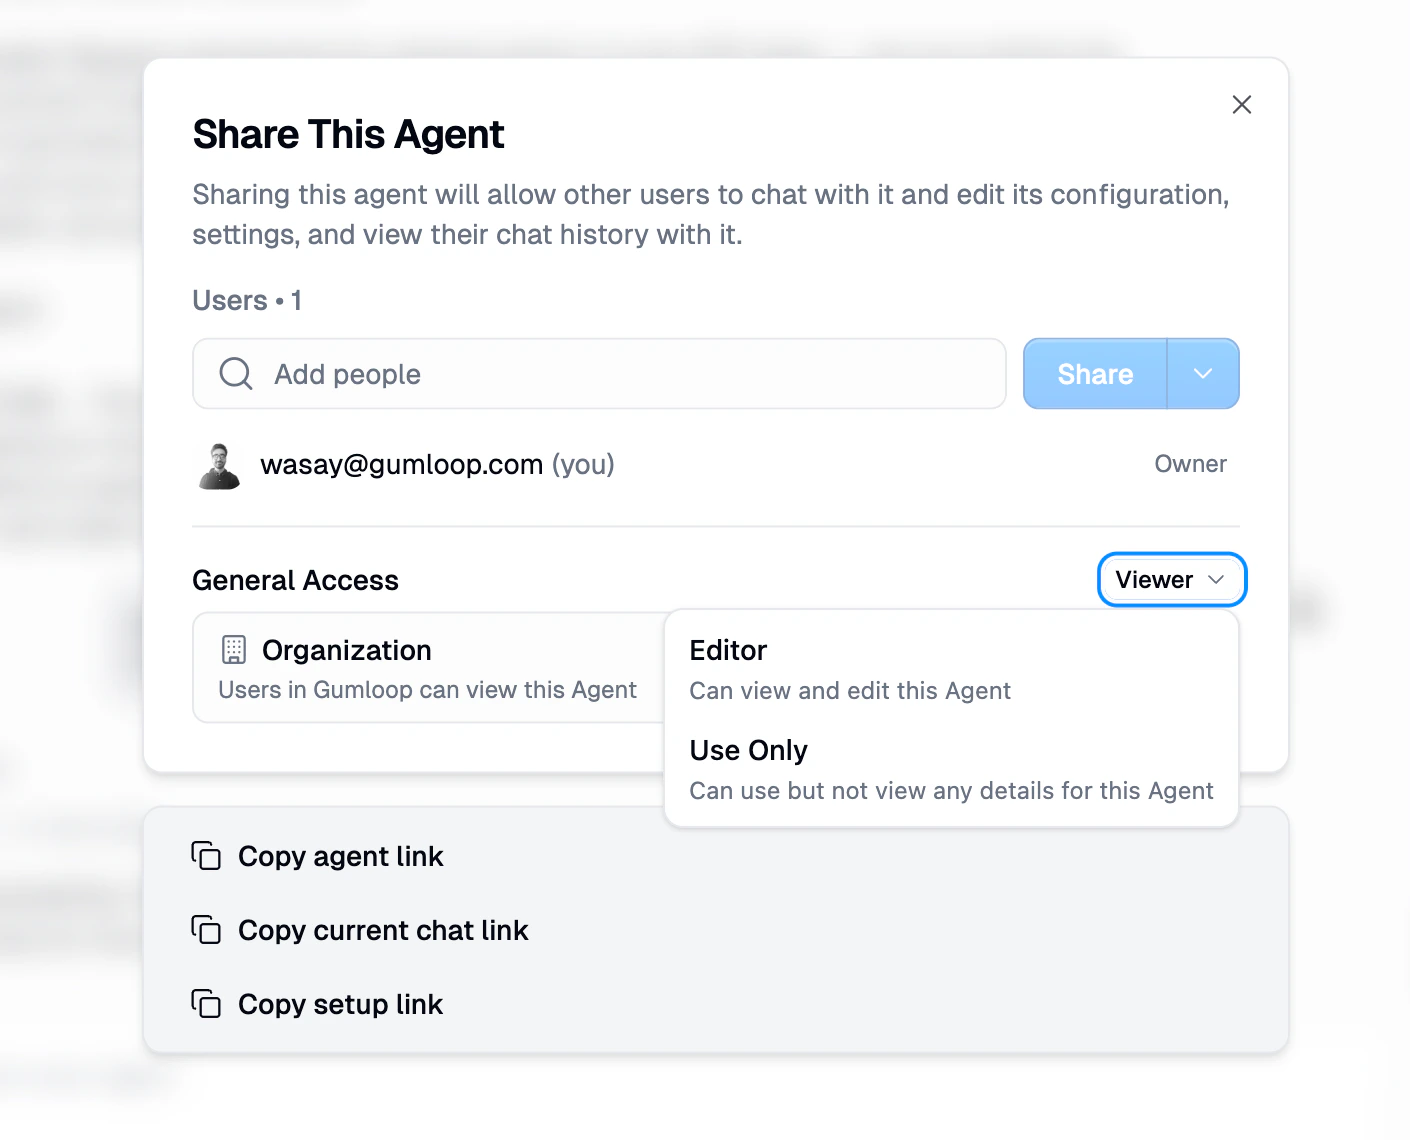
Access Levels
General Access Roles
When you set General Access to Team, Organization, or Anyone, you also choose what role that audience gets. For example, you might give your entire organization Viewer access to an agent, but give your team Editor access.Rules and Constraints
Not every access level is available in every context:
*Organization is only available if you belong to an organization.
Key constraints:
- Team resources cannot be set to Restricted. If a resource lives in a team, the minimum access level is Team. All team members will have access.
- Personal resources cannot be set to Team. There is no team to share with.
How Access Is Resolved
When you try to access a resource, Gumloop checks your permissions in a specific order. The first match wins:- Direct user grant (if you were added by email, this always wins)
- Team grant (if the resource has Team access and you’re a team member)
- Organization grant (if the resource has Organization access and you’re in the org)
- Public grant (if the resource has Anyone access)
- No access (if none of the above matched)
Direct grants always take priority. If you’re added as a Viewer directly, you’ll be a Viewer even if the Organization-level access is set to Editor. This lets resource owners restrict specific users below the general access level when needed.
Making a Copy
Viewers (and above) can make a copy of a shared resource to their own space. This creates an independent copy that they fully own.
Sharing Agents
Agents have the richest sharing model with three roles for sharing: Editor, Viewer, and Use Only.Agent Roles in Detail
Agent-Specific Share Actions
The agent Share dialog includes additional actions at the bottom:- Copy agent link: Copies a direct link to the agent
- Copy current chat link: Copies a link to the current conversation
- Copy setup link: Copies a link that guides users through authenticating with the agent’s required integrations
Sharing Workflows
Workflows support Editor and Viewer sharing roles.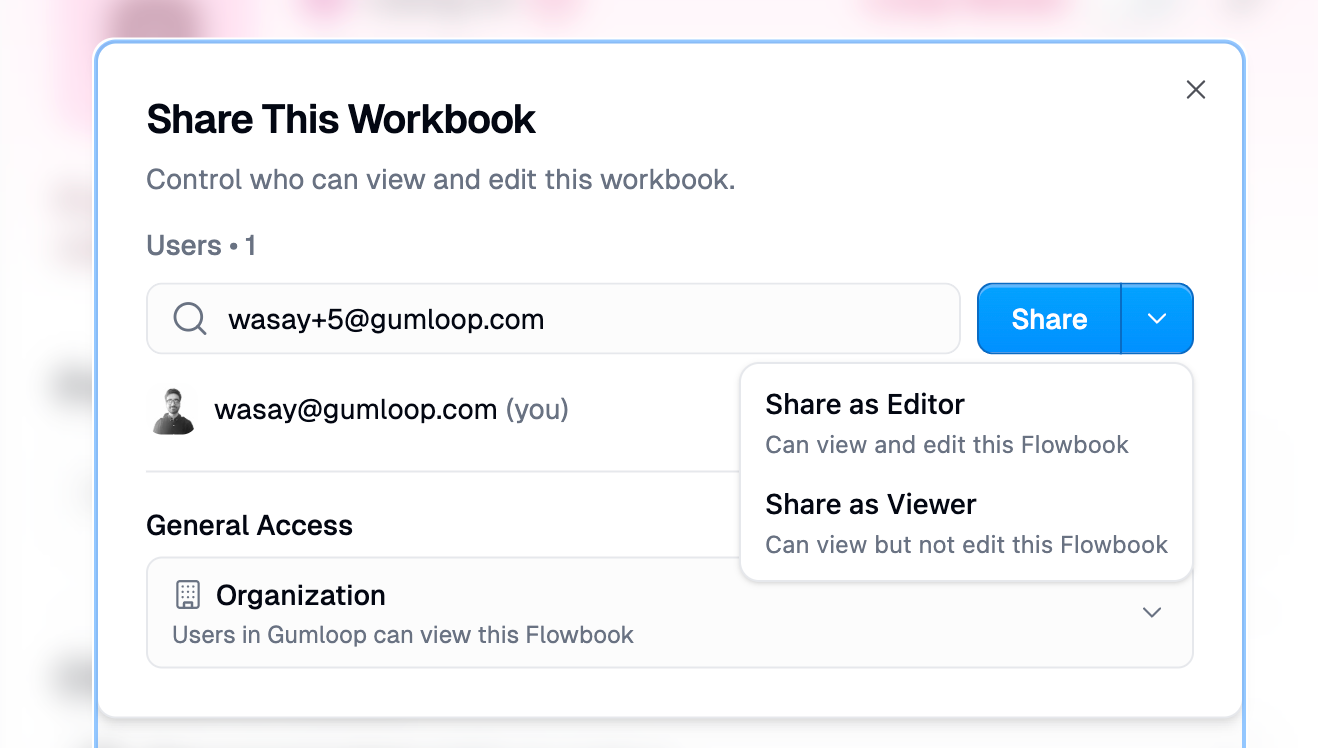
Workflow Roles in Detail
Workflow vs Interface Access
Workflow access and interface access are independent. Sharing a workflow does not automatically share its interfaces, and vice versa. This lets you:- Share an interface widely while keeping the workflow private
- Give someone Editor access to the workflow without giving them access to run the interface
- Make an interface public without making the underlying workflow public
Sharing Custom Nodes
Custom nodes support Editor and Viewer roles. By default, only the creator (Owner) can edit a custom node. See Custom Node Builder for details on custom node sharing.Sharing Chat Sessions
Individual agent chat sessions can be shared with Viewer access only. The chat creator (Owner) controls sharing. Shared viewers can read the conversation but cannot send messages.Finding Shared Resources
Every resource listing page in Gumloop (Agents, Skills, Files, Workflows) includes three tabs to help you find what you need:
The Shared with me tab is the fastest way to find resources that others have given you access to. It shows agents, skills, files, and workflows where you have been explicitly added as a collaborator, or where the General Access level includes you.
Each listing page also supports search and filters so you can narrow down results by name, creator, and other criteria.
Action Requests
When you try to access a resource you don’t have permission to view, Gumloop lets you request access directly. This sends a notification to the resource owner or a workspace admin who can grant or deny your request.How It Works
- You visit a resource you can’t access (an agent, workflow, file, or team). You’ll see a Request Access button.
- Your request is sent to the appropriate person, either the resource owner or a workspace admin, via email and Slack (if connected).
- The recipient reviews your request and can approve or deny it with a single click.
In-App Inbox
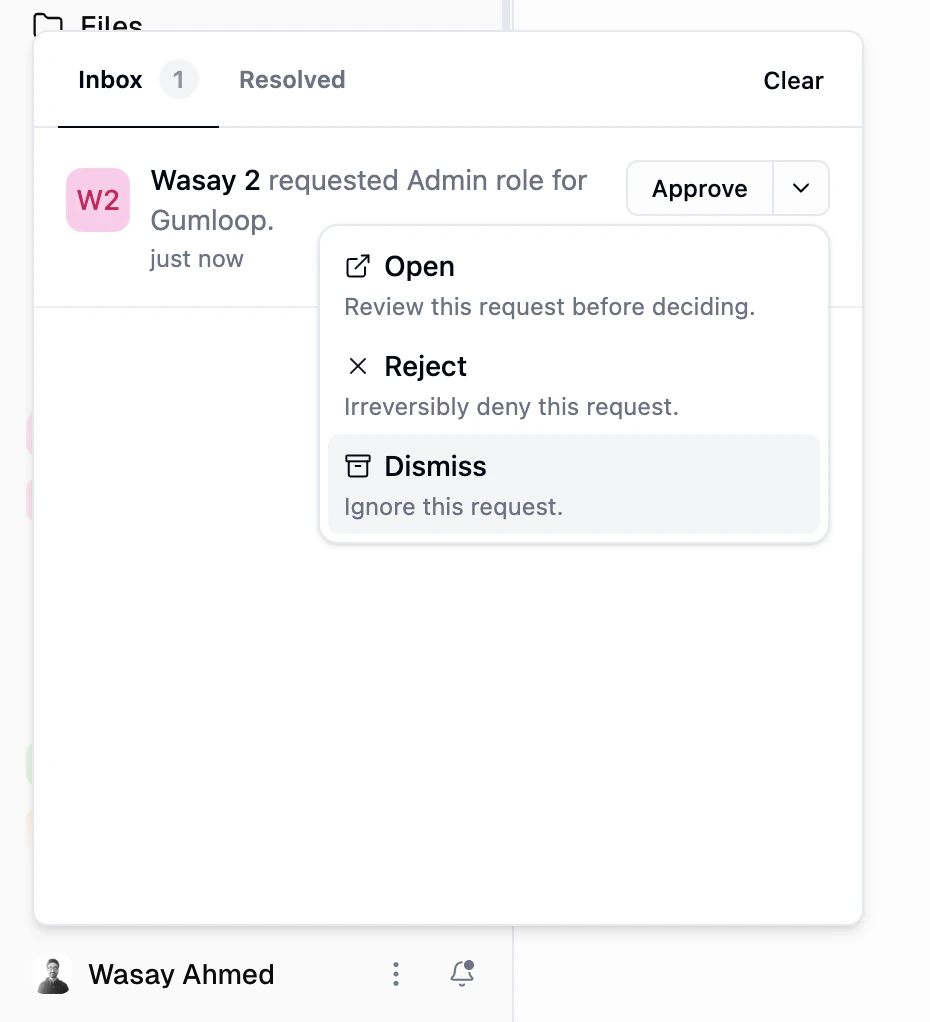
Admins and resource owners can review and respond to action requests directly from the Inbox in Gumloop. When a request comes in, it appears as a notification with the requester’s name, the requested resource or role, and the time it was submitted. Each request offers four response options:- Approve: Grant the request immediately.
- Open: Review the request details before making a decision.
- Reject: Irreversibly deny the request.
- Dismiss: Ignore the request without taking action.
Slack One-Click Approval
If the approver has Slack connected to Gumloop, they receive the access request as a Slack DM with Approve and Deny buttons. This lets them grant or deny access with a single click, without leaving Slack.Slack one-click approval is currently available for team and organization access requests. Support for other request types (such as individual agent or workflow access) is being rolled out incrementally.
- Approver must have Slack connected. The person who receives the request (resource owner, team admin, or org admin) needs to have authenticated Slack in their Connectors page.
- Requester must have Slack connected. The person requesting access also needs Slack authenticated so Gumloop can identify which Slack workspace they belong to. Without this, the notification is sent via email only.
What You Can Request Access To
Request Lifecycle
Each request is tracked with a durable record:- Pending: The request has been sent and is waiting for a decision.
- Accepted: The recipient approved the request and access was granted.
- Rejected: The recipient denied the request.
- Expired: The request was not acted on within the expiry window.
Cross-Organization Sharing
You can share resources with users in other organizations by adding them by email. When a resource is shared across organizations:- The General Access section is hidden for cross-org users (to protect internal team/org details)
- Cross-org users see a simple badge showing their access level
- Access is governed by the direct user grant only
Enterprise Controls
Organizations on Enterprise plans have additional controls over sharing:Public Sharing Restrictions
Organization admins can restrict users from setting General Access to “Anyone with link” using User Groups. When this restriction is enabled, the “Anyone” option is hidden in the Share dialog, and API calls to set public access will be rejected.Audit Logging
All sharing operations are logged in the audit trail:- When General Access level is changed
- When a user is granted access
- When a user’s access is revoked
Common Questions
What happens when I reduce General Access?
What happens when I reduce General Access?
If you lower the General Access level (e.g., from Organization to Restricted), users who were accessing via that level will lose access. Users with direct grants (added by email) are not affected. If you’re reducing your own access, the UI will warn you before proceeding.
Can I give someone Use Only access to a workflow?
Can I give someone Use Only access to a workflow?
No. Use Only is currently available for agents and skills only. For workflows, the most restricted sharing role is Viewer, which gives read-only access. If you want someone to run your workflow without seeing it, share it as an interface instead.
What's the difference between Viewer and Use Only?
What's the difference between Viewer and Use Only?
Viewer can see the resource’s configuration and use it. Use Only can only use the resource (chat with an agent, or invoke a skill in agents) and cannot see any configuration details, files, or instructions. Use Only is ideal for end users who just need to interact with the resource without seeing how it works.
I'm an Editor but I can't change the Owner's role. Why?
I'm an Editor but I can't change the Owner's role. Why?
Owner grants cannot be modified or removed through the sharing UI. Ownership can only be transferred explicitly by the current Owner. This protects the creator’s control over their resource.
Why can't I set my team resource to Restricted?
Why can't I set my team resource to Restricted?
Resources in a team inherently belong to that team, so team access is the minimum. If you need more restrictive access, move the resource to your personal space first, then share with specific users.
If I make a workflow public, does that make its interface public too?
If I make a workflow public, does that make its interface public too?
No. Workflow access and interface access are configured independently. Making a workflow public does not affect its interface’s access settings, and vice versa.
What can anonymous users do with a public resource?
What can anonymous users do with a public resource?
Anonymous (unauthenticated) users are capped at Viewer access regardless of the public grant’s role setting. They can view the resource but cannot edit, run, or manage anything. They must sign in to get elevated access.
Related Documentation
Organization & Teams
Understand personal spaces, teams, and organizations
Organization Roles
Admin, Manager, and Member roles at the org level
User Groups
Enterprise feature restrictions including public sharing controls