- A specific time arrives (like 9 AM every day)
- A new email lands in your Gmail
- Someone submits your Typeform
- A new record is added to your Airtable
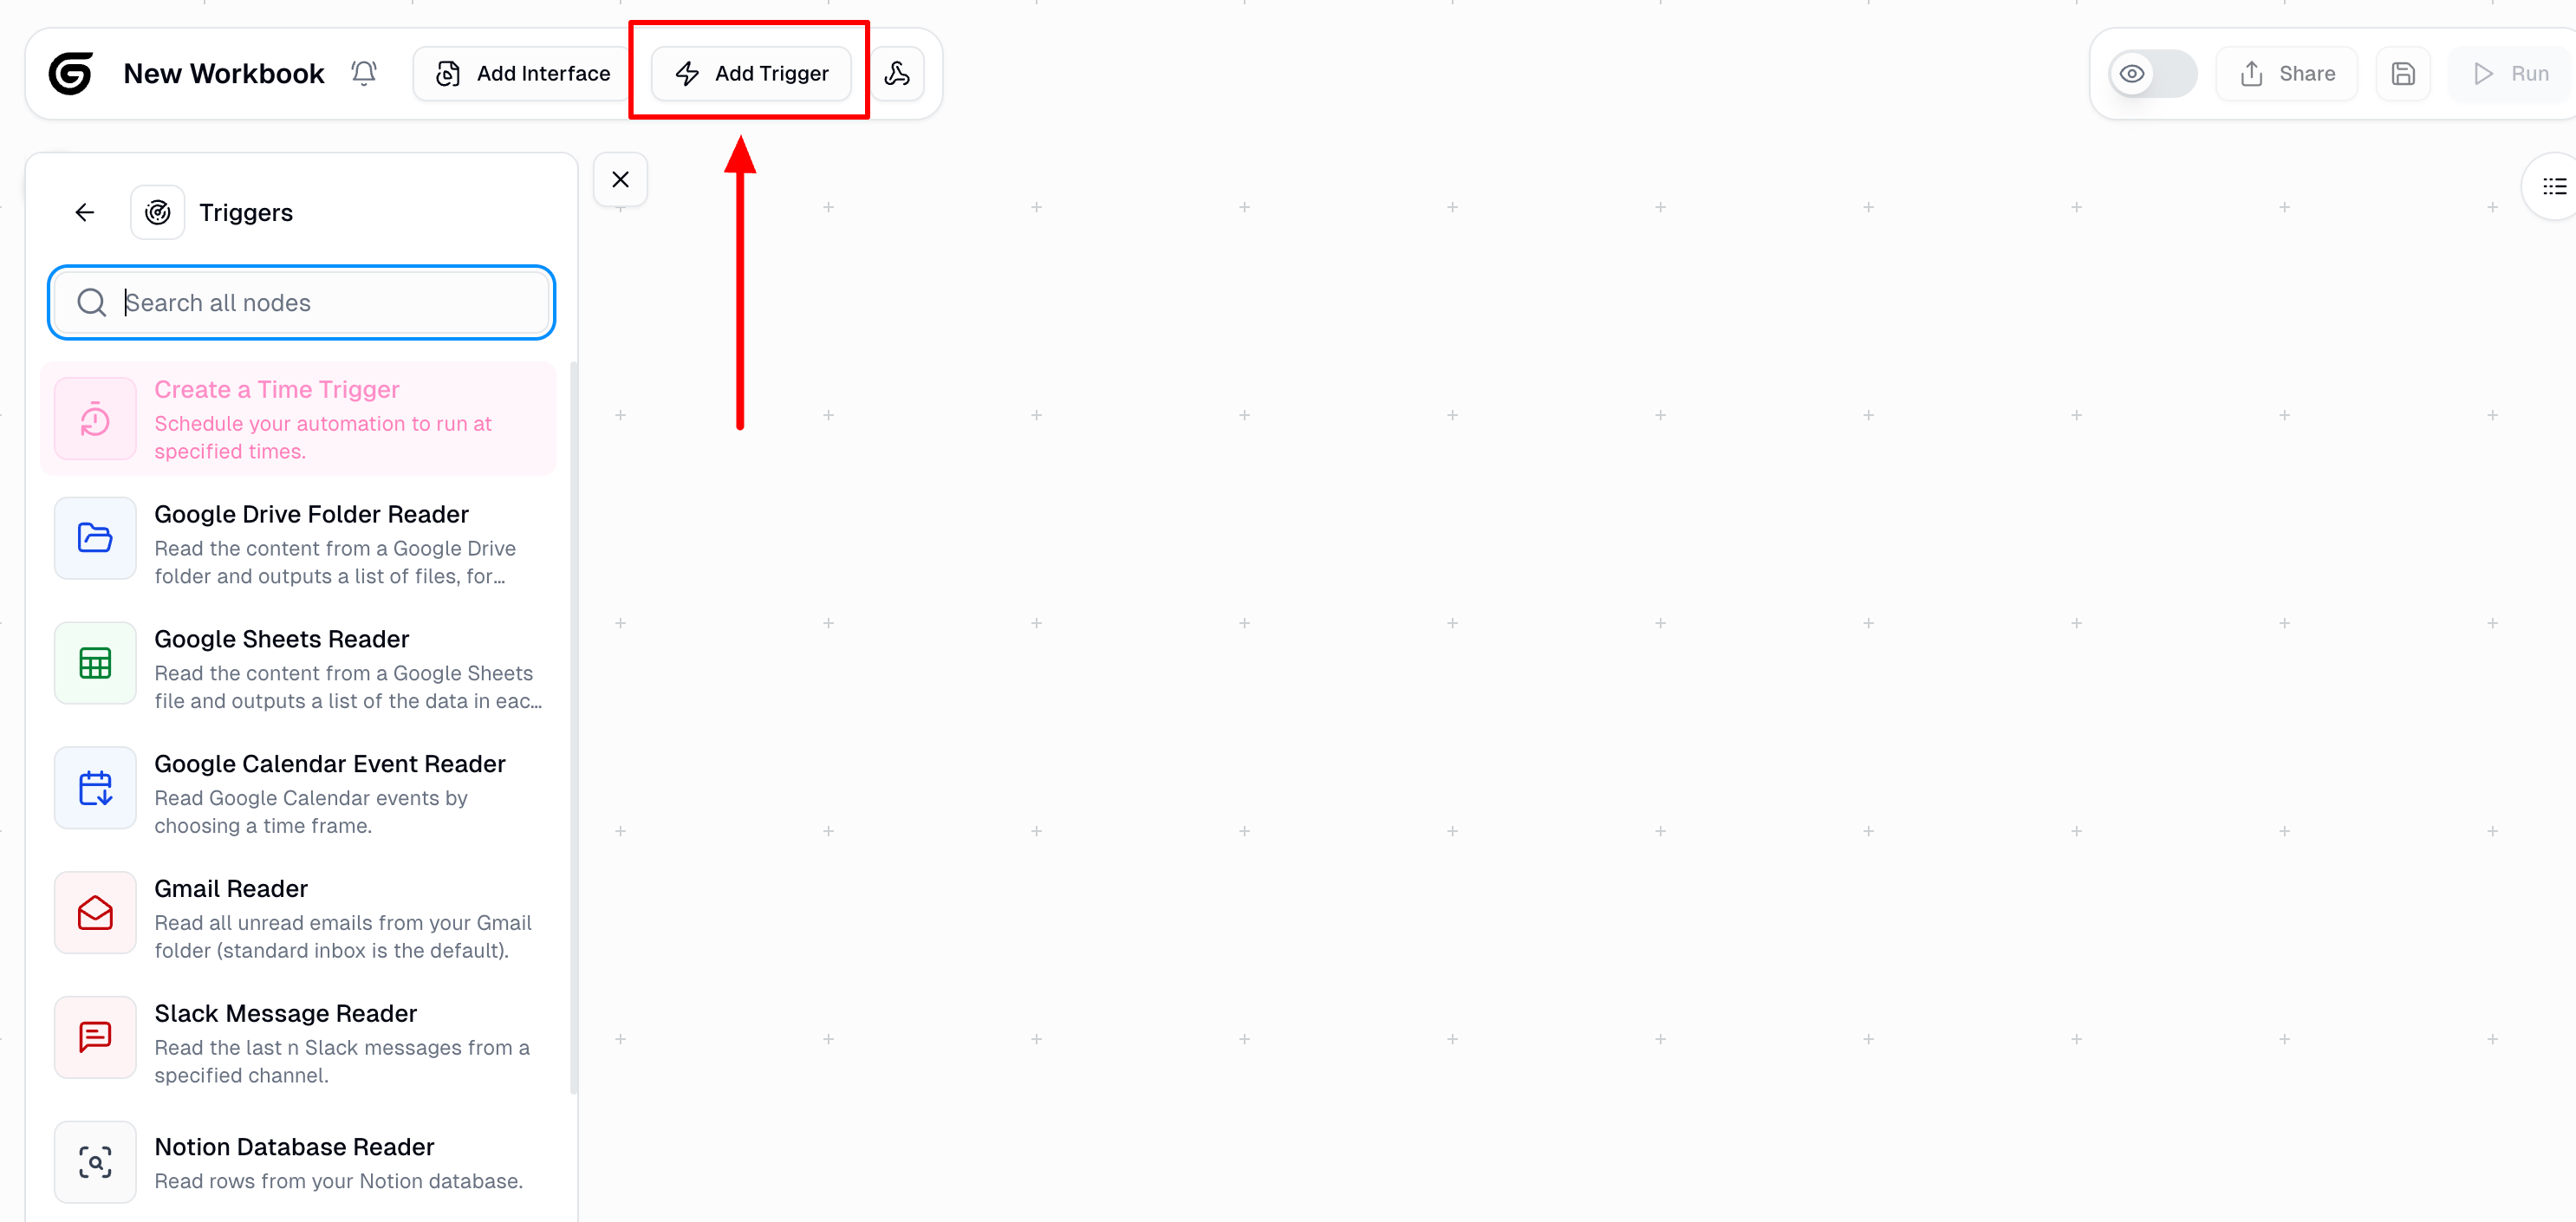
Types of Triggers
Time Based
Schedule workflows to run at specific times with daily, weekly, or custom schedules. Perfect for automating regular tasks.
Webhooks
Start your workflows from external applications. Useful for connecting Gumloop with your other tools.
Email & Messaging
Trigger workflows from Gmail messages, Slack channels, Microsoft Teams channels, or other communication platforms.
Database & Forms
Automatically respond to changes in Airtable, Notion, Google Sheets, or form submissions.
Time Based Triggers
The time trigger is available under the ‘Triggers’ category in the Node Library. You can configure the time settings by specifying how frequently the workflow should run or by customizing the settings manually using the settings cog.Manual Time Settings
Time Configuration Parameters
Time Configuration Parameters
- Minute: The exact minute within the hour (e.g.,
0for the start of the hour) - Hour: The specific hour of the day (e.g.,
6for 6:00 AM) - Day of Month: The specific day(s) of the month (use
*for all days) - Month: The specific month(s) (use
*for all months) - Day of Week: The day of the week (
0and7= Sunday,1= Monday, etc.) - Timezone: The time zone for the schedule
- Max Failure Count: The number of retry attempts if a trigger fails
Example Configuration: The workflow is configured to run every Monday at 6:00 AM Pacific Time, with up to 3 retry attempts if it fails.
Webhooks
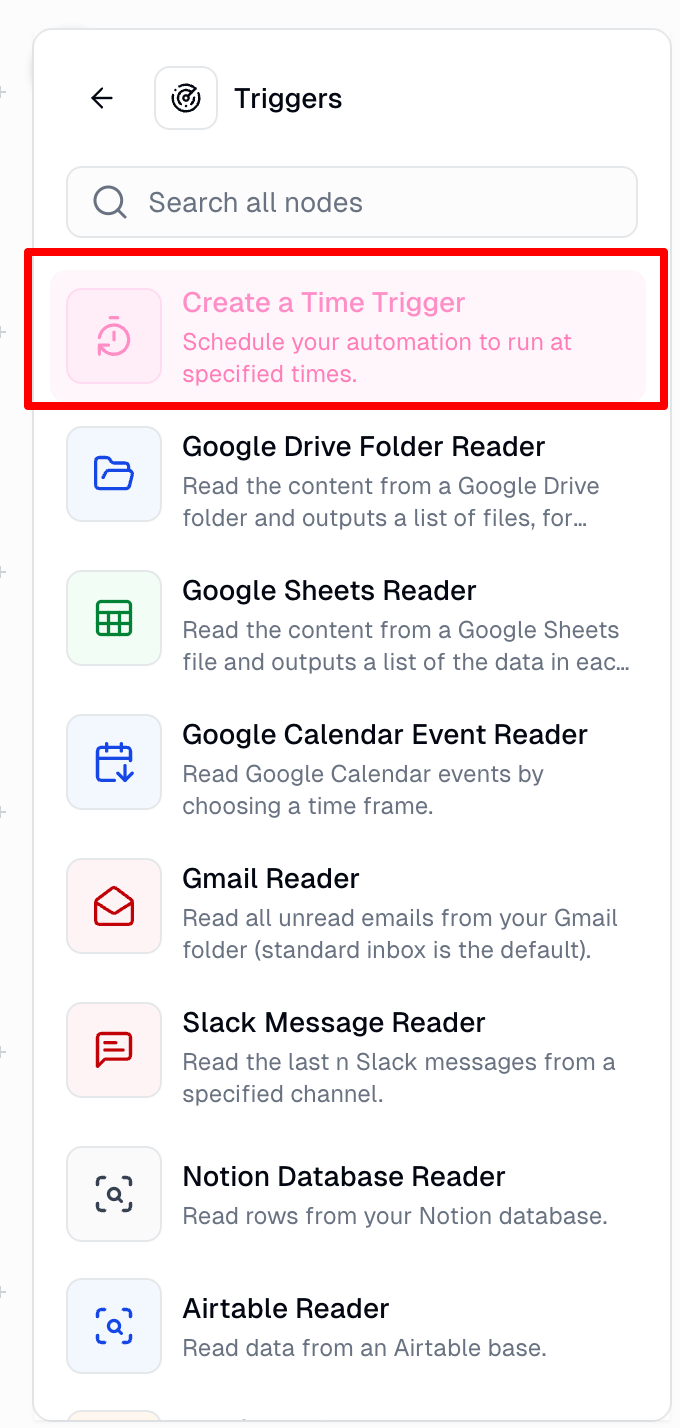
You can add the webhook trigger by clicking on the webhook icon on the top bar:
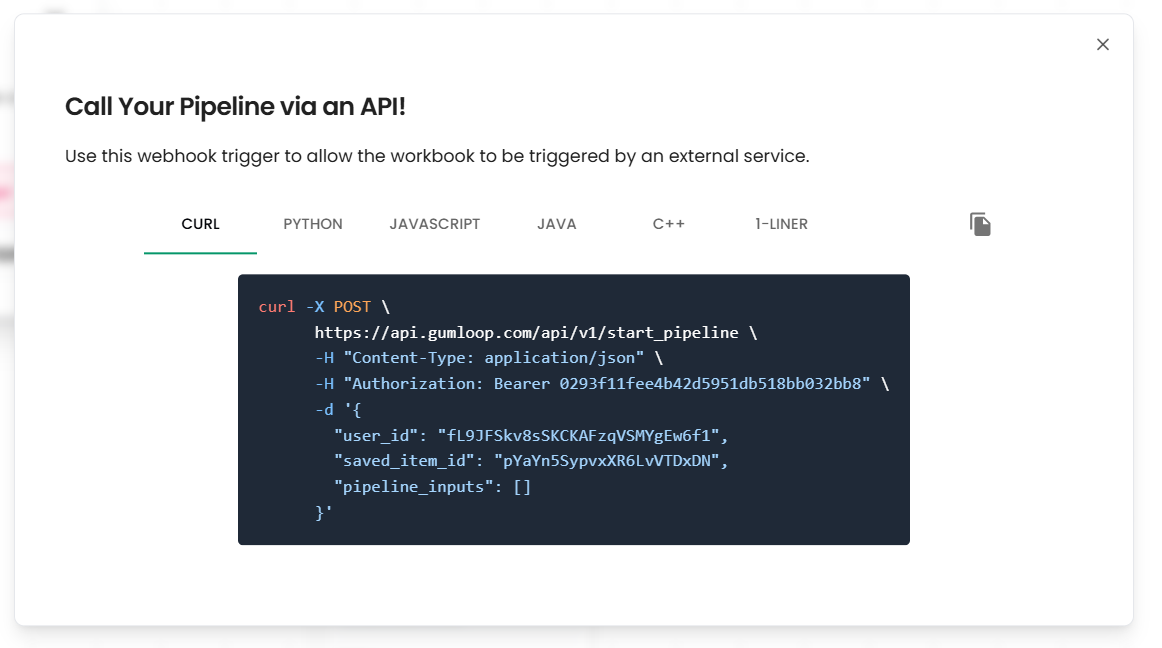
Triggers as Nodes
Drop these nodes directly into your workflow and toggle the “Activate as workflow trigger” option to trigger your automation:Gmail
Starts your workflow when you receive new emails. It can be set to a specific label or your entire inbox.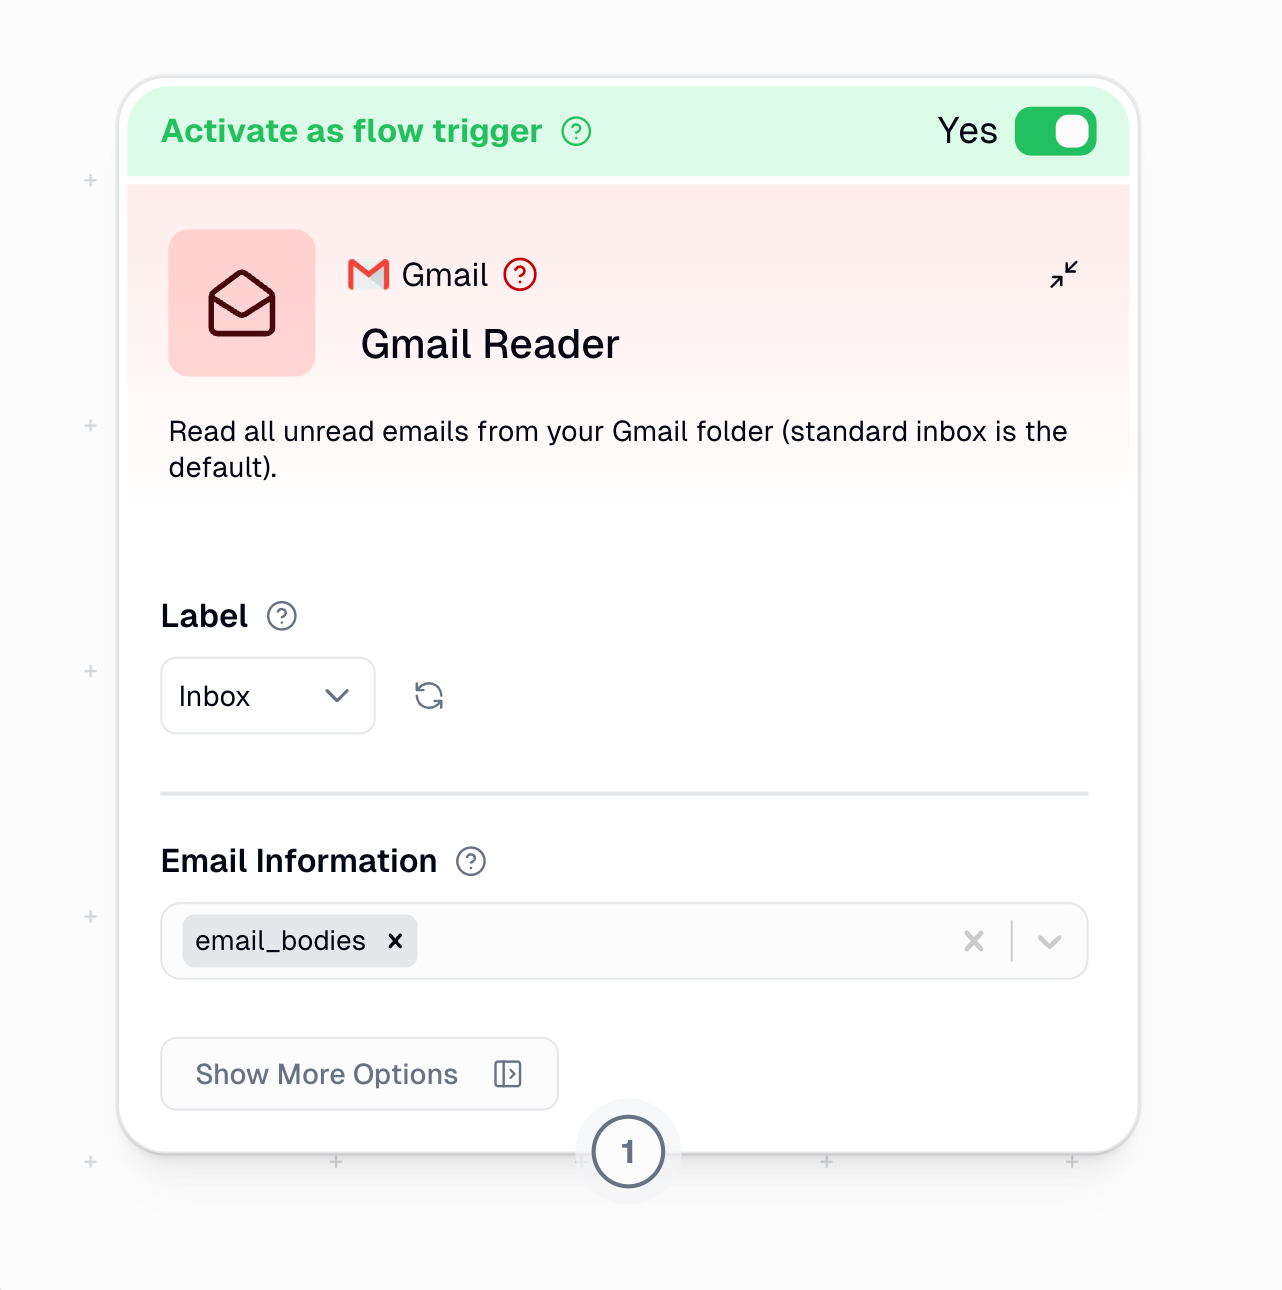
Slack
Starts your workflow when you receive a new message in the specified channel. Can work on both new messages and thread replies.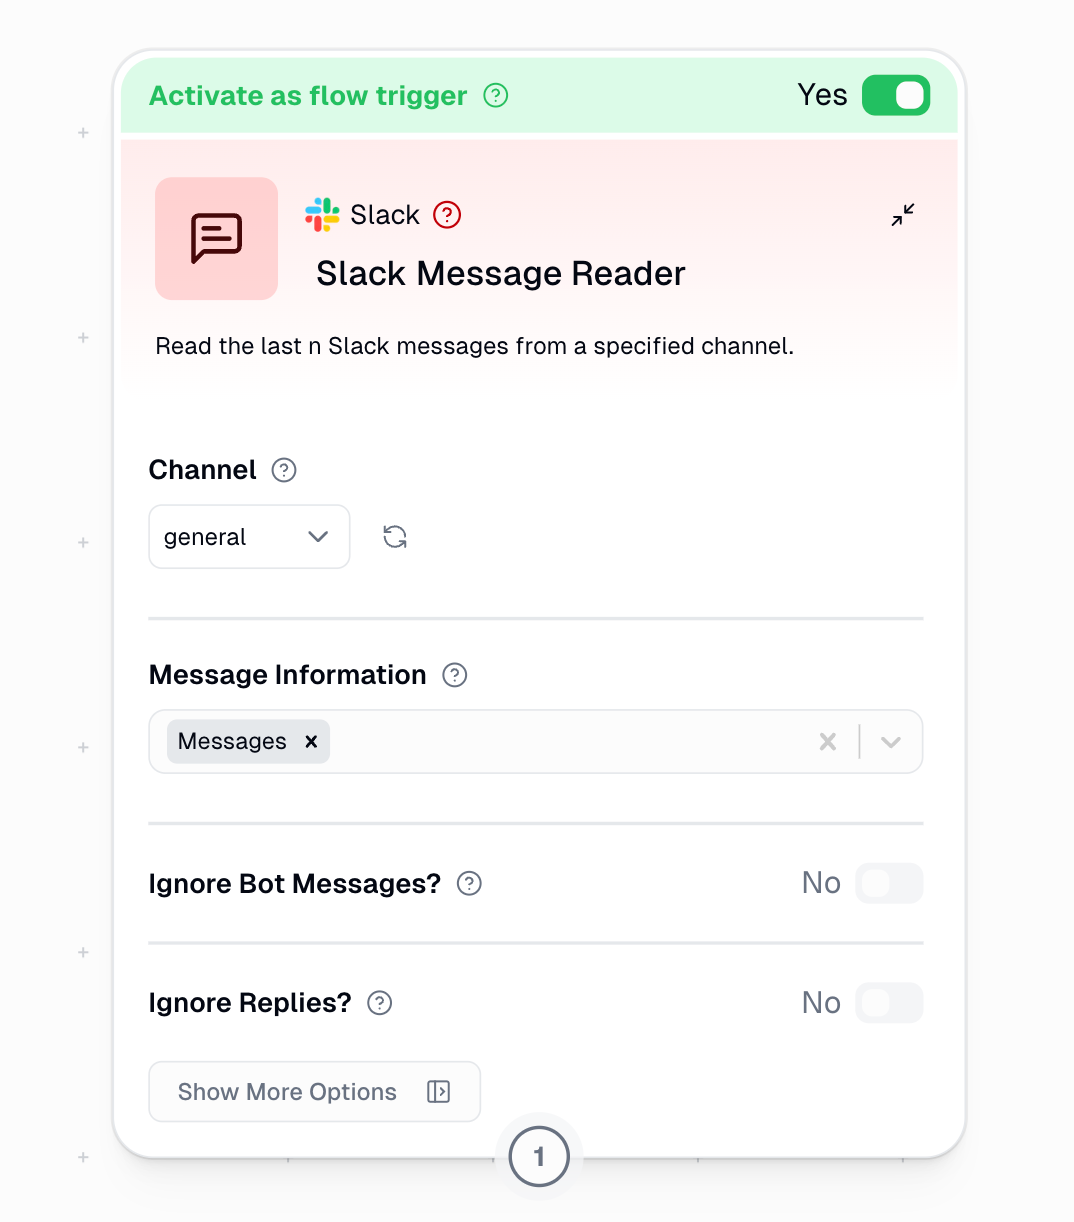
Filtering Options
When using the Slack Message Reader as a trigger, two important filtering options help you control exactly which messages will start your workflow:- Ignore Bot Messages
- Ignore Replies
This toggle controls whether automated messages should trigger your workflow.
- No (Default): All messages will trigger your workflow, including those from bots and integrations
- Yes (Recommended): Only human-generated messages will trigger your workflow
- Prevents potential trigger loops where your workflow output triggers itself
- Reduces noise from system notifications and other automated messages
- Essential when your workflow posts back to the same channel
Recommended Trigger Settings
For most automations, we recommend:- Ignore Bot Messages: Yes - Prevents trigger loops and focuses on human communications
- Ignore Replies: No - Captures all relevant communications including thread discussions
Microsoft Teams
Starts your flow when a new message is posted in a specified Microsoft Teams channel. Works with both new messages and thread replies.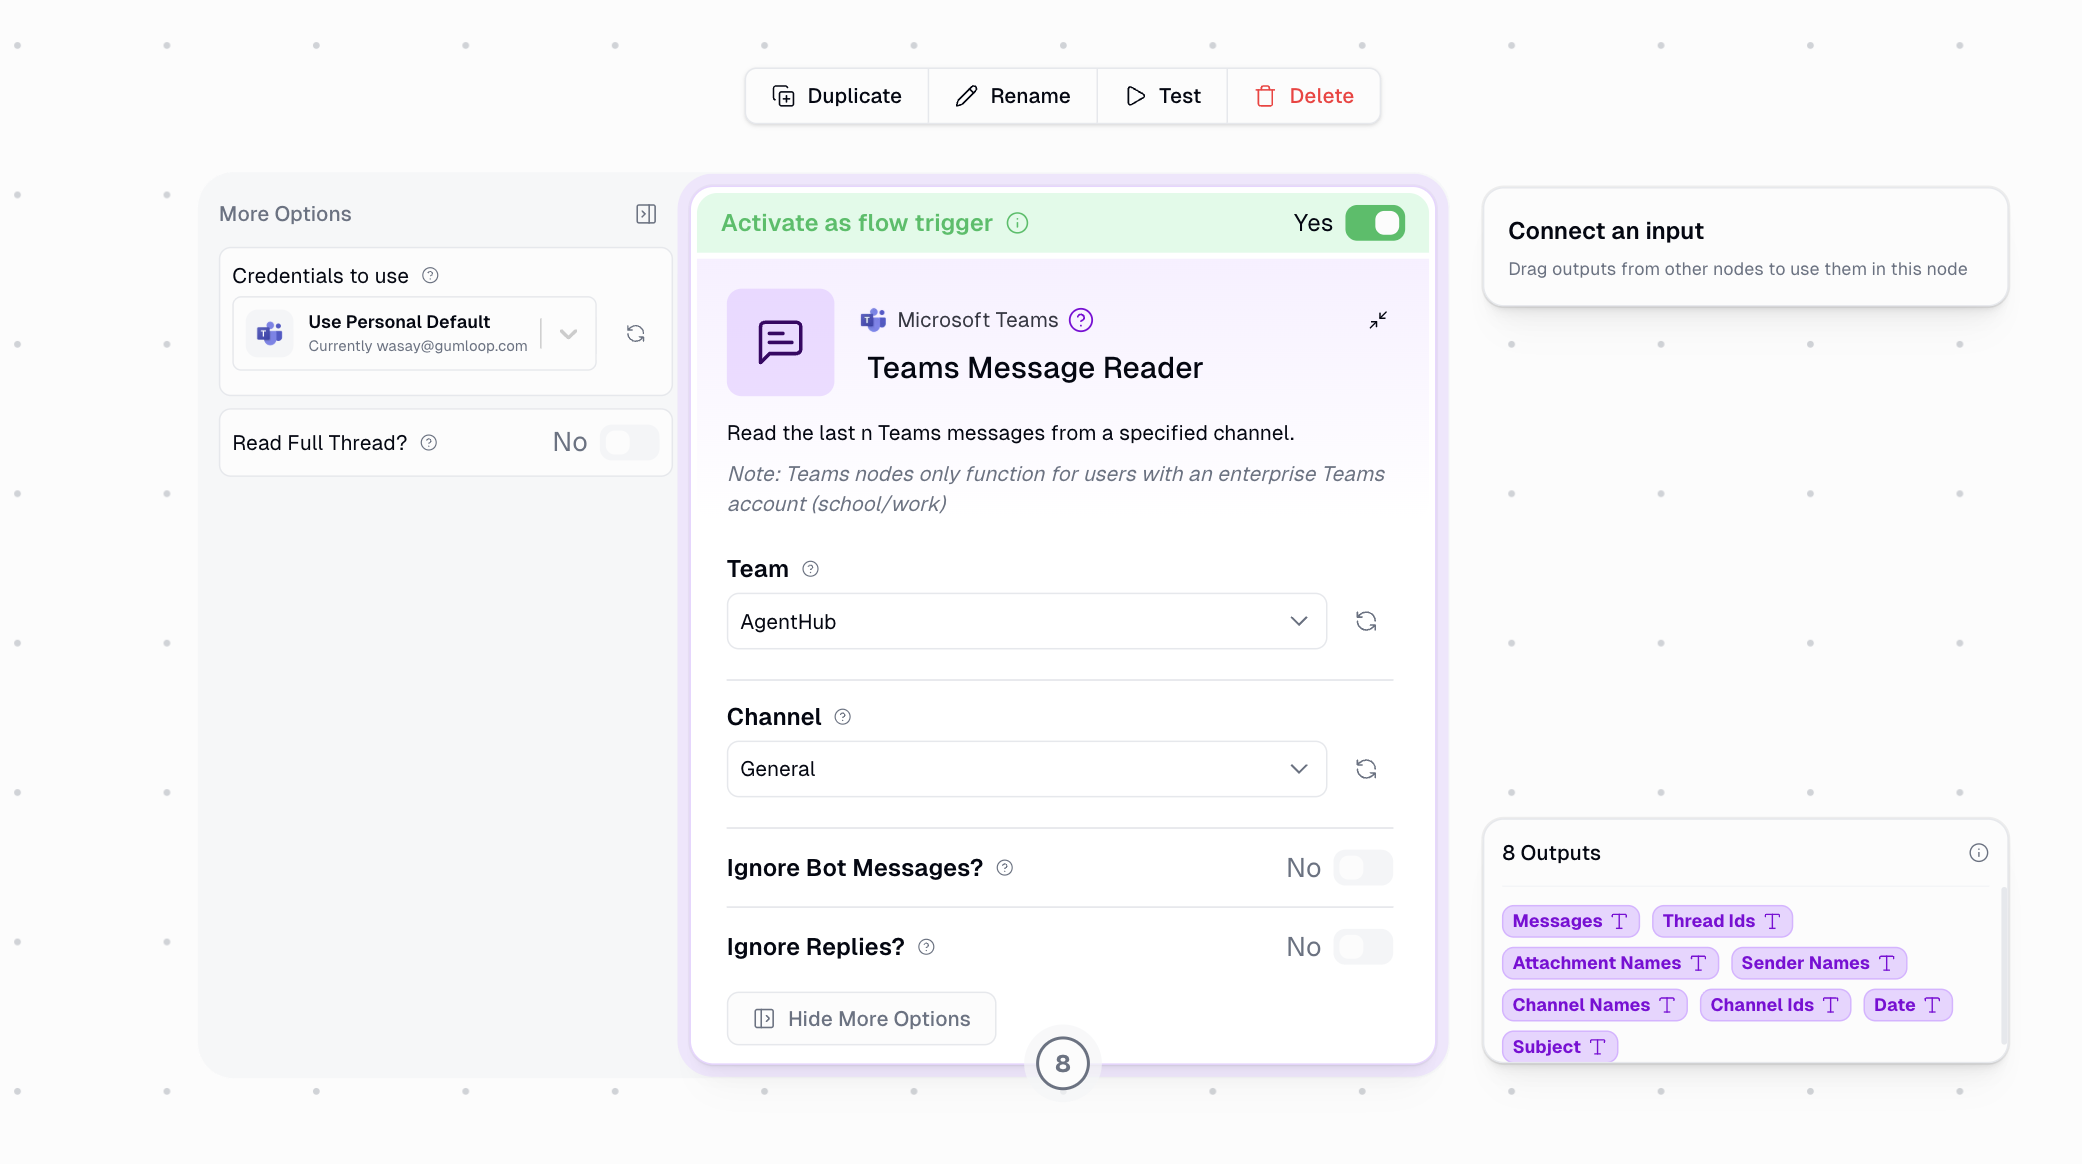
Filtering Options
When using the Teams Message Reader as a trigger, two filtering options help you control which messages start your flow:- Ignore Bot Messages
- Ignore Replies
This toggle controls whether automated messages should trigger your flow.
- No (Default): All messages will trigger your flow, including those from bots and applications
- Yes (Recommended): Only human-generated messages will trigger your flow
- Prevents potential trigger loops where your flow output triggers itself
- Reduces noise from system notifications and other automated messages
- Essential when your flow posts back to the same channel
Recommended Trigger Settings
For most automations, we recommend:- Ignore Bot Messages: Yes - Prevents trigger loops and focuses on human communications
- Ignore Replies: No - Captures all relevant communications including thread discussions
Configuration Steps
Configuration Steps
- Add the Teams Message Reader node to your flow
- Select your Team and Channel
- Toggle
Activate as flow trigger - Configure filtering options (Ignore Bot Messages, Ignore Replies)
- Save workflow
Additional Options
Additional Options
Read Full Thread: When enabled under “More Options”, the trigger will fetch the full thread for each incoming message instead of just the new message.
Use Cases
Use Cases
- Auto-respond to customer questions in support channels
- Route messages to different workflows based on content
- Log channel activity to external systems
- Bridge communications between Teams and other platforms
Output Data: When used as a trigger, the node outputs single values (not lists) for each field: Message, Thread ID, Attachment Names, Sender Name, Channel Name, Channel ID, Date, and Subject.
Incident.io
Automatically starts your workflow when new incidents are detected in incident.io. Polls for updates every 5 minutes.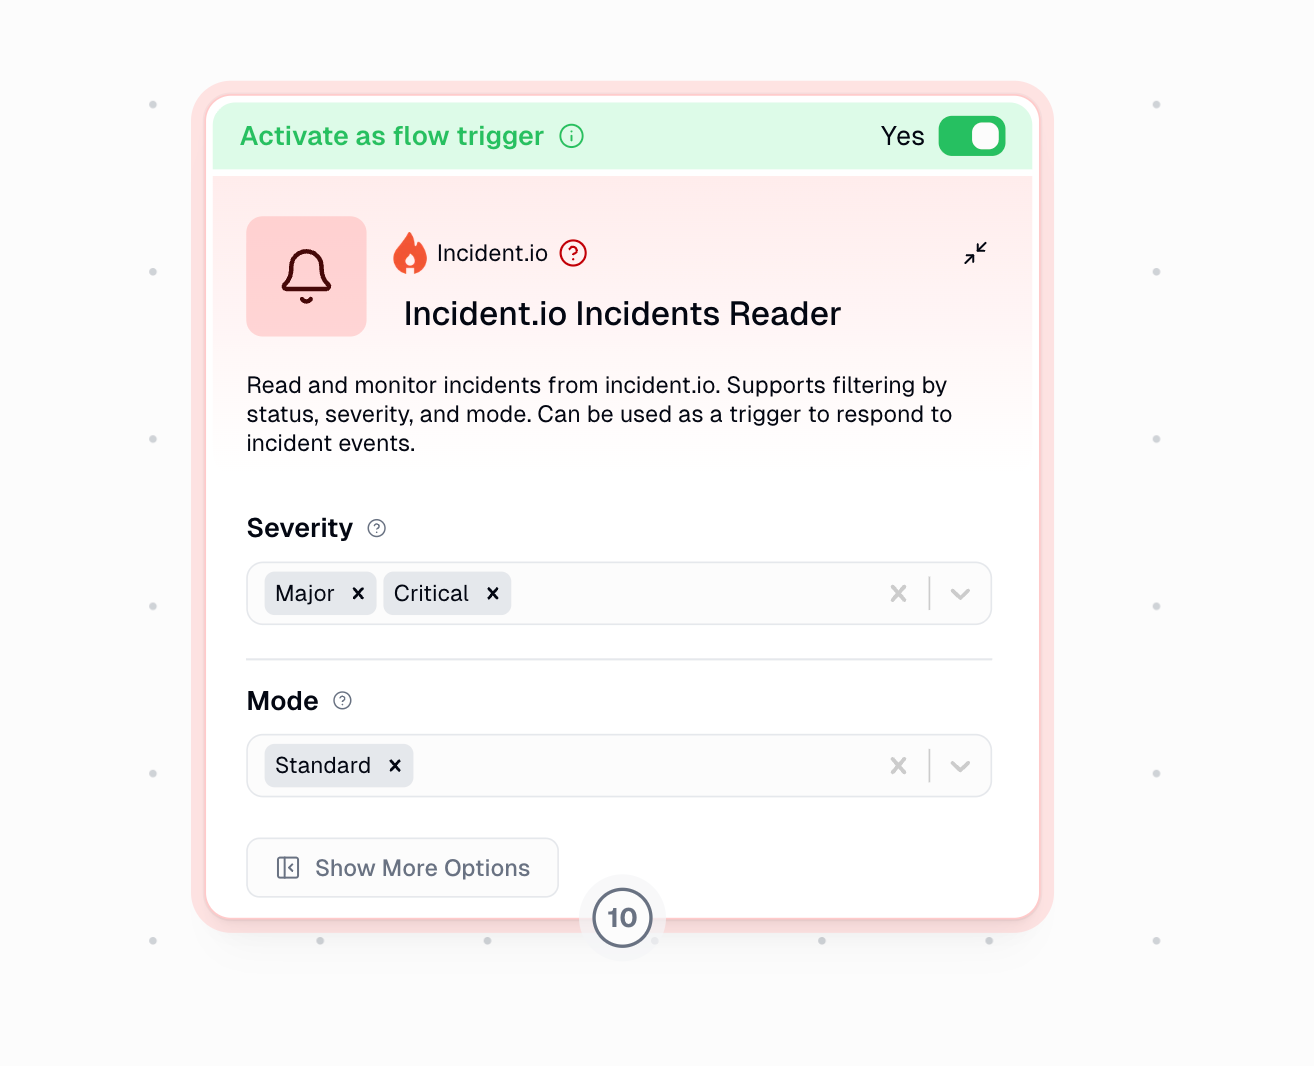
Configuration Steps
Configuration Steps
- Add the Incident.io Incidents Reader node to your workflow
- Configure filters for Severity and/or Mode (optional)
- Toggle
Activate as workflow trigger - Save workflow
Filter Options
Filter Options
Severity: Filter by incident priority (Minor, Major, Critical)Mode: Filter by incident type (Standard, Retrospective, Tutorial, Test)
Status filters are not applied in trigger mode, only Severity and Mode
Use Cases
Use Cases
- Automatically notify teams about critical incidents
- Create support tickets for major incidents
- Post incident updates to Slack channels
- Log incidents to tracking systems
Output Data: Provides incident ID, name, status, severity, timestamps, summary, permalink, and Slack channel ID as individual outputs
Airtable
Starts your workflow when your tables update.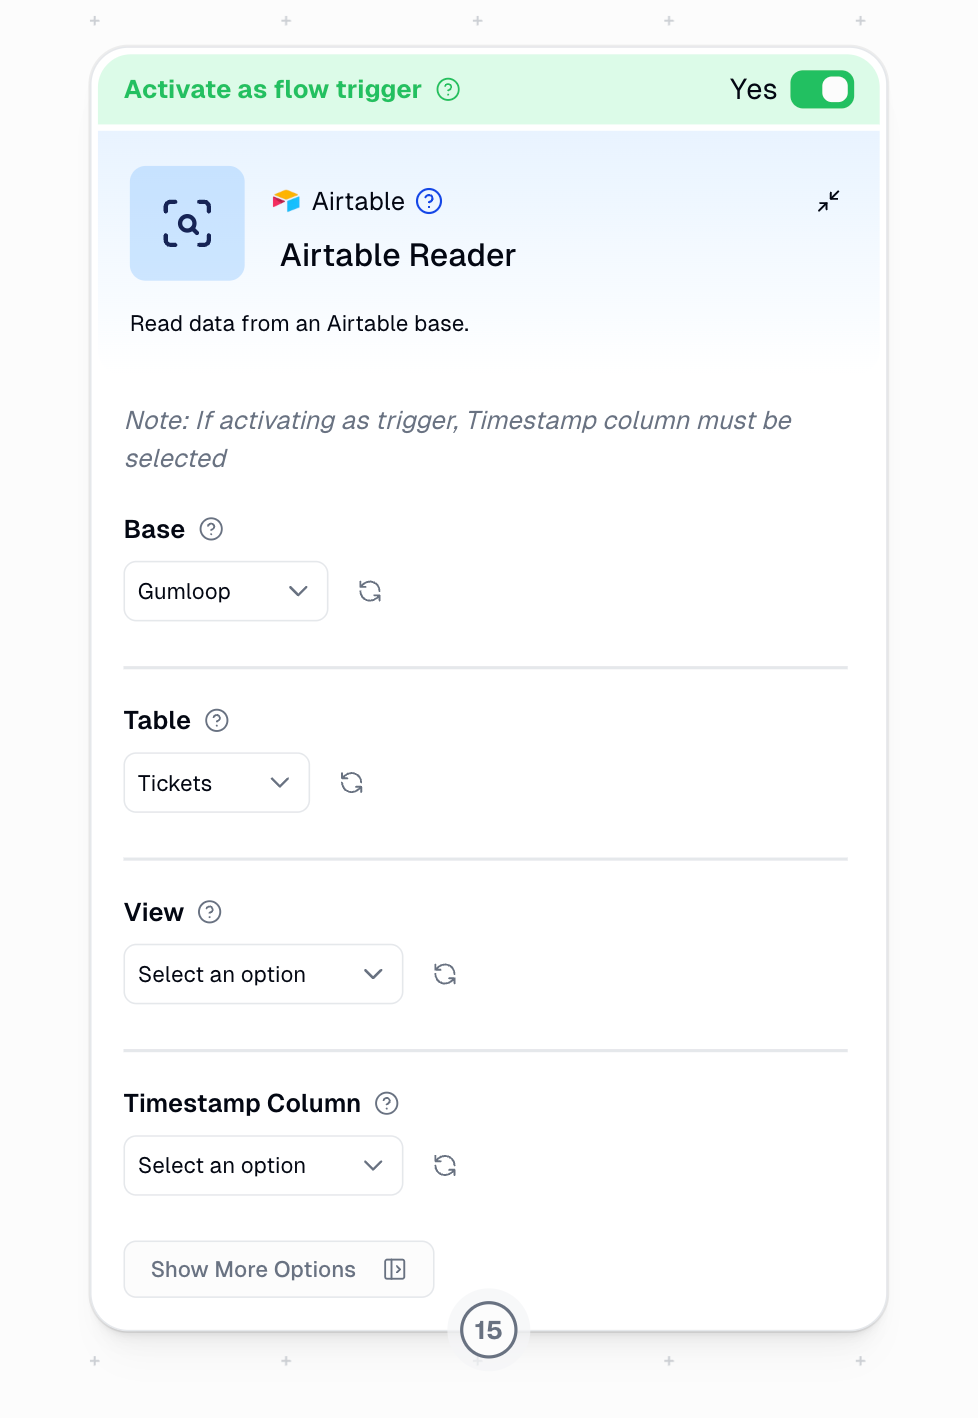
Add Last Modified Timestamp Field
Requires a “Last Modified Timestamp” field type column to track changes: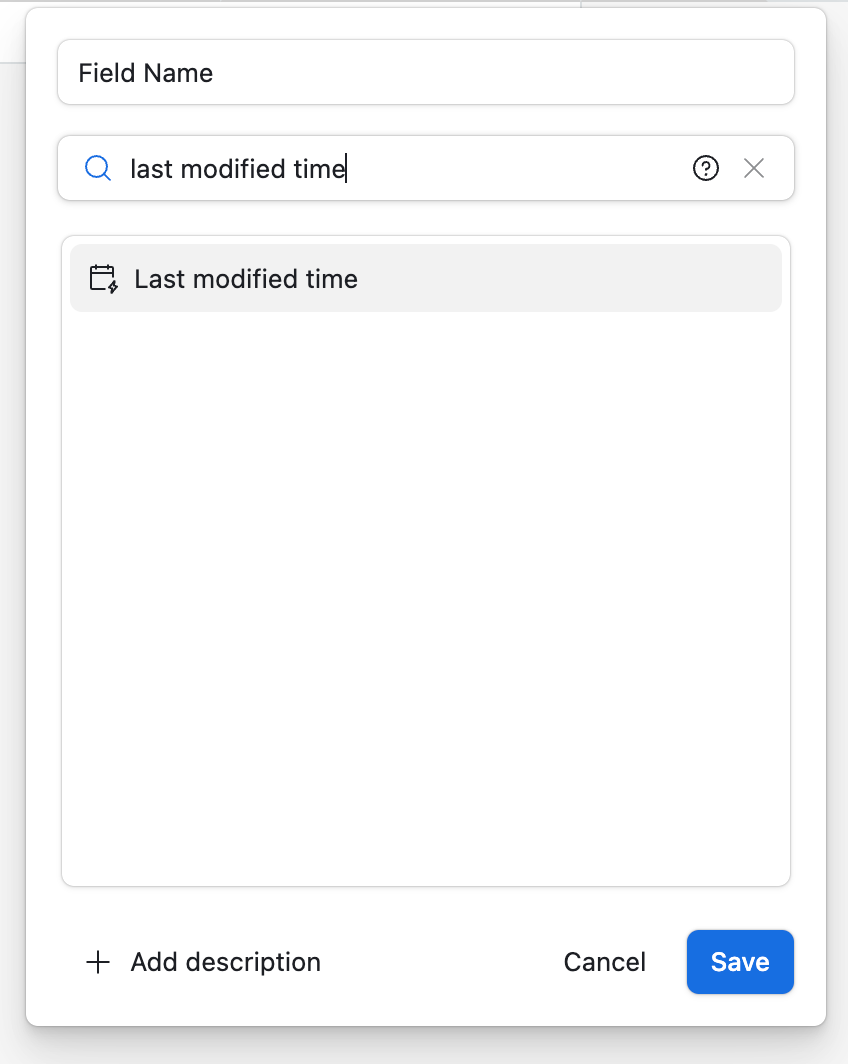

Configure Trigger
Set up the Airtable trigger in your workflow and toggle “Activate as workflow trigger”
Typeform
Triggers the workflow on new form submissions.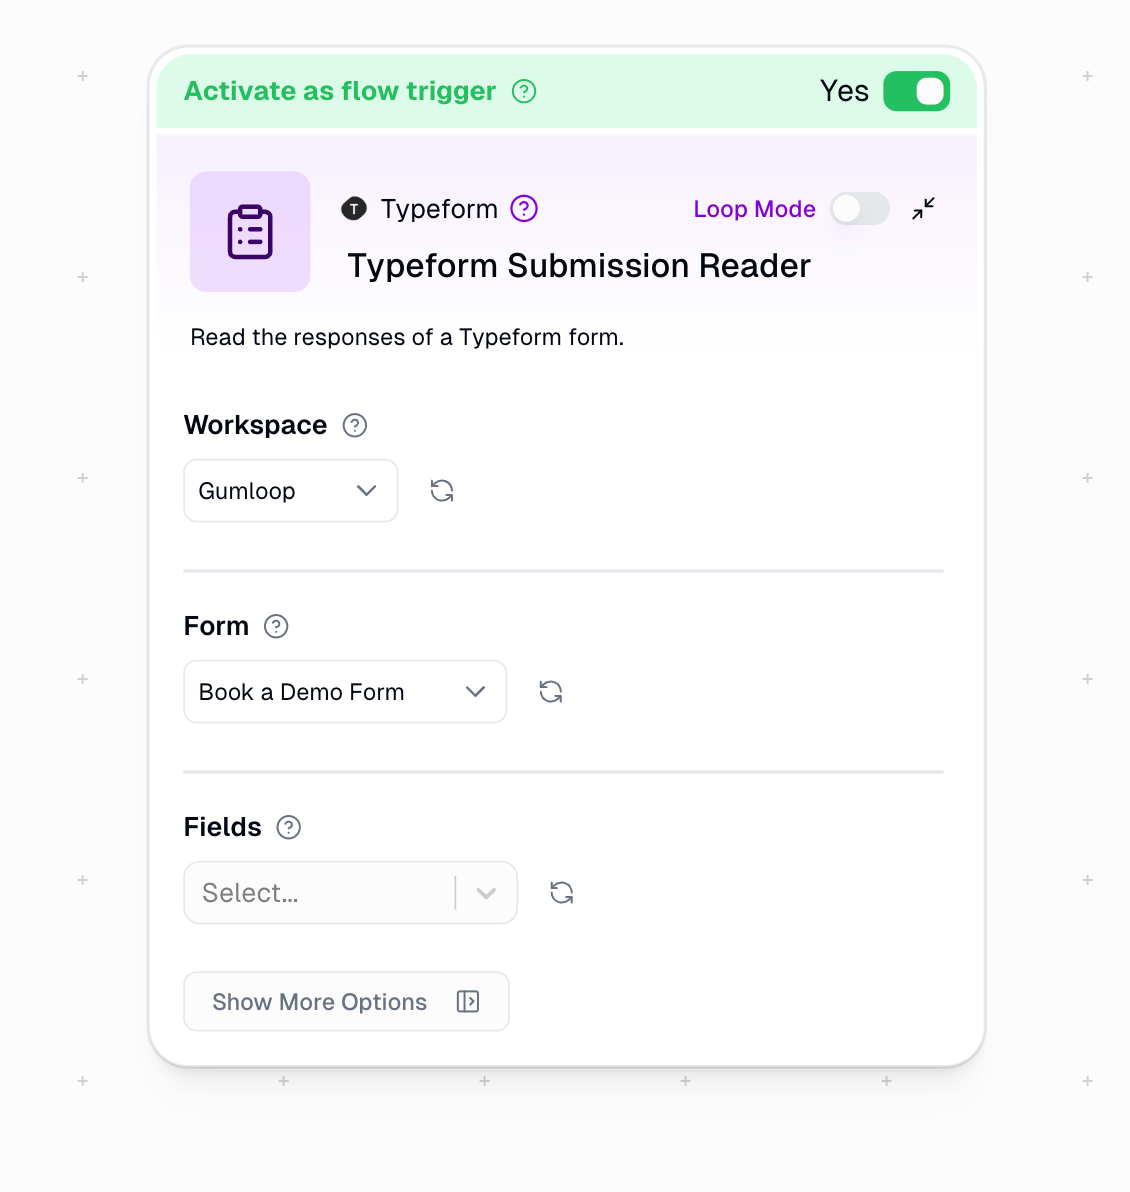
Notion
Starts your workflow when your database updates. Takes a few minutes to activate after creation. Polls for updates every 60 seconds.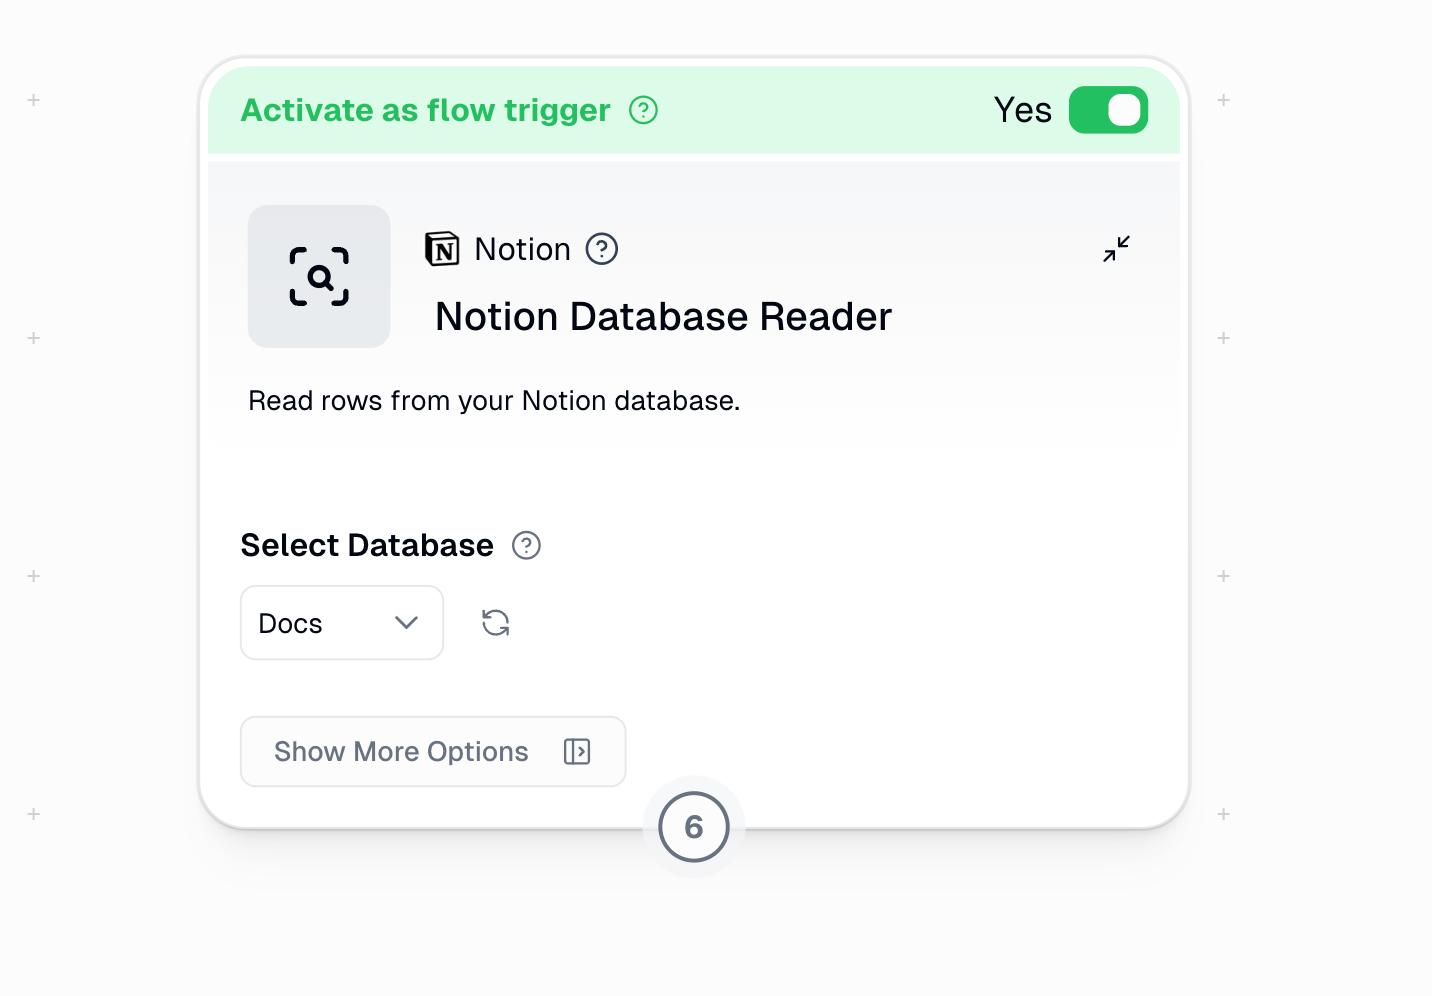
Google Drive
Starts your workflow when your selected Google Drive folder receives a new file upload.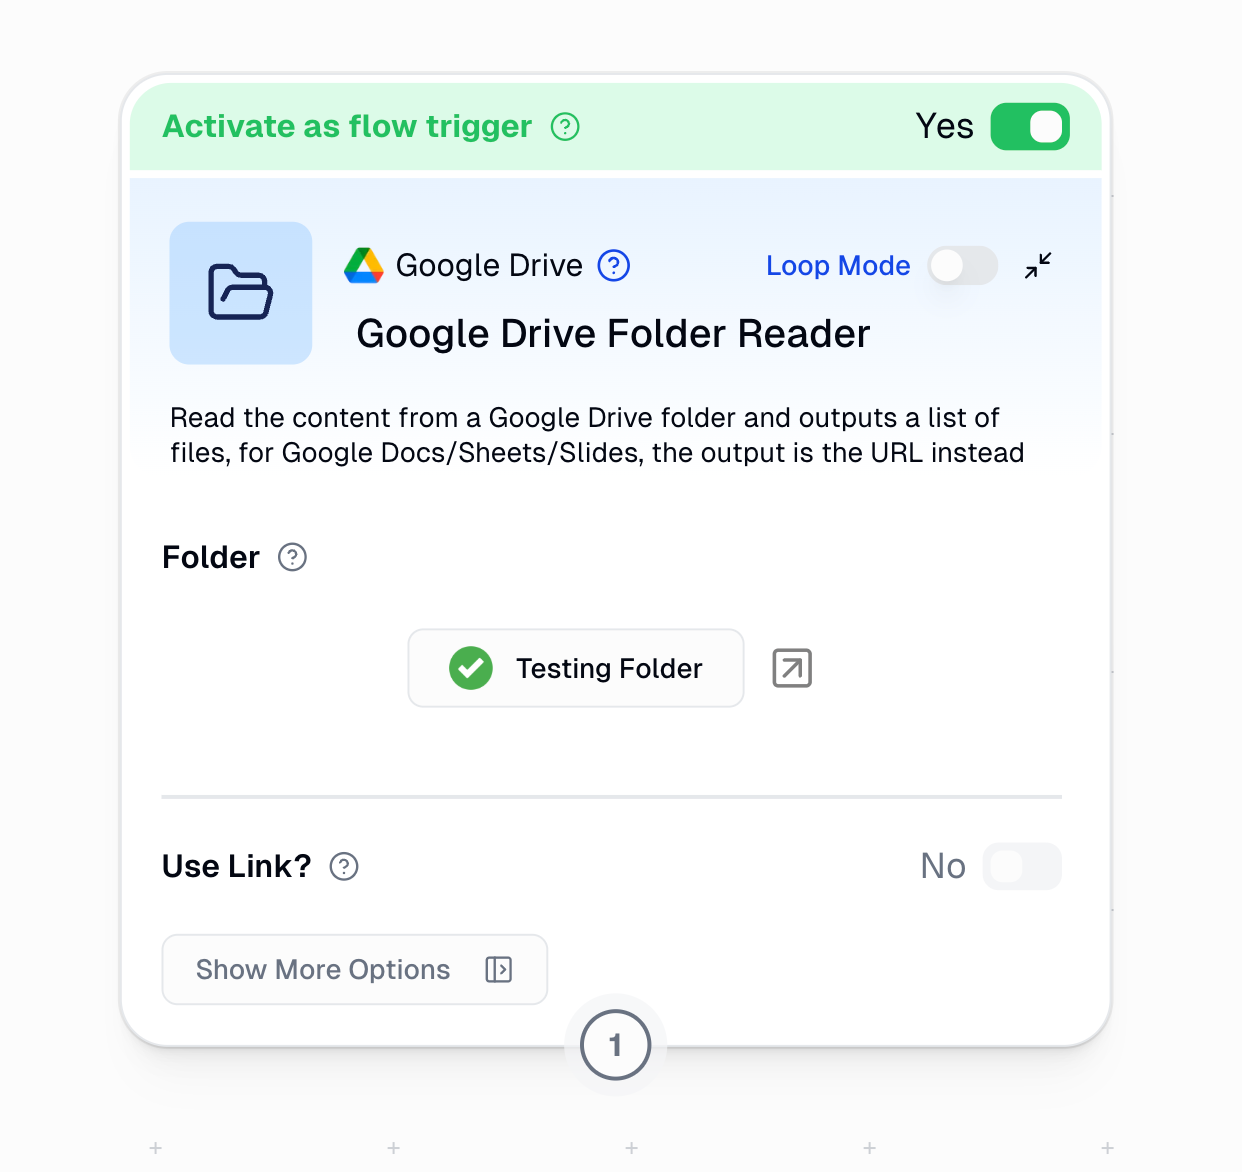
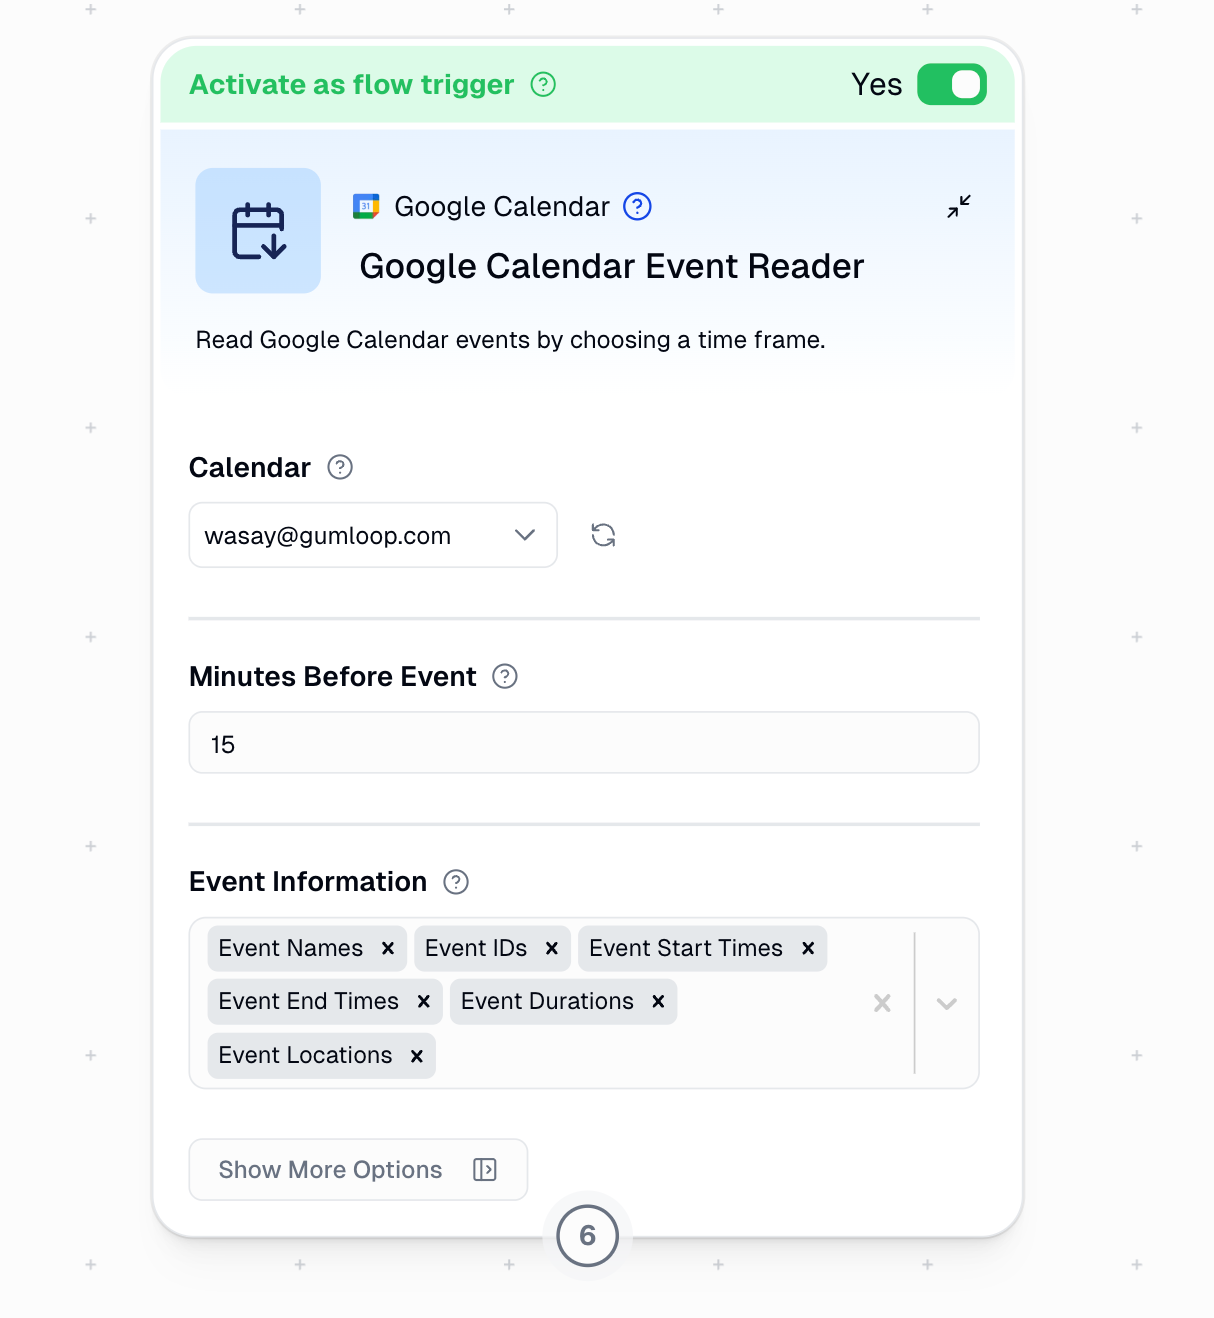
Google Calendar Event Reader
Triggers the workflowX minutes before every event on your calendar. Default time is 15 minutes, you can adjust this under the Minutes Before Event input.
Google Forms
Automatically starts your workflow when someone submits a Google Form. Perfect for automating follow-up actions based on form submissions.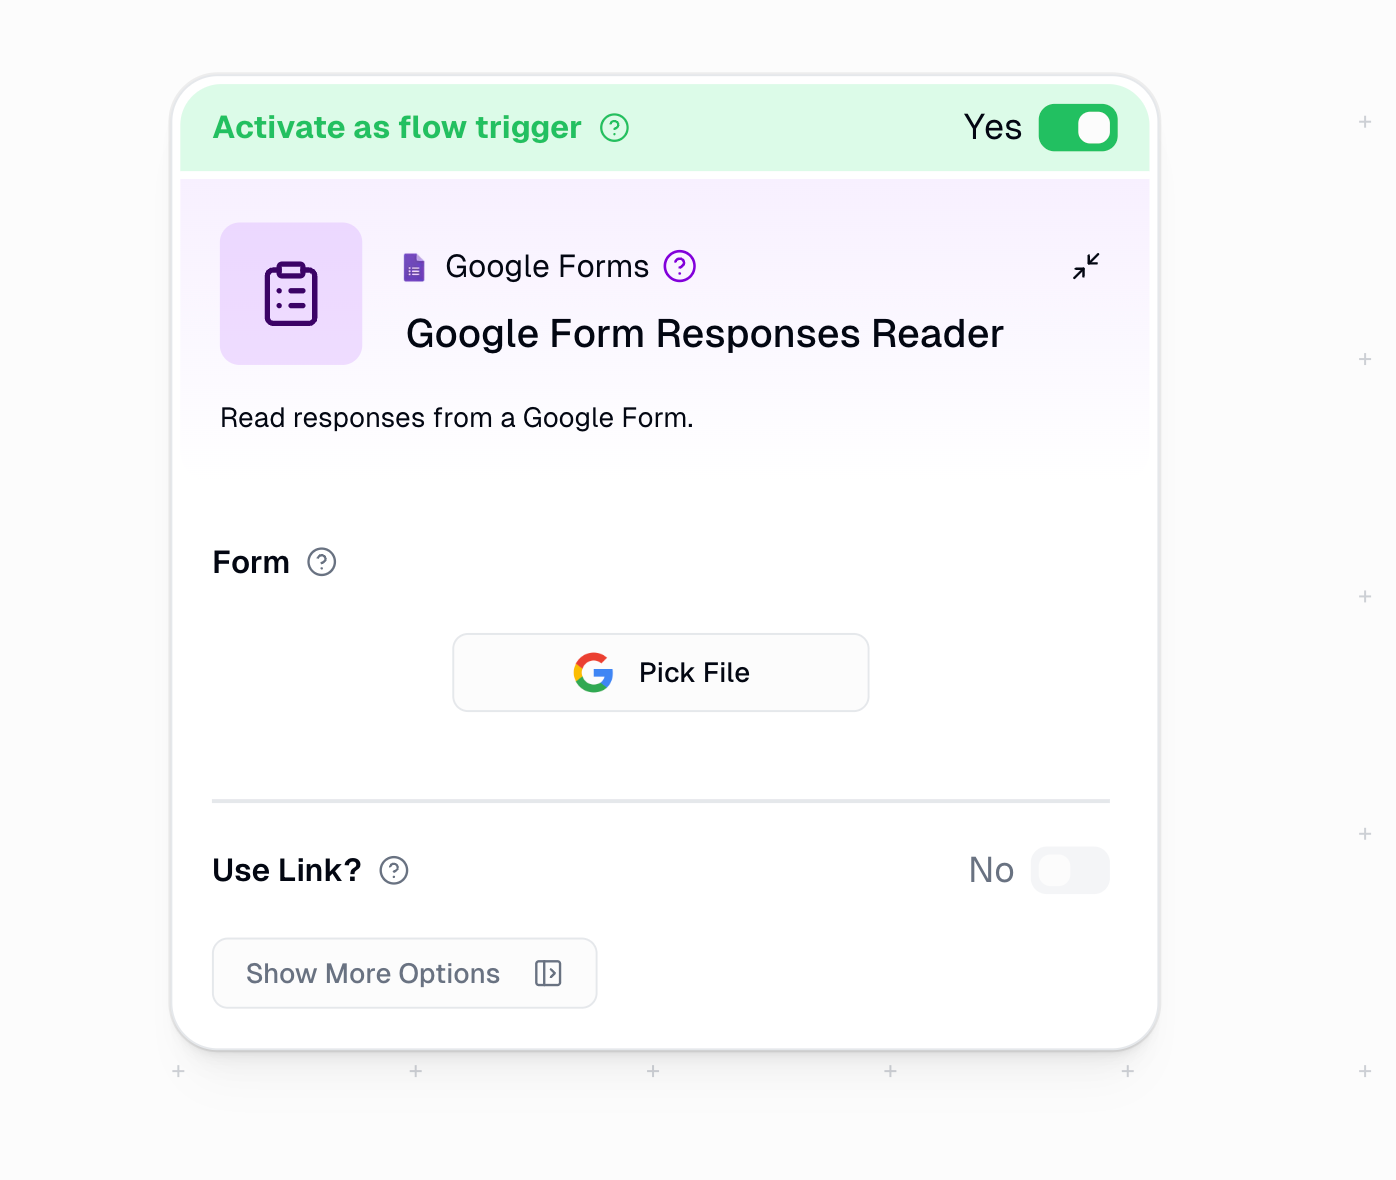
Configuration Steps
Configuration Steps
- Select your Google Form (via direct selection or URL)
- Toggle
Activate as workflow trigger - Save workflow
Use Cases
Use Cases
- Customer onboarding automation
- Survey response processing
- Lead qualification workflows
- Event registration handling
Output Data: Provides all submitted form fields as individual outputs
Google Sheets
Automatically starts your workflow when data in your Google Sheet changes.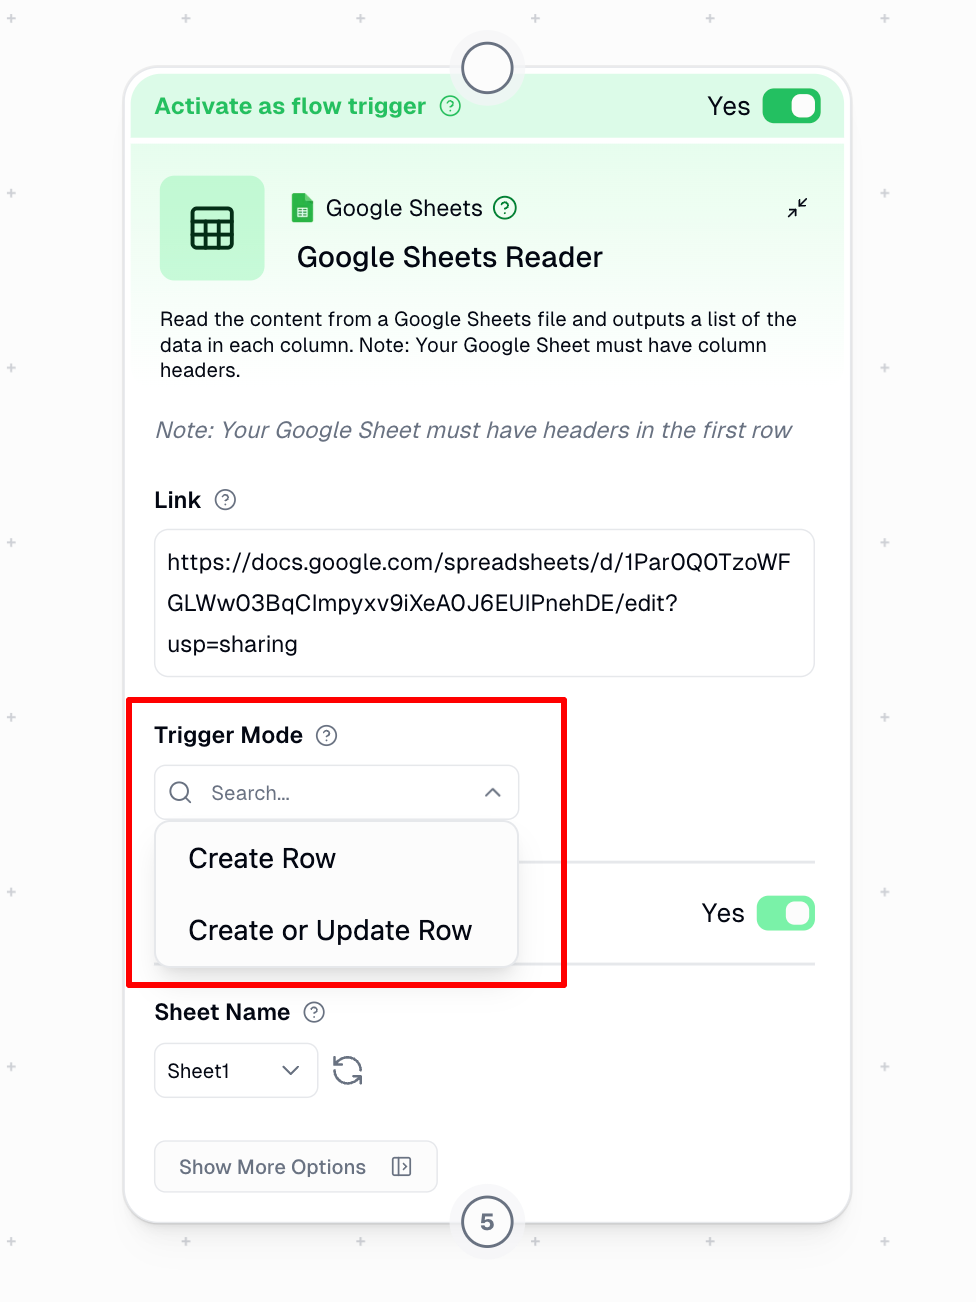
Trigger Modes
Two trigger modes are available:Create
Only triggers on new rows added to the sheet
Create or Update
Triggers when rows are added OR existing rows are modified
Understanding Row Events
- Row Creation: Triggers when any new row is added to your sheet
- Row Update: Triggers when any cell value is changed in any existing row
Configuration
Timing and Behavior
After creating or updating a trigger, it may take up to 5 minutes to become active. The system checks for updates approximately every 60 seconds thereafter.
Troubleshooting Google Sheets Triggers
Basic Checks
Basic Checks
- Verify Activation: Ensure you’ve saved the workflow after setting up the trigger and running the workflow manually works
- Check Permissions: Confirm your Google account has appropriate access to the spreadsheet
- Inspect Headers: Make sure your sheet has headers in the first row and at least one row of data thereafter
Testing and Updates
Testing and Updates
- Test Simple Changes: Test the trigger with a simple row addition to verify functionality
- Refresh Column Data: If you’ve modified your sheet structure, click the refresh icon (🔄) next to the Sheet Name and save
Mode-Specific Considerations
Mode-Specific Considerations
- Consider Row Order: If using the “Create” mode, remember that it only detects newly added rows, not modified existing rows
- Unique Identifiers: For mission-critical workflows, include a unique ID column to ensure reliable row tracking
Reset Trigger
Reset Trigger
Consider resetting the trigger by disabling the “Activate as workflow trigger” toggle, saving, enabling the same toggle and saving again
Understanding Edge Cases
- Column Changes
- Row Operations
- Adding New Columns: New columns are automatically included in trigger data
- Inserting Columns: System adapts to columns inserted between existing ones, but may trigger for any rows where the row hash changes
- Deleting Columns: System adapts to columns deleted between existing ones, but may trigger for any rows where the row hash changes
Zendesk
Automatically starts your workflow when ticket events occur in Zendesk. Supports multiple trigger modes for different use cases.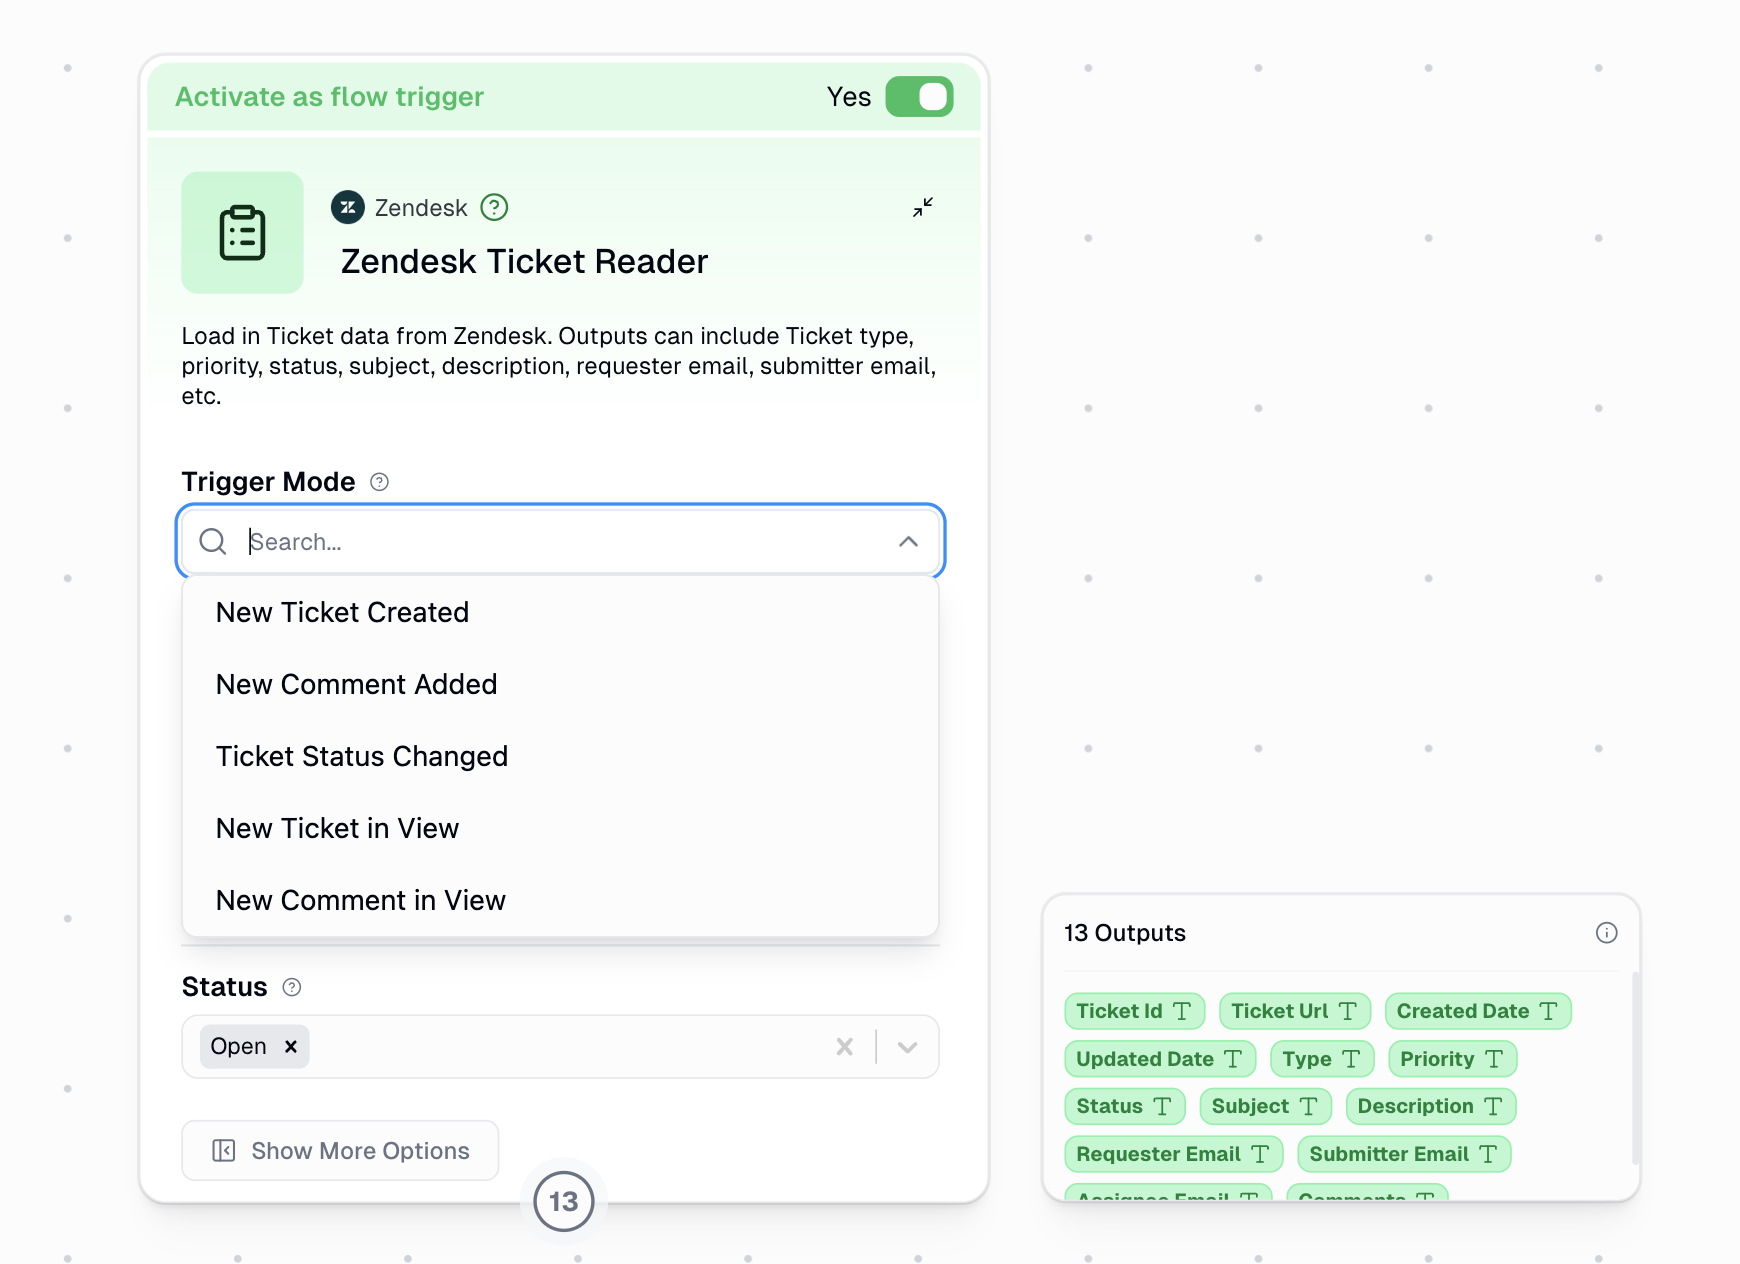
Trigger Modes
- New Ticket Created
- New Comment Added
- Ticket Status Changed
- View-Based Triggers
Triggers when a new ticket is created in Zendesk. You can filter by Type, Priority, and Status to only trigger on specific tickets.
Configuration Steps
Configuration Steps
- Add the Zendesk Ticket Reader node to your workflow
- Toggle
Activate as workflow trigger - Select a Trigger Mode from the dropdown
- Configure filters (Type, Priority, Status) or select a View
- Save workflow
Filter Options
Filter Options
Type: Filter by ticket type (Question, Incident, Problem, Task, Empty)Priority: Filter by urgency (Low, Normal, High, Urgent, Empty)Status: Filter by ticket state (Open, Pending, Solved)
View-based triggers use the View’s built-in filters instead of Type/Priority/Status
Use Cases
Use Cases
- Alert teams when urgent tickets are created
- Track customer responses with comment triggers
- Escalate tickets that change to pending status
- Monitor SLA compliance with view-based triggers
Output Data: Provides Ticket ID, URL, Created Date, Updated Date, Type, Priority, Status, Subject, Description, Requester Email, Submitter Email, Assignee Email, and Comments as individual outputs
Setting Up Triggers
Sharing Triggers via Interfaces
If you’ve built a workflow with triggers and want to let others subscribe to it without giving them access to the workflow itself, you can use Workflow Subscriptions.Workflow Subscriptions
Let users subscribe to your workflow’s triggers through an Interface. Subscribers configure their own trigger settings—schedule, Gmail label, Slack channel, etc.—and provide their input values. The workflow runs automatically when the trigger fires.
How It Works
- Create an Interface for your workflow
- Enable Allow Workflow Subscriptions in the Form Builder
- Share the interface link with users
- Users subscribe by configuring the trigger and filling in the form inputs
Workflow Subscriptions are ideal when you want others to benefit from your automation without managing their own copy of the workflow. For cases where users need to customize the workflow logic, consider Organization Templates instead.
Important Notes
- Triggers are only available on the Solo tier and above
- One workflow can have multiple triggers
- Always save your workflow before and after adding triggers
- Test your triggers after setup

