

Overview
Connectors let your agents use services such as Gmail, Slack, and Salesforce. Add the connectors an agent needs, then connect an account for each service. You can connect multiple accounts and choose which one the agent uses. A connector provides tools for a service. Its connected accounts provide authentication, such as OAuth authorization or an API key. Secrets are separate: they store values an agent uses in its code sandbox. See Code Sandbox & Secrets.Personal connectors
Private to you. Perfect for individual work, testing, and personal accounts.
Team connectors
Shared with your team. Use a team account when everyone should work through the same service account.
Personal vs team connectors
Connect an account
Connect an account once, then reuse it across your agents. A personal account is available to you; a team account is available to members of that team.Connect a personal connector
1
Go to your Connectors page
Visit your Connectors page or navigate via Settings → Connectors
2
Choose a service
Open All or Discover, find the service you need, and start its connection process. If it is already listed under Connected, use the + next to the service to add another account.
3
Authenticate
OAuth (most services): Click “Connect” and follow the authorization flow. No manual token management needed. Examples: Gmail, Slack, Microsoft services.API Keys (some services): Paste your API key directly. Examples: OpenAI, AWS, Anthropic.
4
Set as default (optional)
If you connect multiple accounts for the same service (e.g., three different Gmail accounts), you can choose which one is your default. If you only have one account connected for a service, it’s automatically your default.

Other members do not get direct access to your personal credentials. If you explicitly set a connector to Agent-owned, people who can use that agent can act through the pinned account. See Agent-owned credentials.
Connect a team connector
Team connectors are shared integrations that everyone on a specific team can use. They are scoped to that team, and a team’s default account applies when the agent uses Use Team Default. Open the team’s Connectors page to add an account. See Add team connectors for the steps.Choose Which Account to Use
A connector can have several connected accounts for the same service, such as three Gmail accounts. The agent’s Account selector determines which one it uses.In agents
Open a connector in the agent’s Connectors section to choose its account. Agents can be shared with your organization or specific people, so account selection must also work for whoever runs the agent. How to choose:Everyone as themselves
Pick Use Personal Default. Each person who runs the agent uses their own account, so data stays private to each user. This is the default.
Everyone as one shared login
In a team agent, pick Use Team Default (or pin a team account). Every team member who runs the agent uses that same shared account.
Which account does the agent run with? It depends on the option you pick and who runs the agent:
- Use Personal Default (the default for both personal and team agents): the agent uses the running user’s own default account. Share the agent and each person uses their own account, so data stays private to each user.
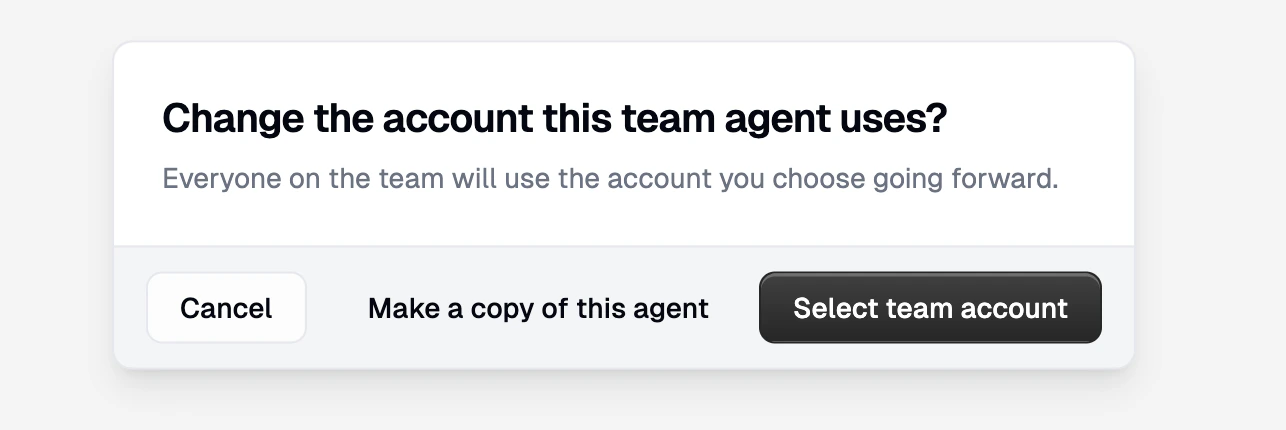
- Use Specific Account uses the selected account when available. For user-owned connectors, a missing personal pin or a user without access to the agent’s home team can fall back to their personal default. A missing team pin does not fall back for users who have access to that team; repair the selection in the agent’s settings.
- Use Team Default uses the shared team default when the running user has access to that team. Without that access, the running user can use their personal default instead.
- Agent-owned credentials are the exception. When you explicitly pin an account as agent-owned, everyone who can access the agent uses that account when tools are called, including people you share it with. See Agent-Owned Credentials below.
Personal agents
Personal agents offer two choices. A personal agent can still be shared, so the table shows which account is used when you run it versus when someone you shared it with runs it.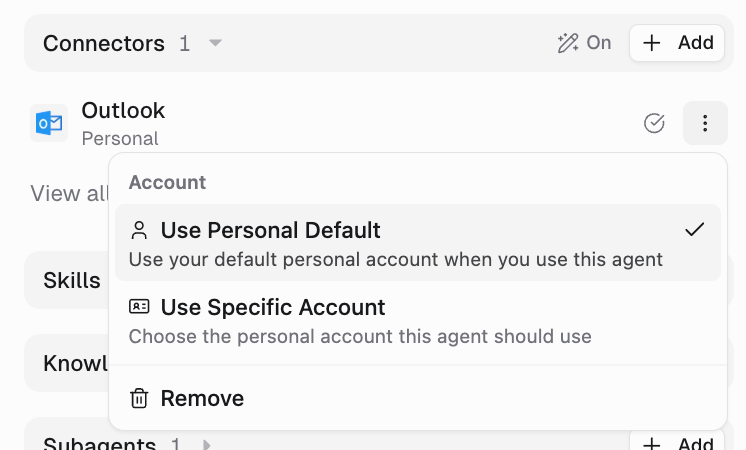
Team agents
Team agents have a third option: Use Team Default. This lets all team members share one account without each person needing their own credentials for that service.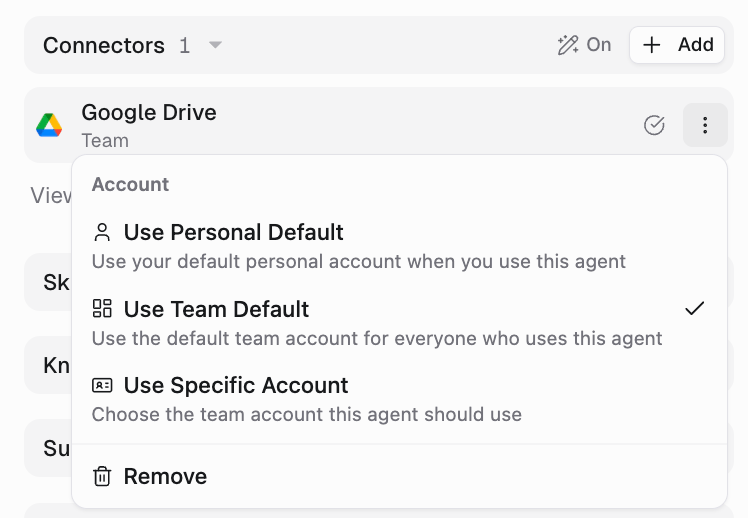
Agent-owned credentials
By default, connectors are user-owned: each person who runs the agent uses an account available to them, following the personal and team selection rules above. Agent-owned credentials change this. When a connector is agent-owned, everyone who can access the agent uses the one account or connection you pinned, without getting direct access to the underlying credential.Selection and ownership are separate. Choosing a specific account decides which account the agent uses. Ownership decides whose identity runs the tool. Selecting a specific account does not make it agent-owned on its own. You turn that on explicitly.
Which ownership mode to use
User-owned / User/Team-owned
Each person who runs the agent acts as themselves, using the account available to them. Pick this when a shared agent should work on each user’s own data and that data should stay private to each user. This is the default.
Agent-owned
The agent is bound to one specific account, and everyone who can access it acts as that account no matter who runs the agent. Pick this when the agent should always use one connected account, such as a shared service account or a support inbox, so the agent always behaves the same way for every user.
Turn on agent-owned for a connector
1
Select a specific account
In the Agent tab, expand Connectors, open the connector’s detail view, and select the account you want to pin.
2
Set Credential ownership
A Credential ownership control appears once a specific account is selected. Choose one of: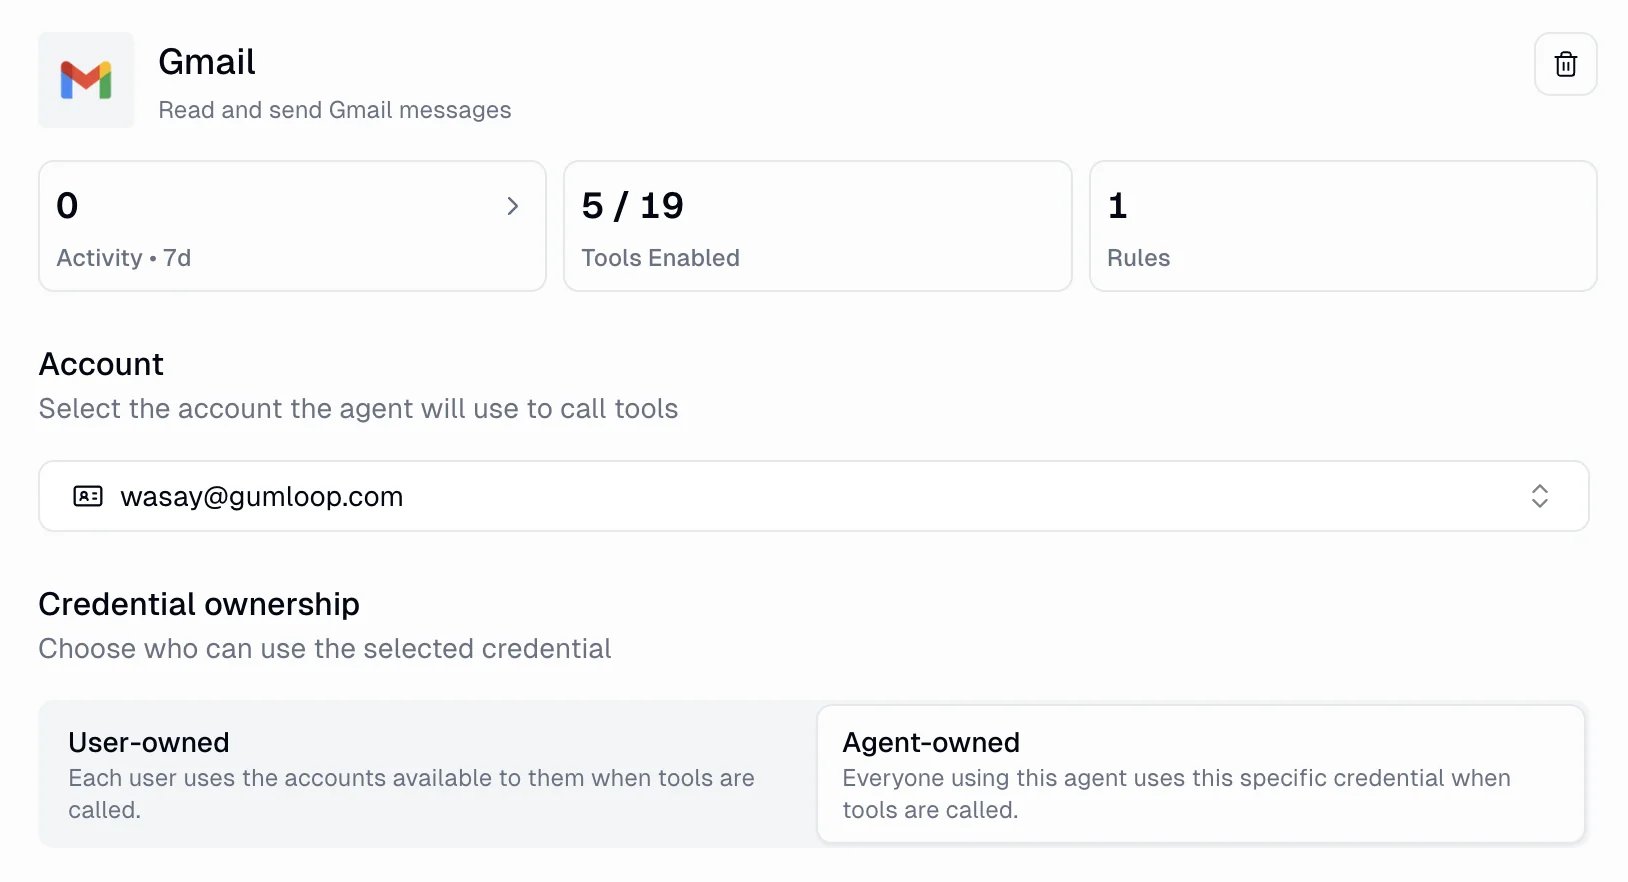

- User-owned (labeled User/Team-owned on team agents): each user uses the accounts available to them when tools are called. This is the default.
- Agent-owned: everyone using this agent uses the pinned credential when tools are called.
Enterprise availability
For organizations, agent-owned credentials are restricted by default. An admin turns them on per custom role with the Agent-owned credentials feature toggle. Members whose roles do not grant it see the Agent-owned option disabled. You can only pin an account you have access to, and Gumloop re-checks that when the agent is saved. The same organization permission covers agent-owned secret bindings. With permission to edit a custom agent, you can pin a personal or team Vault secret you can access for everyone who can use the agent, including people outside its home team. This grants use through the agent, not direct Vault access, and cannot be combined with Anyone sharing.Agent-owned credentials are required for agents that let Slack members without Gumloop accounts run them. Those people have no accounts of their own to authenticate with, so any user-owned connector fails for them. See Organization Service Accounts for Slack Agents.
Team API keys
If an API call fails because it needs a member’s personal connector, connect the account to the team and select a team-shared account instead. A team API key cannot use a member’s personal default, even when the request names that member. It also cannot read that member’s personal secrets, saved website logins, or browser profiles. If you need to use your own personal account or credentials, use your personal API key. Agent-owned credentials follow the ownership and sharing rules above. For chat files or personal agent files, use a personal API key whose account can access the conversation or file. A team API key cannot open those files, and switching keys does not grant access by itself. Shared team files remain available according to their permissions.Manage your connectors
Viewing your connectors
Viewing your connectors
Visit your Connectors page to see all your personal connectors, last refresh time, connected services, and defaults.
Refreshing a connector
Refreshing a connector
OAuth connectors automatically renew access tokens when the saved authorization is still valid. If a connected service no longer accepts the saved OAuth authorization, refresh that account and complete authorization again. A temporary connection or renewal failure is different: retry the task first, because it does not necessarily mean the authorization has been revoked.If the saved login is rejected, retry once. If it fails again, refresh the account the agent was actually using, not another account for the same service. A connection prompt may identify that account.
- Go to your Connectors page
- Open that account’s three-dot menu and choose Refresh
- Complete the authorization flow again
Who does a connection link check?
Who does a connection link check?
A connection link checks the person who opens it, using their account availability, access to the agent’s home team, and organization restrictions. It does not check readiness on the original requester’s behalf or give you access to that person’s account.Completing the connection does not guarantee automatic resume in every channel or run type. If the task stopped rather than paused for a connection, retry it after the required action is complete. Owner-only repairs and organization restrictions still need the appropriate owner or admin.
Does an HTTP error mean I should refresh my connector?
Does an HTTP error mean I should refresh my connector?
An HTTP request error is not necessarily a credential problem. Refreshing an account does not fix a non-authentication HTTP error. Before retrying an action that sends, creates, or updates something, check whether it already completed to avoid duplicating it.
- Transient error, such as HTTP 408 or 5xx: retry once. If it still fails, stop repeating the request and try again later. An HTTP/protocol failure without a status also gets one retry.
- Non-transient HTTP error, such as HTTP 400 or 404: check the tool arguments. Retrying the same bad request does not fix it. If the arguments are correct, check the connector’s configuration.
- HTTP 401: the saved login was rejected. Follow the targeted account-refresh guidance above if one retry also fails.
- HTTP 403: the connected account may lack permission for the action. Check access rather than treating it as a rejected login.
- HTTP 429: this is a rate limit. Wait before retrying; refreshing the connector does not remove the limit.
Removing a connector
Removing a connector
- Go to your Connectors page
- Find the connected account to remove, open its three-dot menu, and choose Revoke
- Confirm removal
Setting defaults
Setting defaults
Personal default: Your default account for a service. An agent uses it for your tasks when its account setting is Use Personal Default.Team default: The team’s shared default account for a service. Team members use it when the agent’s account setting is Use Team Default.
Admin setup
Some services require an administrator to authorize Gumloop before anyone on the team can connect their own account.Microsoft Office Setup (Admin Only)
For organizations using Microsoft services (Teams, Outlook, Excel, Word, OneLake), administrators must configure consent in Microsoft Entra ID before users can authenticate.Start by connecting a Microsoft connector in Gumloop yourself. Gumloop only appears in your tenant once someone attempts to authenticate, so do this first or you won’t find the app in the steps below.
- Tenant-wide consent
- Admin consent
- Direct consent link
Option 1: Grant Admin Consent (Recommended)
1
Access Microsoft Entra admin center
2
Navigate to Enterprise apps
Navigate to Entra ID > Enterprise apps > All applications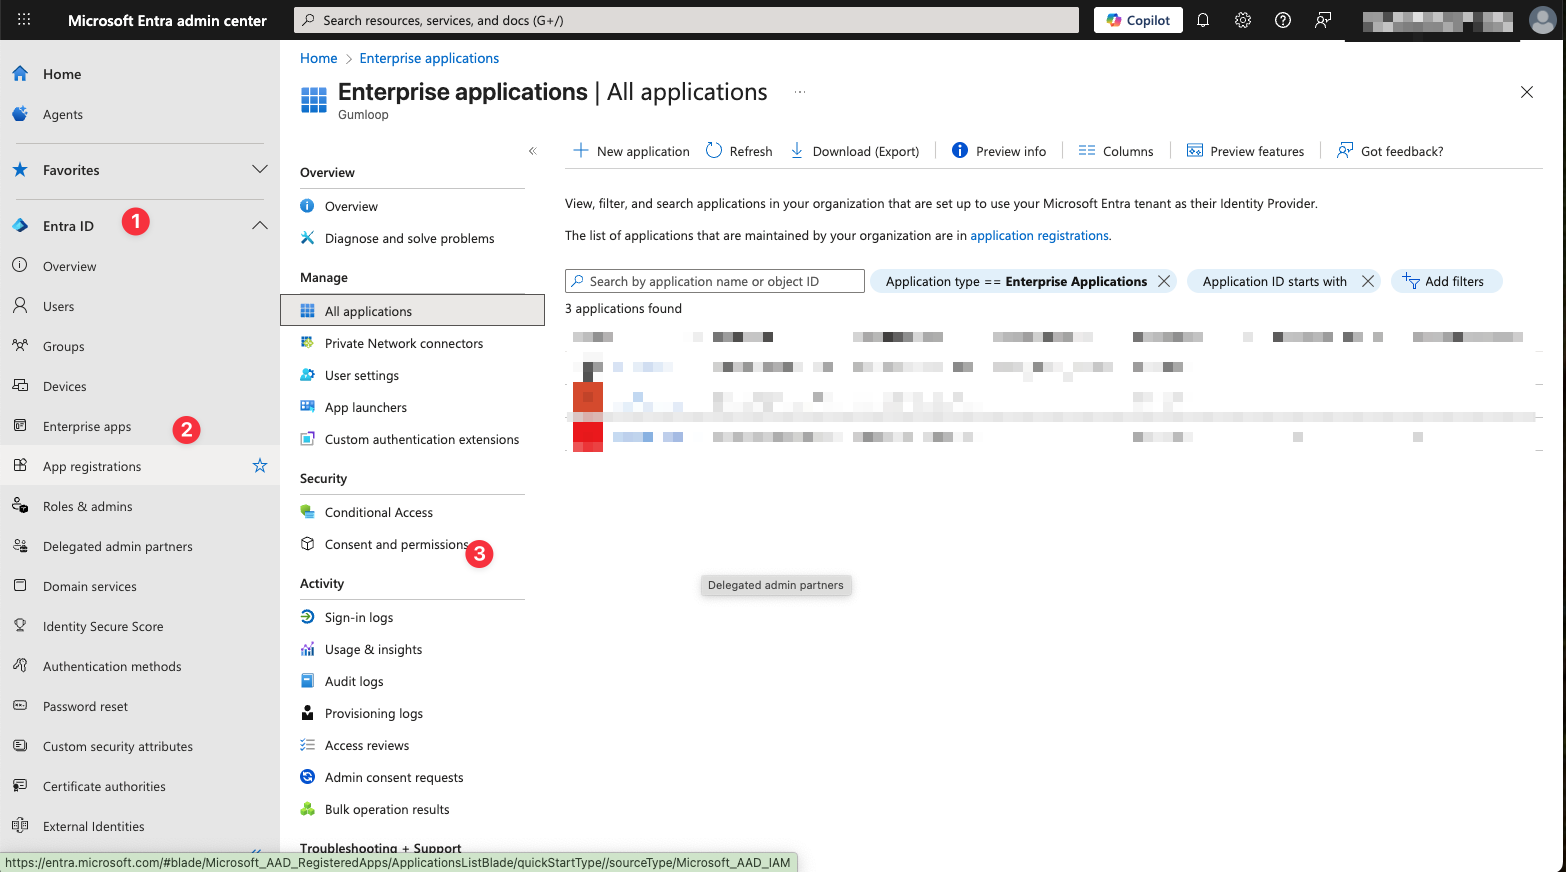
3
Search for Gumloop
Search for Gumloop using client ID: 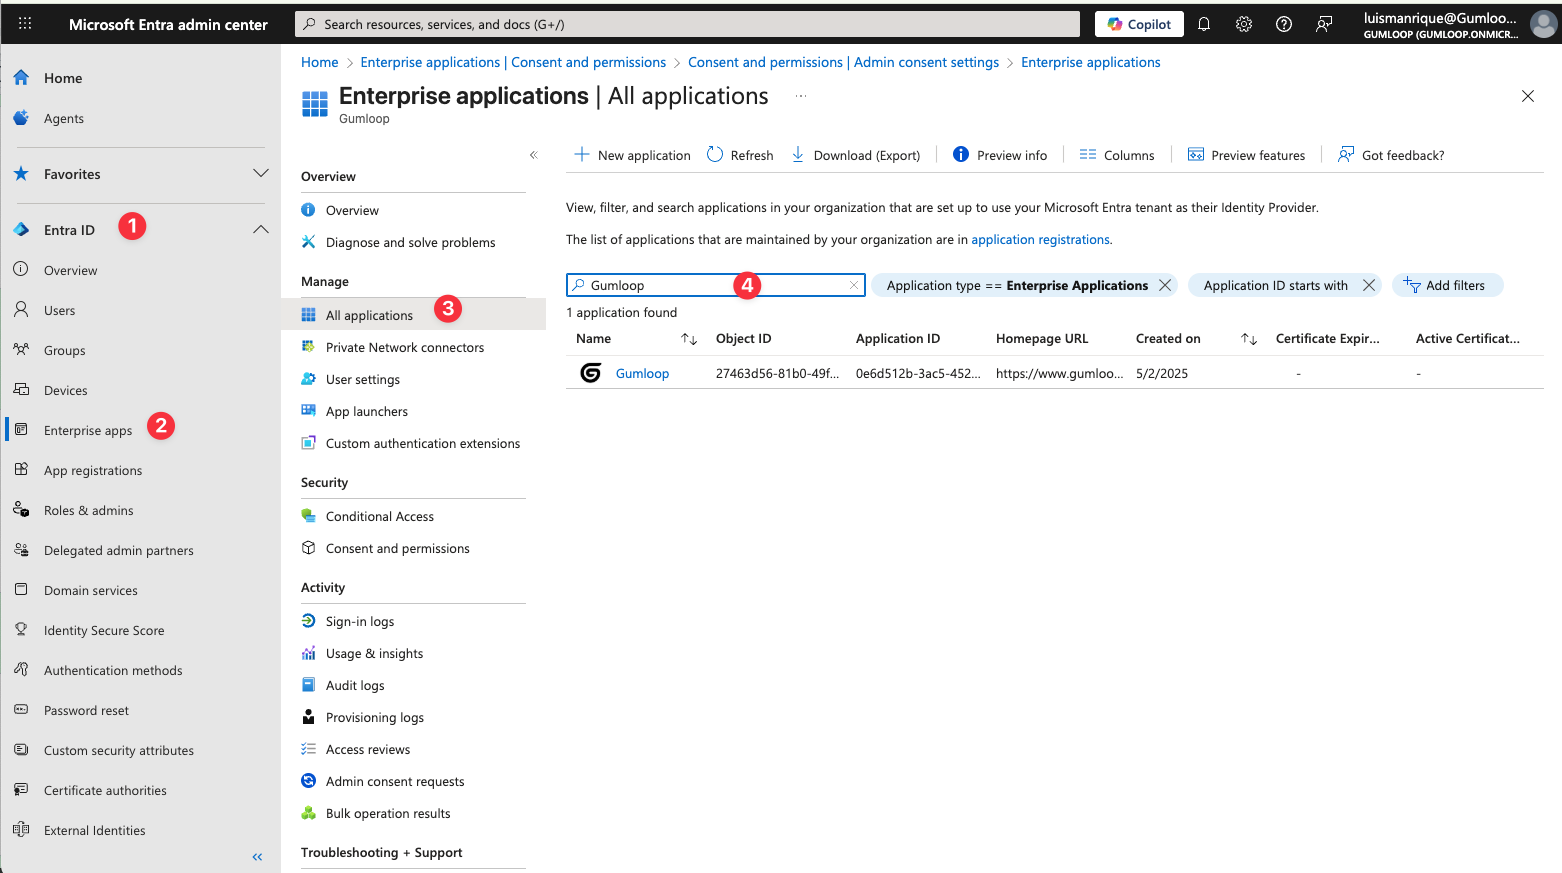
d3c2a9a5-7f60-40d1-a8ba-62bab546a0f34
Grant consent
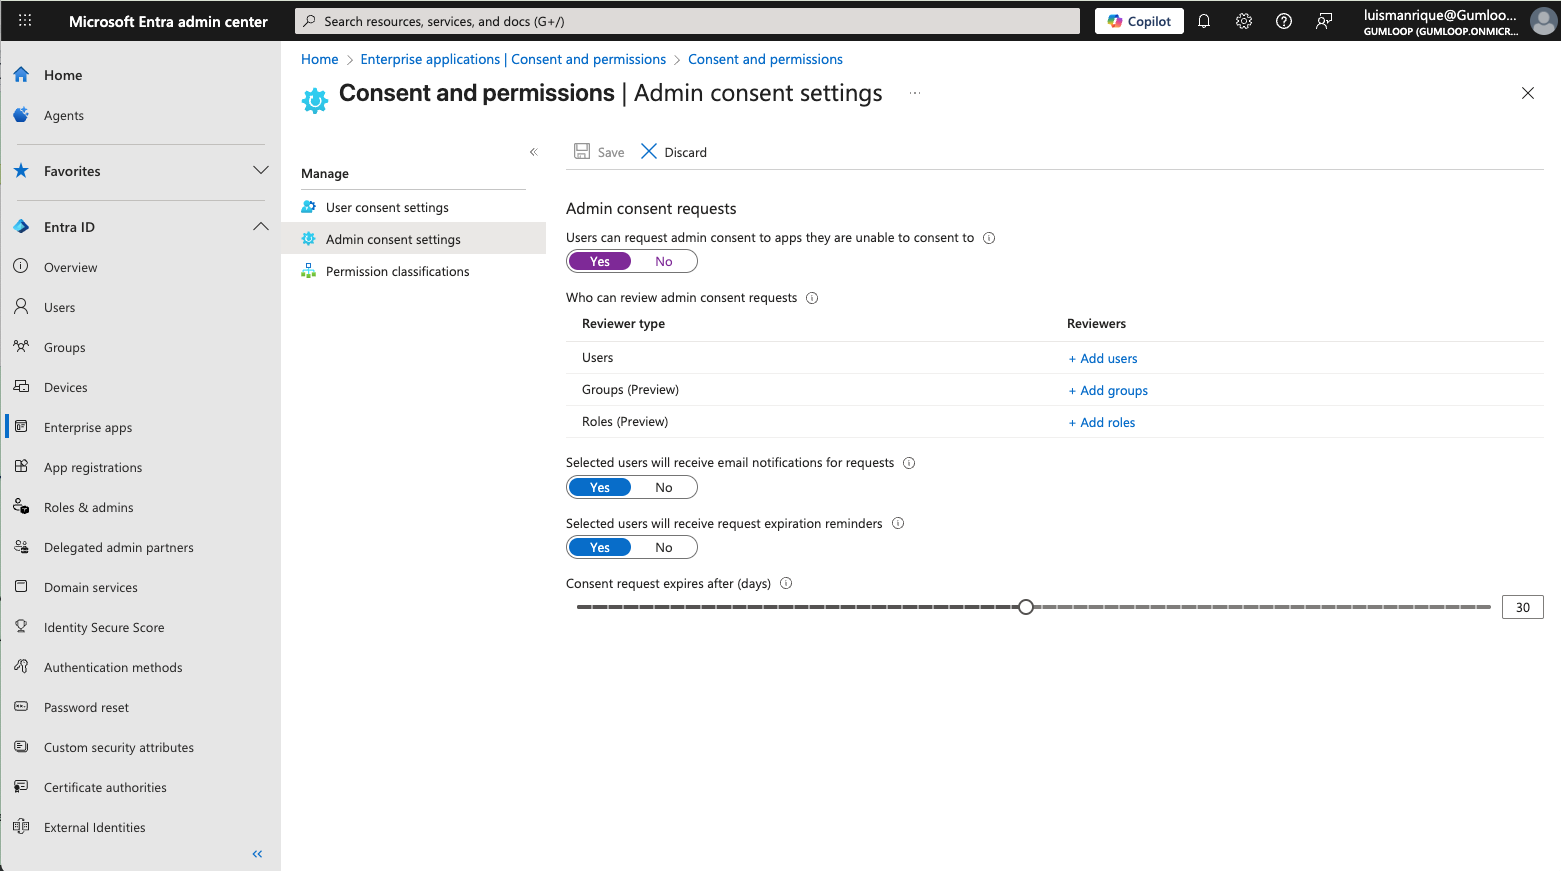
Under Security > Permissions, click Grant admin consent, then complete the sign-in prompt and click Accept.
5
Verify the permissions landed
Still under Security > Permissions, open the Admin consent tab. You should see a row for each permission listed in Required Permissions by Service.If the tab is empty or unchanged, the request failed and nothing was granted. Use the Direct Consent Link tab above instead.
Required permissions by service
Every permission below is delegated. Gumloop acts only as the signed-in user and can never do more than that user could do themselves. There are no application (app-only) permissions, so Gumloop has no standalone background access to other people’s mailboxes, files, or sites. Each service also requiresoffline_access, which lets Gumloop refresh its access token without asking users to sign in each time it expires.
Expand a service to see the permissions it needs and the consent link that grants them. Only grant the services you actually plan to use.
Outlook
Outlook
Outlook Calendar
Outlook Calendar
Excel and Word
Excel and Word
OneDrive
OneDrive
OneLake
OneLake
OneLake needs its own consent link and is not covered by the other services.
Grant OneLake permissions →
Azure
Azure
Azure needs two separate consent links. Open both.
Grant Azure resource management permissions →Grant Azure AI permissions →
Salesforce setup (Admin only)
As of September 2025, Salesforce introduced new security restrictions that require administrators to pre-install the Gumloop connected app before users can authenticate with their Salesforce instances. For more details, see the official Salesforce documentation.Gumloop is a Salesforce Connected App, not an AppExchange app. You will not find it in the Salesforce AppExchange marketplace. A Salesforce administrator needs to authorize the connection directly.
- Admin connects directly (recommended)
- Non-Admin user flow
The easiest way is for a Salesforce administrator to authenticate directly from Gumloop:
1
Go to your Connectors page
Visit the Salesforce connectors page in Gumloop
2
Click Connect and authorize
Click Connect next to Salesforce and sign in with your Salesforce admin account.
3
Gumloop is automatically added
The Gumloop connected app is automatically installed in your Salesforce organization. No additional setup needed.

Managing the connected app in Salesforce
- Go to Setup > Apps > Connected Apps > Manage Connected Apps
- Find the Gumloop app to view or modify settings
- Configure user access policies, IP restrictions, and session policies as needed
For more details, refer to the Salesforce Connected App documentation.
Security & compliance
SOC 2 Type II
Certified secure infrastructure and processes
GDPR compliant
Full compliance with data protection regulations
Trust Center
View our complete security documentation
Related documentation
Organization and teams
Understand how personal spaces and teams work
User roles & permissions
Organization and team permission levels