Documentation Index
Fetch the complete documentation index at: https://docs.gumloop.com/llms.txt
Use this file to discover all available pages before exploring further.
Overview
Organization Templates is an organization-wide feature that allows Team and Enterprise users to share their own workflows as templates across their entire organization. Unlike the standard template library that contains pre-built Gumloop templates, Organization Templates is a user-generated repository of workflows specific to your organization.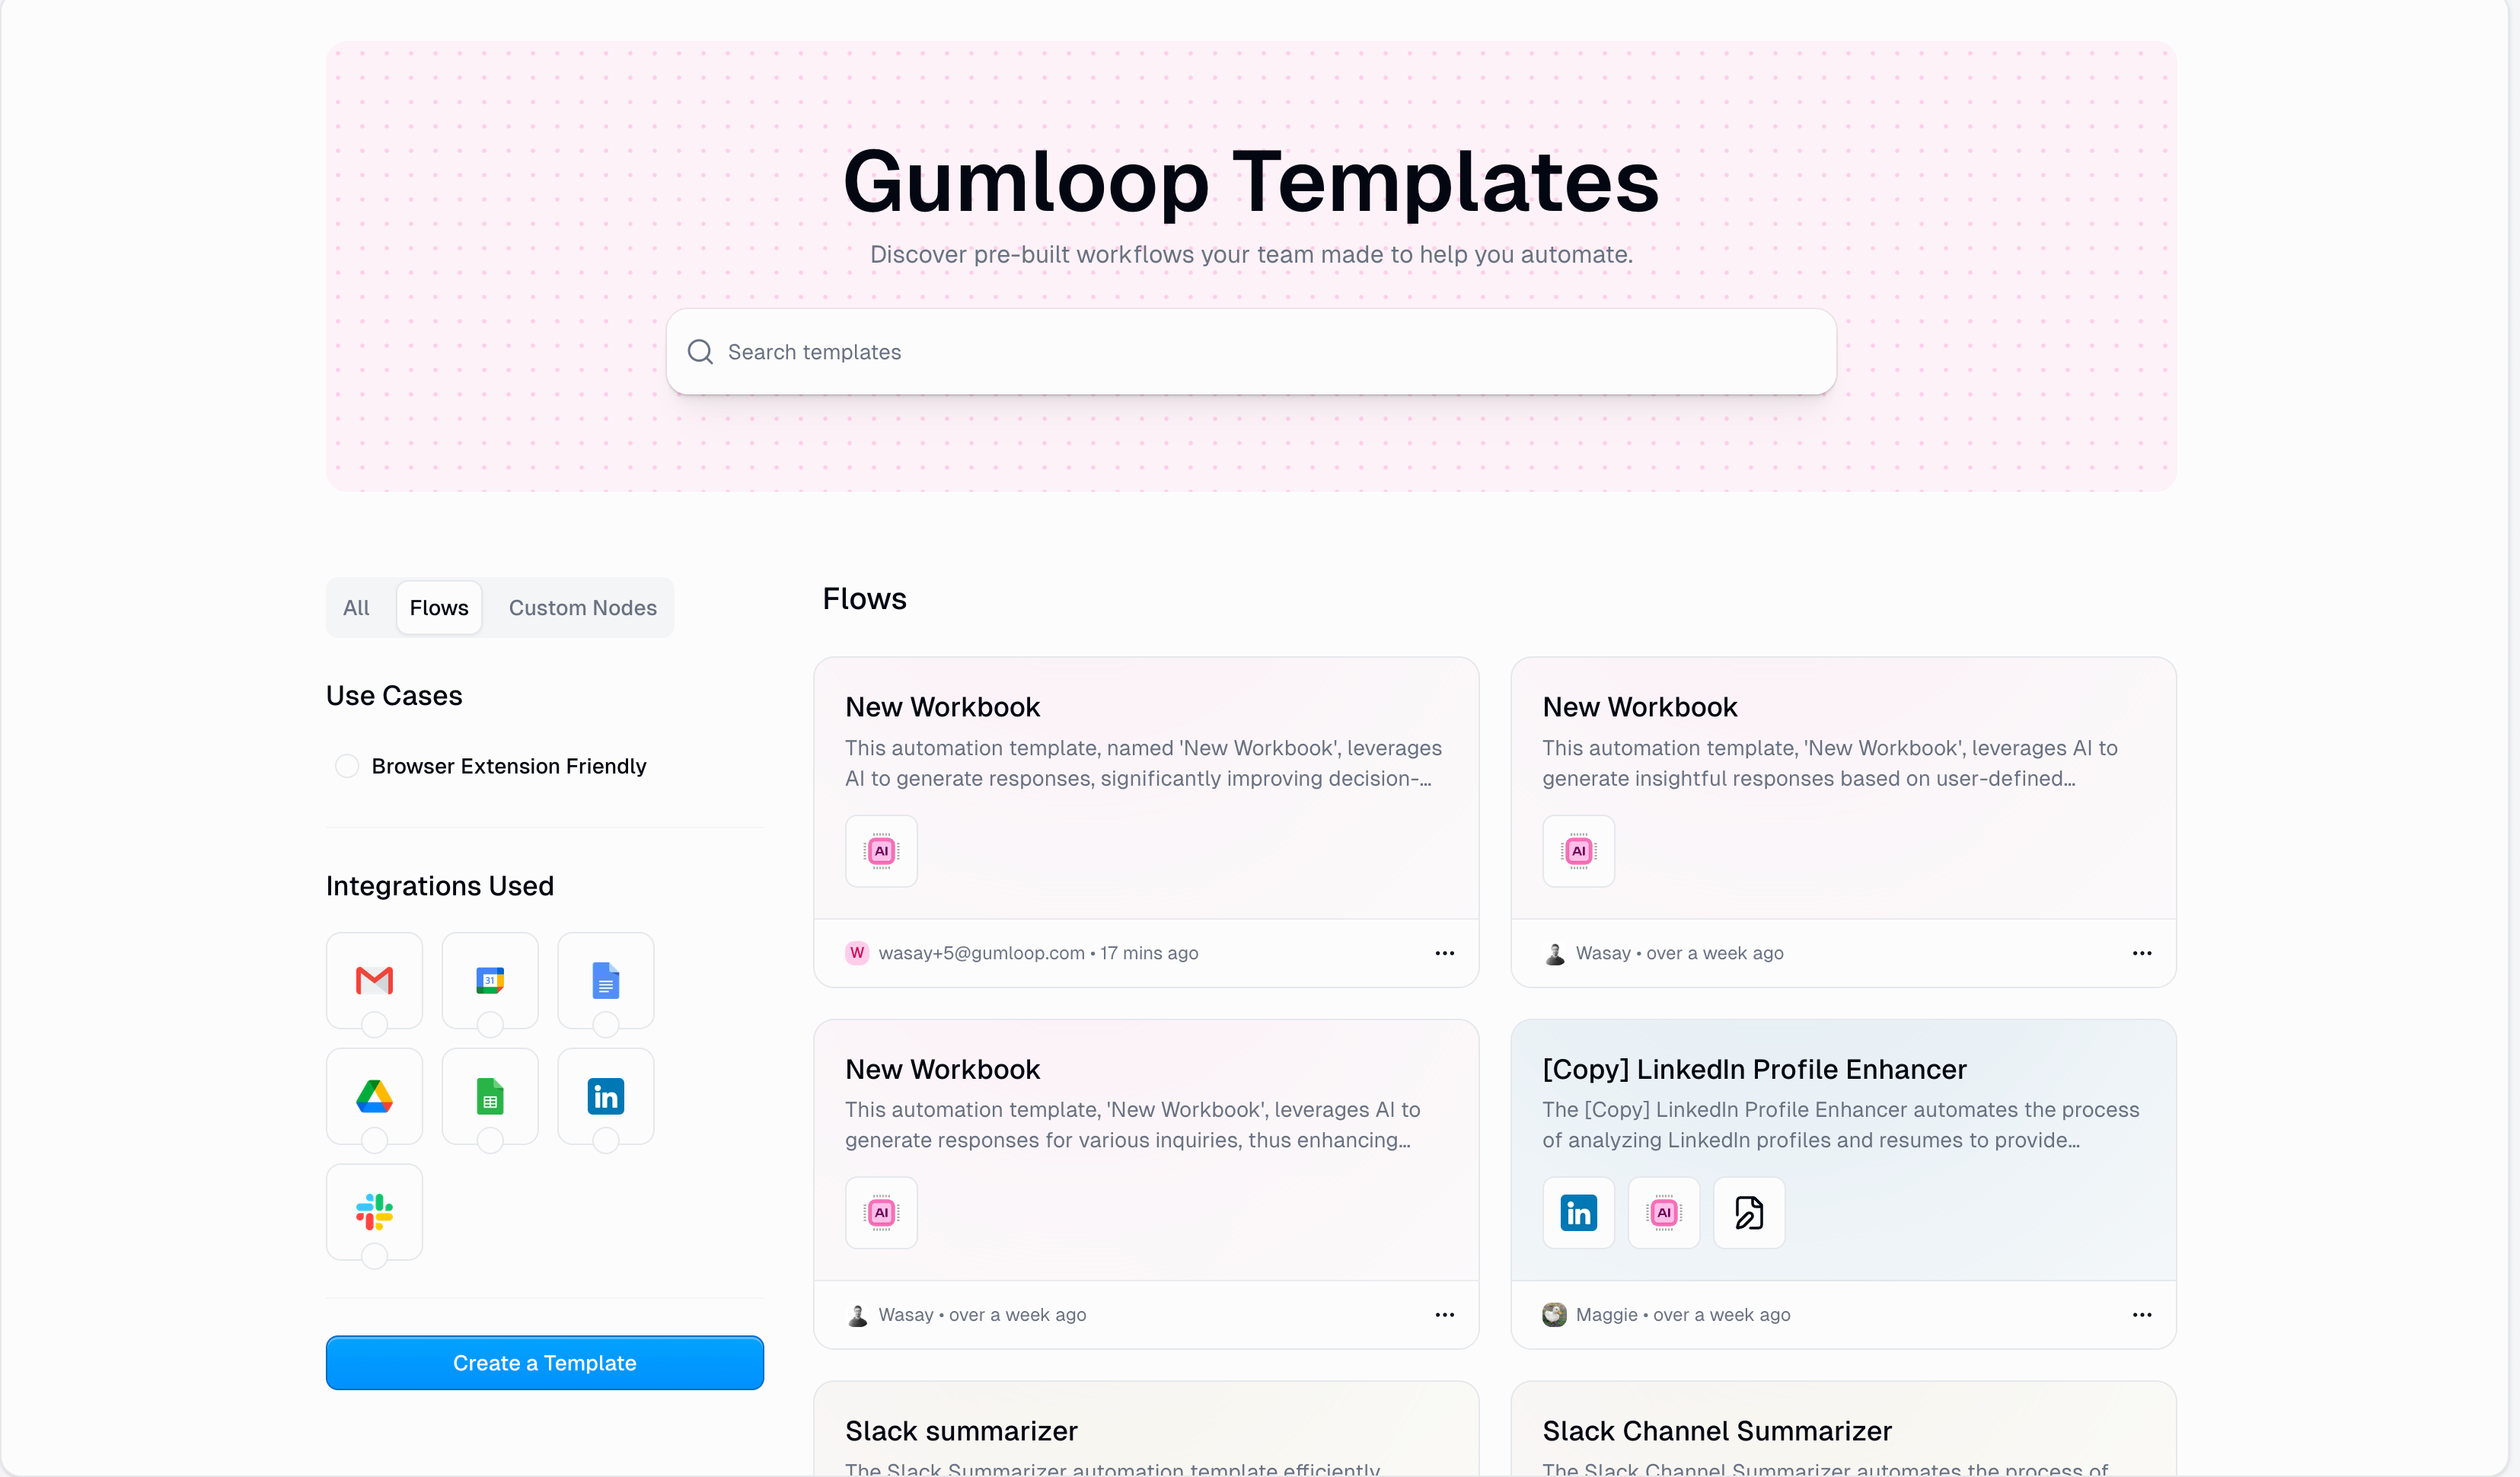
Key Benefits
Standardize Workflows
Reduce Duplicate Work
Accelerate Onboarding
Share Best Practices
Account Requirements
- An active Team or Enterprise subscription
- Organization membership (user must be part of an organization on Gumloop)
Quick Navigation
Create a Template
Edit Templates
Delist Templates
How Organization Templates Works
Organization Templates operates on a simple publish-and-use model with three core principles:| Principle | Description |
|---|---|
| Instant Publishing | Users create and publish workflows as templates - no approval needed |
| Organization-Wide Access | Published templates are immediately available to all organization members |
| Self-Service Management | Template creators and organization admins can delist templates as needed |
Creating a Template
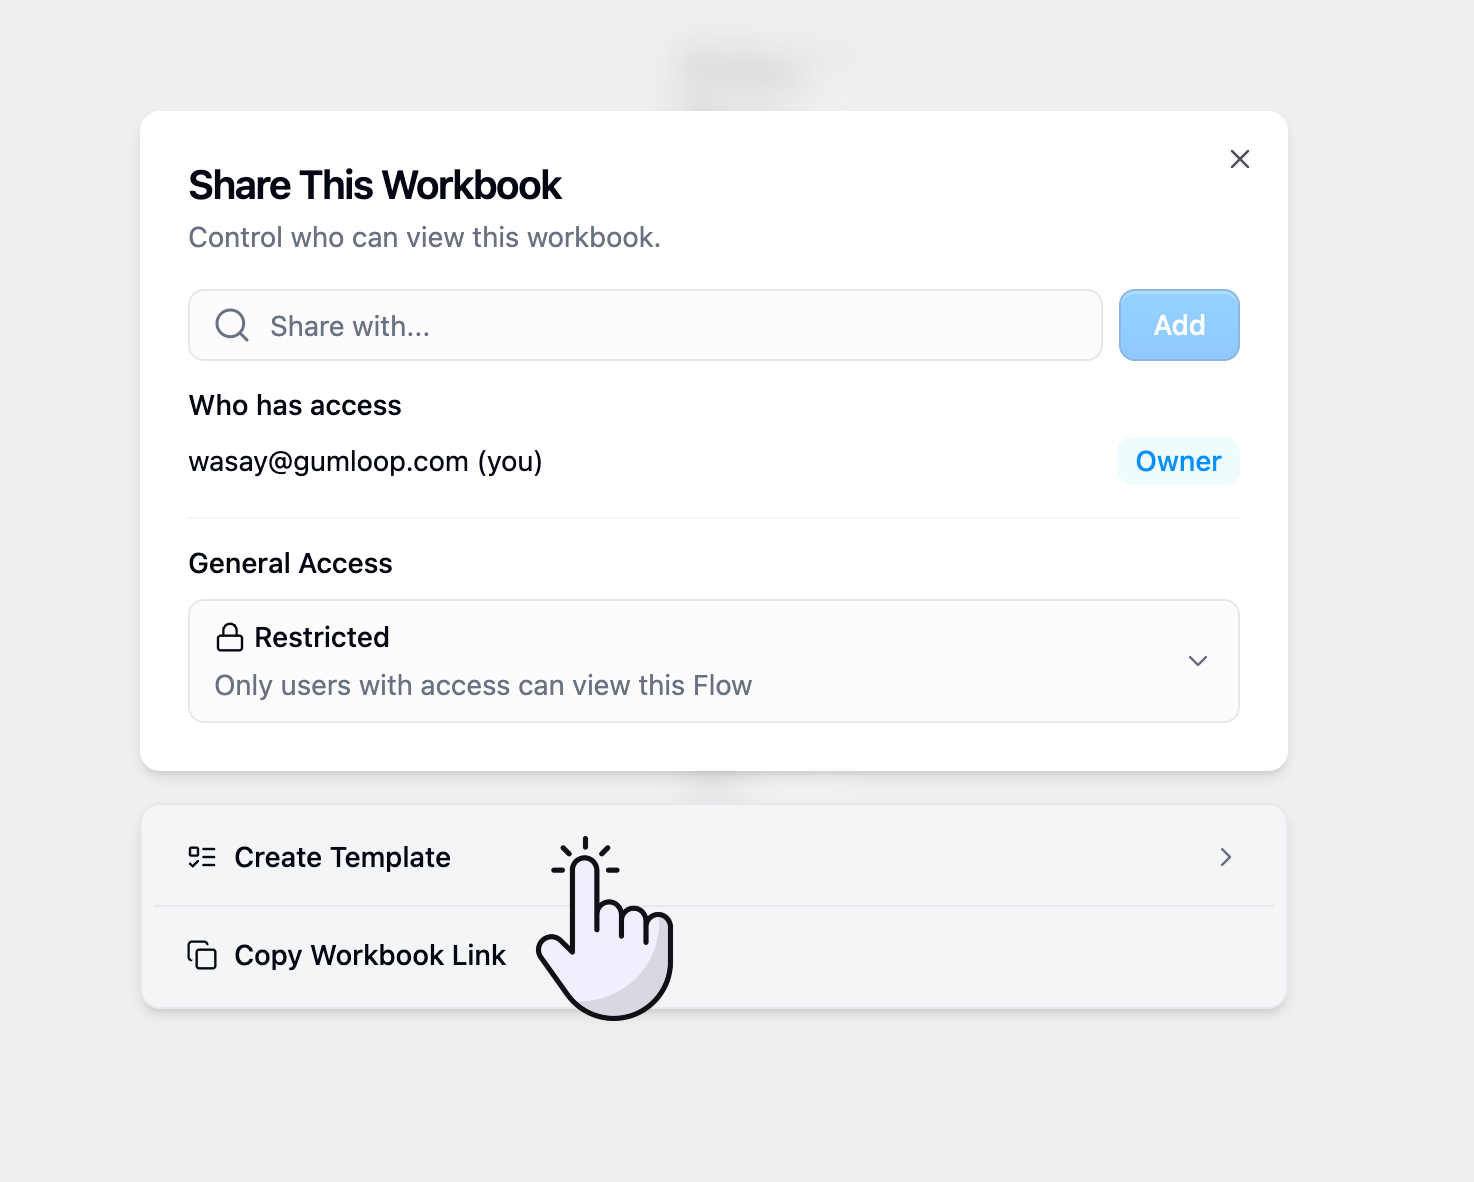
Turn any workflow into a template with setup instructions that guide your team members through configuration.Navigate to Your Workflow & Click on the Share Menu

Create Template with Set-up Instructions
Review AI-Generated Setup
- Template title
- Description
- Setup checklist with basic steps
- Required credentials detection
Configure Template Details
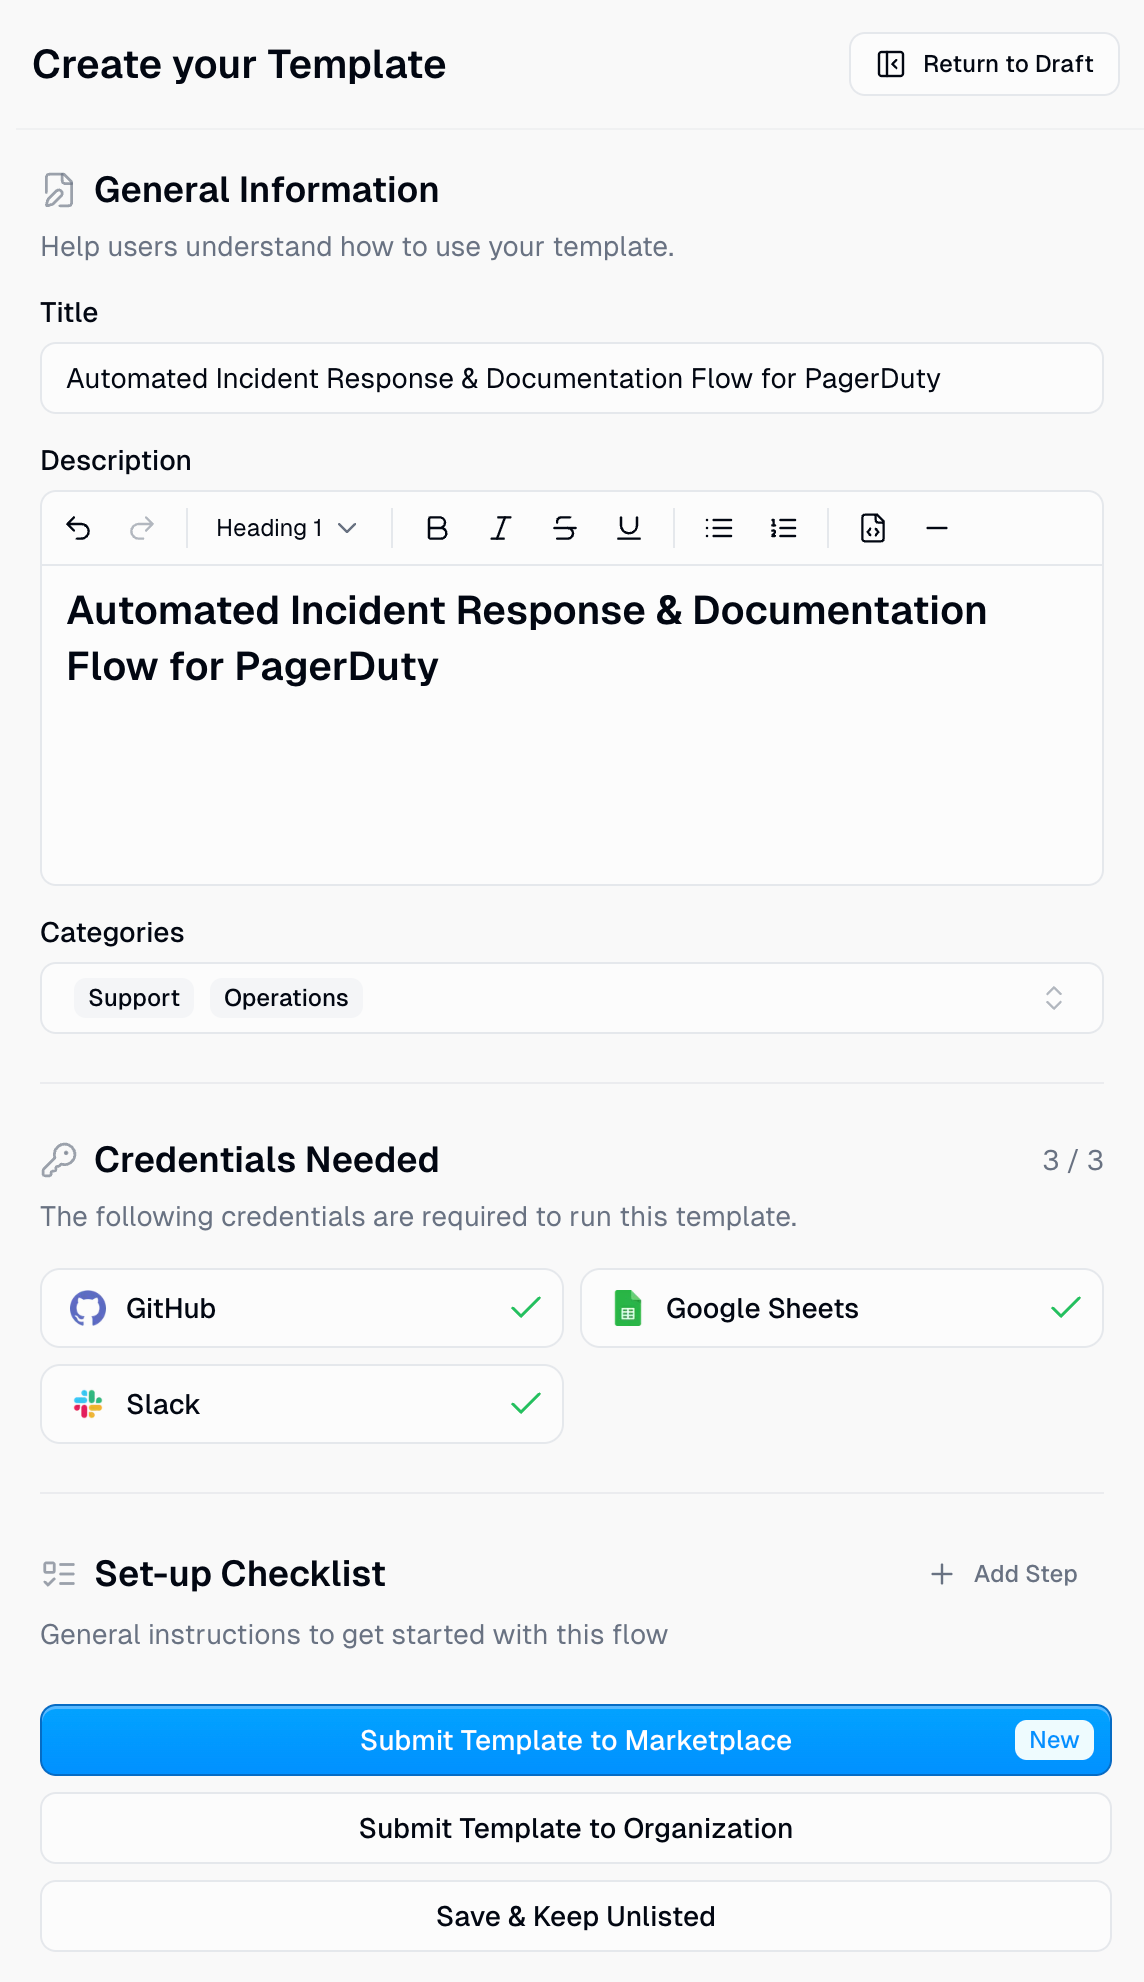
General Information
General Information
- Who is this for?
- What problem does it solve?
- What does the workflow do?
- How can users customize it?
- Any requirements or prerequisites
Credentials Needed
Credentials Needed
Set-up Checklist
Set-up Checklist
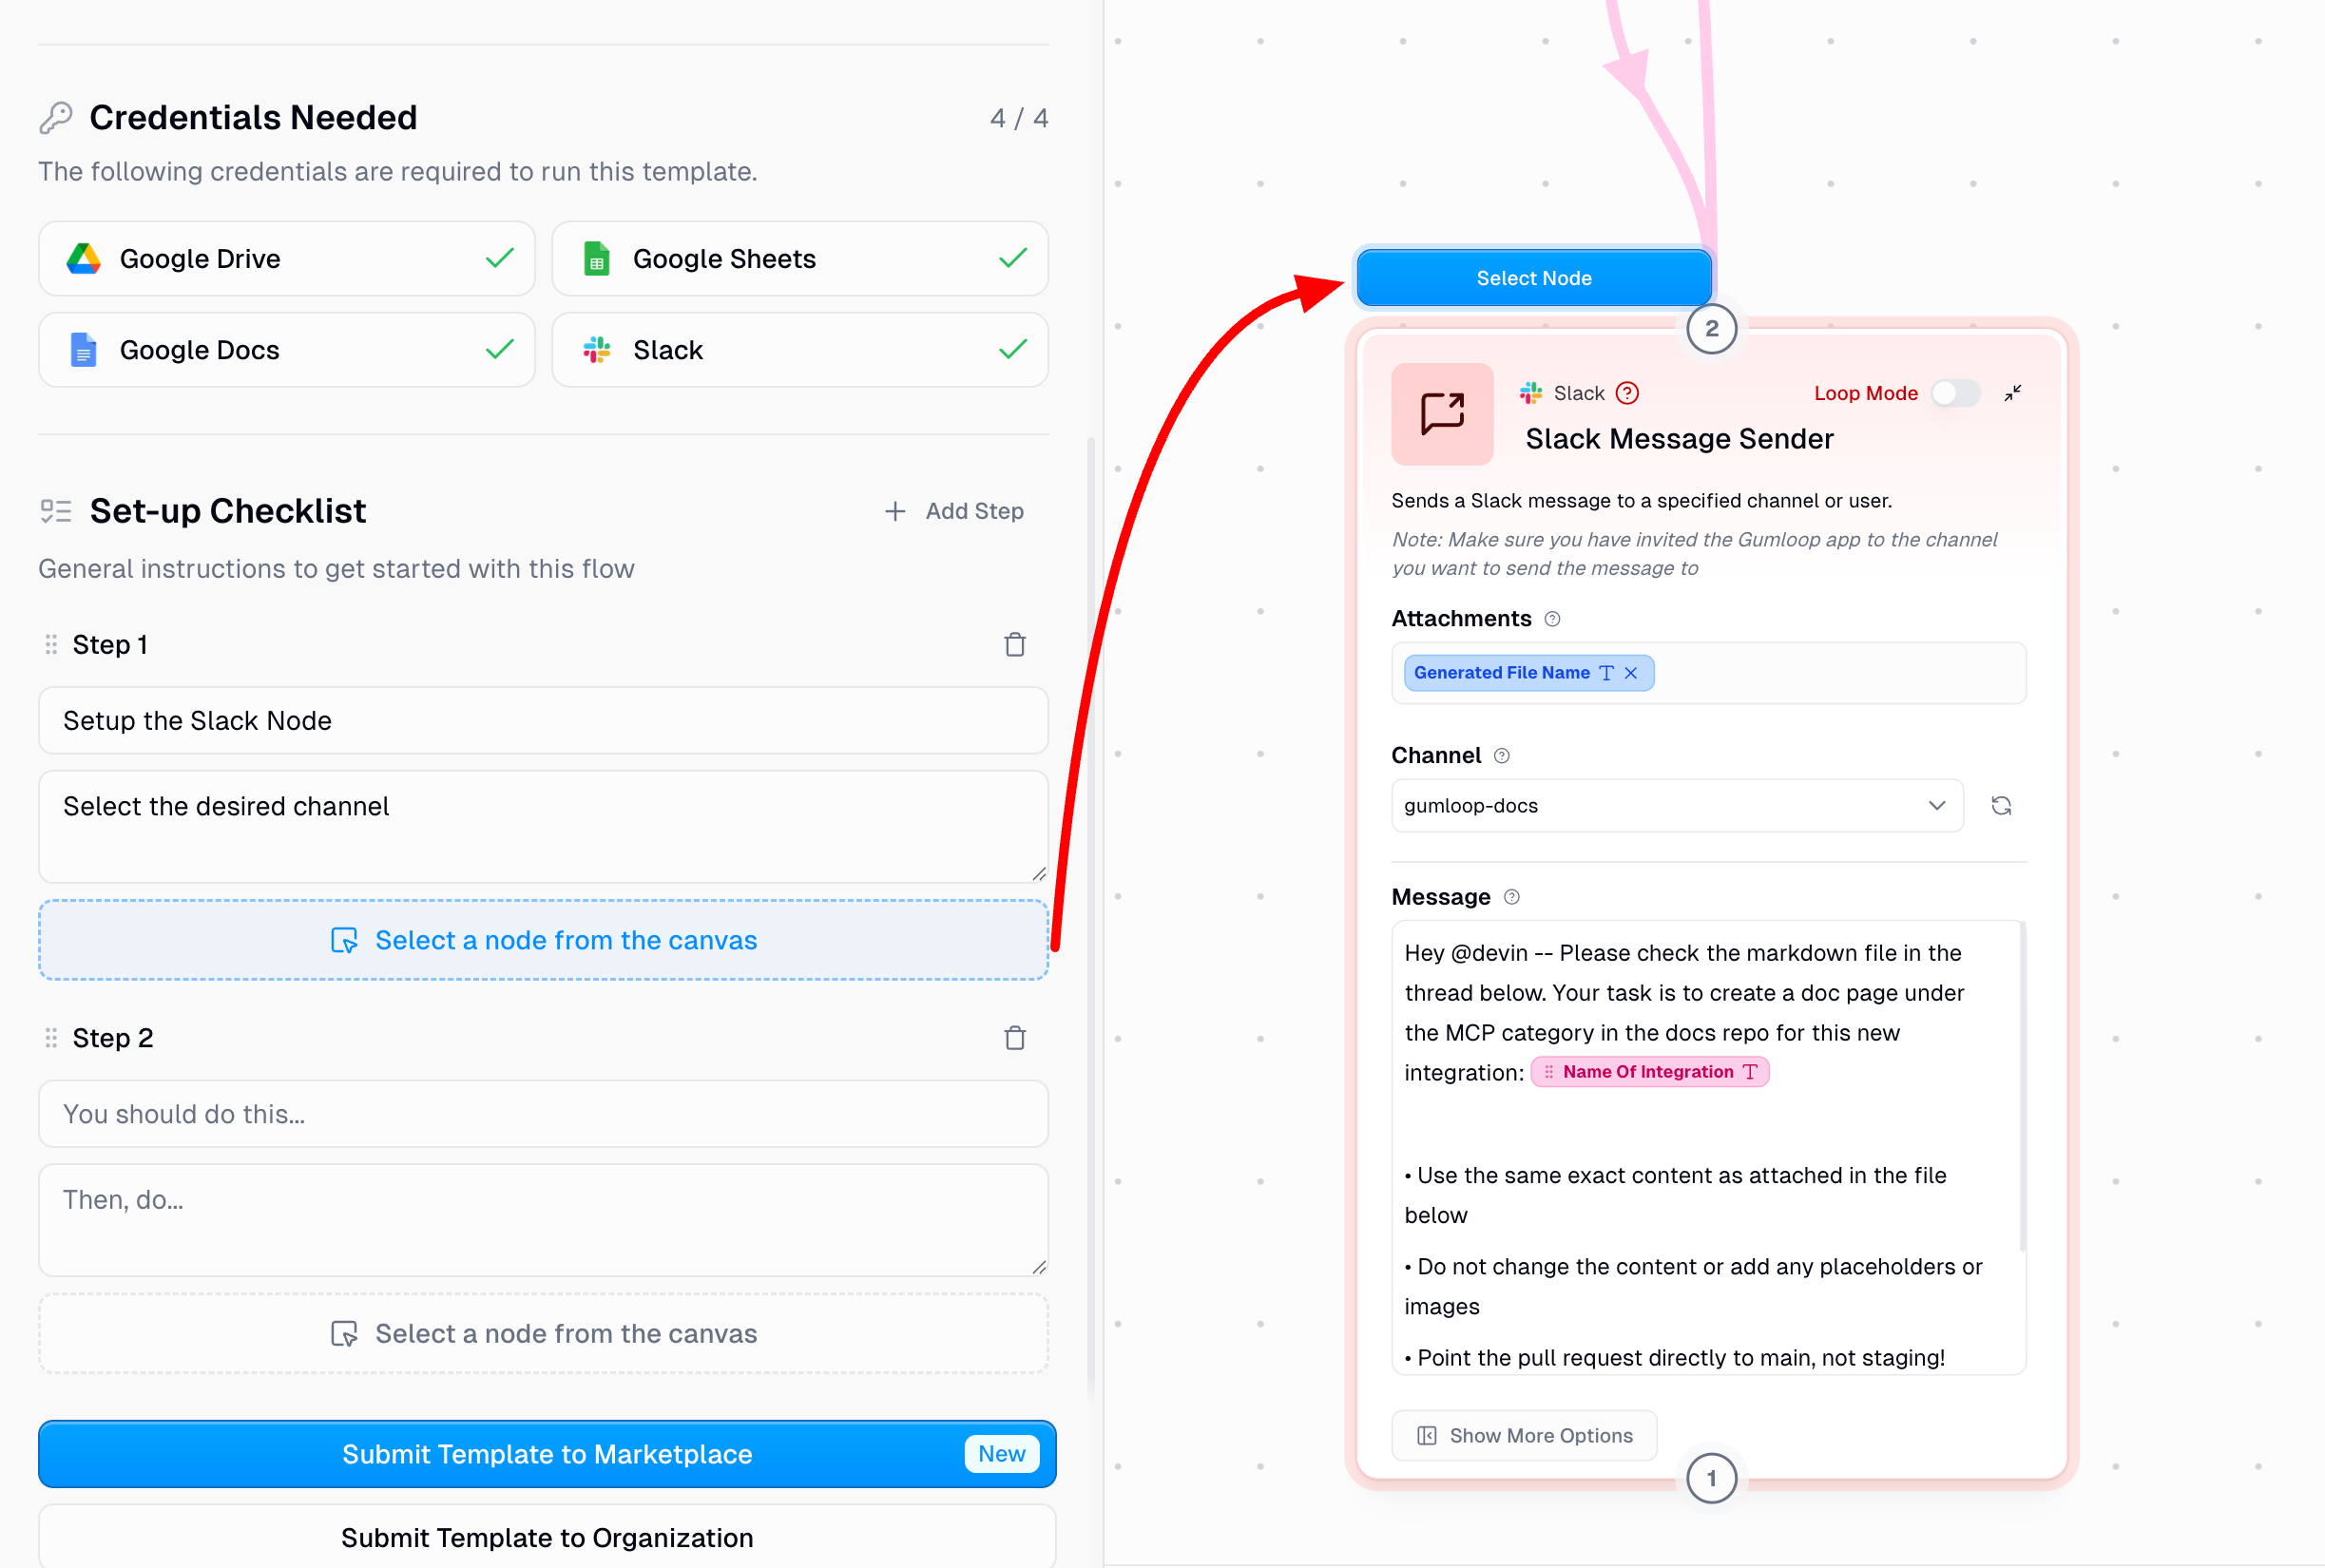
- Add a Clear Title: Describe what the user needs to do (e.g., “Configure Email Trigger Node”)
- Provide Detailed Instructions: Explain exactly what to configure and why. Don’t assume users are familiar with your specific setup.
- Link to Relevant Nodes: Click Select a node from the canvas to highlight the specific node users should configure for this step. This helps users navigate complex workflows.
- Include External Resources: If users need to set up external tools (like copying a Google Sheet template), provide direct links.
Editing Published Templates
Need to update a template after it’s been published? You can make changes and republish them instantly.Click the Template Badge
Make Your Changes
- General Information (title, description, categories)
- Credentials needed
- Setup checklist

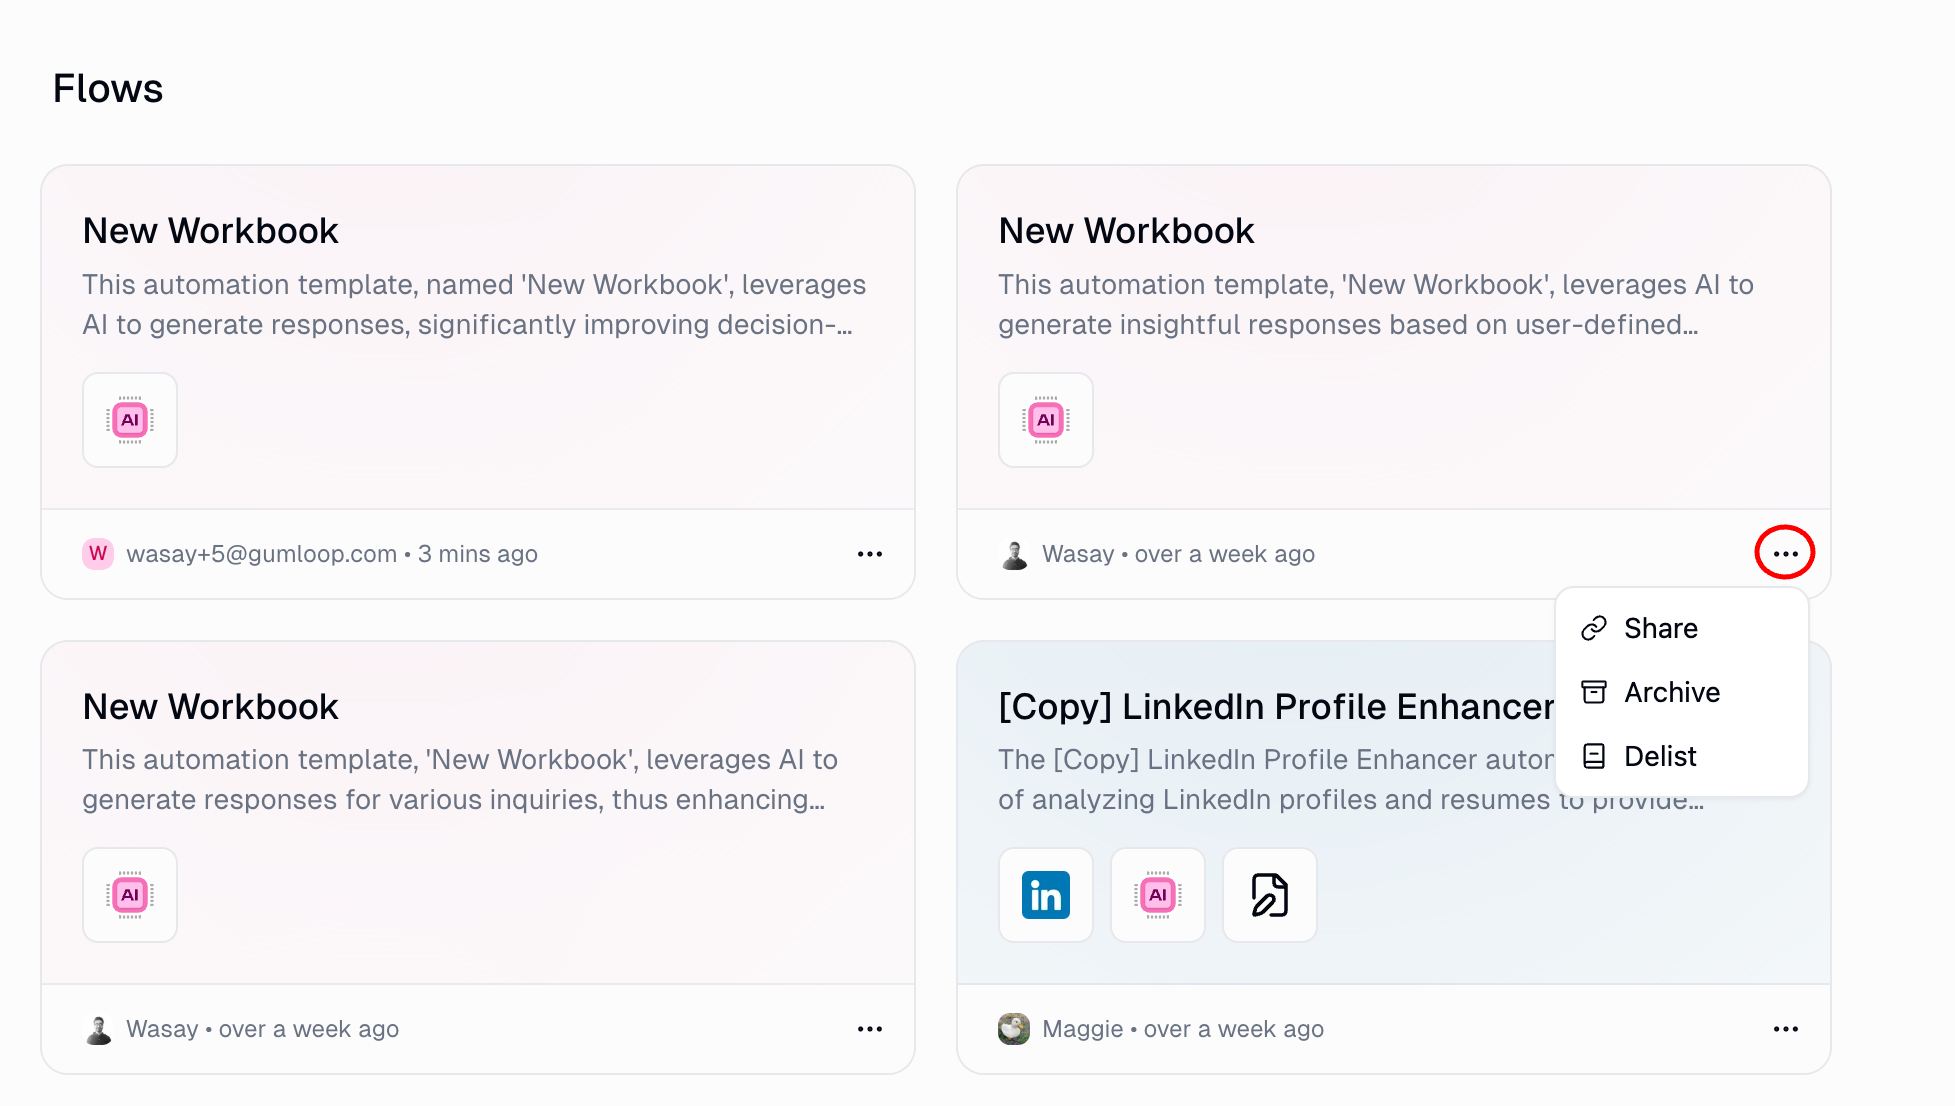
Delisting Templates
If you need to remove a template from the gallery, you can delist it at any time.Click the Template Badge

Managing Templates
For Template Creators
Template creators can manage their published templates at gumloop.com/templates/organization: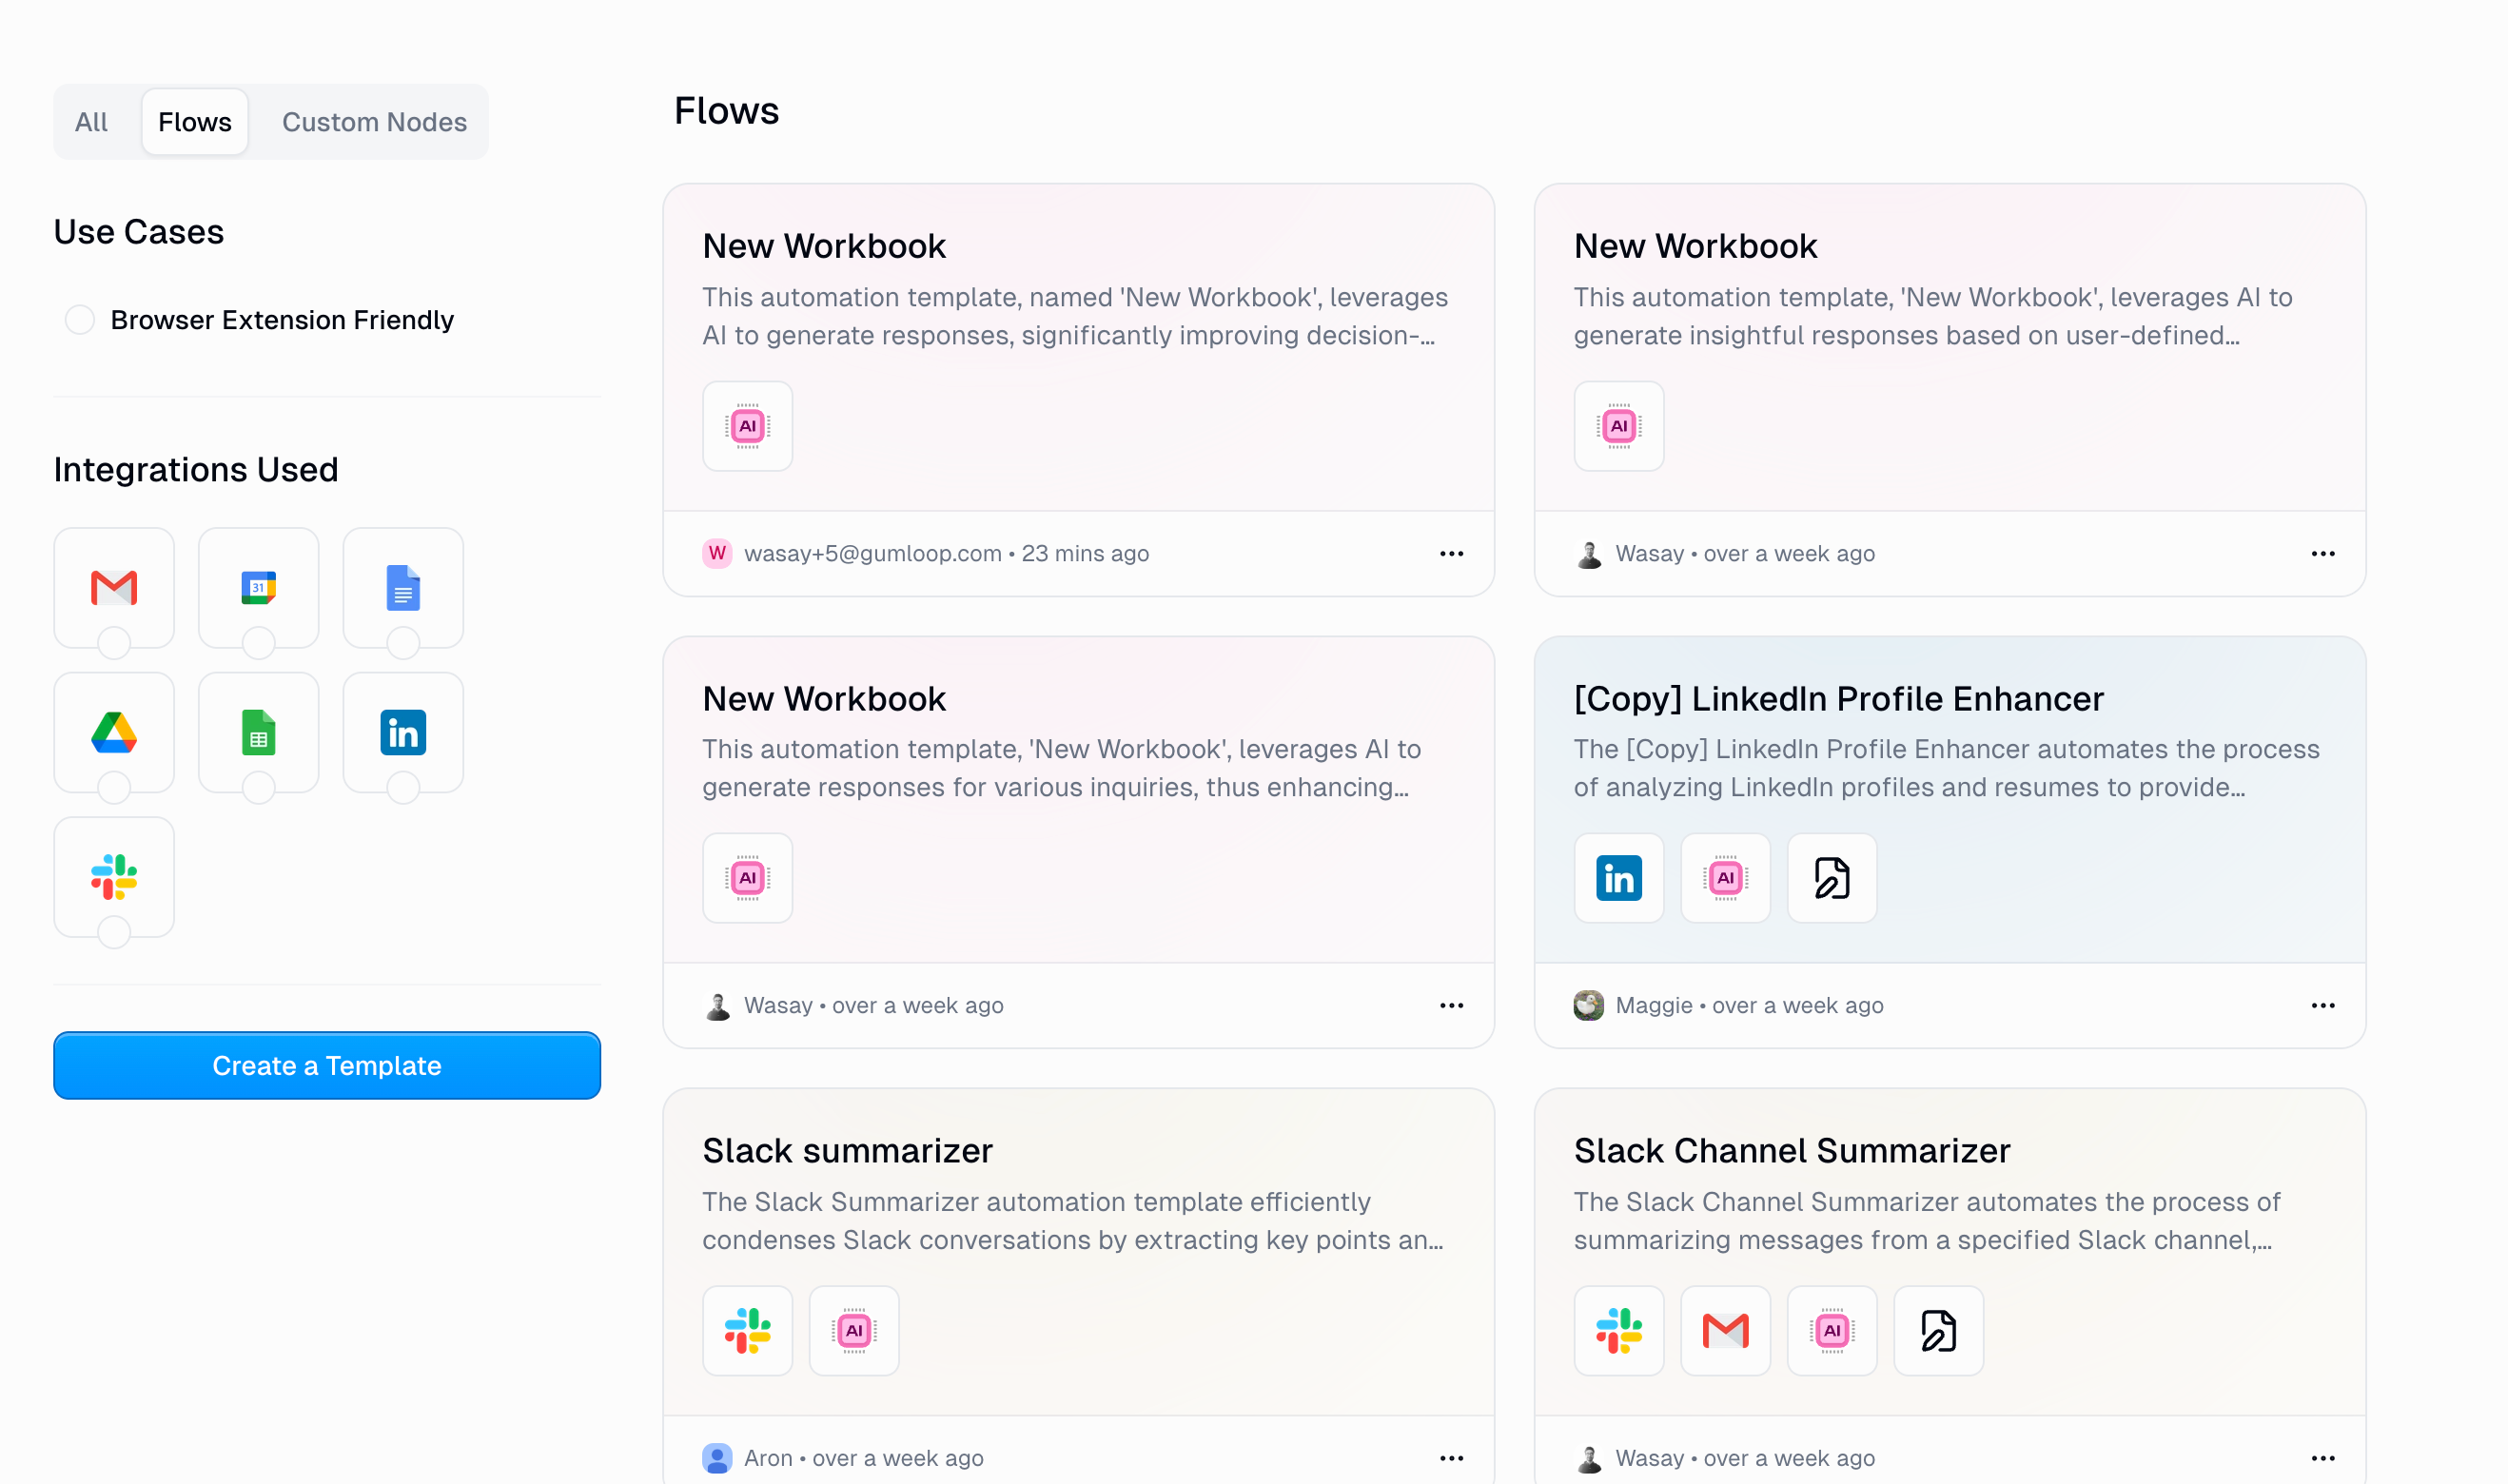
- View all your published templates
- Share direct links to specific templates
- Edit templates to update information
- Delist templates that are no longer needed
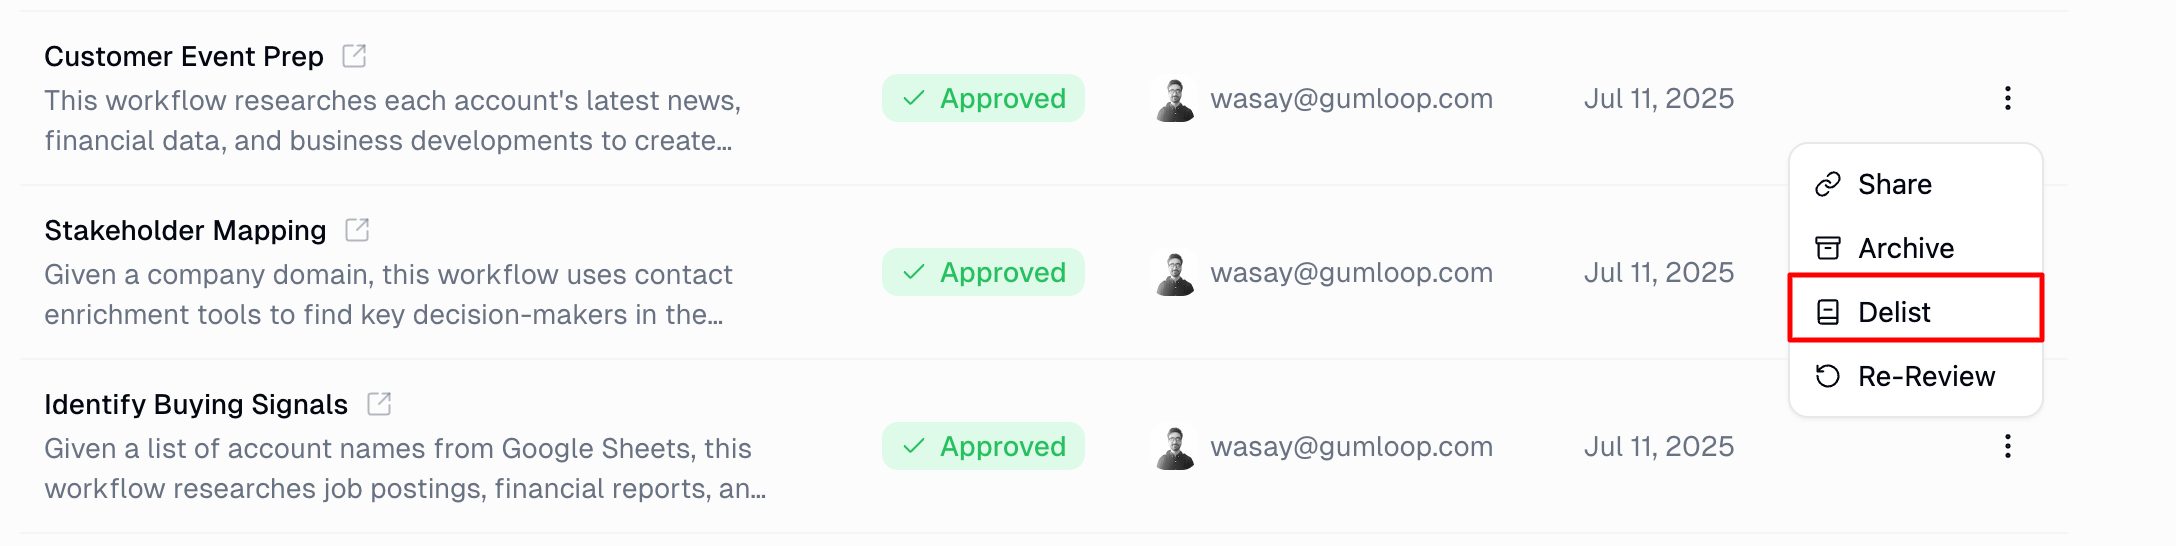
For Organization Administrators
Organization administrators have additional management capabilities through the Organization Settings:
- Review all templates published in your organization
- Delist any template that doesn’t meet standards or is outdated
Using Templates
Accessing Templates
Any organization member can access templates through gumloop.com/templates/organization: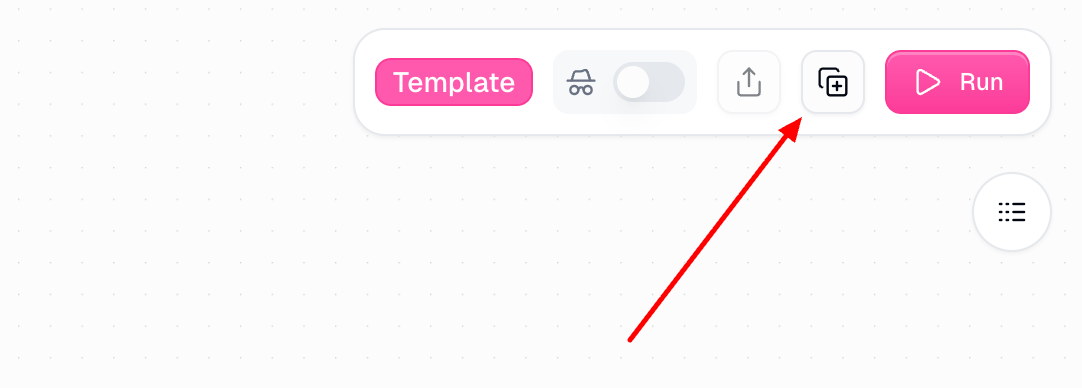
Template Cloning Details
When you clone a template, here’s what happens:| Aspect | Details |
|---|---|
| New Workbook Created | A brand-new workbook is created in your selected team or personal space |
| Structure Preserved | All workflow logic and node configurations are maintained |
| Credentials Not Shared | You must configure your own credentials and API keys |
| Full Customization | You can modify your copy without affecting the original |
Templates vs Workflow Subscriptions
Organization Templates give users a cloned copy of your workflow that they own and can customize. But what if you want to share the benefits of your workflow without giving away the workflow itself?Workflow Subscriptions
Choosing the Right Approach
| Scenario | Best Option |
|---|---|
| Users need to customize prompts, nodes, or logic | Organization Templates |
| Workflow is a starting point users will build upon | Organization Templates |
| Users just need the output, not the workflow | Workflow Subscriptions |
| You want to maintain control and push updates | Workflow Subscriptions |
| Users don’t need to understand the underlying automation | Workflow Subscriptions |
Best Practices
Documentation Best Practices
Rename Nodes Descriptively
Rename Nodes Descriptively
Rename Outputs Meaningfully
Rename Outputs Meaningfully
Use Note Nodes
Use Note Nodes
Use Subflows
Use Subflows
Best Practices for the Template Description
The template description is what potential users see when browsing the gallery. Make it clear, comprehensive, and helpful.Creating Effective Titles
Creating Effective Titles
Writing the Details Section
Writing the Details Section
External Resources
External Resources
Comparison: Organization Templates vs Public Templates
| Feature | Organization Templates | Public Gumloop Templates |
|---|---|---|
| Creator | Organization members | Gumloop team |
| Visibility | Only within your organization | All Gumloop users |
| Approval Process | None - instant publishing | Pre-approved by Gumloop |
| Use Cases | Organization-specific workflows | General automation patterns |
| Plan Requirements | Pro/Enterprise plans only | Available on all plans |
| Management | Can be delisted by creator or org admin | Managed by Gumloop |
| Customization | Tailored to your organization’s needs | Designed for broad applicability |
Frequently Asked Questions
Who can publish templates?
Who can publish templates?
Are templates immediately available after publishing?
Are templates immediately available after publishing?
Can I edit a published template?
Can I edit a published template?
What happens to existing copies when a template is delisted?
What happens to existing copies when a template is delisted?
Can templates be shared between organizations?
Can templates be shared between organizations?
How do I know if my template is being used?
How do I know if my template is being used?
Can I restrict who can publish templates?
Can I restrict who can publish templates?