What Does the Router Node Do?
The Router node acts as a decision point in your workflow, splitting your workflow into multiple paths and automatically choosing which path to follow. Think of it like an if-else statement, but significantly more powerful.Up to 8 Routes
Create multiple conditional paths instead of just if/else logic
AI-Powered Decisions
Use intelligent routing based on content understanding
Logical Conditions
Apply precise rule-based routing with boolean operators
Automatic List Processing
Process batches with item-by-item evaluation

- Route urgent tickets → Escalation team
- Route billing questions → Finance department
- Route general inquiries → Standard support queue
AI Routing vs Standard Routing
Choose the right routing mode based on whether your decisions require interpretation or can be defined with exact rules.AI Routing
Use when you need content understandingBest for analyzing sentiment, understanding context, categorizing nuanced content, and making subjective classifications.Cost: 2-30 credits based on the AI model
Standard Routing
Use when you have clear criteriaBest for exact keyword matching, numerical comparisons, binary decisions, and deterministic routing.Cost: 0 credits (logic-based)
Quick Comparison
- AI Routing Details
- Standard Routing Details
When to Use AI Routing
Use AI routing when your routing decisions require content understanding and interpretation.Ideal scenarios:- Analyzing sentiment or tone
- Understanding context and intent
- Categorizing nuanced content
- Making subjective classifications
AI routing is enabled by default. You can select different AI models based on complexity, with credit costs ranging from 2-30 credits per routing decision.
Real-World Examples
- AI Routing: Support Triage
- Standard Routing: Lead Qualifier
Support Request Triage
View Full Workflow →This workflow intelligently categorizes support requests using AI-powered routing.1
Read Emails
Gmail Reader pulls support emails from a specific label
2
AI Routing
Router analyzes content to understand intent and urgency
3
Route to Teams
Each route triggers different actions for appropriate teams
Support requests require interpretation - the AI understands context, tone, and intent to determine urgency and category. Keywords alone can’t capture this nuance.Router Setup:
- Route 1: “General Questions” → Slack notification to general support
- Route 2: “Billing Questions” → Email to finance team
- Route 3: “Feature Request” → Create Linear ticket
Loop Mode Processing
How It Works
When you pass a list to the Router, each item is evaluated separately and can be routed to different paths based on its individual characteristics. Example: View Loop Mode Workflow →Configuration
Required Inputs
Input to Evaluate
Input to Evaluate
The specific data field that determines which route to take. The Router analyzes this field to make routing decisions.Example for support tickets:
ticket_description- Route based on issue contentpriority_level- Route based on urgencycustomer_tier- Route based on customer status
Routes (Up to 8)
Routes (Up to 8)
The different paths your data can follow. Each route represents a distinct outcome or processing path.Example for support system:
- Route 1: “Urgent” - High-priority issues
- Route 2: “Billing Question” - Payment-related
- Route 3: “Technical Support” - Product issues
- Route 4: “General Inquiry” - Everything else
Optional Settings
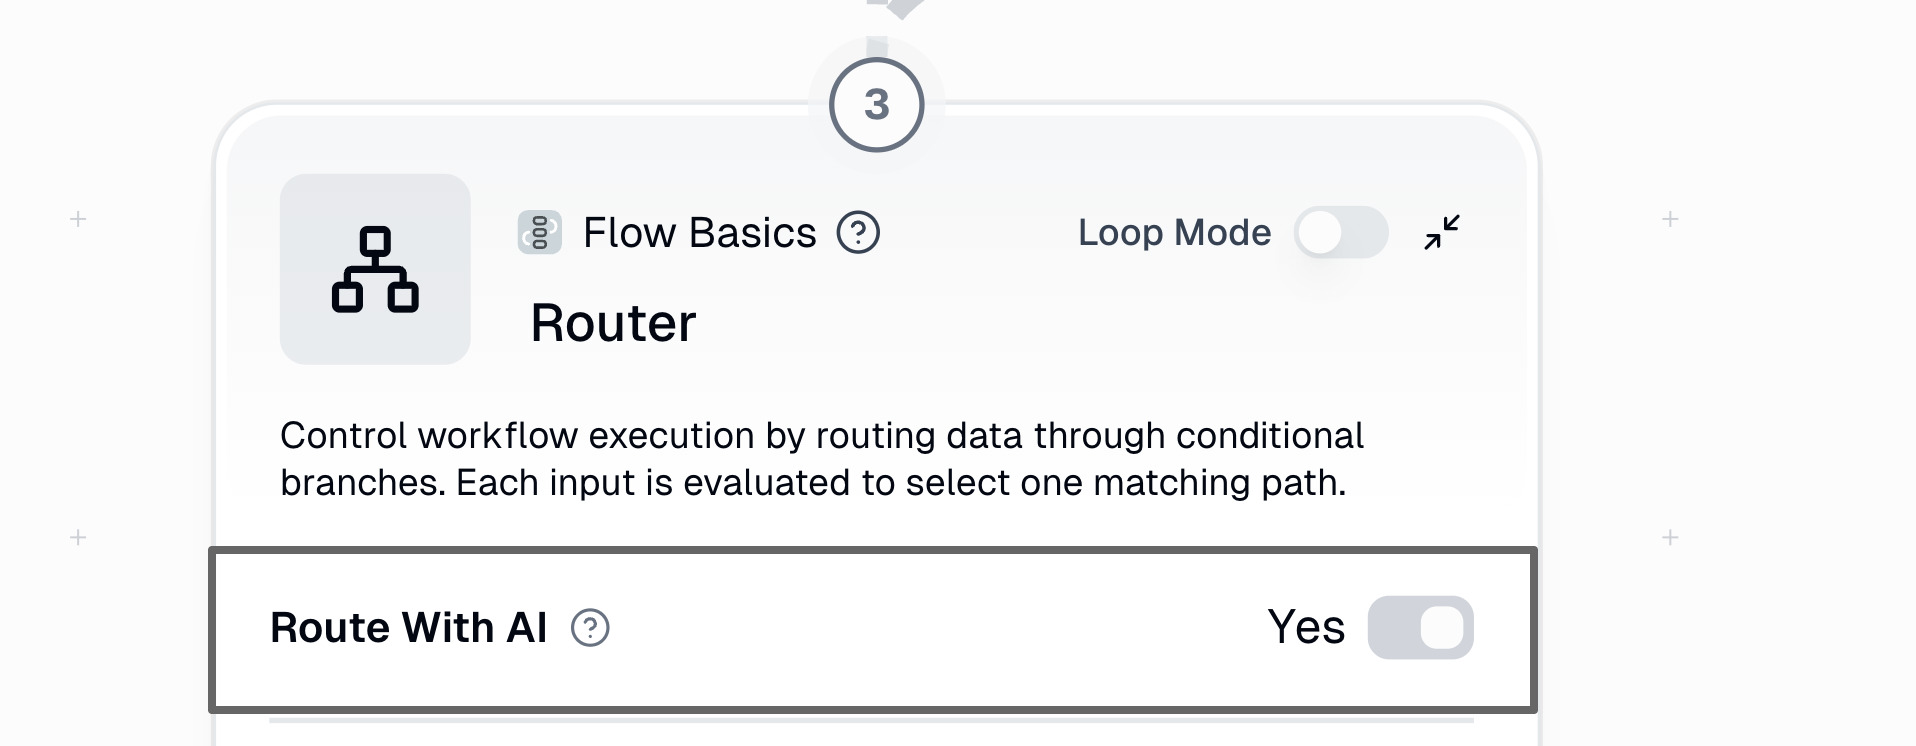
Route With AI
Route With AI
Toggle between AI-powered routing and standard logical routing.Default: Enabled (AI Mode)When to disable: When you need deterministic, rule-based routing with zero credit cost
AI Model Selection
AI Model Selection
Choose which AI model powers your routing decisions (only available in AI mode).Model tiers:
- Standard models: 2 credits - Good for straightforward categorization
- Advanced models: 20 credits - Better for complex decisions
- Expert models: 30 credits - Best for nuanced interpretation
Understanding Outputs
The Router creates separate output branches for each route. Each branch contains all the original inputs. Example Setup:Visual Workflow
Detailed Configuration Guide
- AI Routing Setup
- Standard Routing Setup
Configuring AI Routing
1
Ensure AI Mode is Enabled
“Route With AI” should be toggled ON (this is the default)
2
Select Input to Evaluate
Choose which data field the AI should analyze for routing
3
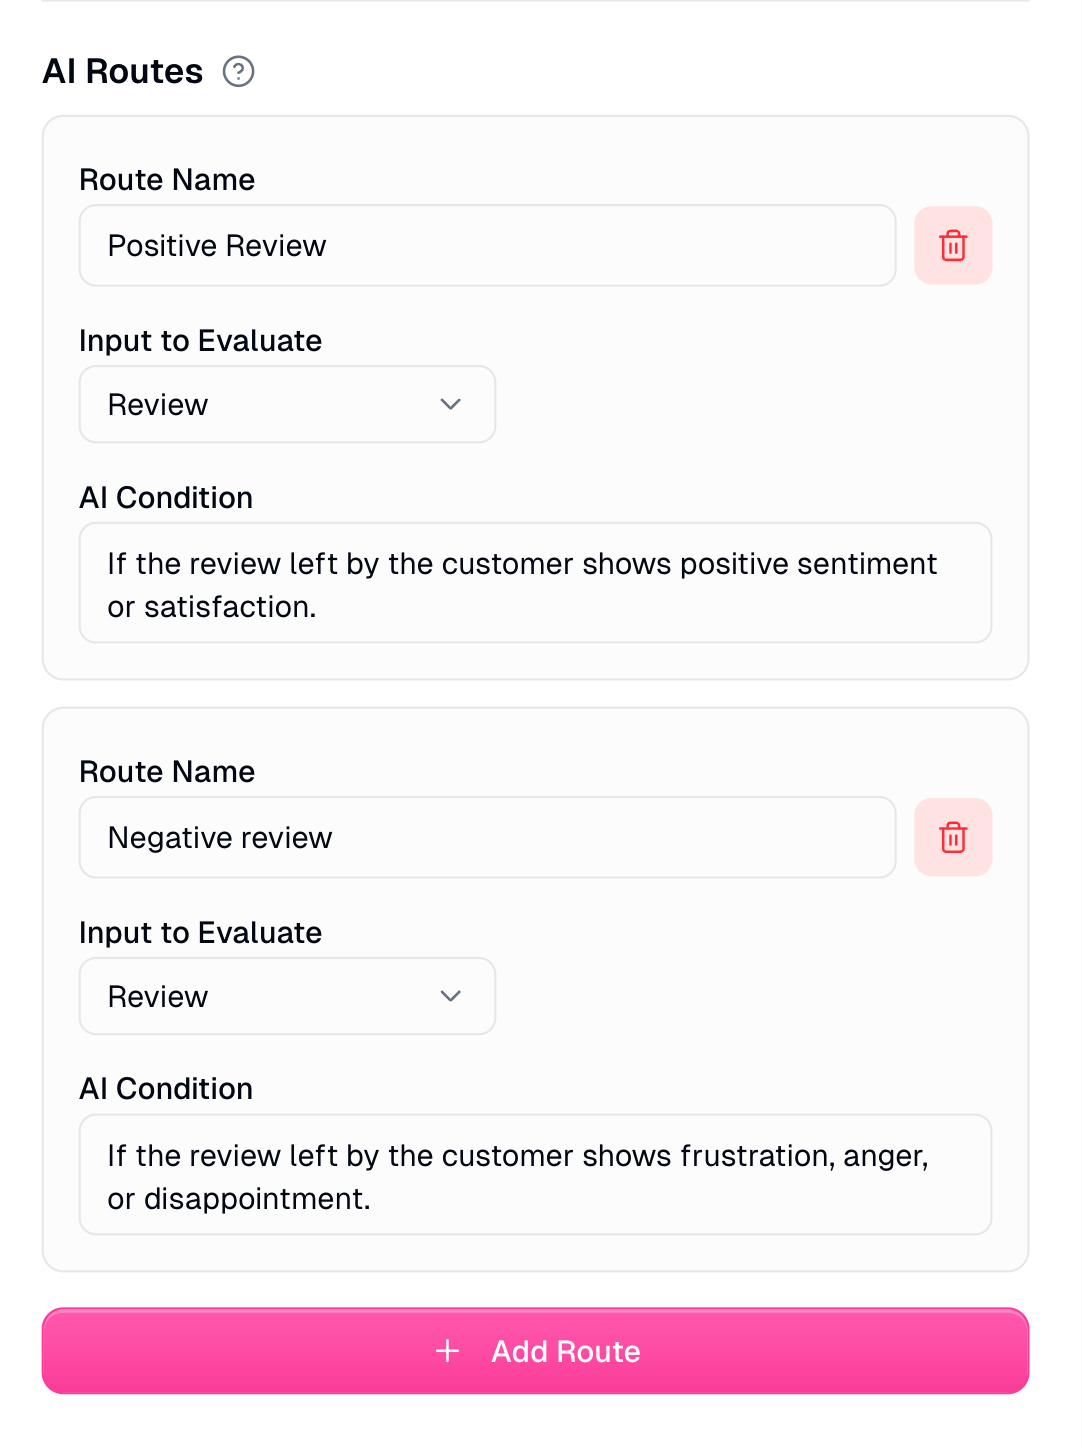
Create Routes
Add up to 8 routes with clear, descriptive names
4
Write AI Conditions
Describe in natural language when each route should be used (optional but recommended)
5
Choose AI Model
Select model based on decision complexity
Best Practices
Descriptive Route Names
✅ “Positive Review”, “Negative Review”
❌ “Route A”, “Route B”Even without conditions, AI infers logic from clear names
❌ “Route A”, “Route B”Even without conditions, AI infers logic from clear names
Clear AI Conditions
✅ “expresses anger, frustration, or demands action”
❌ “negative sentiment”Give AI enough context for accurate decisions
❌ “negative sentiment”Give AI enough context for accurate decisions
Right Model Selection
Match model power to complexity:
- Simple categorization → Standard
- Nuanced interpretation → Expert
Include Examples
Best Practices
- General
- AI Routing
- Standard Routing
Start Simple
Begin with 2-3 routes, add complexity gradually as you test and validate
Test Thoroughly
Validate routing with diverse sample data including edge cases
Descriptive Naming
Clear route names improve debugging and maintenance significantly
Always Add Fallback
Include a catch-all route at the bottom to handle unmatched items
Order Matters
Place specific conditions first, general conditions last
Monitor Run Logs
Check logs regularly to verify routing behavior
Troubleshooting
"No route matched" Error
"No route matched" Error
Problem: An item didn’t match any route conditions.Solutions:
- Add a fallback route with opposite conditions to catch unmatched items
- Review your conditions - may be too restrictive
- Check input data for unexpected formats or values
- Always include a catch-all route at the bottom
- Test with diverse sample data including edge cases
"Input type mismatch" Error
"Input type mismatch" Error
Problem: Inputs being evaluated are different types (e.g., mixing text and lists).Solutions:
- Ensure all inputs are the same type
- Use data conversion nodes before the Router
- Check upstream nodes for unexpected output types
- Validate data types in testing
- Use consistent data structures throughout workflow
"List size mismatch" Error
"List size mismatch" Error
Problem: List inputs have different lengths.Solutions:
- Use Duplicate node to match list sizes
- Filter lists to same length before routing
- Verify upstream list generation
- Check list lengths in testing
- Ensure list-generating nodes produce consistent outputs
Debugging Checklist
Check Run Logs
Monitor which routes are being selected and verify expected behaviorView Run Logs Documentation →
Test Simple Cases First
Start with clear-cut examples before testing edge cases
Validate Input Data
Ensure data is clean, properly formatted, and matches expected types
Use Descriptive Names
Clear route names make debugging significantly easier
Need Help?
Contact Support
Need help? Reach out to us and we’ll assist you.