Quick Start
Add the Output node to your workflow
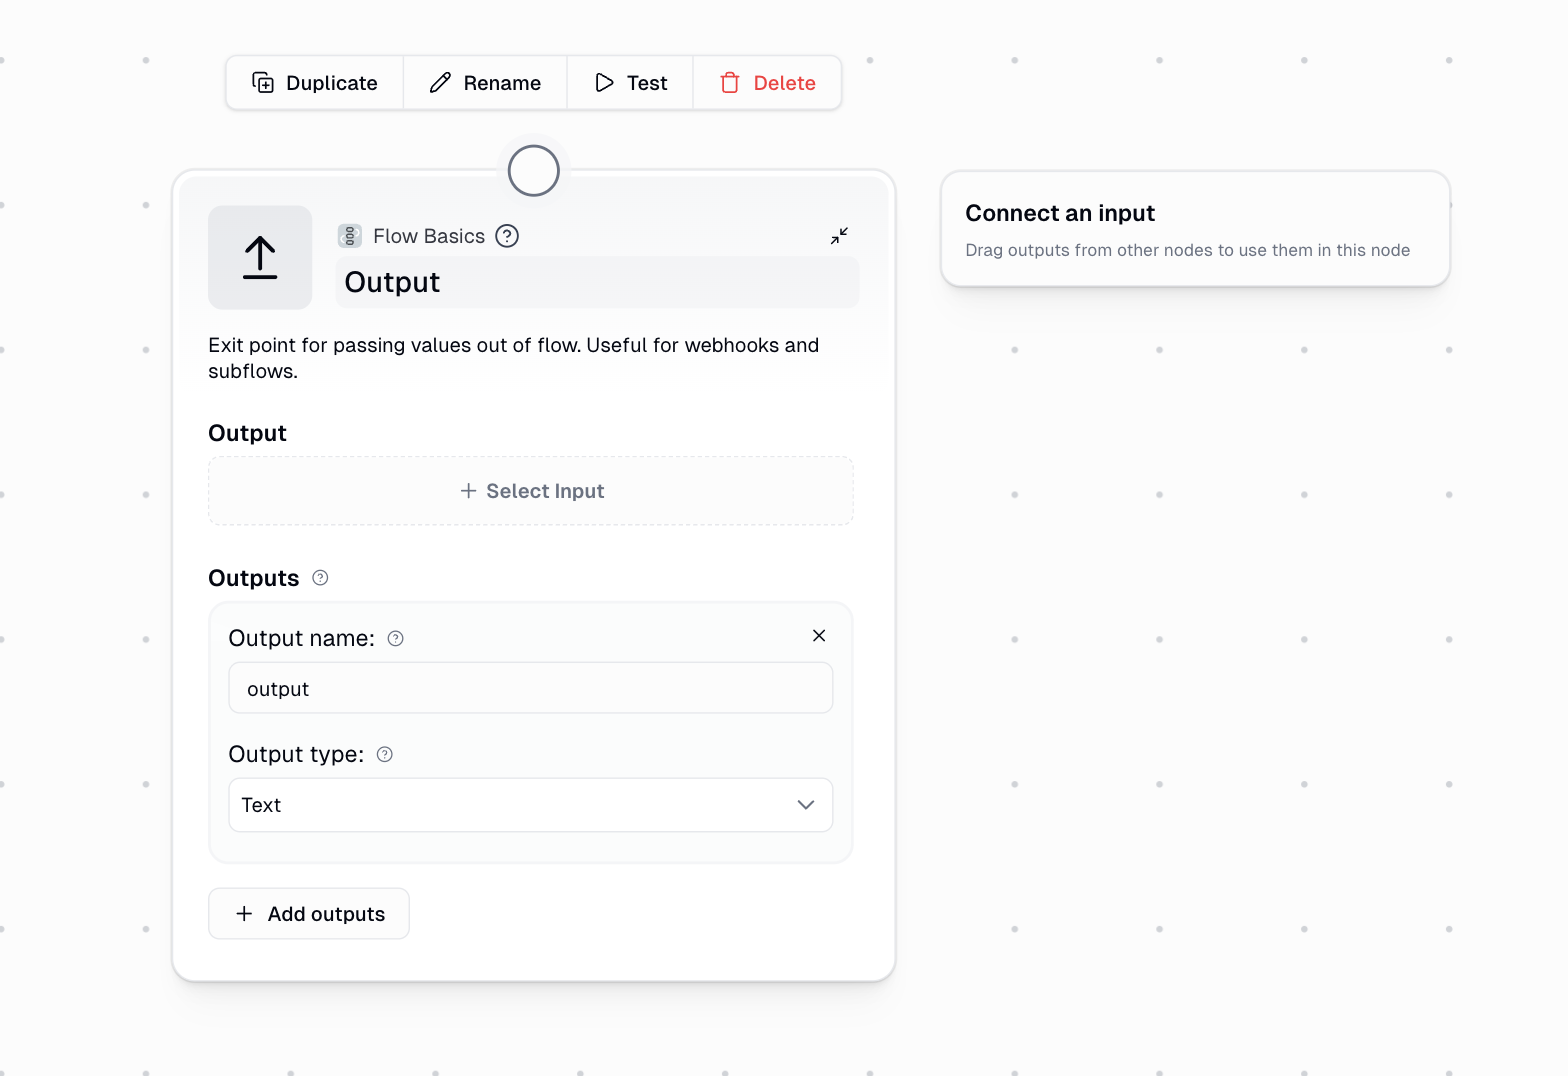
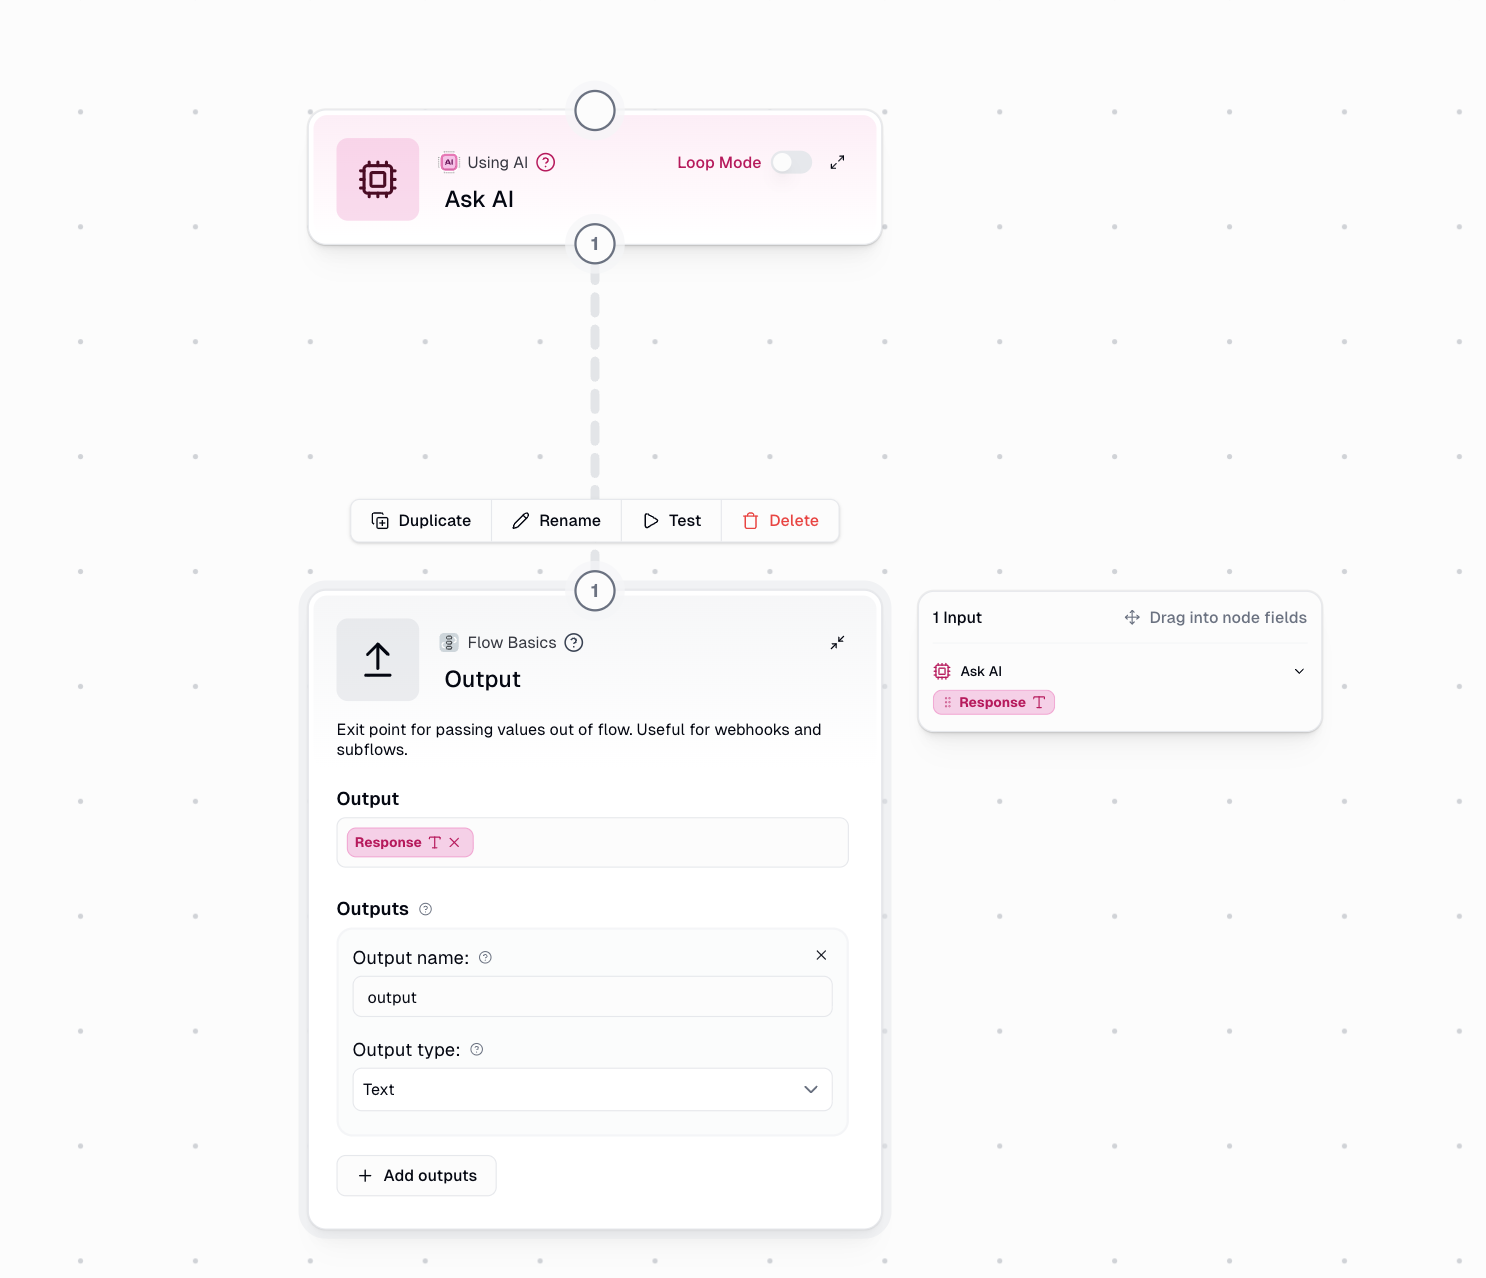
Drag the Output node from the node library into your canvas at the end of your workflow
Name your output
Give your output a descriptive name (e.g., “summary”, “processed_data”, “email_list”)
Node Configuration
Required Fields
Output
Output
The value or data you want to pass out of the workflow. Connect this to the output of any previous node in your workflow by dragging its output badge into this field.
Output Name
Output Name
A descriptive name to identify this output. This name is used when:
- Accessing the output in parent workflows
- Retrieving data via webhook responses
- Using the workflow as a subflow in other workflows
- Allowing agents to view the results when the workflow is used as a tool
Optional Fields
Output Type
Output Type
Sets the expected data format for your output:
| Type | Use Case | Example |
|---|---|---|
| Text | Single values like strings or numbers | A summary, email address, or processed text |
| List | Arrays of values | List of URLs, email addresses, or extracted items |
| Any | Mixed or unknown data types | API responses, complex objects, or testing |
Multiple Outputs
You can configure multiple outputs within a single Output node by clicking the + Add outputs button. This is useful when your workflow produces several distinct results that need to be accessed separately.When to Use the Output Node
Subflows
Required for reusable workflowsWhen creating a subflow, the Output node defines what data becomes available to the parent workflow. Without it, the parent workflow cannot access any results.
Webhooks
Return data to external systemsWhen your workflow is triggered via webhook, the Output node’s data is returned in the API response, making it accessible to the calling system.
Agent Tools
Enable agents to view resultsWhen using a workflow as a tool in an agent, the Output node is required for the agent to see and use the results of the workflow execution.
API Responses
Programmatic accessWhen running workflows via the Gumloop API, outputs are returned in the
get_pl_run response, allowing programmatic access to results.Using Workflows as Agent Tools
When an agent invokes a workflow as a tool, it needs to receive the results to continue its reasoning and decision-making. Without an Output node, the agent cannot see what the workflow produced, making the tool effectively useless.
Example: Creating an Agent-Compatible Workflow
Consider a workflow that uses Ask AI to analyze text. To make this workflow usable as an agent tool:Name the output descriptively
Use a clear name like “analysis_result” or “summary” so the agent understands what it’s receiving
The output name you choose will be visible to the agent, so use descriptive names that help the agent understand what data it’s receiving.
Working with Subflows
The Output node is essential for creating modular, reusable workflows through subflows.Passing Data to Parent Workflows
When you use a workflow as a subflow, all outputs defined in the Output node become available in the parent workflow:Chaining Subflows
Create complex data processing pipelines by passing outputs from one subflow to another:Output Types Explained
- Text
- List
- Any
Use for single valuesChoose Text when outputting:
- A single piece of text or string
- A number or calculated value
- A summary or processed result
- Any single, non-list value
Common Use Cases
Email Processing Pipeline
Email Processing Pipeline
Extract and output email addresses from a document:The parent workflow or webhook can then use this list for further processing.
Content Summarization
Content Summarization
Summarize content and return the result:Perfect for creating reusable summarization subflows.
Data Transformation
Data Transformation
Transform data and output multiple results:Use multiple outputs to provide comprehensive results.
Agent Research Tool
Agent Research Tool
Create a research workflow that an agent can use:The agent receives the research findings and can use them in its response.
Important Considerations
Output Naming Best Practices
Output Naming Best Practices
- Use descriptive, lowercase names with underscores (e.g.,
customer_email,processed_data) - Avoid generic names like “output” or “result” when possible
- Keep names consistent across related workflows
- Consider how the name will appear to agents or in API responses
Type Consistency
Type Consistency
- Match the output type to your actual data to avoid unexpected behavior
- Use List type when working with Loop Mode results
- Use Any type sparingly, as it provides less clarity to downstream consumers
Multiple Outputs
Multiple Outputs
- Add multiple outputs when your workflow produces distinct results
- Each output can have its own name and type
- All outputs are available simultaneously to parent workflows and API responses
The Output node is your workflow’s gateway for sharing results with the outside world. Whether you’re building reusable subflows, creating webhook-triggered automations, or enabling agents to use your workflows as tools, properly configured outputs ensure your data flows seamlessly to wherever it needs to go.

