Node Overview
The Google Sheets Writer node allows you to write data to Google Sheets from your Gumloop flows. It can append new rows, add a single row, or write to specific columns in your spreadsheet.Basic Node Operation
The Google Sheets Writer node works by mapping your flow’s outputs to spreadsheet columns:- Sheet Connection: Connect to an existing Google Sheet
- Column Detection: The node reads the headers in the first row of your selected sheet
- Dynamic Inputs: These headers become available as inputs to the node
- Data Mapping: Connect outputs from previous nodes to these column inputs
- Execution: When the flow runs, data is written to the corresponding columns
Node Inputs
Sheet Selection (Choose one method)
- Select Sheet: Choose to write to an existing Google Sheet from your Drive
- Use Link: Option to use a direct Google Sheets URL
Writer Mode
Choose how to write data to your sheet:- Add New Rows:
- Appends new rows at the bottom of your sheet
- Preserves existing data
- Best for logging or adding new records over time
- Add A Single New Row:
- Appends one row at the end with data from connected nodes
- Write to Column:
- Adds data to a specified column based on connected input
- Writes data vertically down a single specified column
Column Inputs
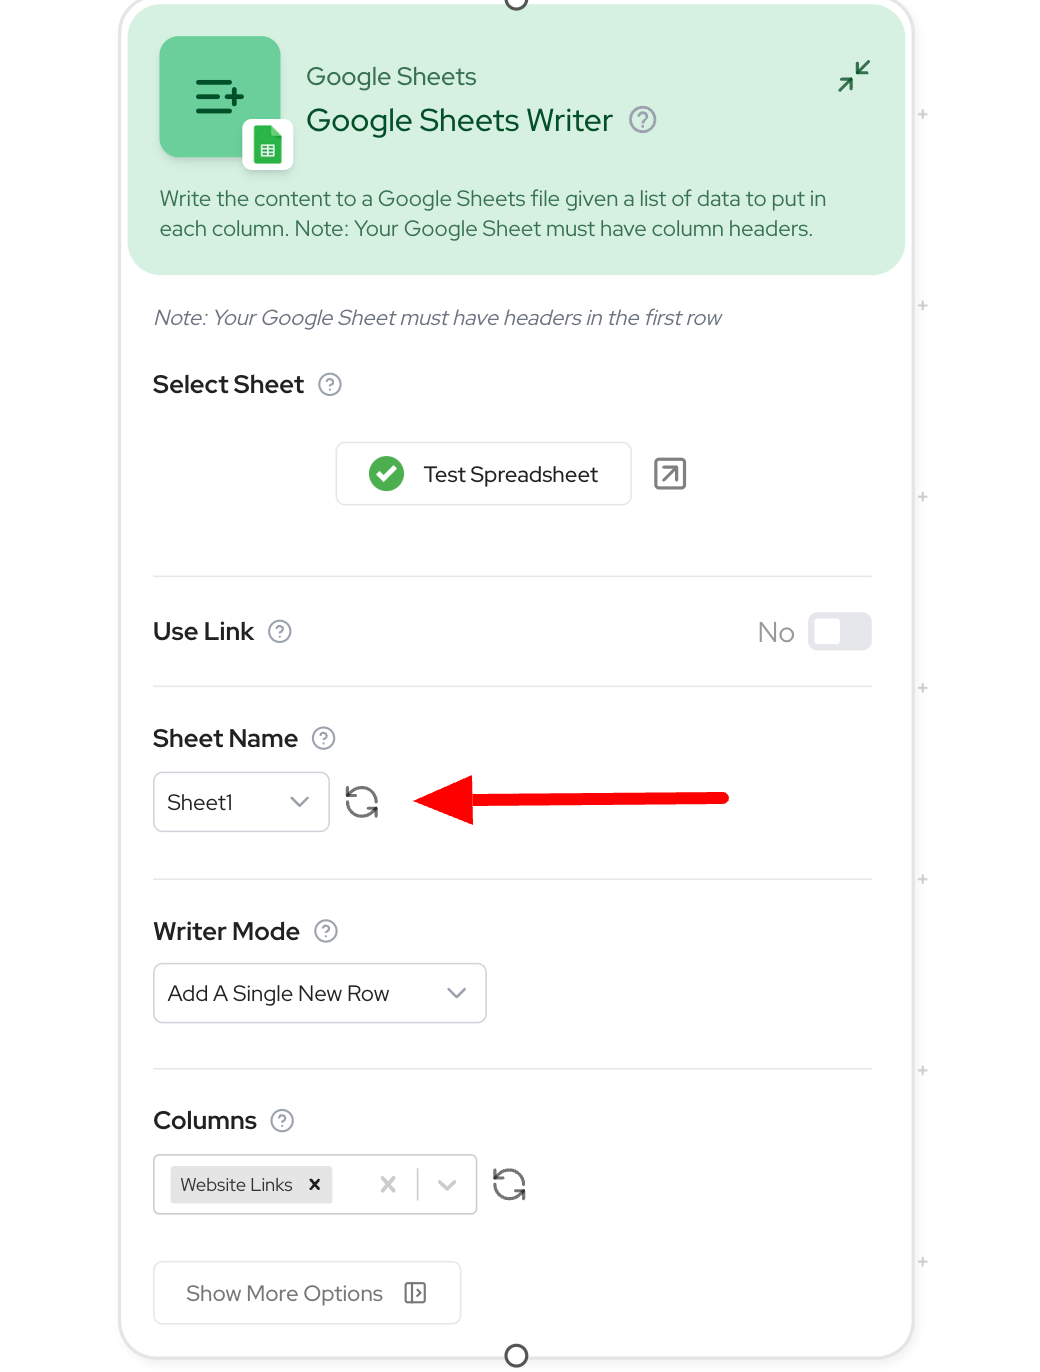
Once connected to a sheet, the node dynamically displays inputs matching the column headers found in the first row of your sheet. Connect your node outputs directly to these column headers to map your data to the appropriate columns in the spreadsheet.Refreshing Column Headers
Important: If you modify column headers in your Google Sheet, you must refresh the node’s column data in Gumloop to see these changes.

- Click the refresh icon (🔄) next to the Sheet Name dropdown
- This will update the available column inputs to match your current Google Sheet structure
- You’ll need to reconnect any node outputs to columns that have been renamed
- After adding new columns to your spreadsheet
- After renaming existing columns
- After deleting columns that are no longer needed
- When new columns in your sheet don’t appear as inputs in the node
Node Output
- Sheet Link: URL to access the Google Sheet where data was written
Additional Features
Create New Sheet Option
Under “Show More Options”, you can enable the “Create New Sheet” feature, which creates a copy of the selected sheet’s schema in a new workbook. When enabled, you can configure:- New Sheet Name: Specify a name for your new sheet (optional)
- New Sheet Permissions: Set access levels for your new sheet:
- Keep Sharing Settings: Maintain your default Google Drive sharing settings
- Anyone Can Edit: Allow anyone with the link to edit the sheet
- Anyone Can View: Allow anyone with the link to view (but not edit) the sheet
- Private: Restricts access to only you
Configure Inputs
The node allows you to configure any of its parameters as dynamic inputs. You can enable these in the “Configure Inputs” section, including:- New Sheet Name: Name for your newly created Google Sheet
- Sheet URL: The URL of the Google Sheet
- Sheet Name: The name of the worksheet within the Google Sheet
- Writer Mode parameters
- And any other node parameters
Example Use Cases
1. Customer Feedback Collection
2. Daily Metrics Logging
3. Creating a New Report Sheet
Important Considerations
- Requires Authentication with Google - Set up in the Credentials page
- Sheet must have headers in the first row for column mapping to work
- You must have write access to the Google Sheet
- After modifying column headers in your Google Sheet, click the refresh button (🔄) next to the Sheet Name to update the available column inputs in Gumloop
- This node only adds new rows - to update existing rows, use the Google Sheets Updater node
- If you’re facing a type mismatch error, toggle the Writer Mode to “Add New Rows” if you’re writing multiple rows
- If “Create New Sheet” option is enabled (found under “Show More Options”):
- An existing sheet must first be selected (to copy the schema)
- Google Drive credentials are required
- You must have permission to write to that Google Drive

