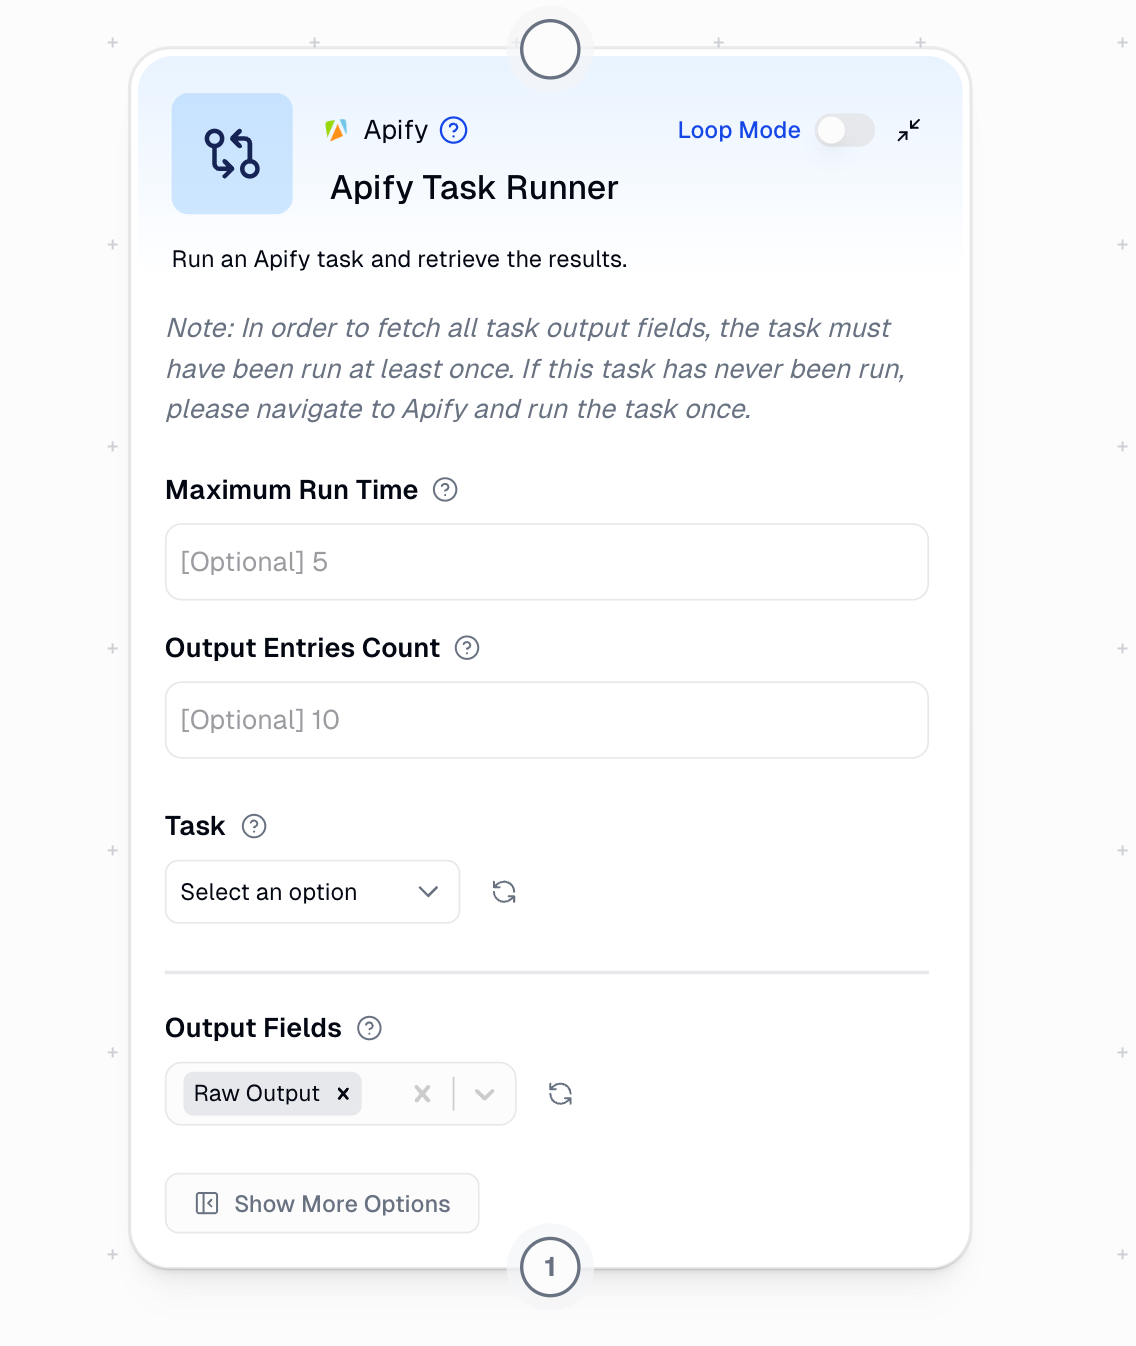
Node Inputs
Required Field
- Task: Select the Apify task to execute
Optional Fields
- Maximum Run Time: Time limit in minutes (default: 5)
- Output Entries Count: Number of results to retrieve (default: 10)
- Output Fields: Select specific data fields to extract
Connect Apify with Gumloop
To use the Apify integration in Gumloop, you will need:- An Apify account
- A Gumloop account
- At least one Apify task that has been run previously
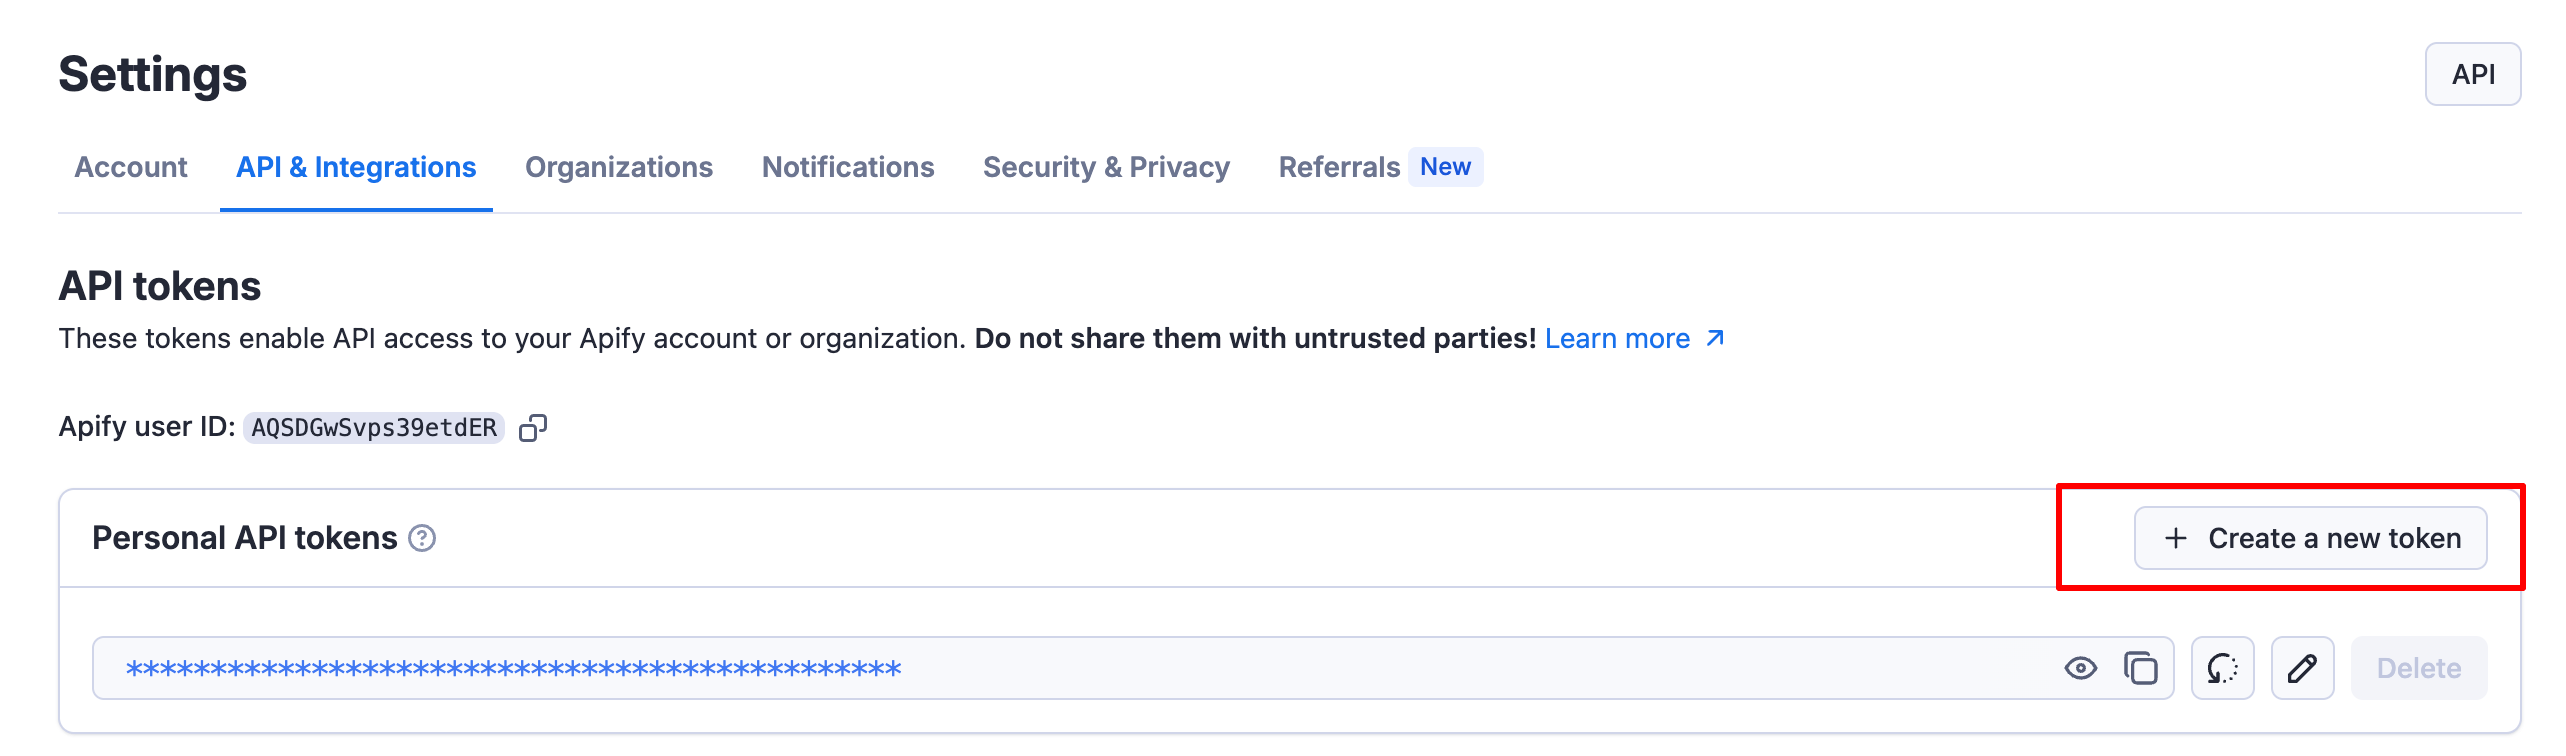
Step 1: Get your Apify API Key
First, you’ll need to get your API key from Apify Console:- Navigate to Apify Console Settings
- Copy your API token from the Integrations section
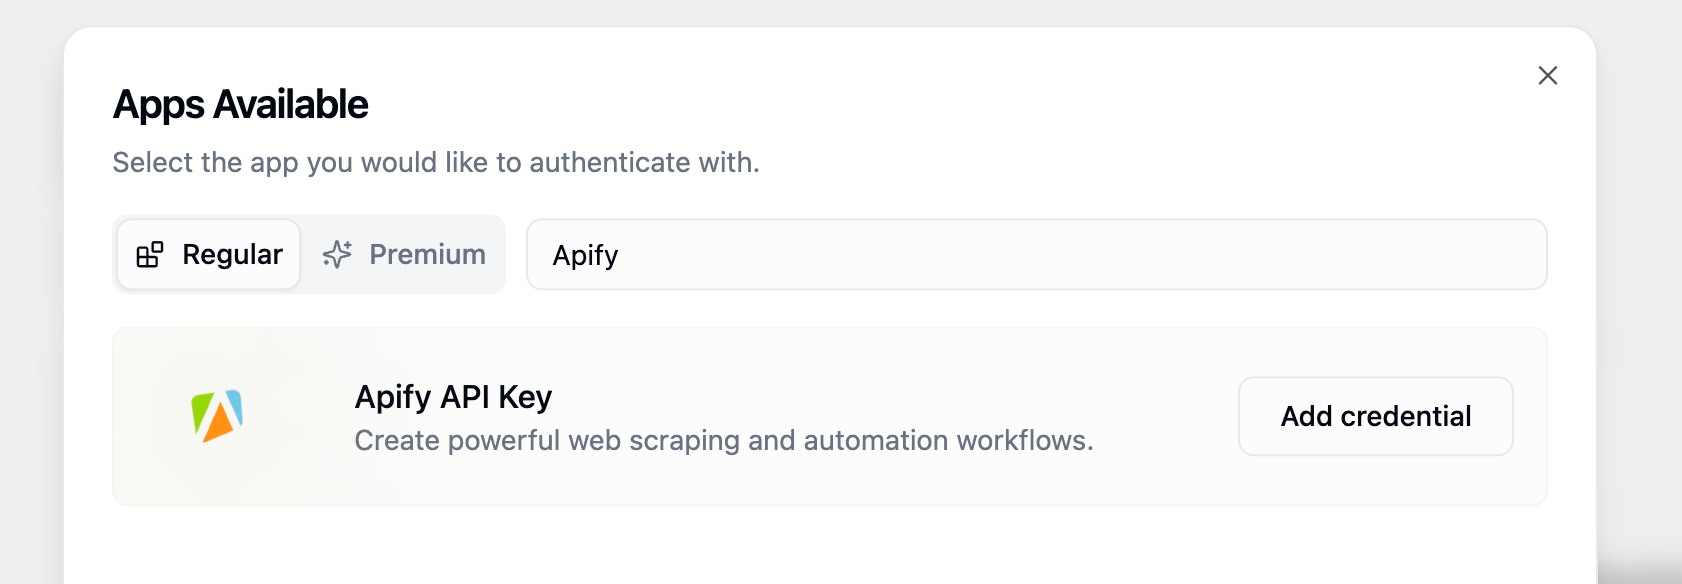
Step 2: Add Apify Credentials to Gumloop
Next, connect your Apify account to Gumloop:- Go to Connectors page
- Search for “Apify” in the credentials list
- Add your Apify API key from Step 1
- Save the credential
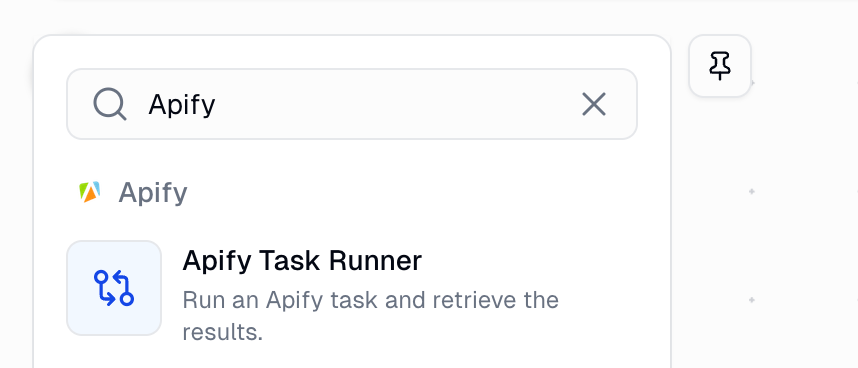
Step 3: Add Apify Task Runner to Your Workflow
Now you can add the Apify Task Runner to your Gumloop pipeline:- Open your Gumloop pipeline editor
- Search for “Apify Task Runner” in the Node Library
- Drag and drop the node onto your canvas
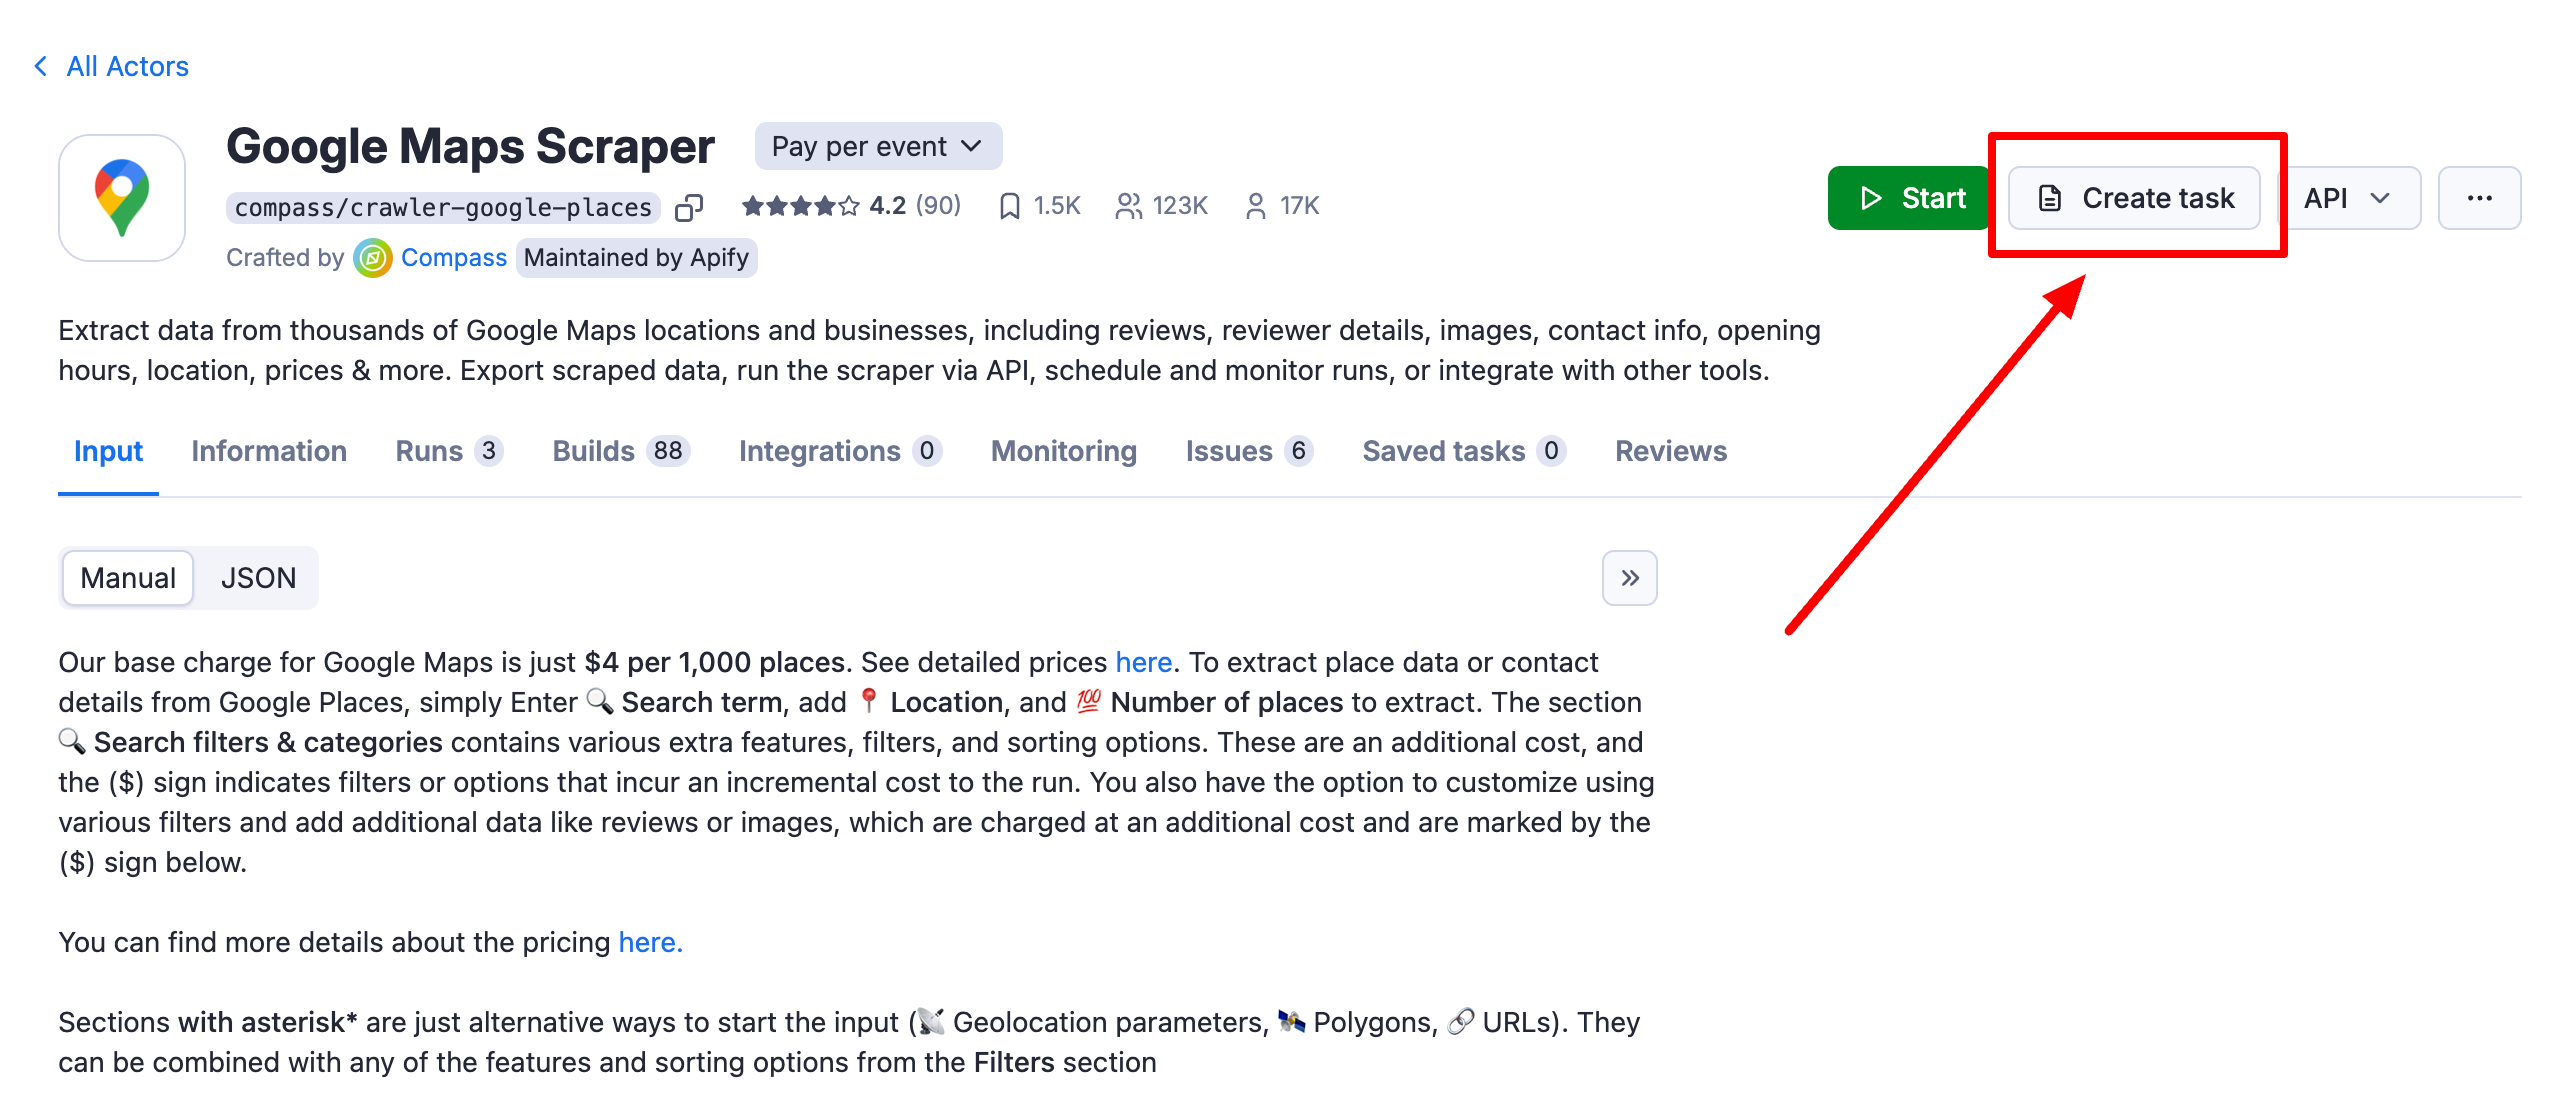
Step 4: Create and Save Tasks in Apify
The Apify Task Runner node fetches tasks from your Saved Tasks in Apify Console. You’ll need to create tasks from your Actors:- Navigate to your Apify Actors
- Click on the Actor you want to use
- Click “Create a task” next to the Run button
- Configure your task settings and save
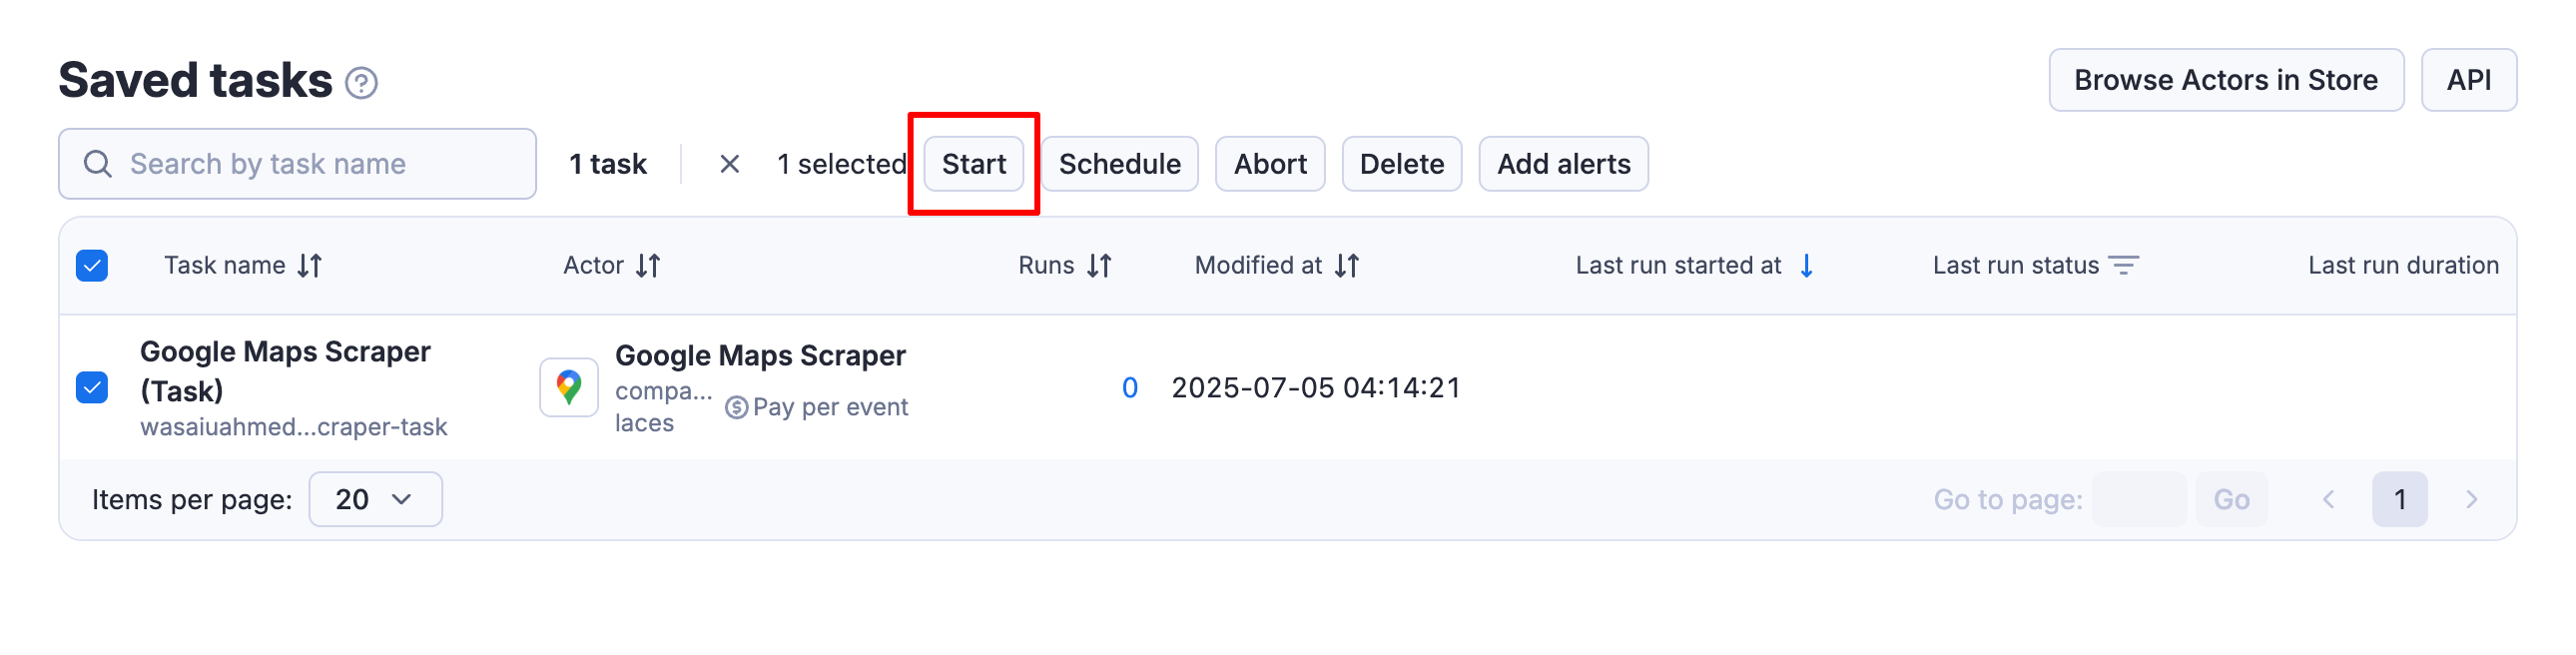
Step 5: Run Your Tasks
Before tasks appear in Gumloop, they must be executed at least once in Apify:- Go to your Saved Tasks
- Click on the task you want to use
- Click “Start” to execute it
- Wait for the task to complete
Step 6: Configure Your Gumloop Workflow
Finally, configure the Apify Task Runner node in your Gumloop workflow:- Select your task from the dropdown menu
- Choose the output fields you want to use
- Configure maximum run time and output limits
- Connect the node to other workflow components
Example Workflow
Here’s a simple example of how to use Apify with Gumloop: Web Scraping + AI Analysis + Email Report- Apify Task Runner: Scrapes product prices from an e-commerce site
- Ask AI: Analyzes price trends and identifies opportunities
- Combine Text: Formats the analysis into a readable report
- Gmail Sender: Emails the report to stakeholders
Best Practices
- Test in Apify First: Always run your tasks in Apify Console before using in Gumloop
- Set Realistic Timeouts: Match the timeout to your task’s expected runtime
- Limit Output Size: Only retrieve the data you need to optimize performance
- Use Specific Fields: Select only the output fields required for your workflow
- Monitor Usage: Keep track of both Apify and Gumloop credit consumption
Native Apify Nodes for Popular Use Cases
For even more powerful and customizable automation, Gumloop offers native nodes for popular Apify use cases that provide enhanced functionality and easier configuration:Specialized Nodes Available
- TikTok
- YouTube
- Google Maps
Why Use Native Nodes?
- Pre-configured: No need to manage Apify tasks or API keys
- Enhanced Features: Built-in data validation and formatting
- Better Performance: Optimized for Gumloop
- Fully Customizable: Easily customize what you want to do with the node using a prompt
General MCP Tutorial to Create your Own Node
Important Considerations:
- Requires Authentication with Apify - Set up in the Connectors page
- Task must be run once on Apify platform first
- Output format depends on entries count
- Consider runtime limits for large tasks