Webhooks
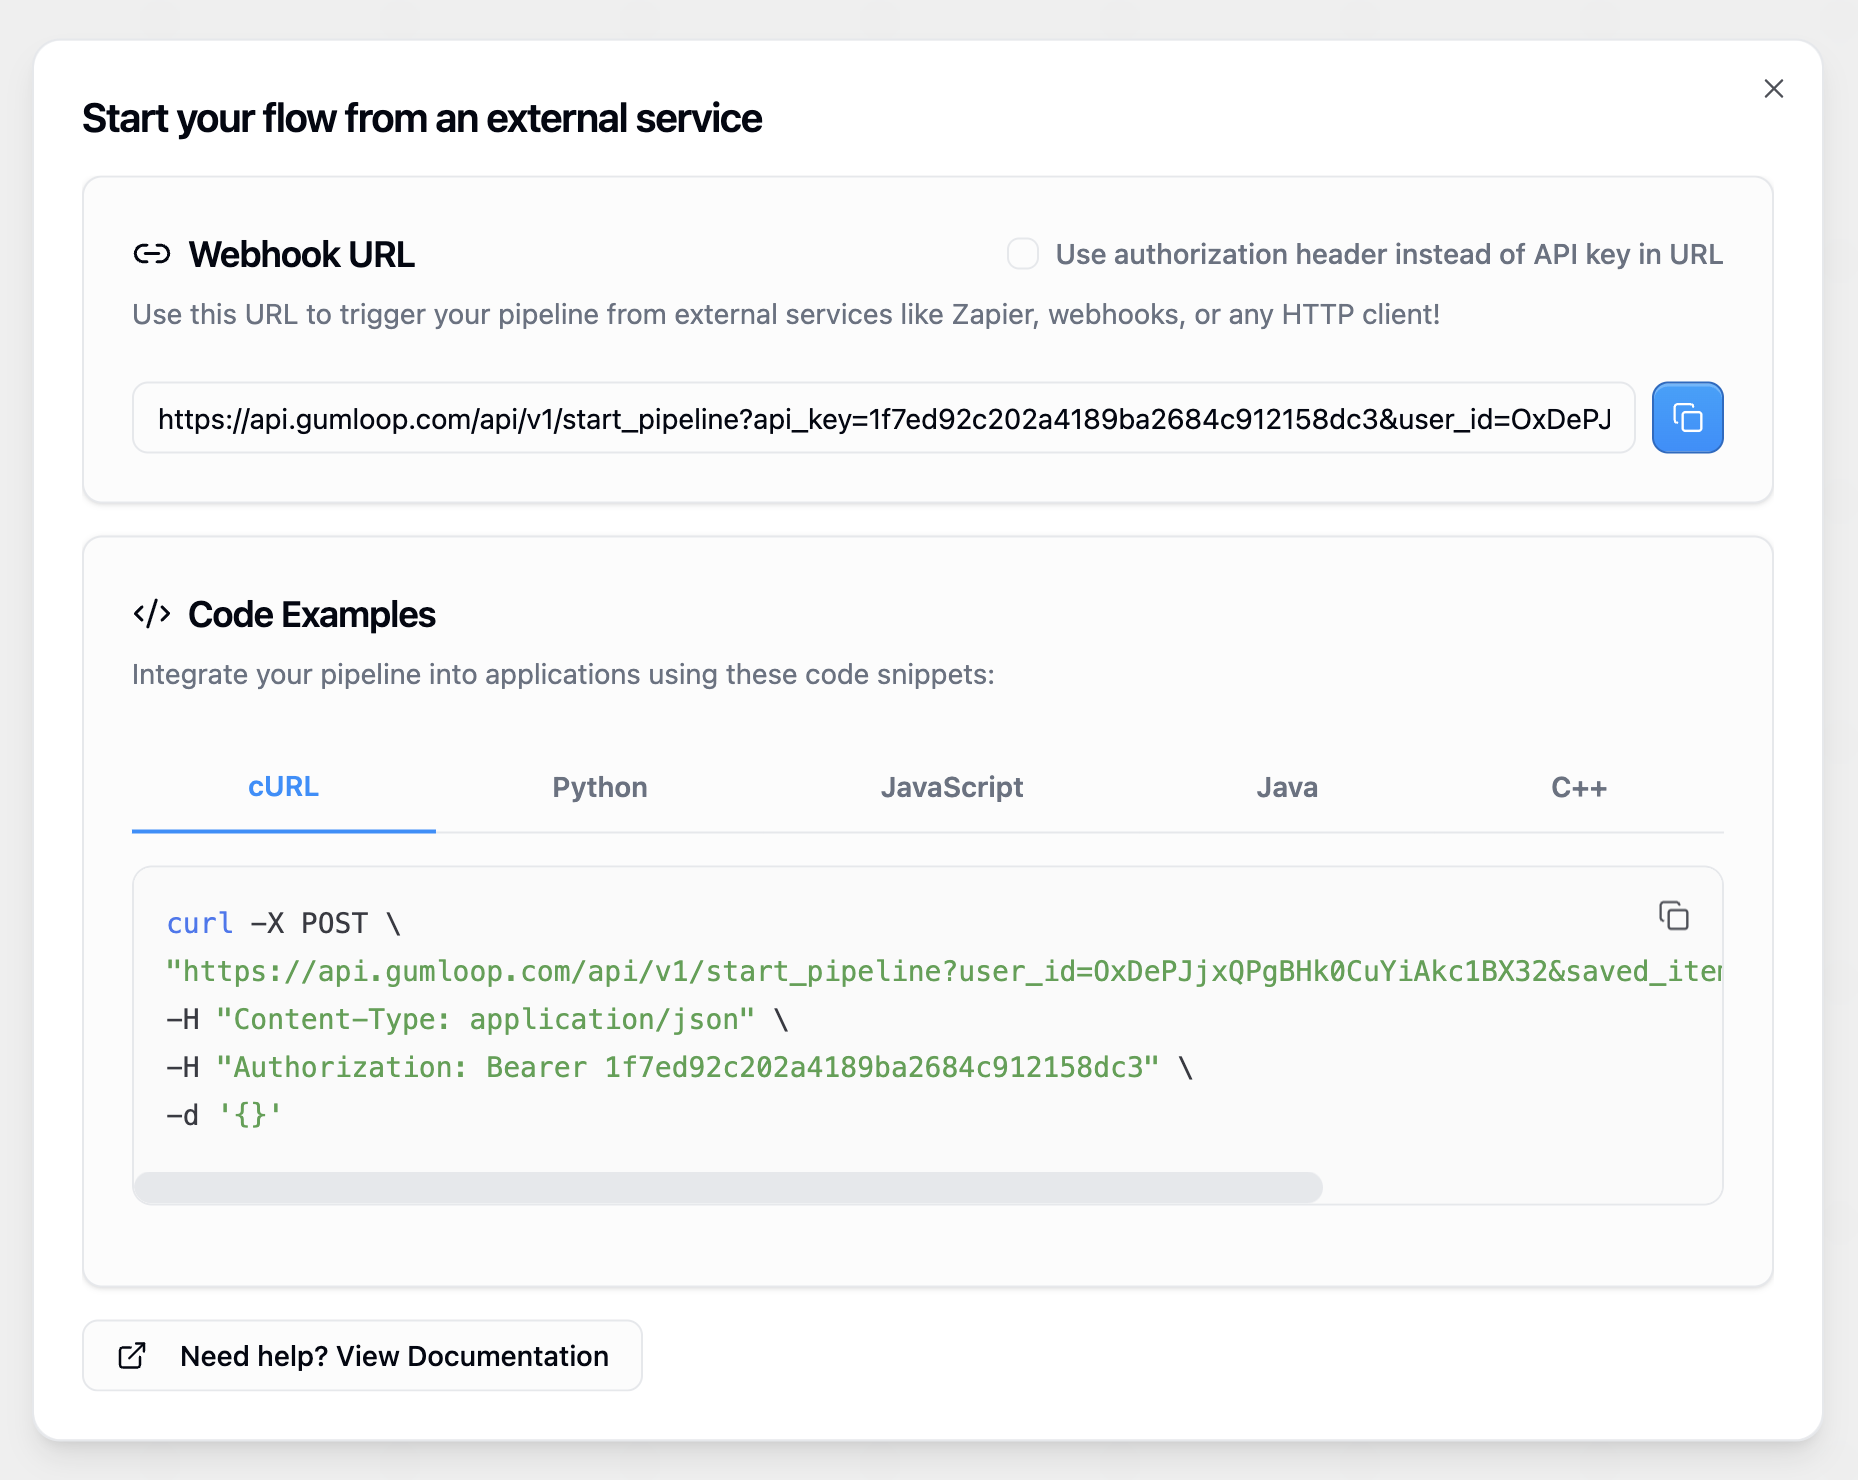
All Gumloop workflows can be triggered via your own external app using webhooks.
Finding Your User ID
Many API endpoints require auser_id parameter. You can find your User ID on the Profile Settings page, under your email address.

Authorization
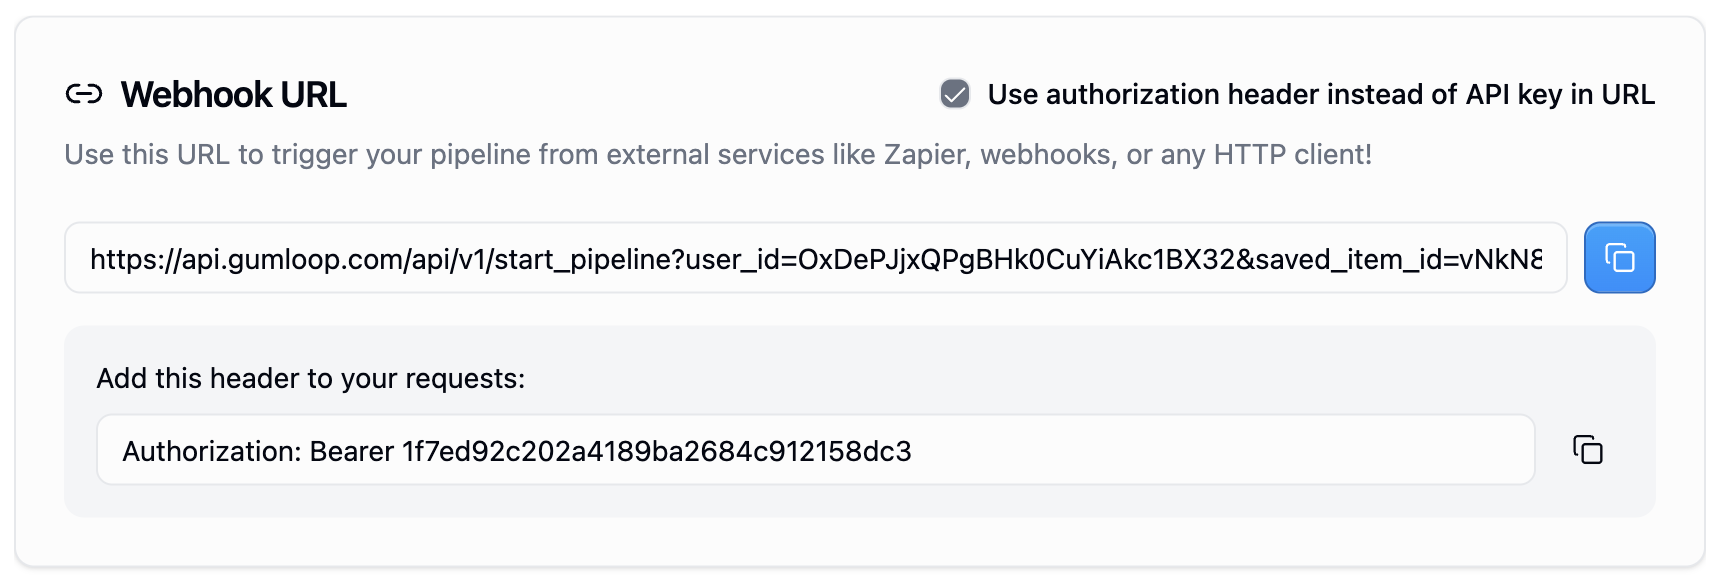
When making requests to trigger your Gumloop workflows, you can authenticate using one of two methods:- API Key in URL
The default method is to include your API key as a query parameter in the URL. This method is simpler and works well for most integrations:
All examples below use the Authorization header method, but you can substitute the API key method in any of them.
Inputs
Most useful workflows require some input from the user. There are two main approaches to handle inputs in your Gumloop workflows:- Webhook Input Node (Recommended)
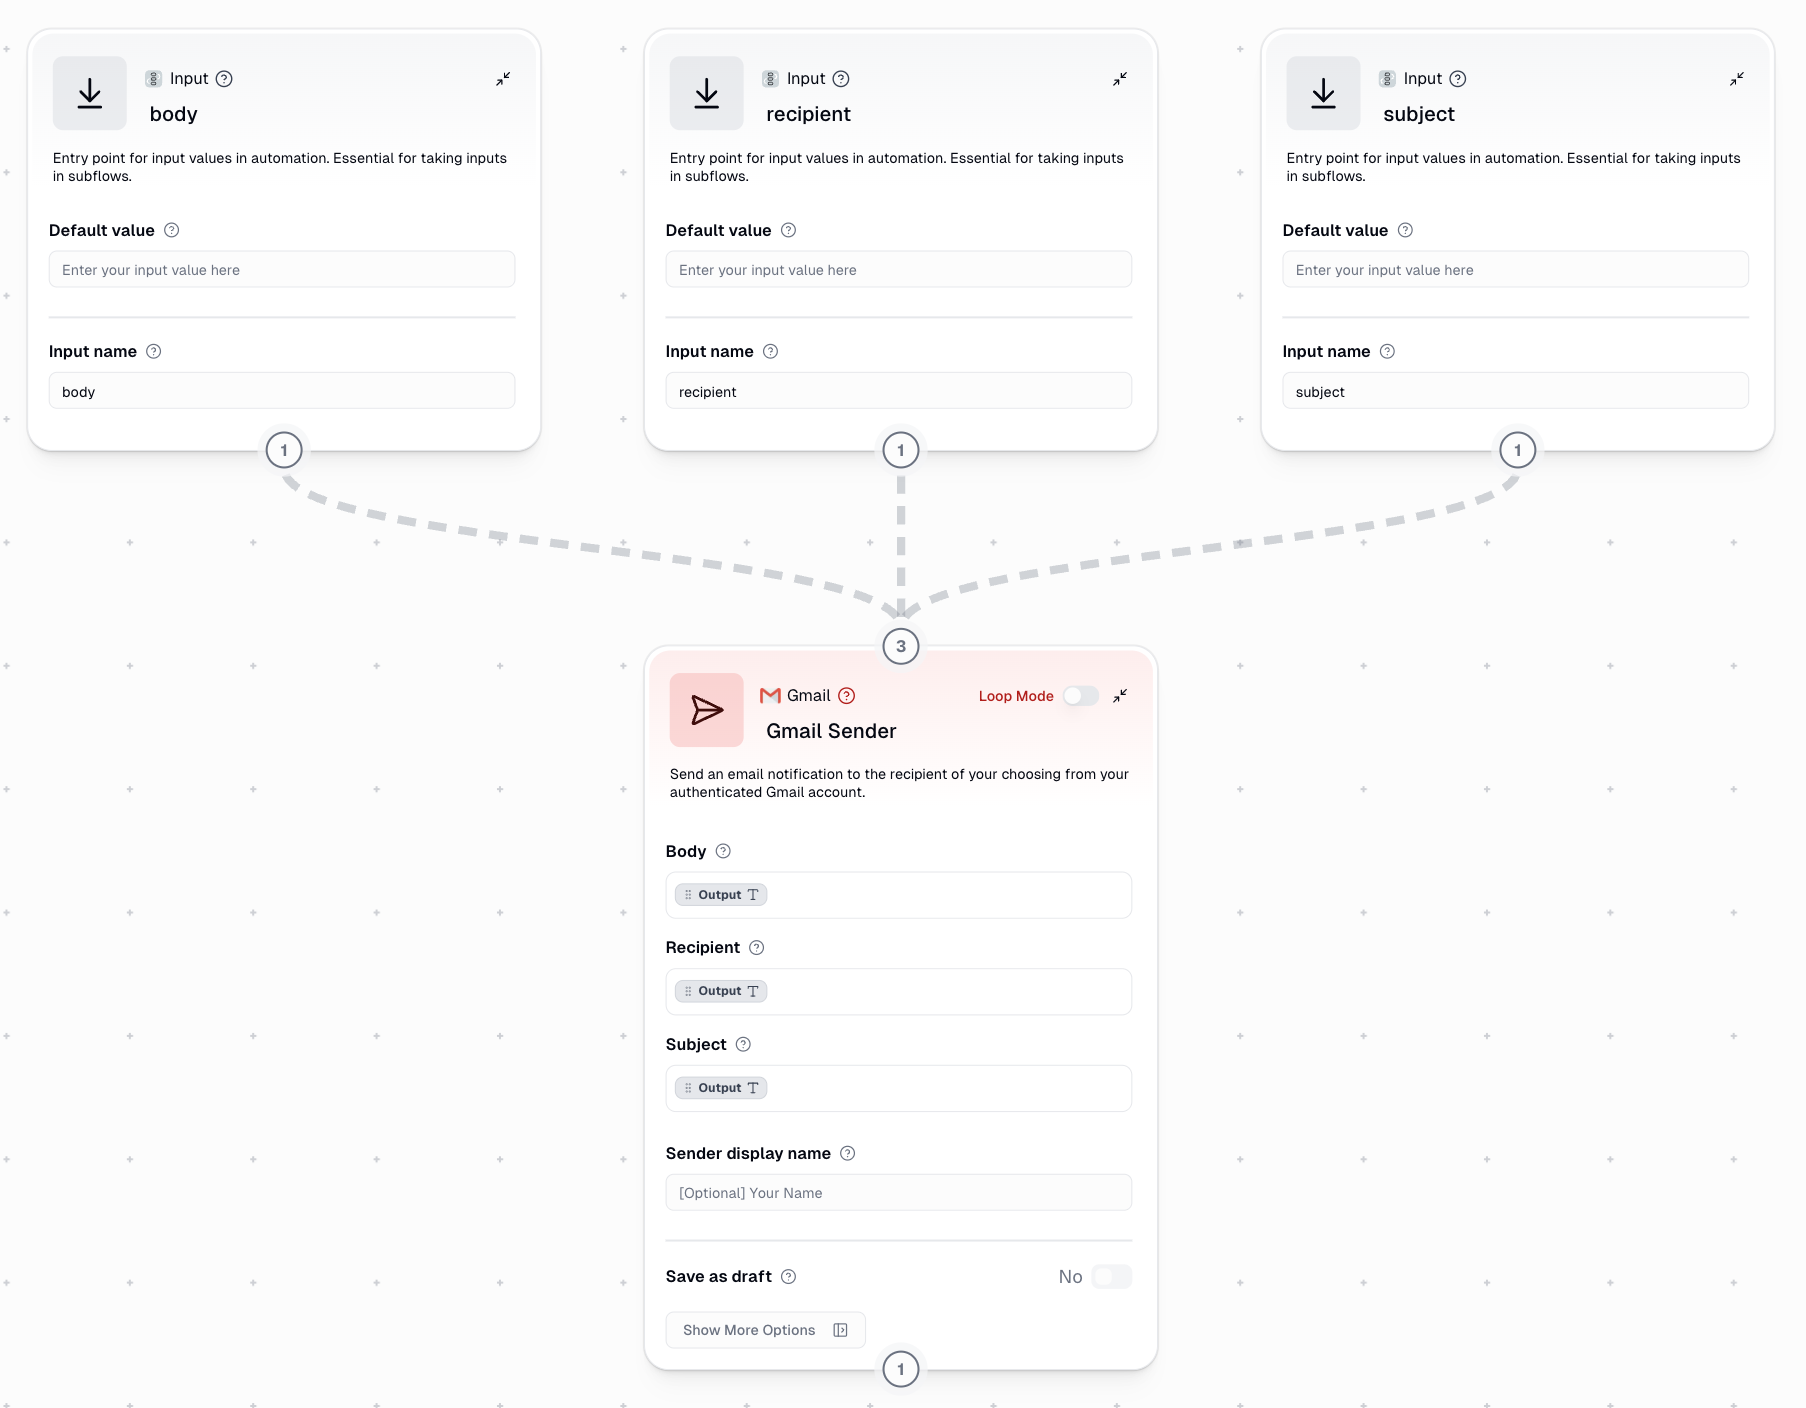
- Named Input Nodes
Webhook Input Node with JSON Parsing
This is the recommended approach for handling inputs. Use a Webhook Input node to capture the entire request body as a string, then parse it using a JSON Reader node. This method provides maximum flexibility and makes it easy to handle complex, nested data structures.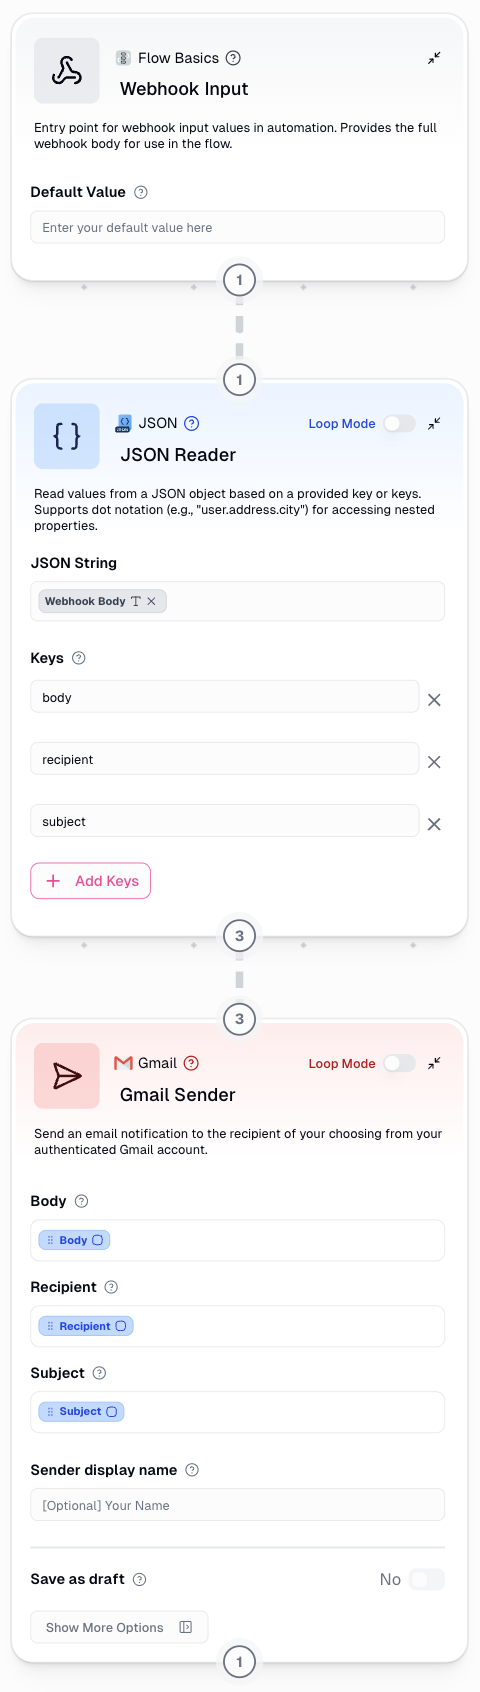
Outputs
When you run a Gumloop pipeline remotely, the POST request tohttps://api.gumloop.com/api/v1/start_pipeline will return a run_id and a URL that links to the workflow run.
Here is an example of the response:
run_id to poll a separate endpoint to get information about the ongoing run like the status, logs, and outputs when it is completed.
Polling for Run Status
In order to poll, make aGET request to https://api.gumloop.com/api/v1/get_pl_run with run_id as a query parameter.
Here is an example of a GET request with cURL, Python, and JavaScript and their outputs:
Response Structure
log, state, and outputs.
log
log
Contains a running log of each node and the activities within it.
state
state
One of “STARTED”, “RUNNING”, “TERMINATED”, “FAILED” or “DONE”.
outputs
outputs
A JSON object with key-value pair where the key is the
output name and the value is the output value. This will only be populated when your pipeline reaches a “DONE” state and you have named output nodes in your pipeline.