> ## Documentation Index
> Fetch the complete documentation index at: https://docs.gumloop.com/llms.txt
> Use this file to discover all available pages before exploring further.
# Workflow Triggers
> Automatically start your workflows based on schedules, webhooks, and external events.
A trigger automatically starts your Gumloop workflow based on external events. For example, your workflow can start whenever:
* A specific time arrives (like 9 AM every day)
* A new email lands in your Gmail
* Someone submits your Typeform
* A new record is added to your Airtable
* A new issue is created in Linear or Jira
* Someone reacts to a message in your Slack channel
* Relevant changes are detected on the web for a topic you're tracking
## Types of Triggers
Schedule workflows to run at specific times with daily, weekly, or custom schedules. Perfect for automating regular tasks.
Start your workflows from external applications. Useful for connecting Gumloop with your other tools.
Trigger workflows from Gmail messages, Slack messages, Slack reactions, Microsoft Teams channels, or other communication platforms.
Automatically respond to changes in Airtable, Notion, Google Sheets, or form submissions.
***
## Time Based Triggers
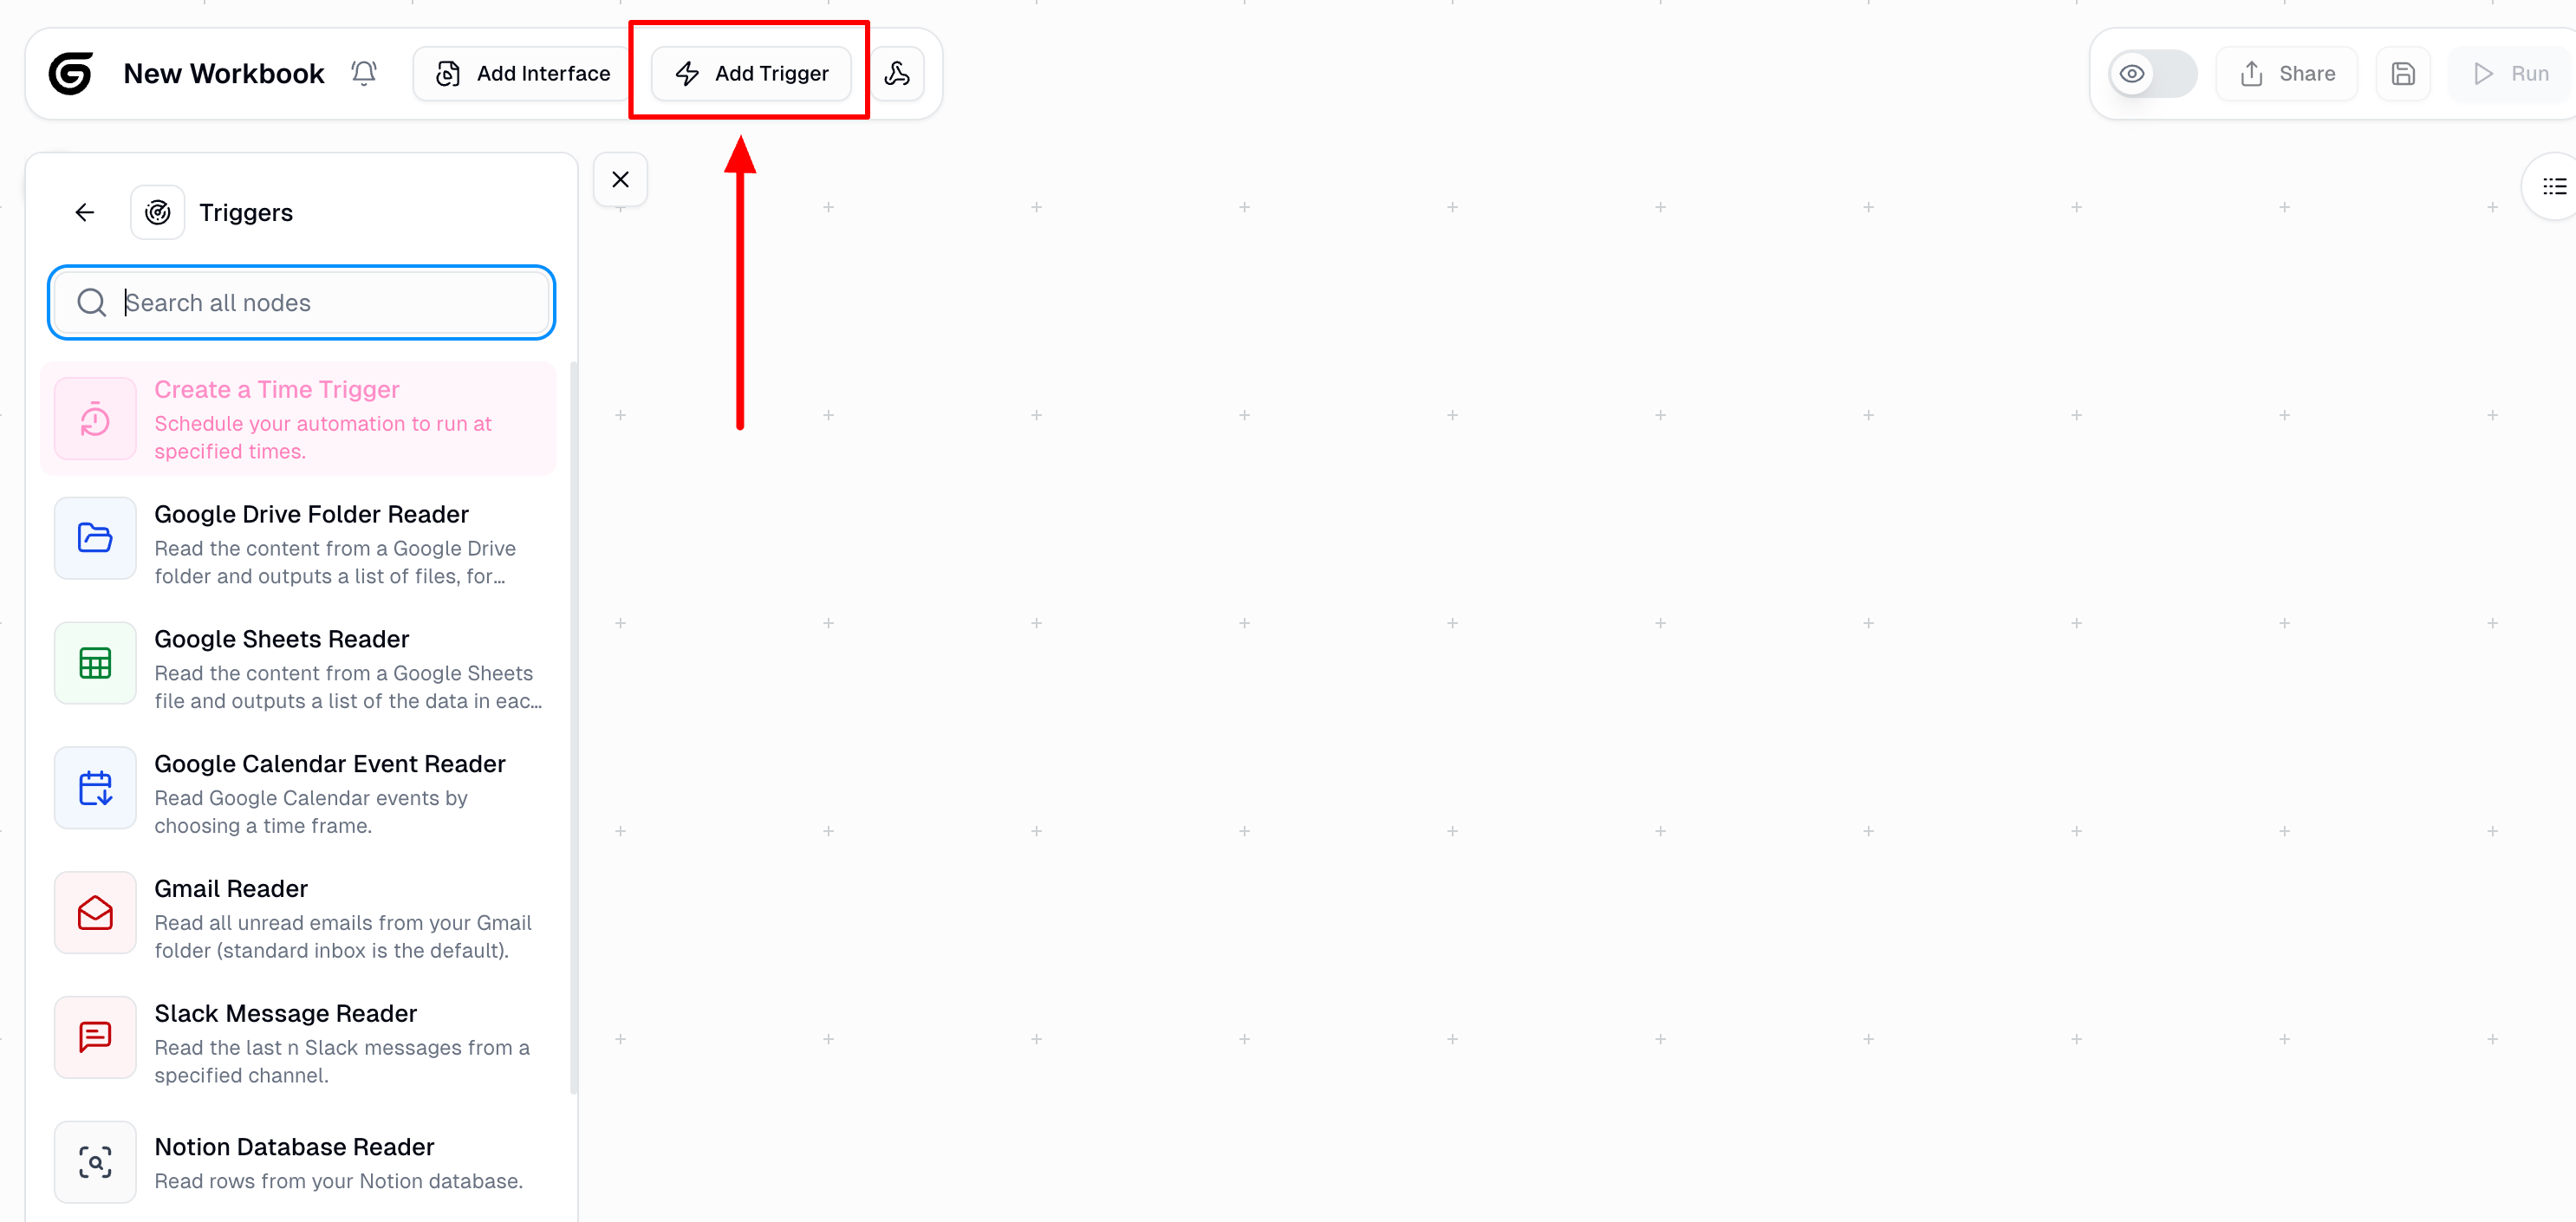
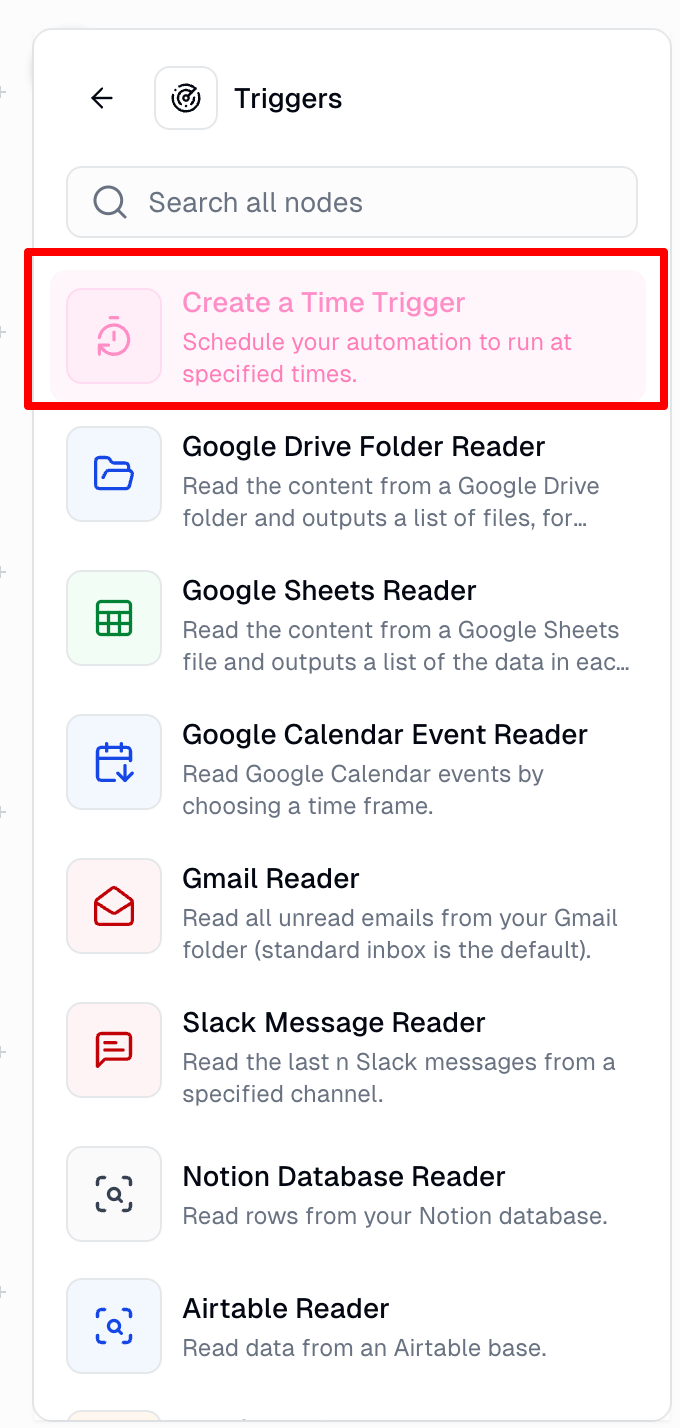
The time trigger is available under the 'Triggers' category in the Node Library. You can configure the time settings by specifying how frequently the workflow should run or by customizing the settings manually using the settings cog.
### Manual Time Settings
* **Minute**: The exact minute within the hour (e.g., `0` for the start of the hour)
* **Hour**: The specific hour of the day (e.g., `6` for 6:00 AM)
* **Day of Month**: The specific day(s) of the month (use `*` for all days)
* **Month**: The specific month(s) (use `*` for all months)
* **Day of Week**: The day of the week (`0` and `7` = Sunday, `1` = Monday, etc.)
* **Timezone**: The time zone for the schedule
* **Max Failure Count**: The number of retry attempts if a trigger fails
**Example Configuration**: The workflow is configured to run **every Monday at 6:00 AM Pacific Time**, with up to 3 retry attempts if it fails.
***
## Webhooks
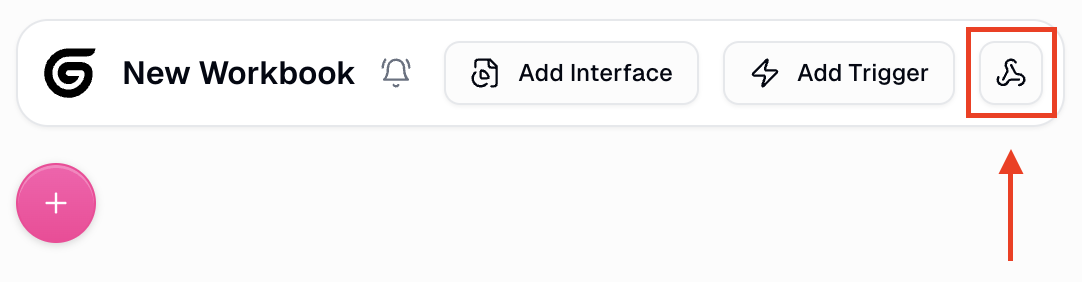
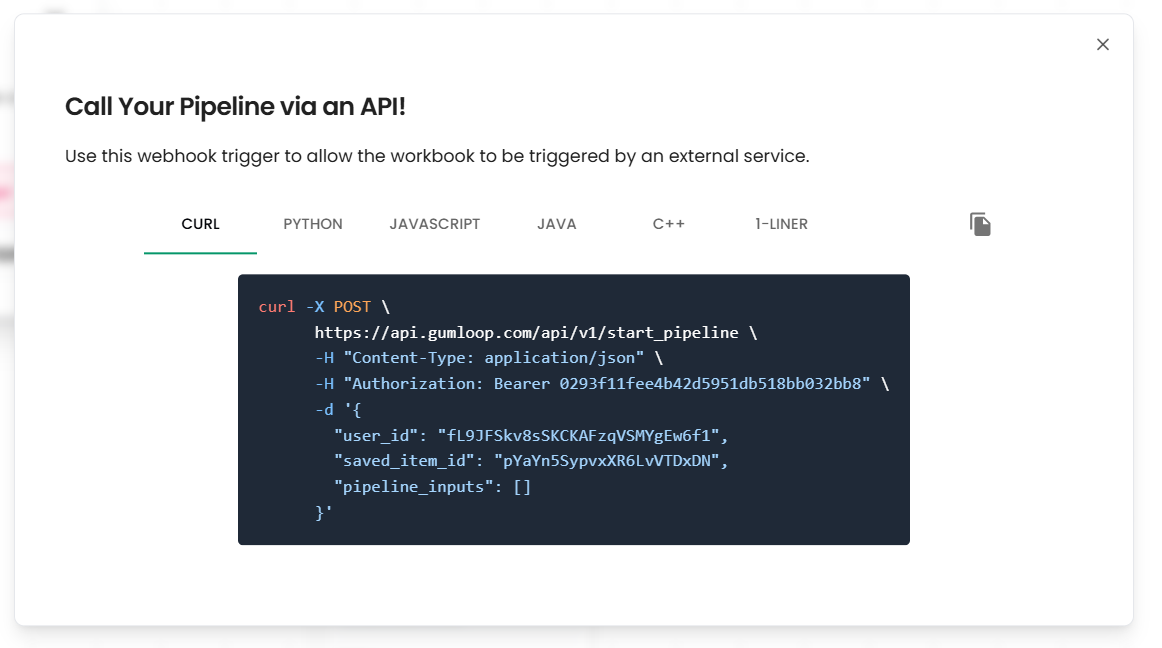
You can add the webhook trigger by clicking on the webhook icon on the top bar:
Check out our [API Reference guide](https://docs.gumloop.com/api-reference/authentication) for more details on how to start workflows via webhook and how to get the output.
***
## Triggers as Nodes
Drop these nodes directly into your workflow and toggle the "Activate as workflow trigger" option to trigger your automation:
### Gmail
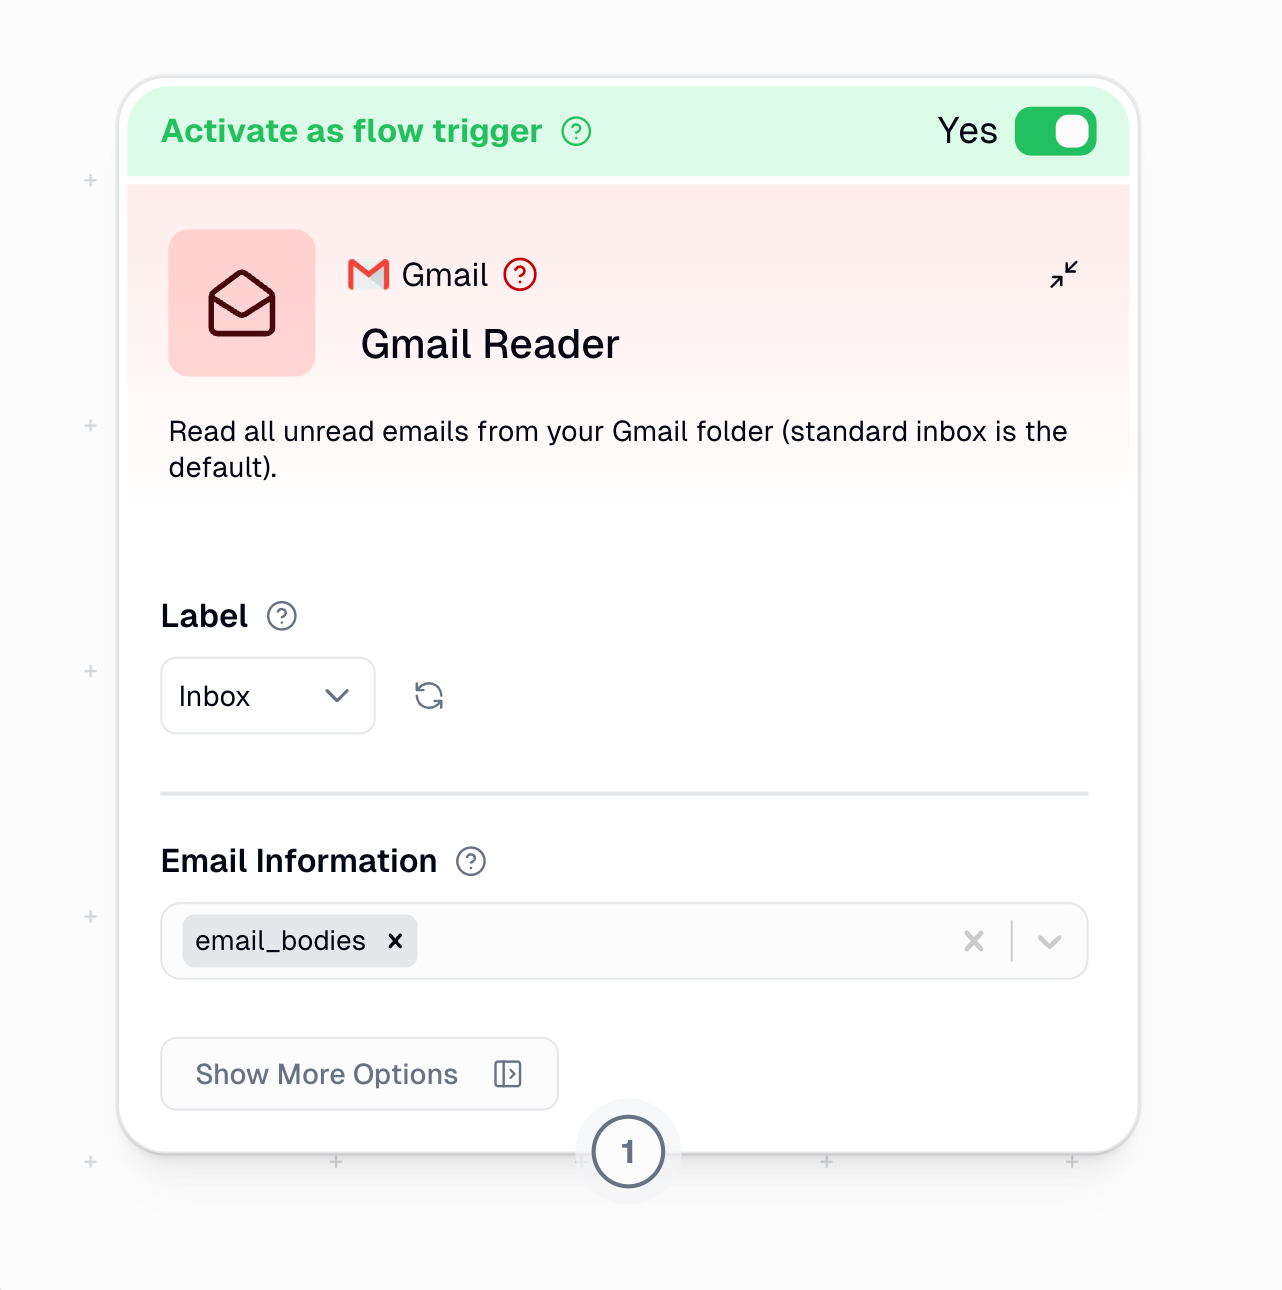
Starts your workflow when you receive new emails. It can be set to a specific label or your entire inbox.
Due to Google watch response API limitations, only one Gmail account can be monitored per credential. For multiple accounts, consider using scheduled time triggers instead. [More info here](https://docs.gumloop.com/nodes/integrations/gmail_reader#important-limitations%3A-multiple-gmail-accounts-%26-email-filtering)
***
### Slack
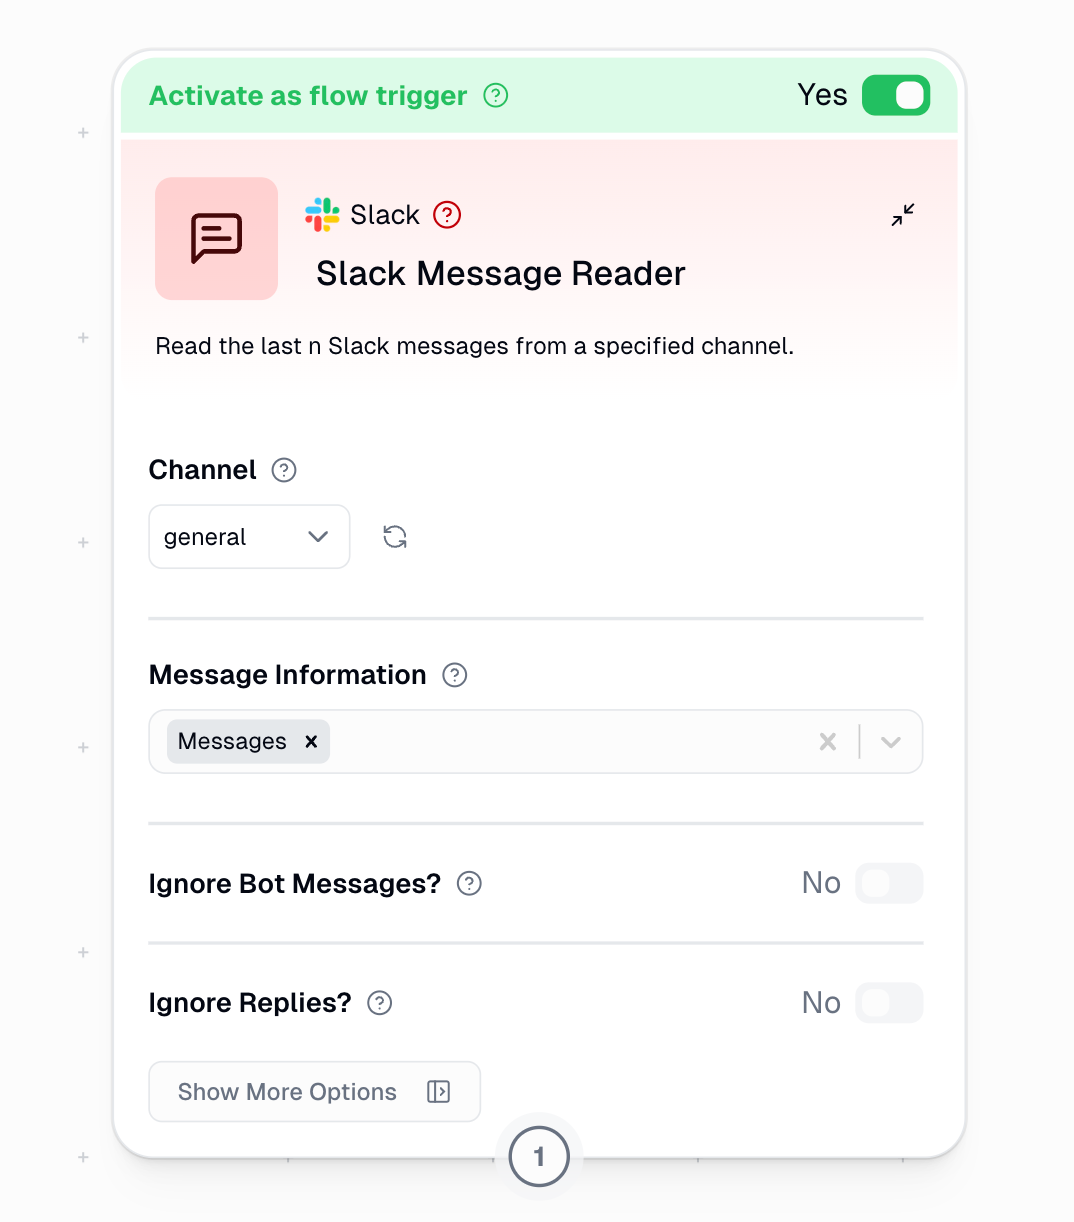
Starts your workflow when you receive a new message in the specified channel. Can work on both new messages and thread replies.
#### Filtering Options
When using the Slack Message Reader as a trigger, two important filtering options help you control exactly which messages will start your workflow:
This toggle controls whether automated messages should trigger your workflow.
* **No (Default)**: All messages will trigger your workflow, including those from bots and integrations
* **Yes (Recommended)**: Only human-generated messages will trigger your workflow
* Prevents potential trigger loops where your workflow output triggers itself
* Reduces noise from system notifications and other automated messages
* Essential when your workflow posts back to the same channel
This toggle determines whether thread replies should trigger your workflow.
* **No (Default)**: All messages trigger your workflow, including replies in threads
* Best for monitoring ongoing conversations
* Useful for support bots that need to track entire discussions
* **Yes**: Only new standalone messages will trigger your workflow
* Replies within conversation threads are ignored
* Focuses automation on new topics/conversations only
* Reduces the volume of triggers in active channels
#### Recommended Trigger Settings
For most automations, we recommend:
* **Ignore Bot Messages: Yes** - Prevents trigger loops and focuses on human communications
* **Ignore Replies: No** - Captures all relevant communications including thread discussions
```mermaid theme={"dark"}
%%{init: {'theme':'neutral', 'themeVariables': { 'primaryColor': '#f5f5f5', 'primaryBorderColor': '#ddd'}}}%%
flowchart TB
A["New Slack Message"] --> B{"Ignore Bot
Messages?"}
B -->|"Yes"| C["Only human
messages trigger"]
B -->|"No"| D["All messages
trigger"]
C --> E{"Ignore
Replies?"}
D --> E
E -->|"Yes"| F["Only main channel
messages trigger"]
E -->|"No"| G["All messages
including replies
trigger"]
```
When building response bots, always enable "Ignore Bot Messages" to prevent infinite loops where your bot responds to its own messages.
***
### Slack Reaction Reader
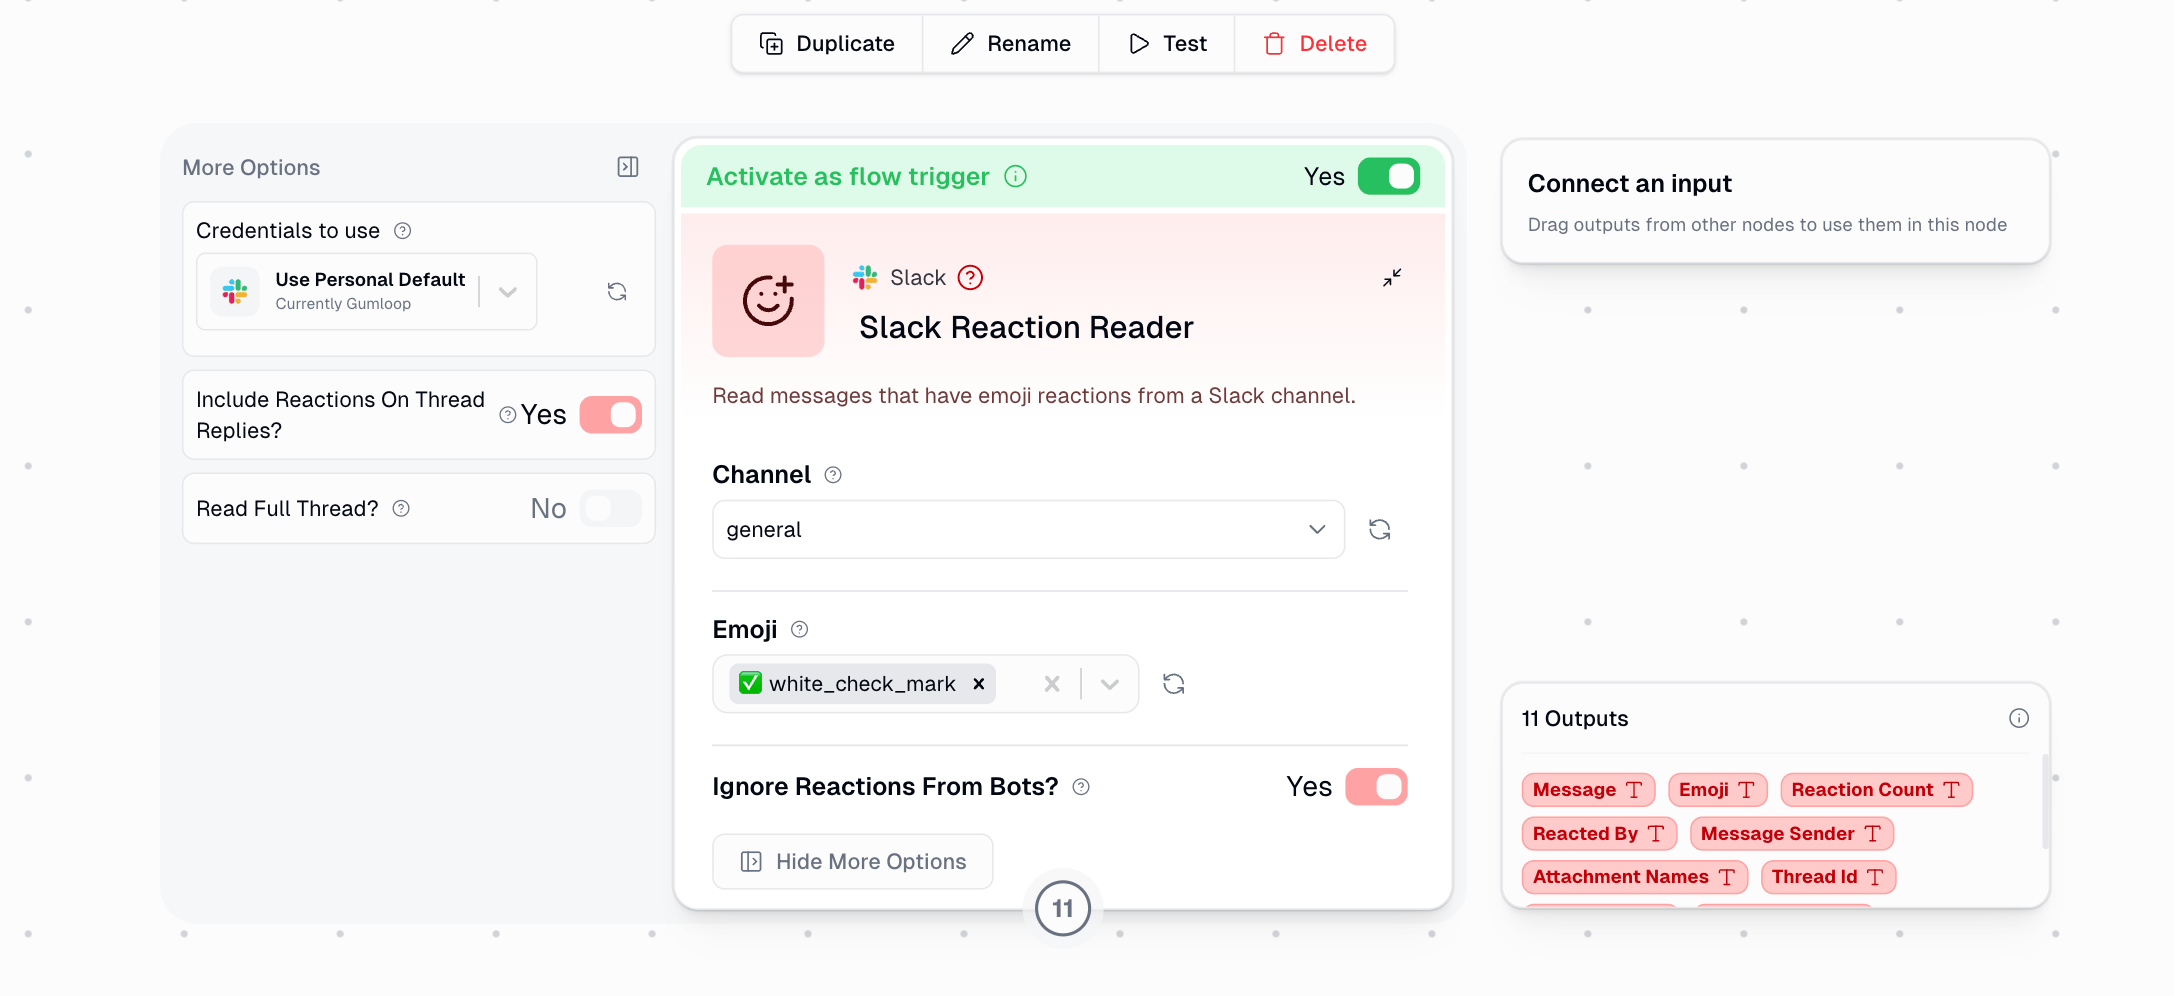
Starts your workflow when someone reacts to a message with an emoji in the specified Slack channel. This is a real-time trigger that fires within seconds of the reaction being added.
#### Configuration
Add the **Slack Reaction Reader** node to your workflow.
Choose the Slack channel to watch for reactions.
Select one or more specific emoji to listen for (e.g., `white_check_mark`, `thumbsup`). Leave empty to trigger on any reaction. Custom workspace emoji are supported.
Toggle `Activate as flow trigger` to Yes.
Save your workflow.
#### Filtering Options
Controls whether reactions added by bots should trigger your workflow.
* **Yes (Default)**: Only reactions from human users will trigger your workflow. Reactions from Gumloop itself are always ignored regardless of this setting.
* **No**: All reactions trigger your workflow, including those from bots and integrations.
Controls whether reactions on messages inside threads should trigger your workflow.
* **Yes (Default)**: Reactions on both top-level channel messages and thread replies will trigger your workflow.
* **No**: Only reactions on top-level channel messages will trigger your workflow. Reactions inside threads are ignored.
Controls how much message context is included in the output when a reaction fires the trigger.
* **No (Default)**: Only the single message that was reacted to is returned.
* **Yes**: The entire thread containing the reacted message is fetched and returned as the Message output.
**Output Data**: When used as a trigger, the node outputs single values for each field: Message, Emoji, Reaction Count, Reacted By, Message Sender, Attachment Names, Thread ID, Thread Link, Channel Name, Channel ID, and Date.
* Approve requests by reacting with a checkmark emoji
* Escalate messages that receive a specific emoji (e.g., 🚨) to another channel or system
* Log reacted messages to a spreadsheet or database for tracking
* Kick off follow-up workflows when a team lead reacts to a message
* Build a bookmarking system where reacting saves messages to Notion or Airtable
***
### Microsoft Teams
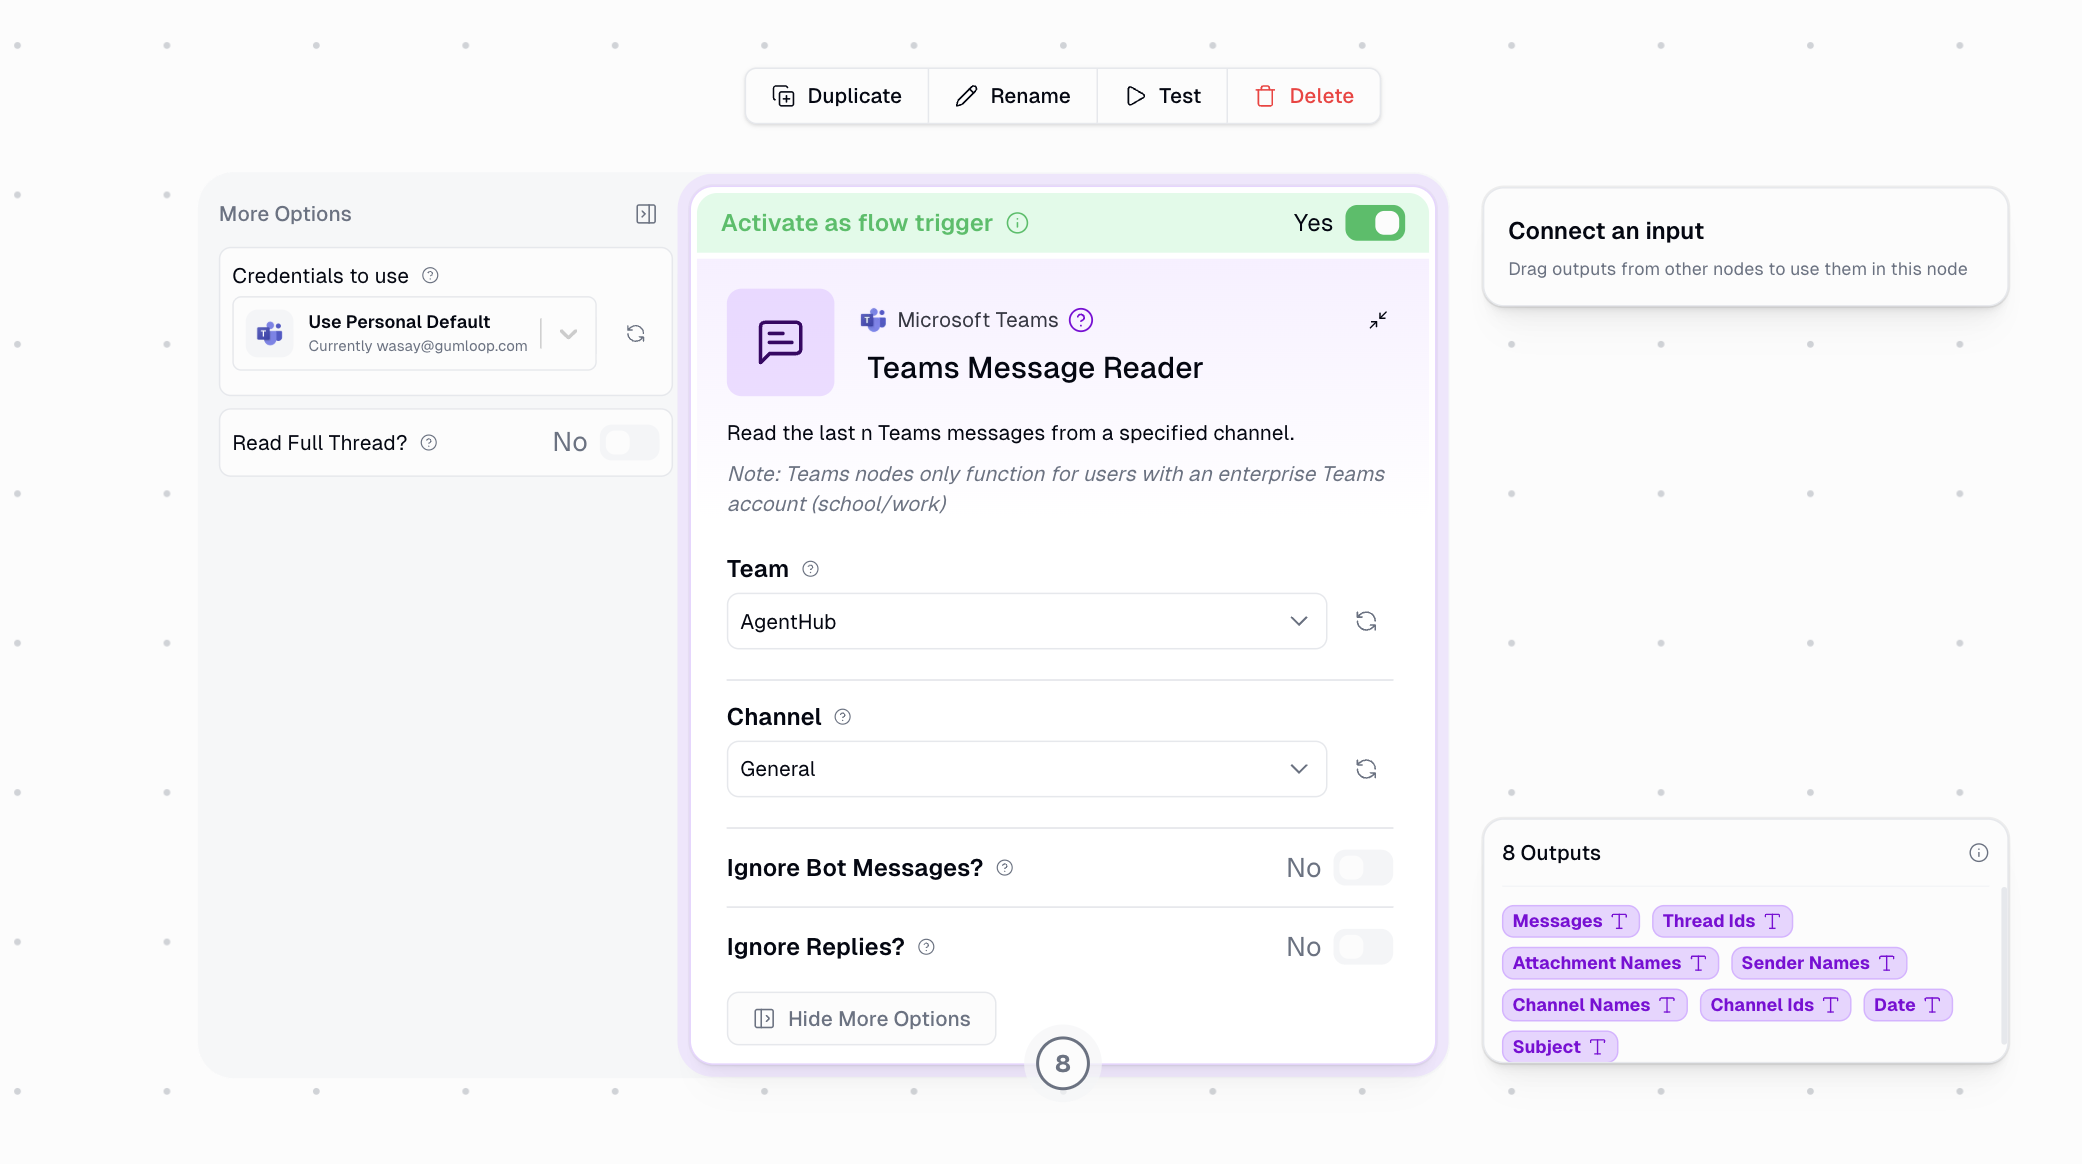
Starts your flow when a new message is posted in a specified Microsoft Teams channel. Works with both new messages and thread replies.
Teams triggers only work with Microsoft 365 work or school accounts. Personal Microsoft accounts are not supported.
#### Filtering Options
When using the Teams Message Reader as a trigger, two filtering options help you control which messages start your flow:
This toggle controls whether automated messages should trigger your flow.
* **No (Default)**: All messages will trigger your flow, including those from bots and applications
* **Yes (Recommended)**: Only human-generated messages will trigger your flow
* Prevents potential trigger loops where your flow output triggers itself
* Reduces noise from system notifications and other automated messages
* Essential when your flow posts back to the same channel
This toggle determines whether thread replies should trigger your flow.
* **No (Default)**: All messages trigger your flow, including replies in threads
* Best for monitoring ongoing conversations
* Useful for support bots that need to track entire discussions
* **Yes**: Only new standalone messages will trigger your flow
* Replies within conversation threads are ignored
* Focuses automation on new topics/conversations only
* Reduces the volume of triggers in active channels
#### Recommended Trigger Settings
For most automations, we recommend:
* **Ignore Bot Messages: Yes** - Prevents trigger loops and focuses on human communications
* **Ignore Replies: No** - Captures all relevant communications including thread discussions
When building response bots, always enable "Ignore Bot Messages" to prevent infinite loops where your bot responds to its own messages.
* Add the Teams Message Reader node to your flow
* Select your Team and Channel
* Toggle `Activate as flow trigger`
* Configure filtering options (Ignore Bot Messages, Ignore Replies)
* Save workflow
**Read Full Thread**: When enabled under "More Options", the trigger will fetch the full thread for each incoming message instead of just the new message.
* Auto-respond to customer questions in support channels
* Route messages to different workflows based on content
* Log channel activity to external systems
* Bridge communications between Teams and other platforms
**Output Data**: When used as a trigger, the node outputs single values (not lists) for each field: Message, Thread ID, Attachment Names, Sender Name, Channel Name, Channel ID, Date, and Subject.
***
### Incident.io
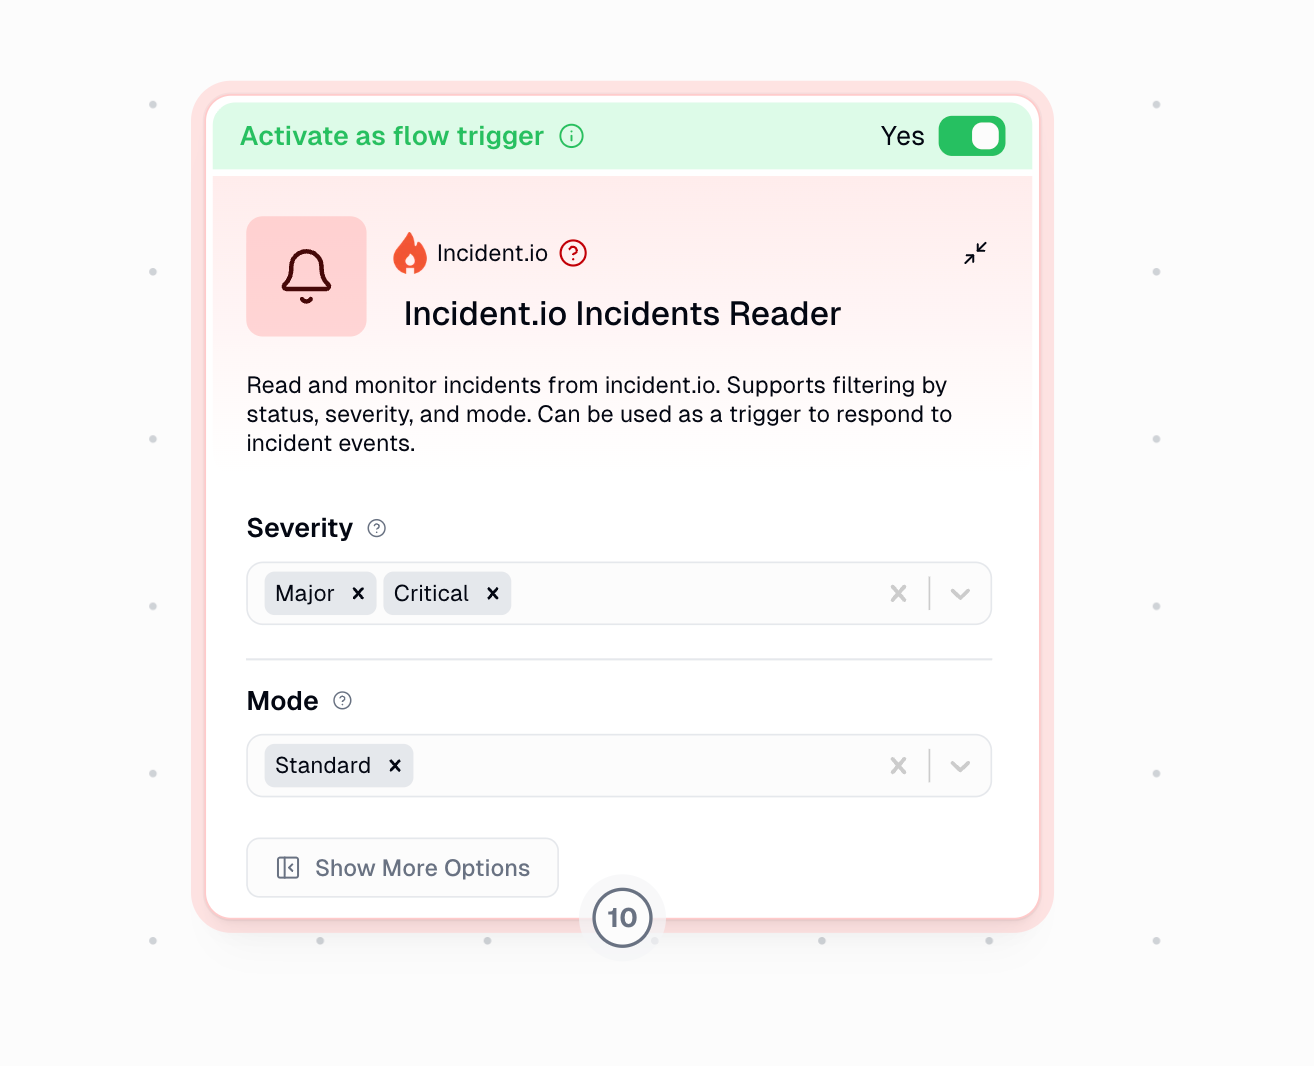
Automatically starts your workflow when new incidents are detected in incident.io. Polls for updates every 5 minutes.
* Add the Incident.io Incidents Reader node to your workflow
* Configure filters for Severity and/or Mode (optional)
* Toggle `Activate as workflow trigger`
* Save workflow
**Severity**: Filter by incident priority (Minor, Major, Critical)
**Mode**: Filter by incident type (Standard, Retrospective, Tutorial, Test)
Status filters are not applied in trigger mode, only Severity and Mode
* Automatically notify teams about critical incidents
* Create support tickets for major incidents
* Post incident updates to Slack channels
* Log incidents to tracking systems
**Output Data**: Provides incident ID, name, status, severity, timestamps, summary, permalink, and Slack channel ID as individual outputs
***
### Airtable
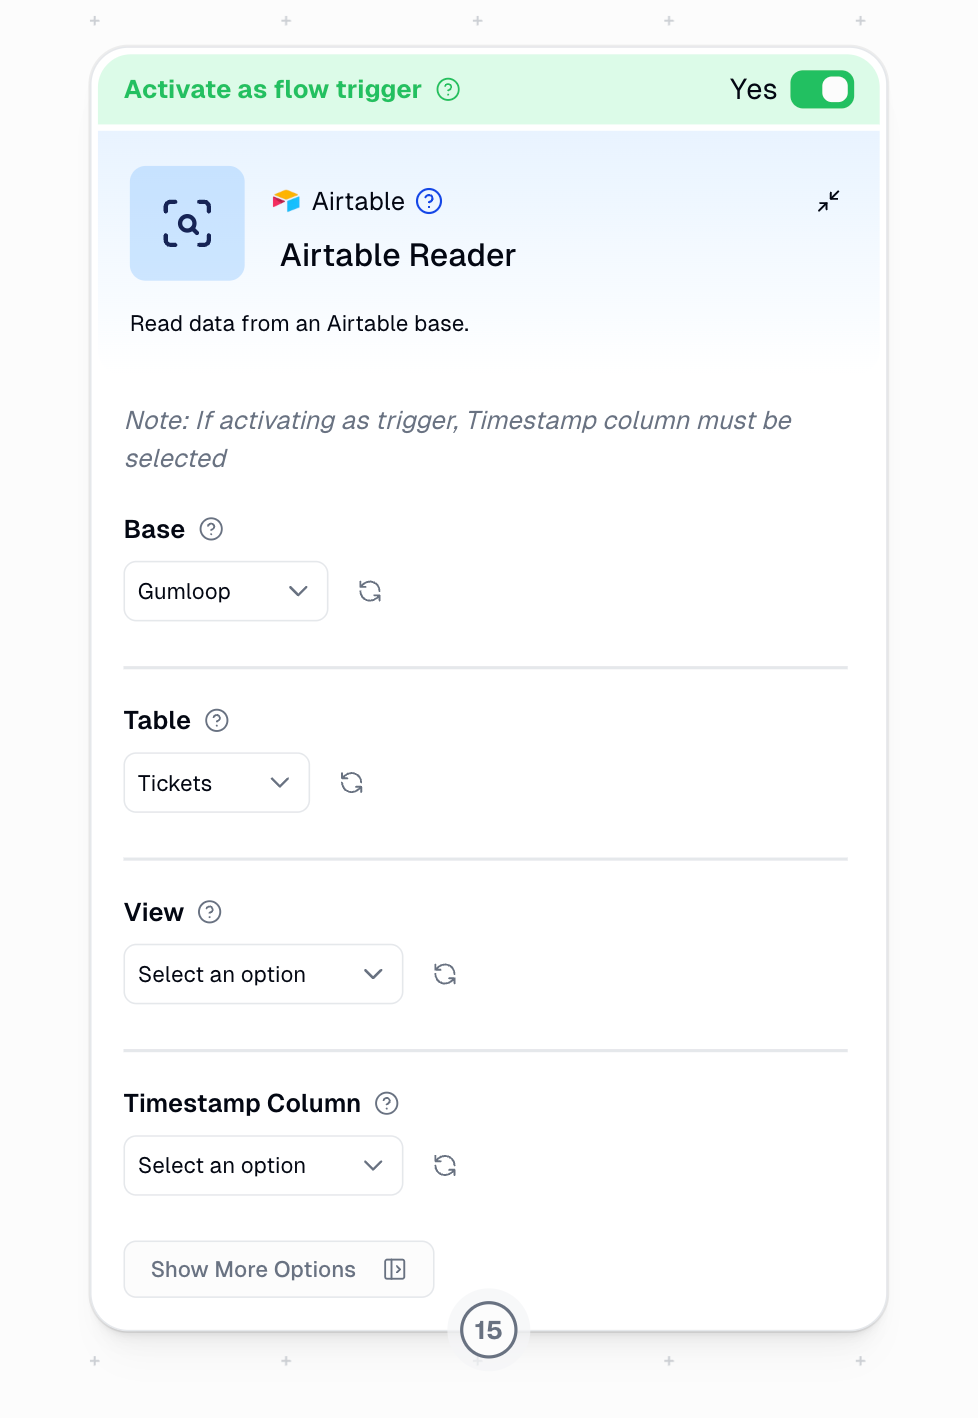
Starts your workflow when your tables update.
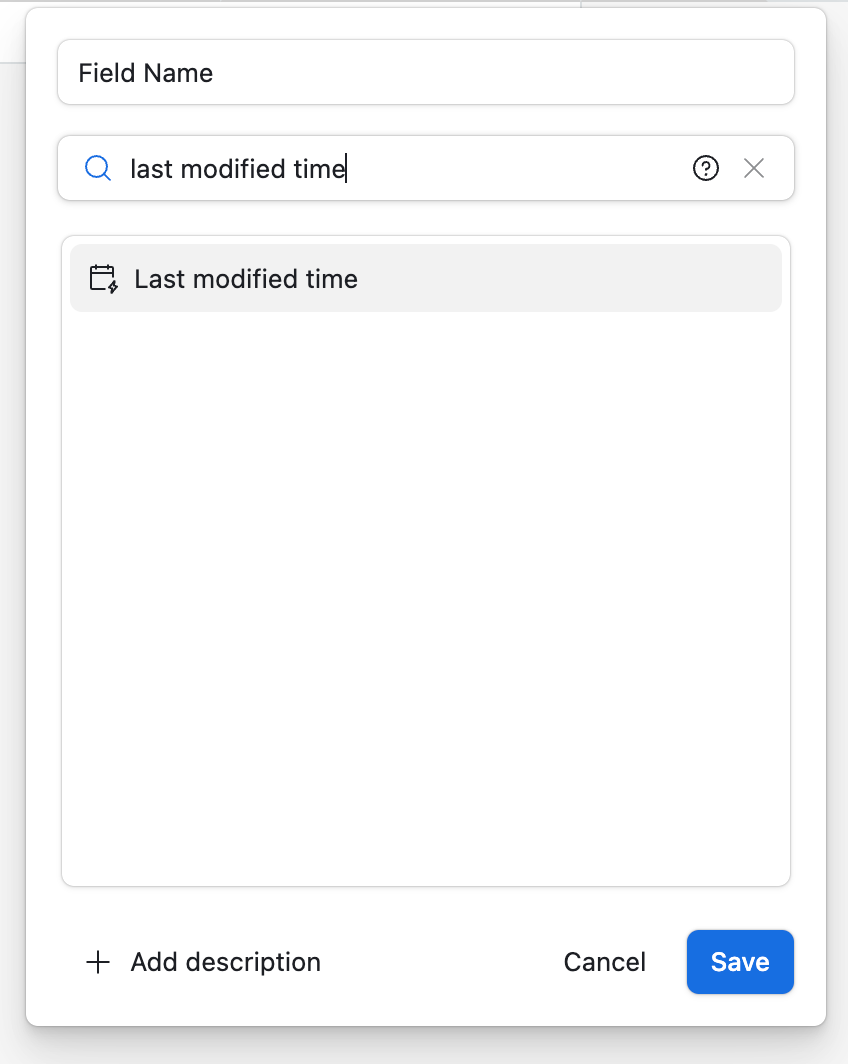
Requires a ["Last Modified Timestamp" field type column](https://support.airtable.com/docs/last-modified-time-field) to track changes:
Set up the Airtable trigger in your workflow and toggle "Activate as workflow trigger"
Takes a few minutes to activate after creation. Polls for updates every 60 seconds.
***
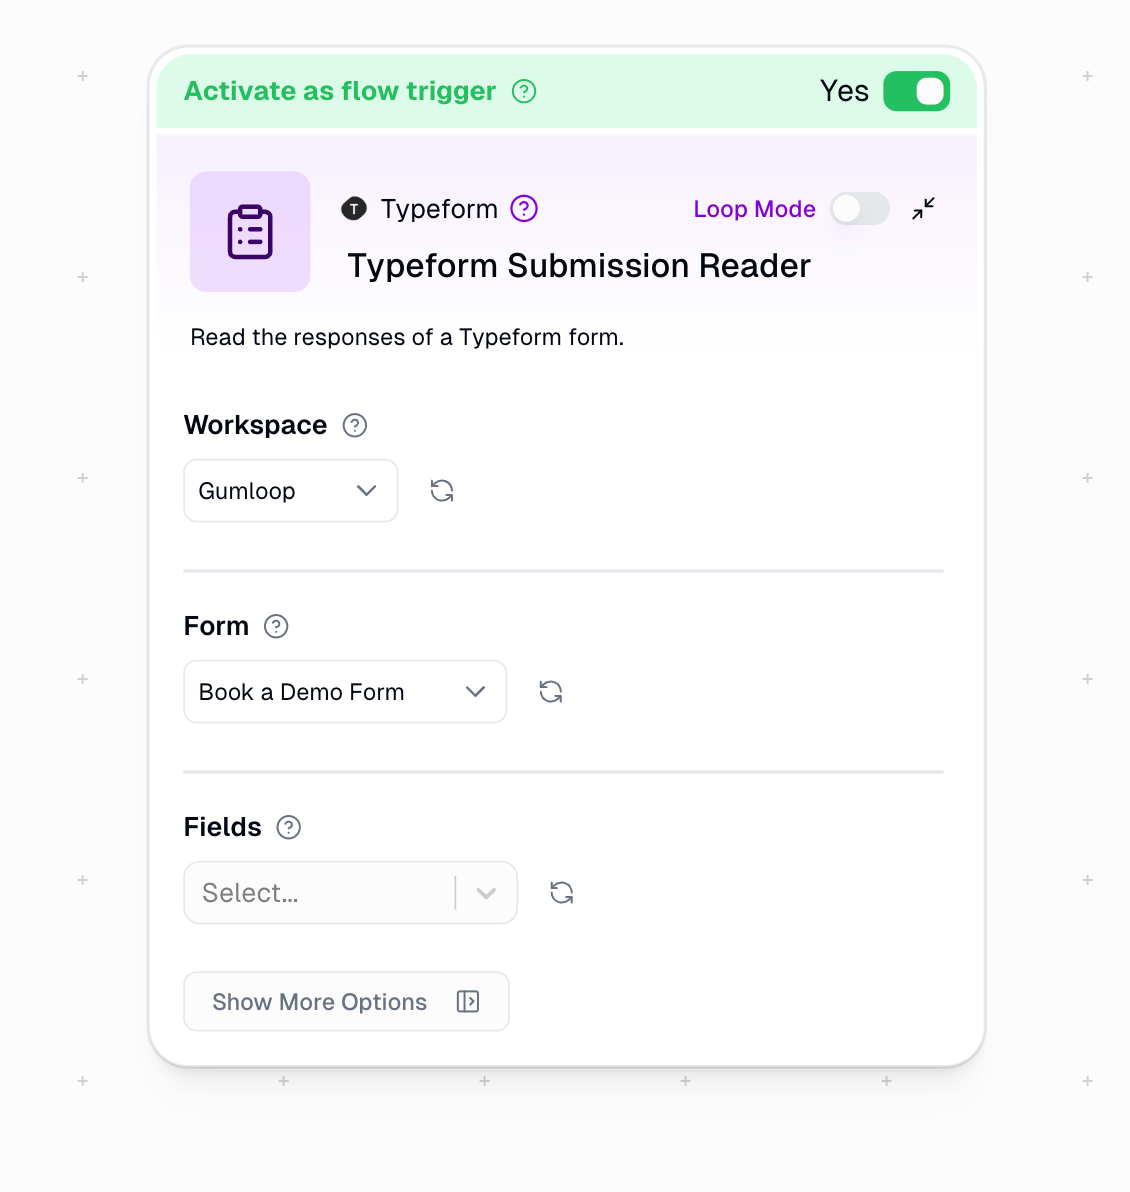
### Typeform
Triggers the workflow on new form submissions.
***
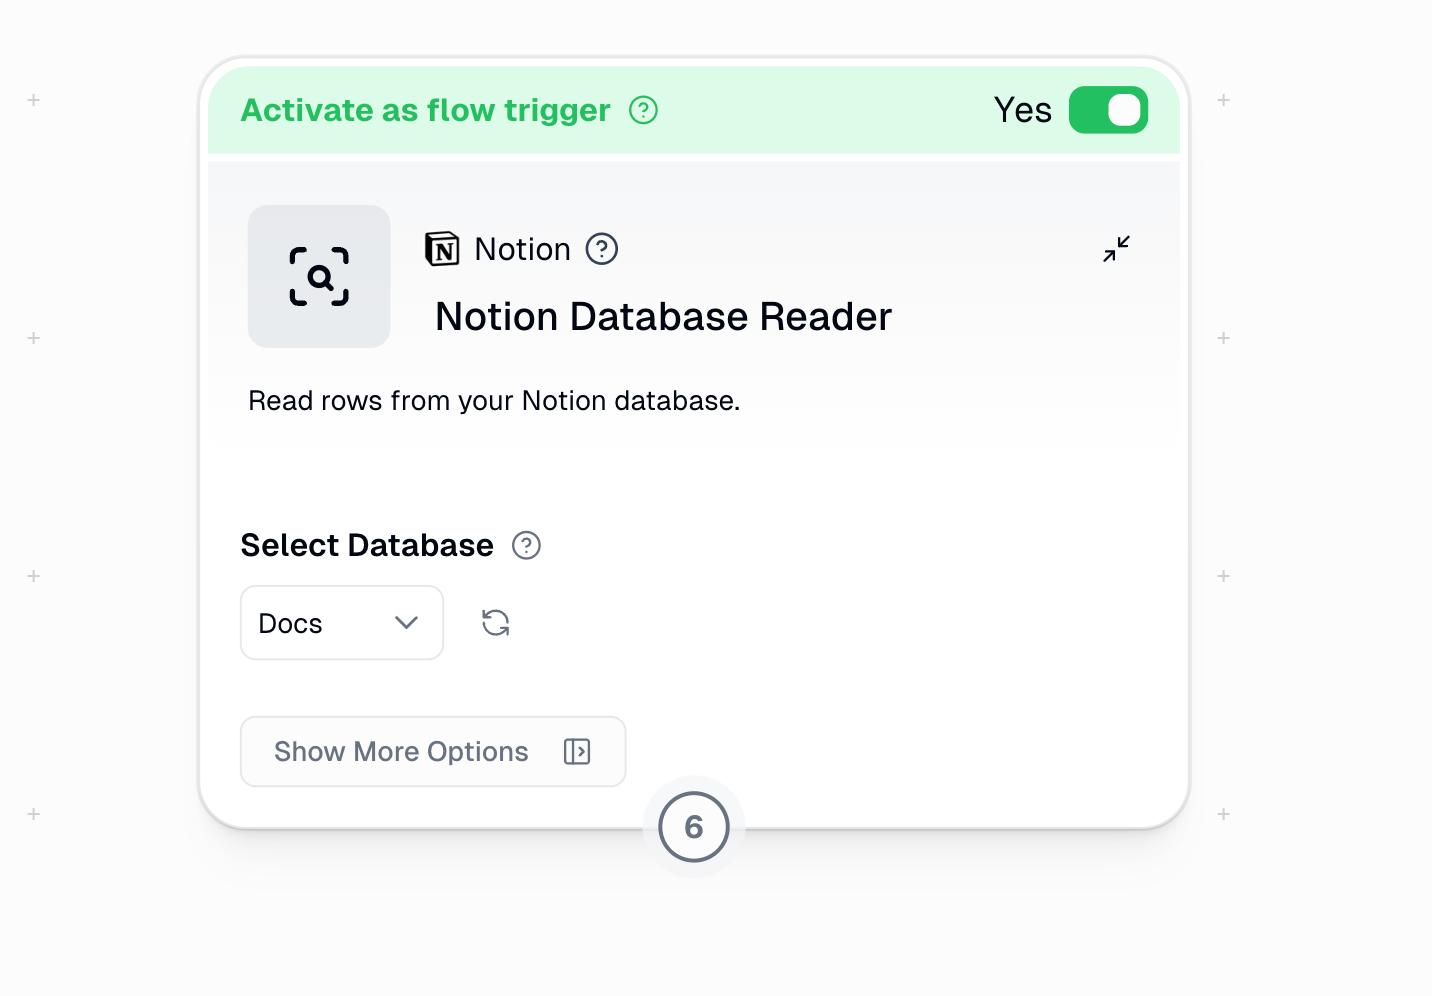
### Notion
Starts your workflow when your database updates. Takes a few minutes to activate after creation. Polls for updates every 60 seconds.
***
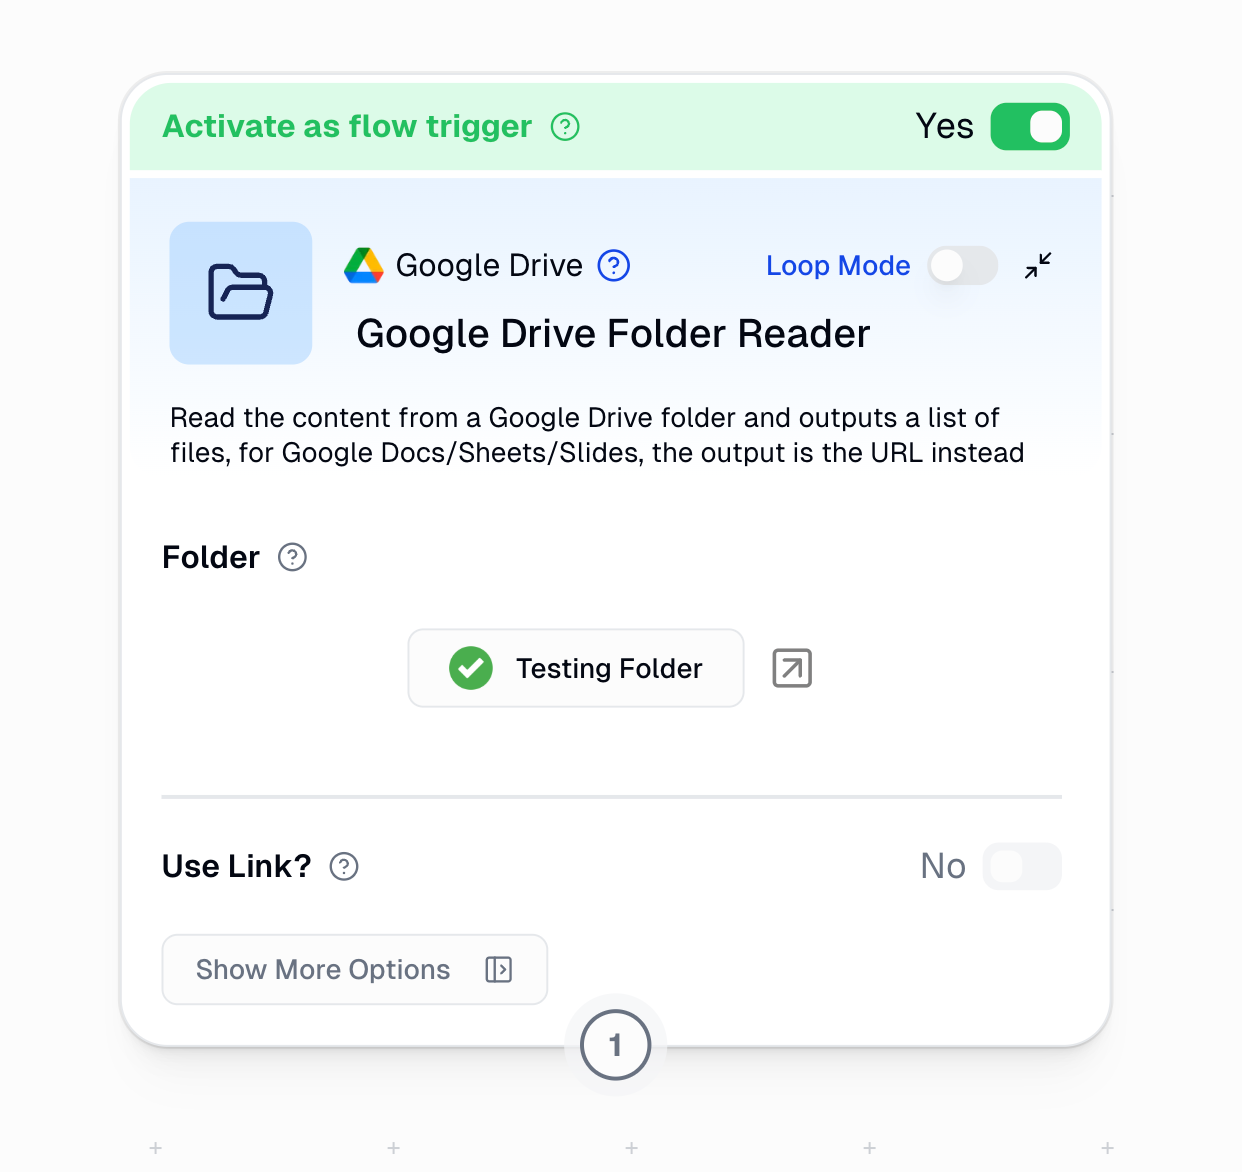
### Google Drive
Starts your workflow when your selected Google Drive folder receives a new file upload.
***
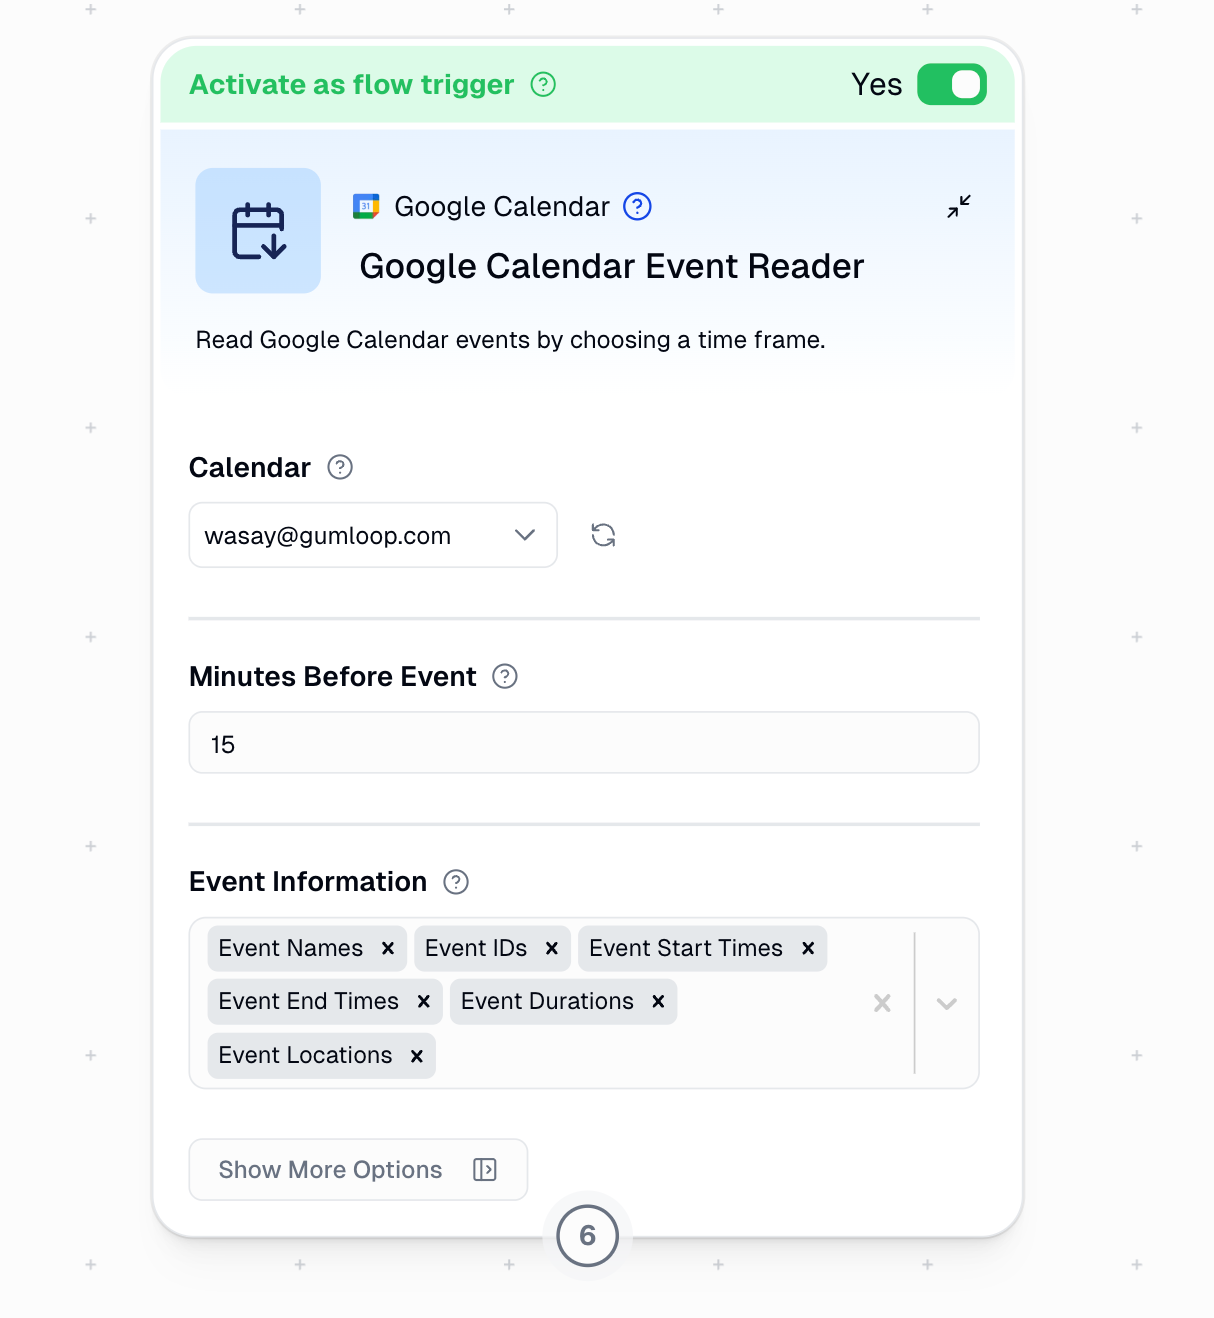
### Google Calendar Event Reader
Triggers the workflow `X` minutes before every event on your calendar. Default time is 15 minutes, you can adjust this under the `Minutes Before Event` input.
***
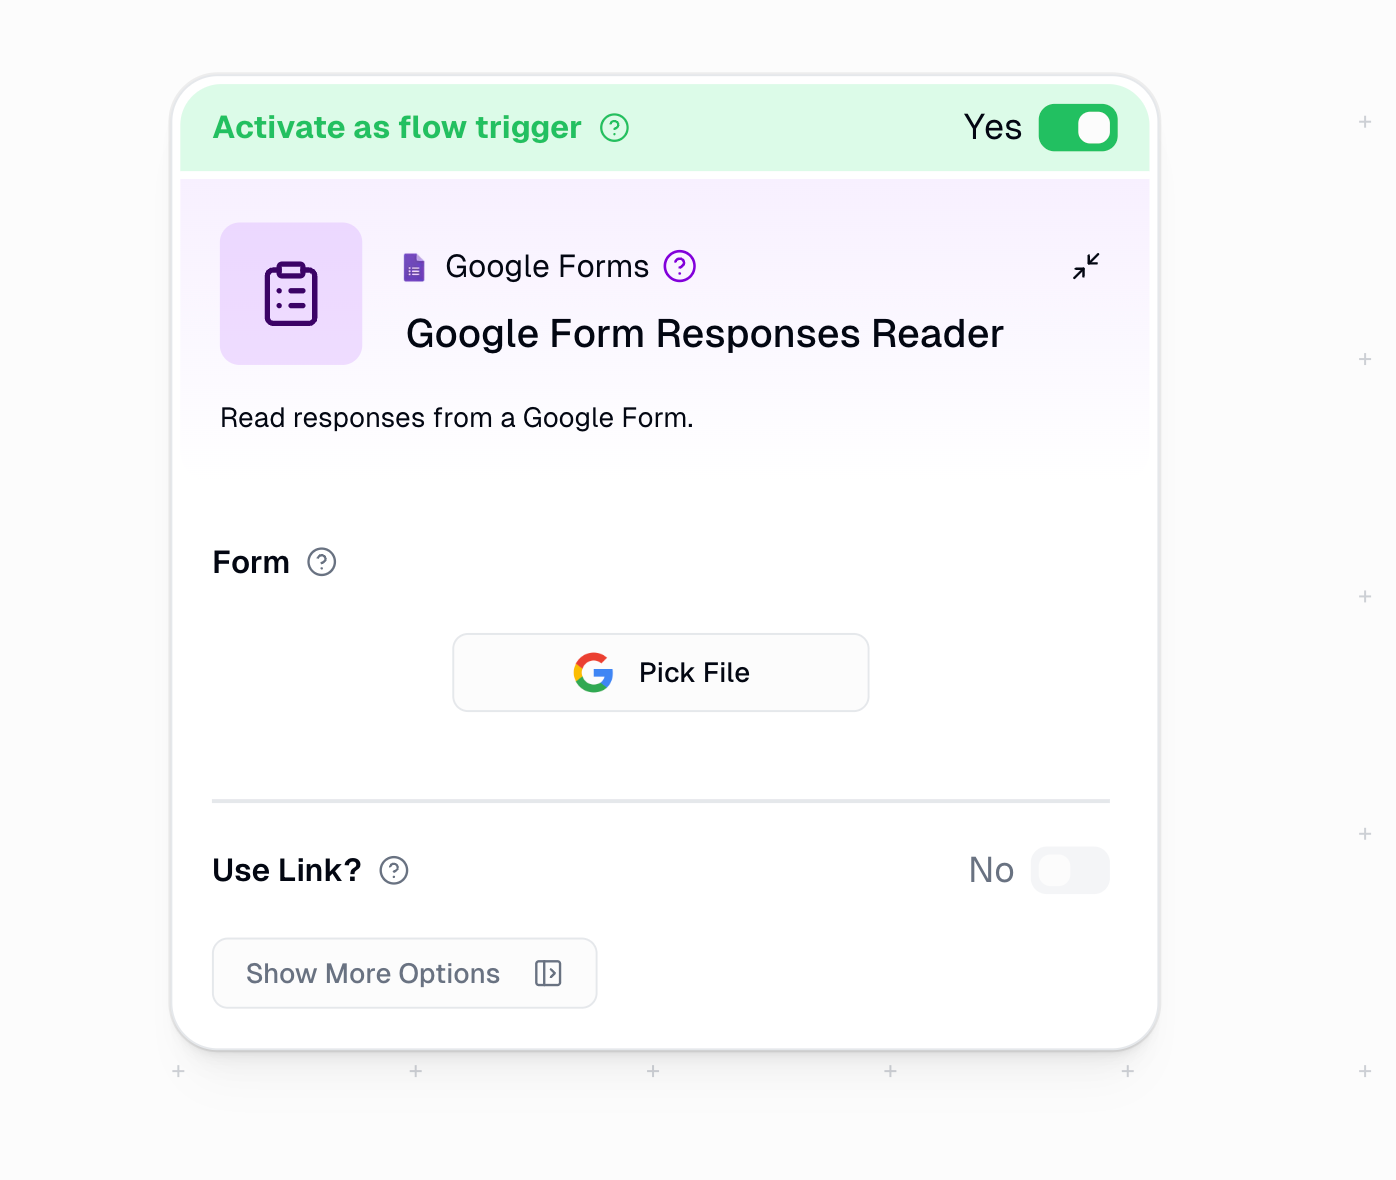
### Google Forms
Automatically starts your workflow when someone submits a Google Form. Perfect for automating follow-up actions based on form submissions.
* Select your Google Form (via direct selection or URL)
* Toggle `Activate as workflow trigger`
* Save workflow
* Customer onboarding automation
* Survey response processing
* Lead qualification workflows
* Event registration handling
**Output Data**: Provides all submitted form fields as individual outputs
***
### Google Sheets
Automatically starts your workflow when data in your Google Sheet changes.
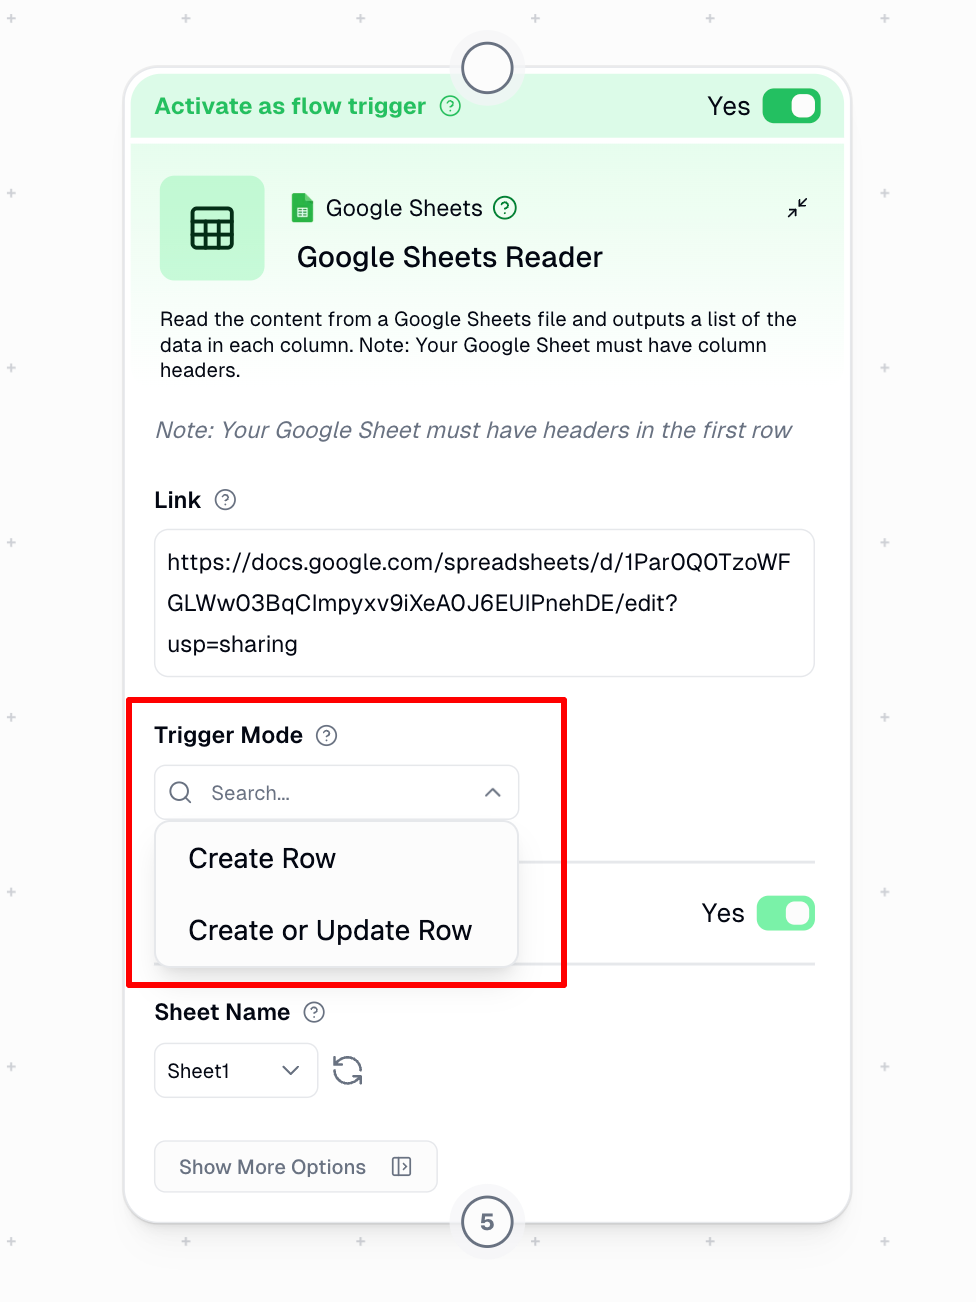
#### Trigger Modes
Two trigger modes are available:
Only triggers on new rows added to the sheet
Triggers when rows are added OR existing rows are modified
#### Understanding Row Events
* **Row Creation**: Triggers when any new row is added to your sheet
* **Row Update**: Triggers when any cell value is changed in any existing row
#### Configuration
Select your Google Sheet (via direct selection or URL)
Specify worksheet tab to monitor
Choose trigger mode based on your needs
Toggle `Activate as workflow trigger`
Save workflow
#### Timing and Behavior
After creating or updating a trigger, it may take **up to 5 minutes** to become active. The system checks for updates approximately **every 60 seconds** thereafter.
#### Troubleshooting Google Sheets Triggers
* **Verify Activation**: Ensure you've saved the workflow after setting up the trigger and running the workflow manually works
* **Check Permissions**: Confirm your Google account has appropriate access to the spreadsheet
* **Inspect Headers**: Make sure your sheet has headers in the first row and at least one row of data thereafter
* **Test Simple Changes**: Test the trigger with a simple row addition to verify functionality
* **Refresh Column Data**: If you've modified your sheet structure, click the refresh icon (🔄) next to the Sheet Name and save
* **Consider Row Order**: If using the "Create" mode, remember that it only detects newly added rows, not modified existing rows
* **Unique Identifiers**: For mission-critical workflows, include a unique ID column to ensure reliable row tracking
Consider resetting the trigger by disabling the "Activate as workflow trigger" toggle, saving, enabling the same toggle and saving again
#### Understanding Edge Cases
* **Adding New Columns**: New columns are automatically included in trigger data
* **Inserting Columns**: System adapts to columns inserted between existing ones, but may trigger for any rows where the row hash changes
* **Deleting Columns**: System adapts to columns deleted between existing ones, but may trigger for any rows where the row hash changes
**Row Additions**: Always triggers workflows in both "Create" and "Create or Update" modes
**Row Updates**: Only trigger in "Create or Update" mode
**Row Deletions**:
* In "Create" mode: No trigger occurs when rows are deleted
* In "Create or Update" mode: Triggers for rows that shift position after deletion
**Row Reordering**:
* In "Create" mode: Not detected
* In "Create or Update" mode: Triggers for all affected rows as their position-based hashes change
***
### Zendesk
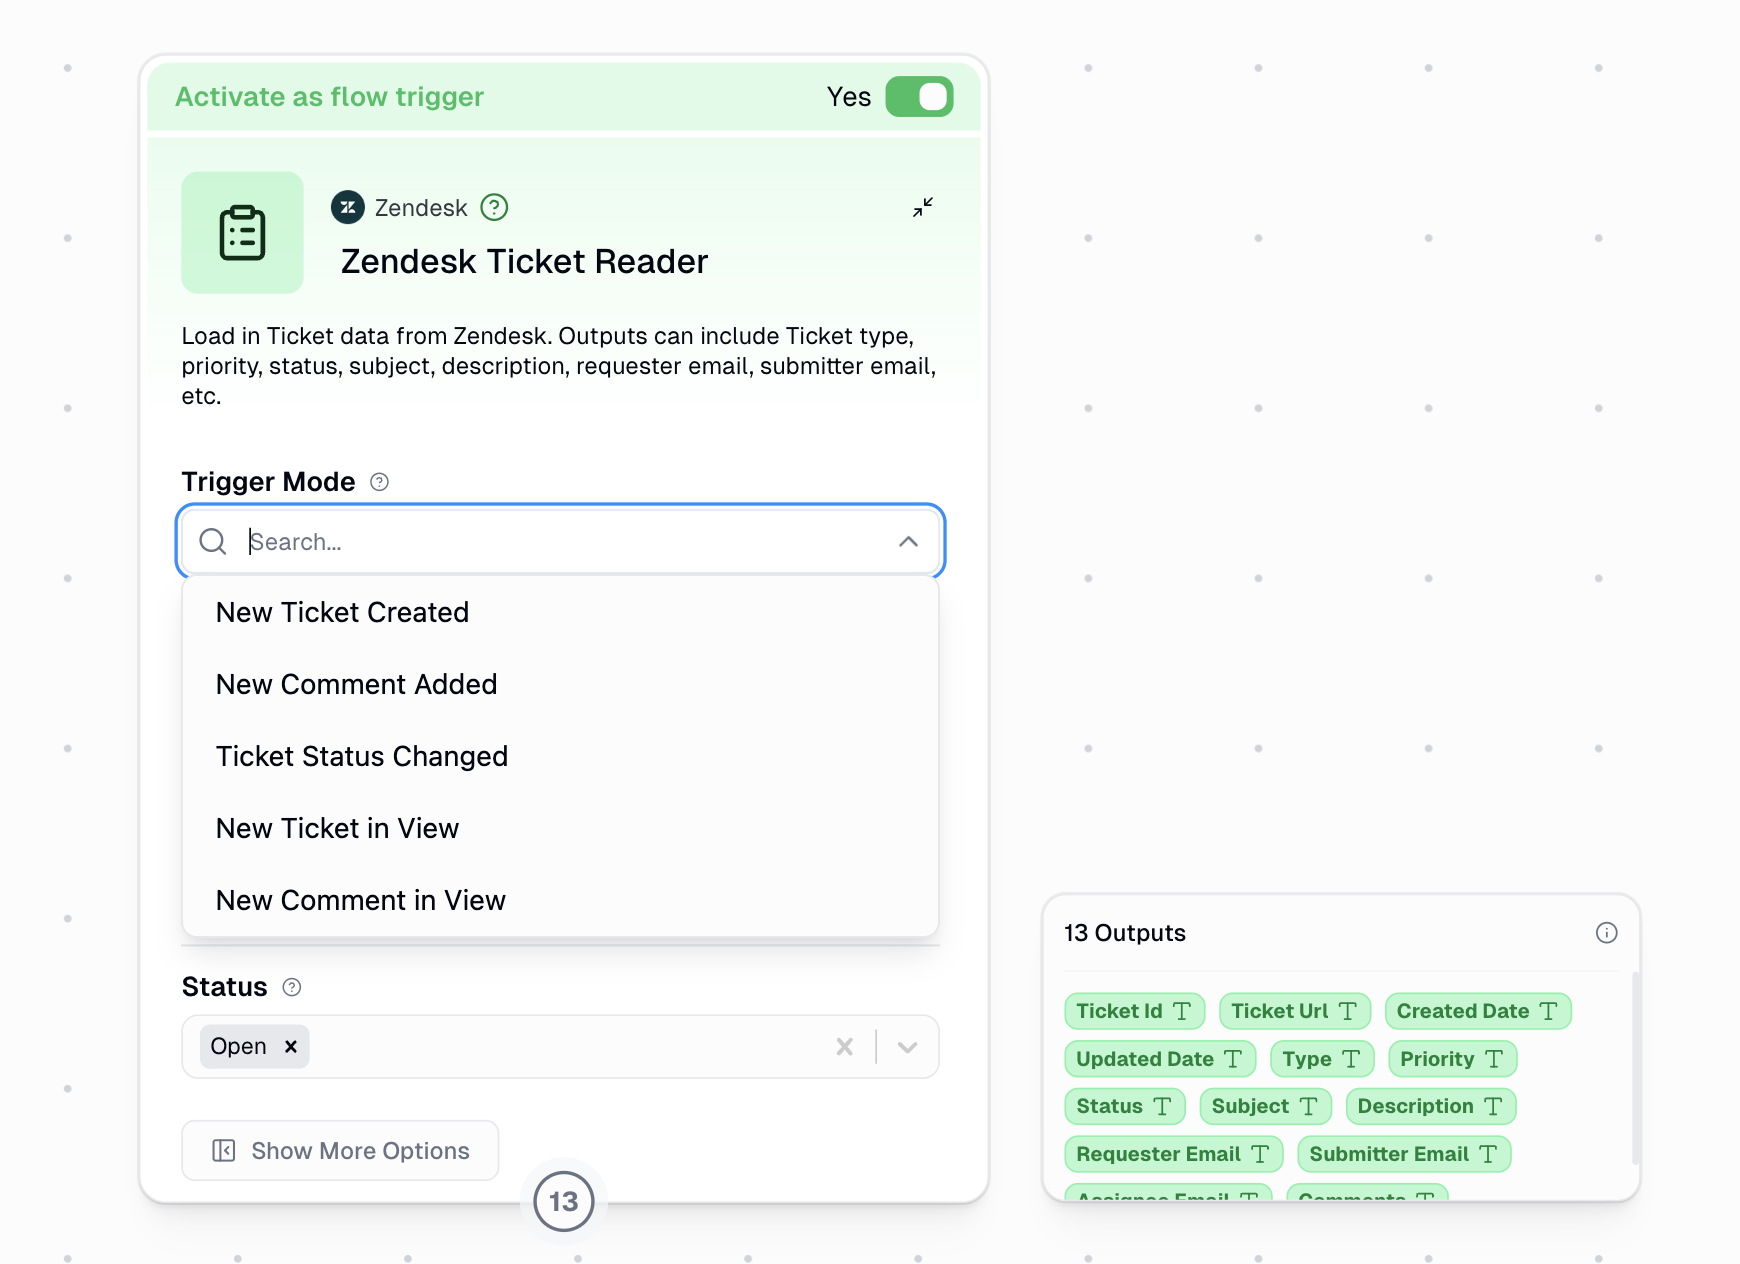
Automatically starts your workflow when ticket events occur in Zendesk. Supports multiple trigger modes for different use cases.
#### Trigger Modes
Triggers when a new ticket is created in Zendesk. You can filter by Type, Priority, and Status to only trigger on specific tickets.
Triggers when a new comment is added to any ticket. Applies Type, Priority, and Status filters based on the ticket's current state.
Triggers when a ticket's status changes (e.g., from Open to Pending). Useful for escalation workflows and SLA monitoring.
**New Ticket in View** and **New Comment in View** modes trigger based on Zendesk Views. Only fires when a ticket transitions into the view - tickets already in the view won't trigger.
* Add the Zendesk Ticket Reader node to your workflow
* Toggle `Activate as workflow trigger`
* Select a Trigger Mode from the dropdown
* Configure filters (Type, Priority, Status) or select a View
* Save workflow
**Type**: Filter by ticket type (Question, Incident, Problem, Task, Empty)
**Priority**: Filter by urgency (Low, Normal, High, Urgent, Empty)
**Status**: Filter by ticket state (Open, Pending, Solved)
View-based triggers use the View's built-in filters instead of Type/Priority/Status
* Alert teams when urgent tickets are created
* Track customer responses with comment triggers
* Escalate tickets that change to pending status
* Monitor SLA compliance with view-based triggers
**Output Data**: Provides Ticket ID, URL, Created Date, Updated Date, Type, Priority, Status, Subject, Description, Requester Email, Submitter Email, Assignee Email, and Comments as individual outputs
***
### Salesforce
Automatically starts your workflow when records are created or updated in any Salesforce object (Opportunities, Leads, Contacts, Accounts, Cases, custom objects, etc.). Polls for changes every 60 seconds.
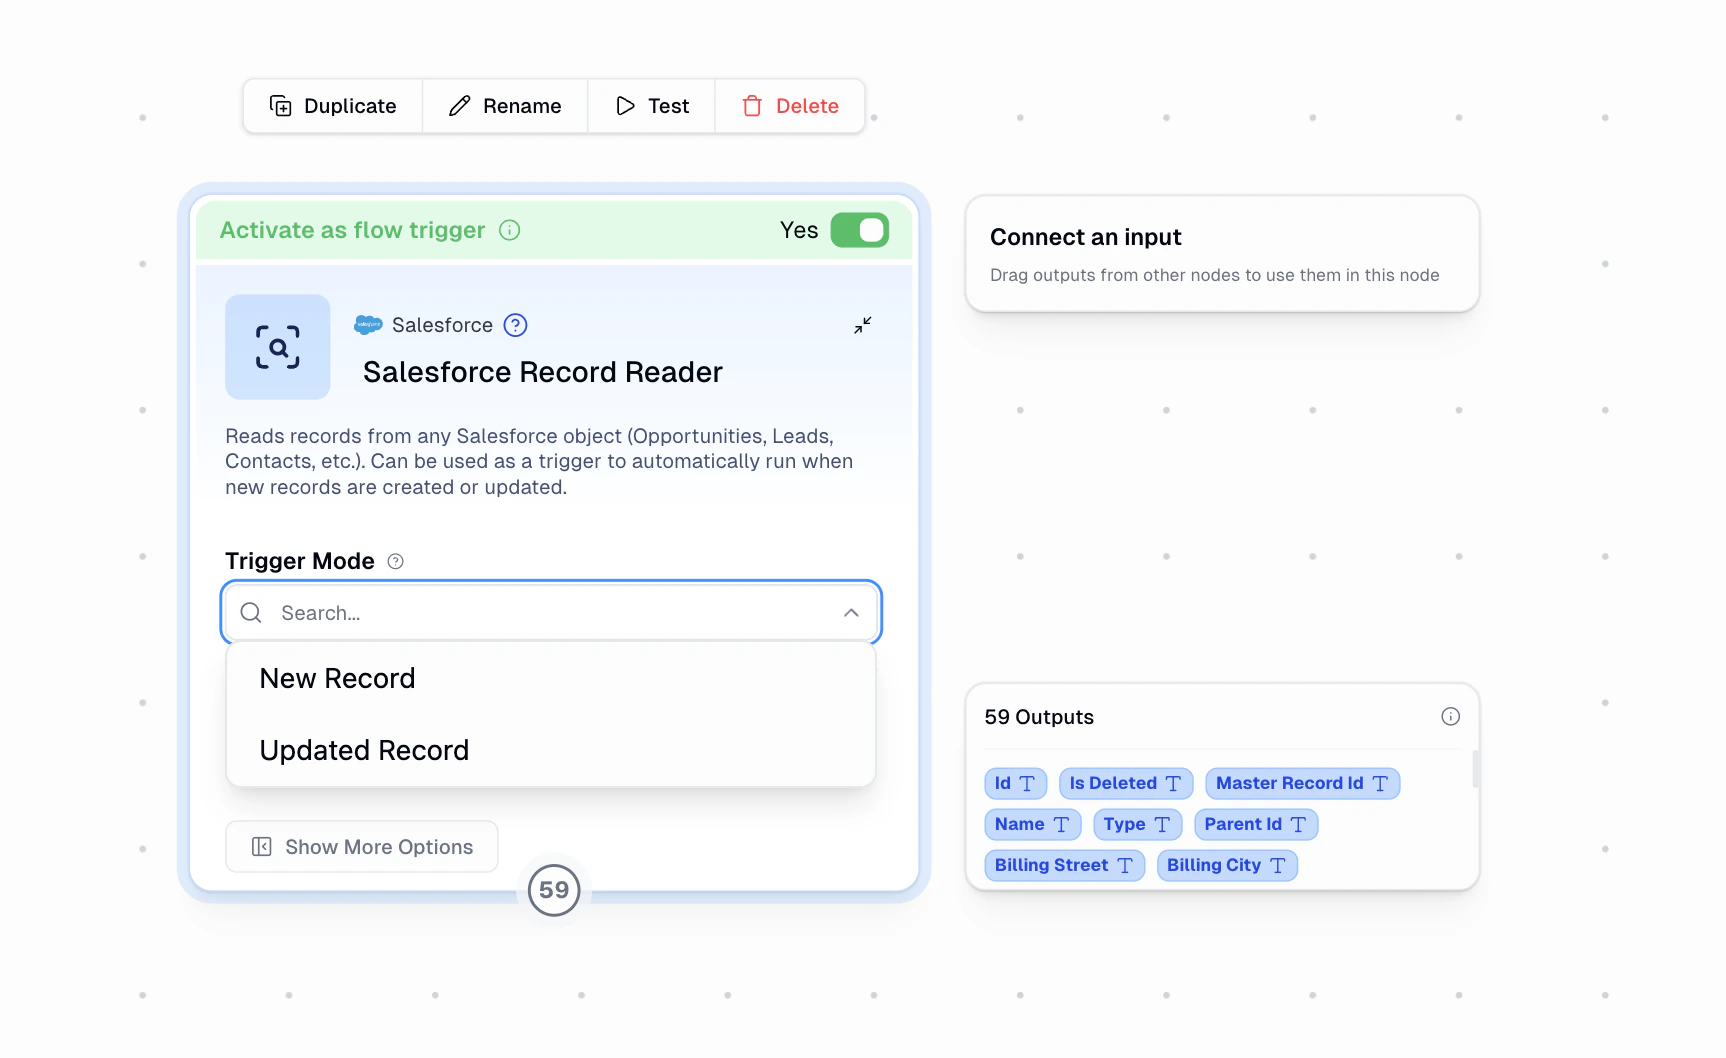
#### Trigger Modes
Triggers when a new record is created in the selected Salesforce object. Uses the record's `CreatedDate` field to detect new entries.
Triggers when an existing record is modified in the selected Salesforce object. Uses the record's `LastModifiedDate` field to detect changes.
Records that were just created (within a few seconds) are automatically filtered out in this mode, so you won't receive duplicate triggers for newly created records. This is because Salesforce may set `LastModifiedDate` slightly after `CreatedDate` on brand-new records.
* Add the **Salesforce Record Reader** node to your workflow
* Select the **Salesforce Object** you want to monitor (e.g., Contact, Opportunity, Lead)
* Choose a **Trigger Mode**: **New Record** or **Updated Record**
* Toggle `Activate as workflow trigger`
* Save workflow
When activated as a trigger, the Salesforce Record Reader polls your Salesforce org for new or updated records of the selected object type, depending on your chosen trigger mode.
* Polls every **60 seconds**
* Fetches up to **5 records per poll**
* Uses a compound cursor of the relevant timestamp field and record `Id` to track its position and avoid processing the same record twice
* Automatically retrieves all available fields for the selected object (excluding compound fields like `MailingAddress`)
* Outputs each field as an individual value for use in downstream nodes
* In **Updated Record** mode, each update to the same record triggers the workflow again (deduplication includes the modification timestamp)
You can monitor any standard or custom Salesforce object, including:
* **Leads** — Trigger on new or updated leads
* **Contacts** — Trigger on new or updated contacts
* **Opportunities** — Trigger on new or updated deals
* **Accounts** — Trigger on new or updated accounts
* **Cases** — Trigger on new or updated support cases
* **Custom Objects** — Any custom object in your Salesforce org
* Automatically enrich new leads with external data
* Notify your team in Slack when a new opportunity is created
* Sync new Salesforce contacts to other CRMs or databases
* Kick off onboarding workflows when new accounts are added
* Route new support cases to the right team
* Re-trigger workflows when a deal stage changes (Updated Record mode)
* Alert your team when a case is updated or reassigned
**Output Data**: All fields from the selected Salesforce object are returned as individual outputs. The exact fields depend on the object type you selected.
**Authentication**: You must configure your Salesforce credentials in [Connectors page](https://www.gumloop.com/personal/connectors) before using this trigger. Gumloop is a Salesforce Connected App — a Salesforce administrator must authorize the connection first. See [Salesforce Setup](/core-concepts/credentials#salesforce-setup-admin-only) for details.
***
### Linear
Automatically starts your workflow when issues are created or updated in your Linear workspace. Polls for changes every 60 seconds.
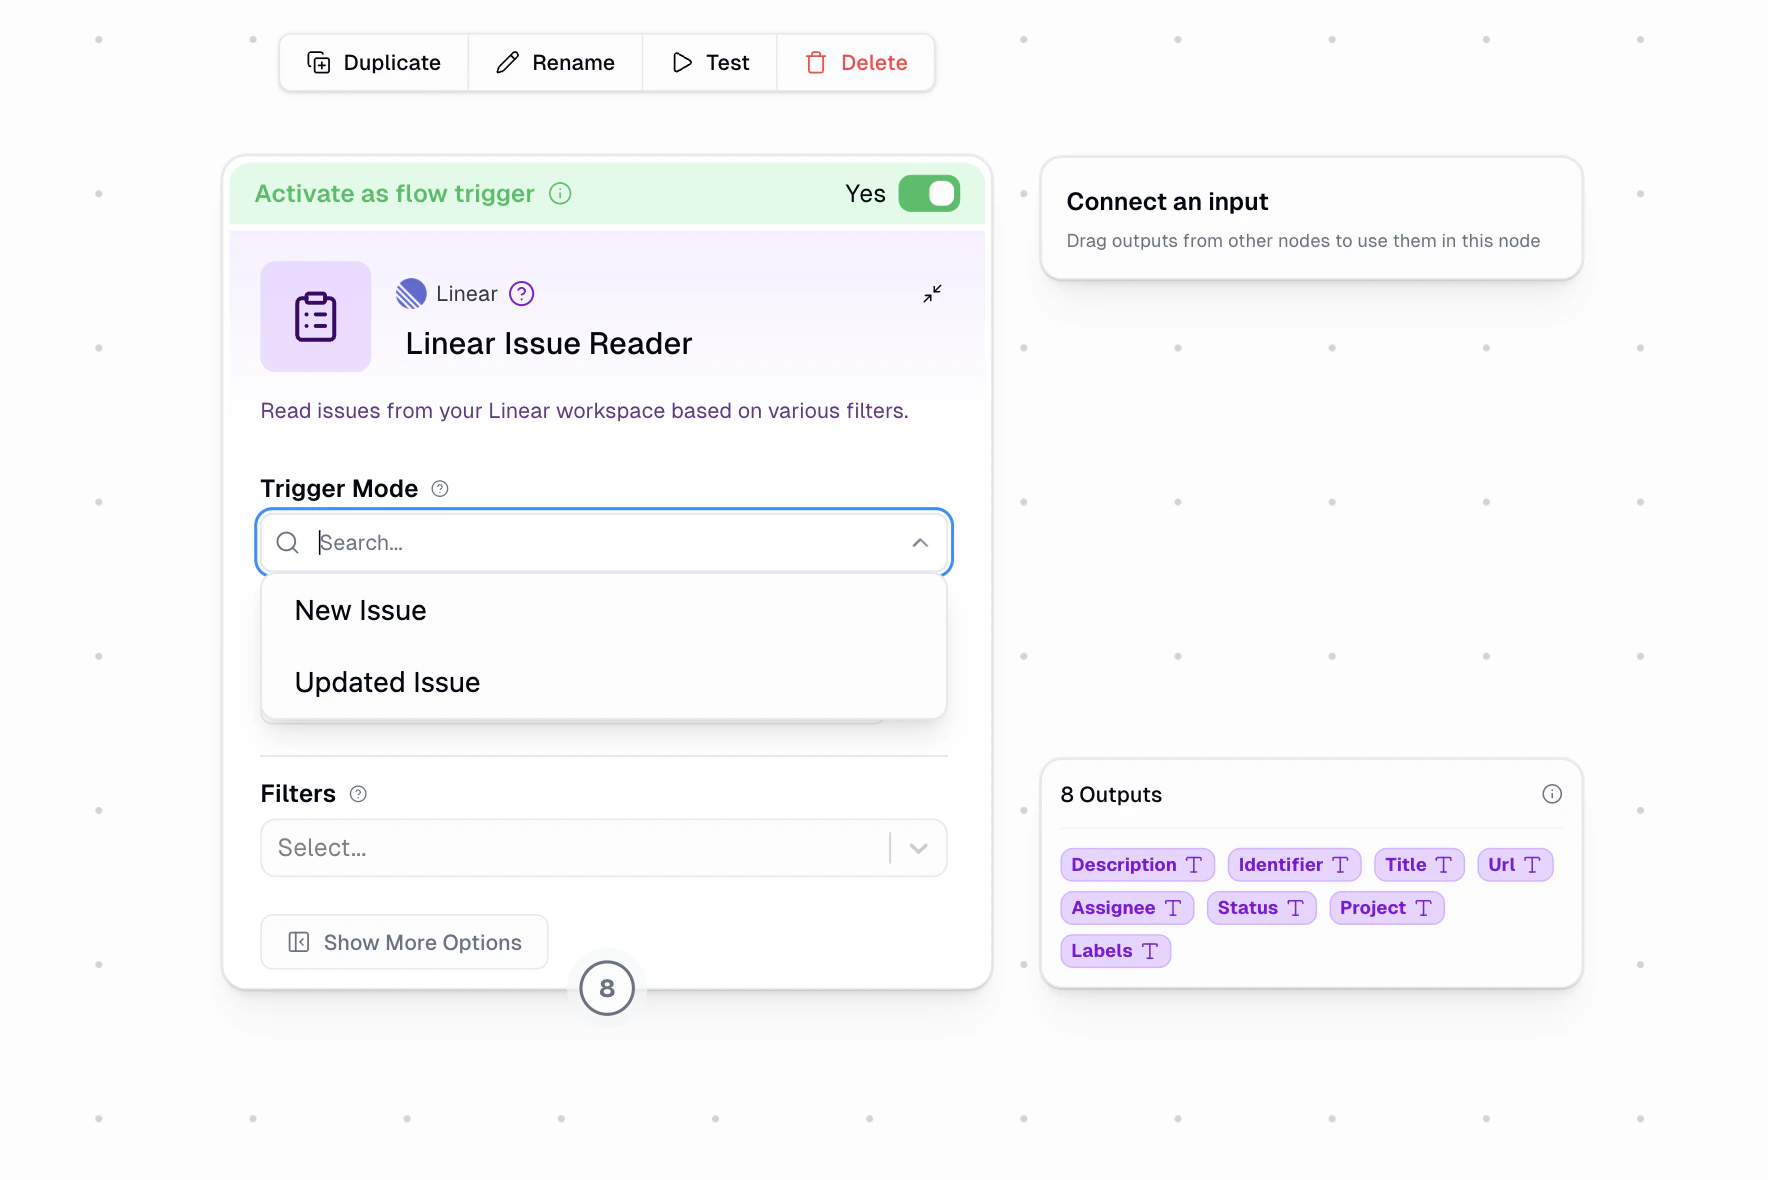
#### Trigger Modes
Triggers when a new issue is created in the selected Linear team. Uses the issue's `createdAt` timestamp to detect new entries.
Triggers when an existing issue is modified in the selected Linear team. Uses the issue's `updatedAt` timestamp to detect changes.
In Updated Issue mode, only genuinely updated issues are returned — issues that were just created are automatically excluded (the trigger filters out any issue whose `createdAt` is after the last poll time).
* Add the **Linear Issue Reader** node to your workflow
* Select the **Team** you want to monitor (required)
* Choose a **Trigger Mode**: **New Issue** or **Updated Issue**
* Optionally add **Filters** to narrow which issues trigger your workflow (Status, Project, Priority, Labels, Assignee)
* Toggle `Activate as workflow trigger`
* Save workflow
When activated as a trigger, the Linear Issue Reader polls your Linear workspace for new or updated issues in the selected team.
* Polls every **60 seconds**
* Fetches up to **5 issues per poll**
* Uses a cursor based on the relevant timestamp (`createdAt` or `updatedAt`) to track its position
* In **Updated Issue** mode, each modification to the same issue triggers the workflow again (deduplication includes the update timestamp)
* Requires a **Team** to be selected — this is a mandatory parameter for the trigger
You can optionally add filters to control which issues trigger your workflow:
* **Status** — Filter by issue status (e.g., In Progress, Done, Backlog)
* **Project** — Filter by Linear project
* **Priority** — Filter by priority level (e.g., Urgent, High, Medium, Low)
* **Labels** — Filter by issue labels (matches issues with at least one of the selected labels)
* **Assignee** — Filter by the team member assigned to the issue
Filters are optional. Without any filters, the trigger fires for all issues in the selected team.
* Alert your team in Slack when high-priority bugs are filed
* Automatically create follow-up tasks when issues move to a specific status
* Sync new Linear issues to external project management tools
* Notify stakeholders when issues in a specific project are updated
* Kick off QA workflows when issues are assigned to the QA team
* Track issue updates for SLA compliance
**Output Data**: Provides Description, Identifier (e.g., "ENG-123"), Title, URL, Assignee, Status, Project, and Labels as individual outputs.
**Authentication**: You must connect your Linear account on the [Connectors page](https://www.gumloop.com/personal/connectors) before using this trigger.
***
### Jira
Automatically starts your workflow when new issues are created in your Jira projects. Polls for new issues every 60 seconds.
#### How It Works
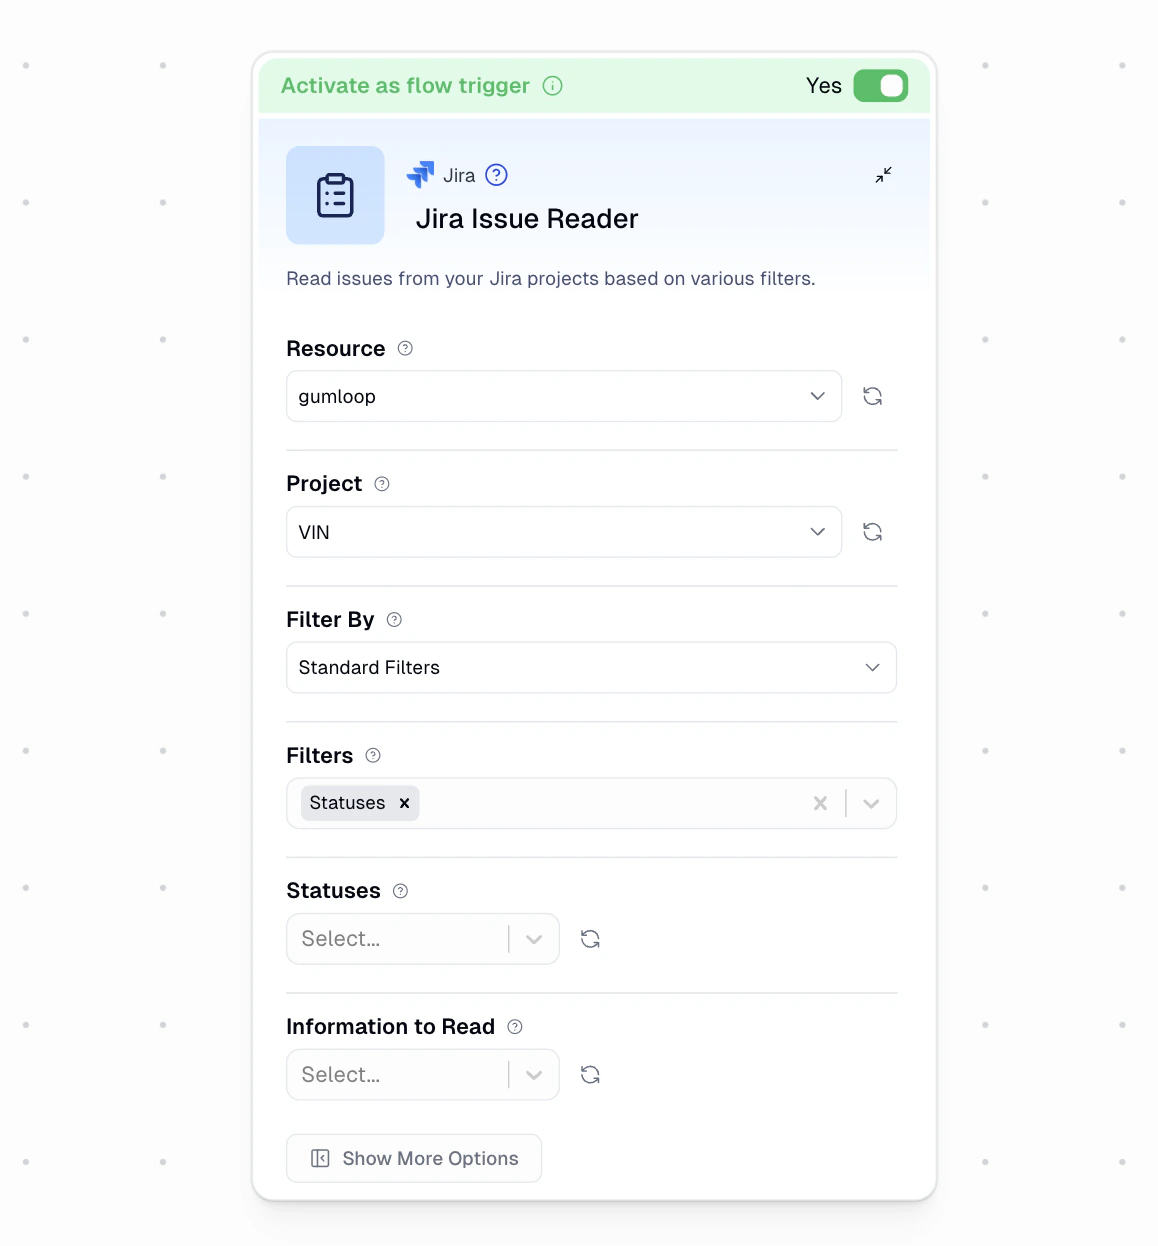
1. Add the **Jira Issue Reader** node to your workflow
2. Select your **Resource** (Jira instance) and **Project**
3. Optionally configure filters to narrow which issues trigger your workflow
4. Toggle `Activate as flow trigger`
5. Save your workflow
When activated, the Jira Issue Reader polls your Jira project for newly created issues. Each new issue triggers your workflow with the issue data.
#### Filter Options
The Jira trigger supports three filtering methods (only one can be active at a time):
Use built-in filter dropdowns to narrow which issues trigger your workflow:
* **Statuses**: Filter by issue status (e.g., "To Do", "In Progress", "Done")
* **Priorities**: Filter by priority level (e.g., "High", "Medium", "Low")
* **Labels**: Filter by specific labels attached to issues
* **Issue Type**: Filter by issue type (e.g., Bug, Task, Story)
* **Assignee**: Filter by the team member assigned to the issue
* **Custom Fields**: Filter by any custom fields configured in your Jira instance (supports AND/OR logic)
Write a custom Jira Query Language expression for advanced filtering. JQL allows complex conditions and combinations for precise control over which issues fire the trigger.
**Example:**
```text theme={"dark"}
project = "Engineering" AND issuetype = Bug AND priority = High
```
Select a filter already saved in your Jira instance. This reuses existing filters without writing JQL — and any updates to the filter in Jira are automatically reflected.
* **Resource**: Your Jira instance/site URL (required)
* **Project**: The Jira project to monitor for new issues (required)
* **Filter By**: Choose between Standard Filters, JQL, or Saved Filter
* **Information to Read**: Select which issue fields to pass to your workflow (e.g., Summary, Description, Assignee, Status, Priority)
* Polls every **60 seconds**
* Fetches up to **5 new issues per poll**
* Uses a compound cursor based on the issue's `created` timestamp and issue key to avoid duplicates
* Automatically notify a Slack channel when high-priority bugs are filed
* Enrich new issues with additional data from external systems
* Route new tickets to the appropriate team based on labels or issue type
* Create corresponding records in other tools (Notion, Google Sheets, etc.) when Jira issues are created
* Trigger QA or deployment workflows when specific issue types are created
**Output Data**: Provides issue fields as individual outputs based on your **Information to Read** selection. Common fields include Summary, Description, Key, Status, Priority, Assignee, Labels, and Issue Type.
**Authentication**: You must connect your Jira account on the [Connectors page](https://www.gumloop.com/personal/connectors) before using this trigger.
***
### Parallel Web Monitor
Automatically starts your workflow when relevant changes are detected across the web for a topic you define. Unlike other triggers that watch a specific service, the Parallel Web Monitor uses AI to continuously scan the web for material changes matching a natural-language query. This makes it ideal for open-ended monitoring like tracking competitors, industry news, regulatory changes, or market movements.
#### How It Works
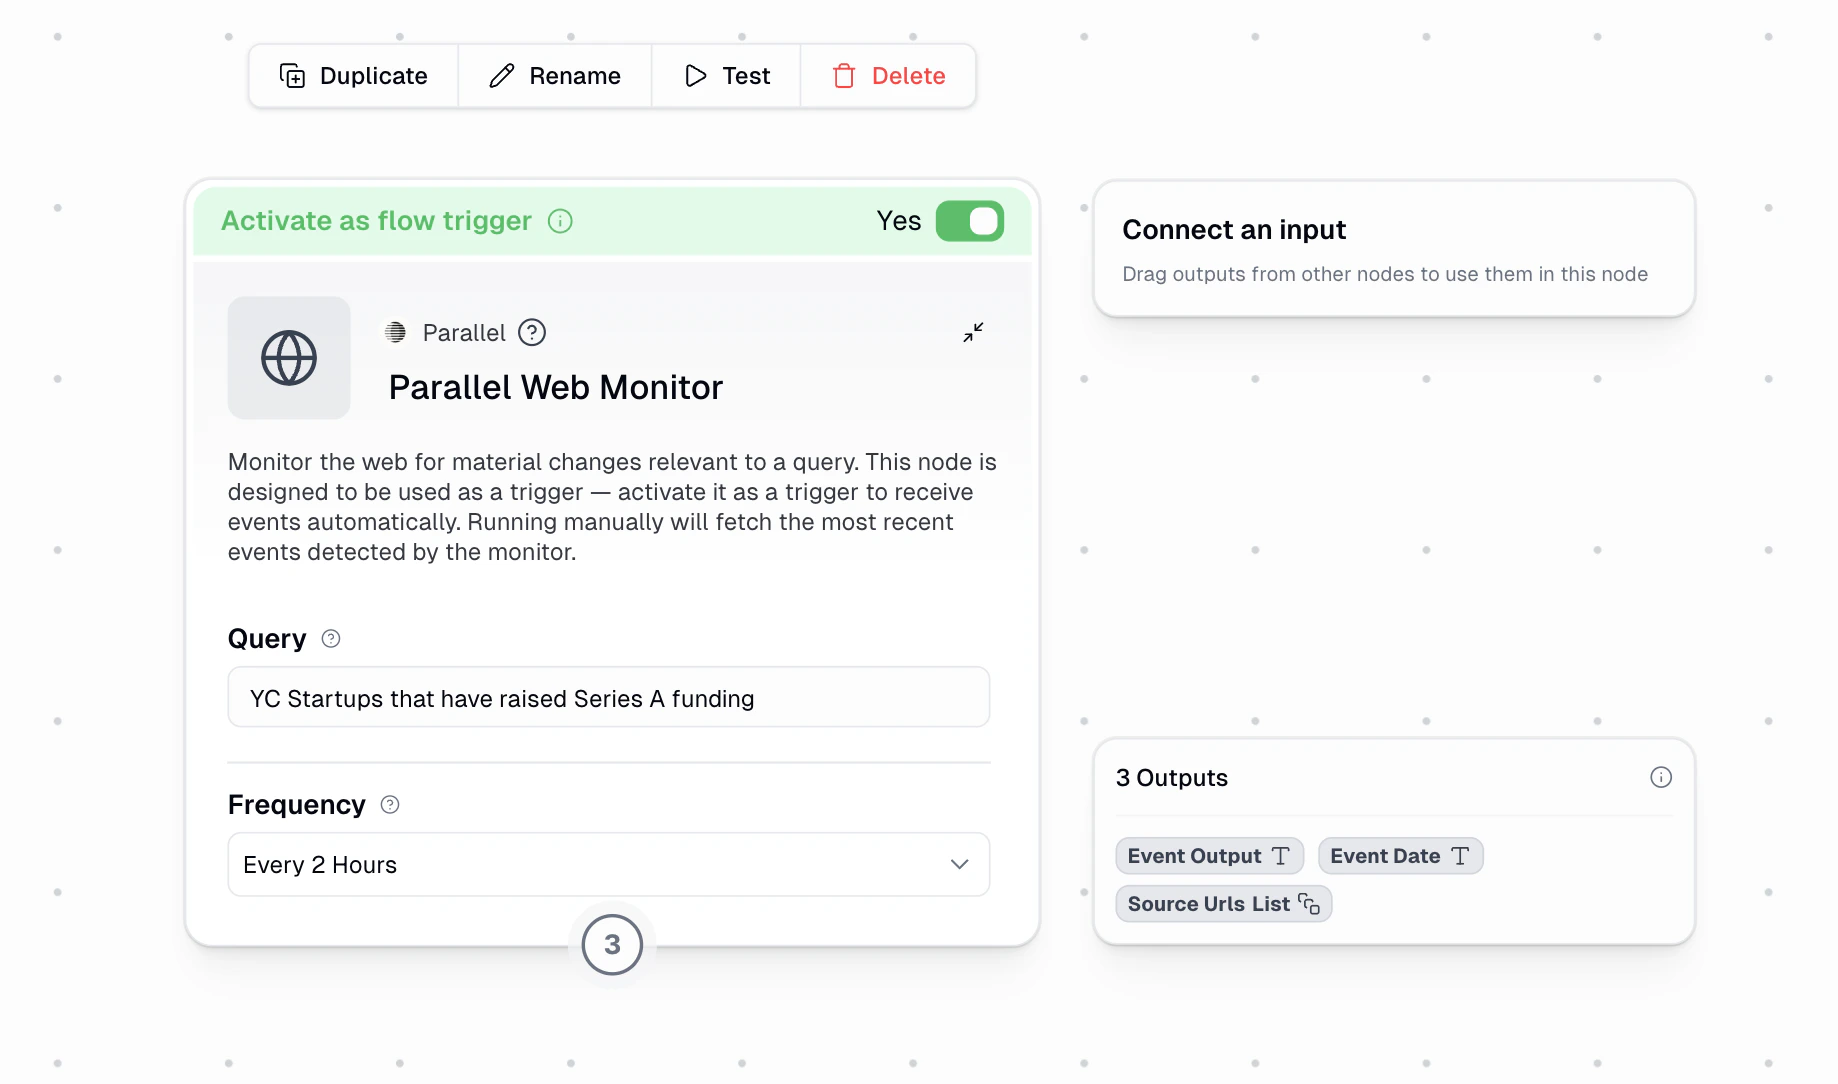
1. You describe **what** you want to monitor using a plain-language query
2. You choose **how often** to check (hourly, daily, or weekly)
3. Parallel's AI scans the web at your chosen frequency and detects material changes relevant to your query
4. When a change is detected, your workflow is triggered with the event details
* Add the **Parallel Web Monitor** node to your workflow
* Write a **Query** describing what you want to monitor — be specific about the topic, company, or product you're tracking
* Set the **Frequency** for how often to check (from every hour up to every 4 weeks)
* Toggle `Activate as flow trigger`
* Save workflow
Your query determines what the monitor tracks. More specific queries produce more relevant results:
| Less effective | More effective |
| -------------------- | ------------------------------------------------------------------- |
| "AI news" | "OpenAI product announcements and API pricing changes" |
| "competitor updates" | "Acme Corp product launches, pricing changes, and new partnerships" |
| "regulations" | "SEC rulings on cryptocurrency ETF applications" |
Think of the query as a research brief — tell it exactly what kind of changes matter to you.
Choose how often the monitor checks for changes:
* **Hourly**: Every 1–24 hours (e.g., "Every 2 Hours")
* **Daily**: Every 1–30 days (e.g., "Daily", "Every 3 Days")
* **Weekly**: Every 1–4 weeks (e.g., "Weekly", "Every 2 Weeks")
Shorter intervals catch changes faster but use more credits. For most use cases, checking every few hours or daily is a good balance.
* Track competitor product launches, pricing changes, or press releases
* Monitor industry news and regulatory developments relevant to your business
* Watch for new funding rounds or acquisitions in a specific market
* Get alerted when a company you're tracking publishes new blog posts or announcements
* Monitor job postings from target companies to spot hiring trends
* Track changes to government policy or legislation in your industry
**Output Data**: Provides **Event Output** (a summary of the detected change), **Event Date** (when it was detected), and **Source URLs** (links to the web pages where changes were found). When run manually without an active trigger, the node returns test data so you can verify your workflow.
**No credentials required.** The Parallel Web Monitor does not require you to connect any external accounts — it works out of the box.
***
## Setting Up Triggers
Drag a trigger node into your workflow or configure the time/webhook triggers
Configure the trigger settings
Toggle 'Activate as workflow trigger' to Yes for node triggers
Connect it to other nodes in your workflow
Save your workflow
***
## Important Notes
Triggers automatically deactivate after 3 consecutive failed runs. If the trigger is deleted, you will receive an email notification.
* Triggers are only available on the [Pro tier](https://www.gumloop.com/pricing) and above
* One workflow can have multiple triggers
* Always save your workflow before and after adding triggers
* Test your triggers after setup
***
## Need Help?
Check our [tutorials](https://www.youtube.com/@Gumloop_Ai) or [reach out to us](https://portal.usepylon.com/gumloop/forms/help) if you need help!